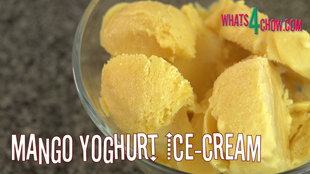
Mango Yoghurt Ice-Cream. Homemade Creamy, Smooth Yogurt Ice Cream.
Author: Whats4Chow
Recipe type: Dessert
Serves: 4
This mango yogurt ice-cream is absolutely delicious. By a adding a little sour cream to the mix, the result is a smooth, creamy ice-cream with very little crystallization, which is always a problem when making yogurt ice cream.
Ingredients
- ½ Cup plain yogurt
- ½ Cultured sour cream
- ¼ Cup sugar
- Flesh of 2 ripe mangos
- 45ml Cane syrup
- Pinch of salt
Instructions
- Place the mango flesh, yogurt, sour cream, sugar, cane syrup and salt in your blender.
- Blend this until absolutely smooth.
- Pour the creamy mixture into your ice cream maker and follow the manufacturer's instructions for your machine.
- If you do not have an ice cream maker, simply pour the mixture into a container and place it in the freezer for 45 minutes. Remove it from the freezer and whisk it vigorously. Return it to the freezer to complete freezing.
- Serve as you would any other ice cream. You will notice just how smooth and creamy this is, with very little crystallization, wonderful color and a magnificent flavor.