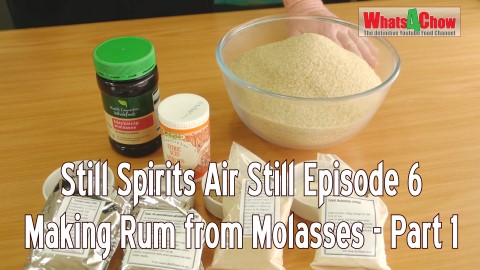
Welcome to episode 7 of our Still Spirits Air Still Series, and Part 2 of Making Rum from Molasses. In this episode we will distill the rum wash, make the cuts, blend the rum and start the aging and oaking process. Spicing the rum to make Captain Morgan Rum, will be covered in a future episode – please subscribe for a heads-up!
Still Spirits Air Still Episode 6 - Making Rum from Molasses Part 1
Author: Whats4Chow
Recipe type: Distilling
Hi and welcome back to our short series on distilling with the Still Spirits Air Still. In this episode we are going to be making rum from black strap molasses. This episode will specifically cover the ingredients required to ferment the wash, and the next episode will cover the distillation and aging of the rum.
Instructions
For more details on the Still Spirits Air Still go to Brewcraft's website - https://www.brewcraft.co.za/air-still...
Still Spirits Air Still - Ep. 5 - Whisky from LME Part 2 - Clearing, Distilling, Making Cuts & Aging
Author: Whats4Chow
Recipe type: Distilling
Still Spirits Air Still - Ep. 5 - Whisky from LME Part 2 - Clearing, Distilling, Making Cuts & Aging In the second episode of our whisky from LME video, we will clear the wash, distill the wash demonstrating how to make the cuts, and then prepare the whisky for aging with charred oak. If you missed episode 1 please click here
Ingredients
Still Spirits Air Still has proved to be an absolute winner, and is suitable for any home distiller that wants a simple, compact system. You can check out the kit that comes complete from Brewcraft here - https://www.brewcraft.co.za/air-still...
Please subscribe to our channel to receive notifications and updates.
Still Spirits Air Still - Episode 4 - How to Make Whisky from Liquid Malt Extract @Whats4Chow
Author: Whats4Chow
Recipe type: Distilling
In episode 4 of our series on the Still Spirits Air Still, we will taking a detour from using the Still Spirits Turbo Pure Yeast, when we make an all-grain whisky from Liquid Malt Extract. In this episode we will set up the fermentation, and this will be followed in the next episode with the clearing and distilling of the whisky.
Ingredients
3kg Liquid malt extract
1.2kg Sugar
36g Still Spirits Whisky Yeast
10g Yeast activator
10g Yeast nutrient
¼tsp Di-ammonium sulphate
10lt Water
Instructions
To view episode !: https://www.youtube.com/watch?v=fo4f9...
To view episode 2: https://www.youtube.com/watch?v=HFqRN...
To view episode 3: https://www.youtube.com/watch?v=zDzFm...
To View Episode 5, Part 2 of LME Whisky: https://www.youtube.com/watch?v=9jUUI...
A huge thanks to Brewcraft South Africa for the loan of the Still Spirits Air Still Kit --- you can check it out on their website http://brewcraft.co.za
In today’s episode we will clear the Still Spirits Turbo Pure Sugar Wash using the two part clearing kit supplied in the Still Spirits Air Still Kit. Once cleared, we will proceed with distilling the wash to attain an excellent quality neutral spirit vodka, something that is normally only possible with a reflux column still.
To conclude this episode, we will do an objective taste test of the “vodka” produced using cheap wine, the same product after filtering through carbon, and the superior vodka produced from the Still Spirits Turbo Pure Yeast sugar wash.
Stay tuned for our next episode where we will be fermenting a grain based wash which will produce acetones, aldehydes and volitiles that will need to be removed from the product during the distillation run.
This will be distilled using the Still Spirits Air Still to see just how well it holds up.
Please like, subscribe and share this video with your family and friends.
You can visit our website for more on distilling, food and drinks at http://whats4chow.com
#stillspirits#stillspiritsairstill#homedistilling#distillingathome#howtodistillalcohol still spirits air still,still spirits air still review,still spirits air still water distiller,still spirits air still essentials kit,still spirits air still instructions,still spirits air still video,still spirits air still starter kit,home distilling,making alcohol at home,easy home distilling,air still training,using turbo pure yeast,making a sugar wash,making a sugar wash for distilling,making sugar wash for air distiller,how to make vodka,how to
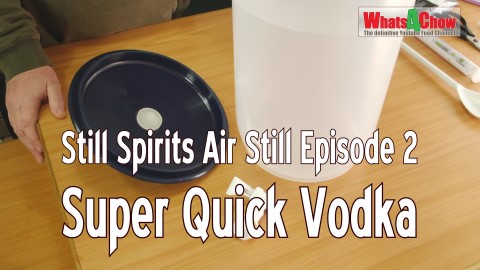
In the second episode of distilling with the Still Spirits Air Still, we are making a sugar wash using the Still Spirits Turbo Pure yeast that is supplied in the kit. The process is very simple and quick, and will yield a sugar wash of around 15% ABV within 7 days.
After this I will show you the quickest way to get started making vodka with your Air Still. Using this trick, you can be distilling vodka immediately, with no fermentation or waiting time required. The method is totally safe and free from methanol.
Hi and welcome to episode 628 with Whats4Chow.com we have something really exciting. Ryan from Brewcraft South Africa sent me a Still Spirits Air Still. This is one Still Spirit’s most recent additions to their distilling equipment range. In this, the first episode of a whole series on the air still, we are going to unbox the machine and run through exactly what the kit includes and what everything does.I will also cover all of the pros and cons of the system in depth which hopefully will help you make a well informed buying decision. Before we begin, let me give you a short summary of what the system is, and where it fits into the marketplace. The airstil is a 4 liter counter-top distiller that is fan cooled. It does not require any water cooling pipes, pumps or reservoirs. This makes the airstil an ideal choice for someone living in an apartment, or in a water-restricted area. The system recommends that you use their specific pure turbo yeast, however you are in no way restricted to this. In later episodes of this series I will cover a whole range of fermentations using regular distiller’s yeast and a variety of different ingredients, anything from bran to rice, and fruits. On with the show…. In the box you will find: Air Still 10L Fermenter with Thermometer Carbon Filter System with Spirit Collector Mixing Spoon Distilling Conditioner Boil Enhancers Air Still Fermentation Kit (Turbo Yeast & Nutrients, Turbo Carbon, Turbo Clear for making a wash) 2 x Flavours Vodka Essences (for flavoured water or vodka) Hydrometer Instructions Let’s go over the pros and cons of buying this system. Pros:1) The most obvious advantage of this system is the air-cooling. You do not require any elaborate cooling system with pipes running all over the place. This also makes it suitable for regions where water is scarce. 2) It truly is the most compact distilling system available, making it practical for people living in apartments with limited space. 3) If you use the Still Spirits Turbo Pure yeast, you do not have to have any brewing or distilling knowledge to use the system. 4) You are not limited to using the Still Spirits Turbo Pure yeast. Once you are comfortable with the simplest process, you can move on and experiment with other fermentations. 5) Everything you need to get started comes in the kit. 6) This is the perfect solution for someone getting started in distilling, and you can be up and running in minutes. 7) Still Spirits supply a massive range of excellent essences to make the drinks of your choice. Anything from Tennessee whisky to cream liqueurs. Cons: 1) The distiller is on the smaller side. With a capacity of 4 liters, or just over a US gallon, a single 2 hour distillation will produce enough vodka to make a liter of final product. If you want to make larger quantities, then you will need to do more runs, or use a larger distiller. 2} This is the simplest type of pot still available. With limited headroom in the boiler cavity, fermentations that don’t use the Turbo Pure yeast will need to be double-distilled. This will lengthen the process by a few hours. 3) The distiller runs at a fixed calibrated temperature. This means that you cannot do stripping runs, however, you can double distil batches if required. In our next episode, we will make a batch of sugar-wash using the Turbo Pure yeast provided in the kit. Once that has been put aside to ferment, I will show you the absolutely quickest way to make vodka, from start to finish in 2 hours, with no fermentation required, and super-cheap. Please subscribe for notifications and updates, and checkout our website http://Whats4Chow.com#stillspirits#stillspiritsairstill#homedistilling#distillingathome#howtodistillalcohol
With festive season just upon us, today we’re going to make a batch of amazing coffee wine. This project started some time ago as an experiment, and the initial results were so pleasing that it warranted further investigation. In the preliminary experiment, I used a generic champagne yeast which produced a very drinkable wine comparable to a good sauvignon blanc.
In light of this, I contacted Anchor Yeast, a subsidiary of Lallimand Yeast in South Africa.
The specialists in the wine yeast division were very helpful in isolating 4 different wine yeasts in order that I could find the very best yeast for this purpose. At this point I would like to make this very clear… this is not a yeast competition, it is an exercise to find the best yeast for making coffee wine.
In addition, the reason I went with Anchor and Lallamand is purely based on their expertise, knowledge and reputation in this field. They were kind enough to supply with 4 sample batches of yeast and all of the relevant data sheets, however I was in no way financially rewarded for using their products. This is a purely scientific endeavour, and in no way meant as an advertisment for Anchor Yeast or Lallamand. In addition, I really wanted to use products that are available world-wide in order that you can give this a try yourself.
I started with the generic champagne yeast as my control batch.
This first of the Lallamand yeasts is the Vin 7. This is yeast developed specifically for the production of Sauvignon Blanc wines. At this stage of the project, I thought this would be my most promising prospect.
Next up is the Vin 13. This yeast has been developed for the production of both Sauvignon blanc and chardonnay.
Then there is NT 202, a yeast developed for the production of aged red wines like Shiraz.
And last but not least is the NT 50, a yeast developed for fruity red wines like Pinotage, that are short aged, and released fast to the market.
To make this project more manageable, I am making small batches of each variant usin 2 liter bottles and Pat Mack’s brew caps. These caps have a built-in pressure release valve in the lid, and for this exercise they are just much easier to use than fermentation bubblers.
The fact that wine in this instance will start off carbonated is immaterial as it will be degassed during the clarification process anyway.
The coffee of choice is a product made by Nescafe’ in South Africa, called Ricoffy. This a blend of pure coffee granule, chicory, dextrins and dextrose. The dextrins and dextrose are yeast friendly, and will ensure a good strong fermentation. This coffee blend is available world-wide through numerous international South African food product franchise outlets. I will leaves links to these in the description. Once again, I would like to stress that this is not and advertisement for Nestle’ or Ricoffy.
Each of 5 bottles receive 90g of Ricoffy granules and 200g of white sugar.
500ml of hot water is added along with a further 500ml of cold water.
Give each bottle a good shake to dissolve the coffee granules and sugar entirely.
Top each bottle up with a further 750ml of cold water, give them another shake, then measure the temperature.
If the temperature is higher than 30c, wait until it drops to 30c before pitching an eighth of a teaspoon of yeast into each bottle.
Place the brew caps or fermentation bubblers on the bottles and place these in a warm but shady place to ferment for 30 days.
The primary reason for this long fermentation is that I want the wines to be totally sugared out in order that we can taste the absolute essence of each variant in its driest form. After this, the wine can be back-sweetened to taste. In addition, in a controlled experiment of this nature, every variant must be treated in exactly the same way.
After the 30 days, each batch was tasted to ensure that all of the sugars had been consumed.
The wine was then poured off into clean sterilized bottles, taking care to leave the majority of yeast and sediment behind.
At this stage, if you opt to use brew caps, the wine will be very fizzy and the racking will require a good deal of patience. This will not be a problem if you use a fermentation bubbler.
The wines will still be almost totally opaque, due to microscopic coffee sediment and yeast in suspension.
To clear the wine, transfer the bottles to your refrigerator for a full 24 hours.
After this time, measure 160ml of water and add 5ml or a teaspoon of gelatin. Allow this stand for about 30 minutes until the gelatin has bloomed in the water.
Microwave the mixture in short bursts until it reaches 150f or 66c, and you’re ready to go.
Pour 30ml of the gelatin solution into each bottle and give it a gentle top-stir with a swizzle stick.
Return the bottles to your refrigerator to clear. The gelatin solution bonds the proteins and particulates in the wine making them heavy enough to precipitate to the bottom of the bottles.
This clearing process can take up to a week to complete.
After this time, pass each wine through a fine filter, or a ceramic filter if available, to keep the coagulated sediment behind.
The wine can be treated with sulphite in the form of Camden tablets to kill any remaining yeast, however I opted to simply bottle and refrigerate.
We live in the heart of the R62, the longest wine route in the world. As a result we have no shortage of wine officianados, and I took full advantage of this. I invited a whole bunch of them to a formal wine tasting, and these are the results.
The Vin 7 which seemed to be the most likely candidate turned out to be a bit thin and lacking in aroma and flavor, however it was still very drinkable.
The Vin 13 was a little more robust, with more coffee aromas coming through, along with a slight cranberry flavor.
The NT50 was again more robust with stronger coffee and berry flavors and aromas. It was very similar to the generic champagne yeast used as the control.
The tote favorite was with no dought, the NT202, which was far ahead of the other wines in aroma and flavor.
The clairty and appearance of all of the varieties was absolutely brilliant, and overall the tasting was met with much interest and enthusiasm.
At this stage I would like to thank Anchor Yeast and Lallamand for supplying the yeast variants and expertise.
Thats it for today folks, please like, subscribe and share this with your friends and family, and we’ll see you again real soon.
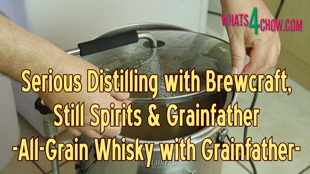
Serious Distilling with Brewcraft, Still Spirits & Grainfather – Grainfather Making Whisky Part 2
Hi and welcome to episode 559 with Whats4Chow.com and the penultimate episode of our short series Serious Distilling with Brewcraft, Still Spirits and Grainfather.
In our previous distilling episode we used the Grainfather to mash a batch of grain to make whisky. The resulting mash has completed fermenting and it is time to clear the fermentation and distill it using the Grainfather armed with the alembic dome lid. This is the very same alembic dome we used on the Still Spirits distiller, and it is available as an optional extra from Brewcraft when you purchase your Grainfather.
To clear the mash we’re going to use the Still Spirits Turbo Clear 2 part kit.
Start by giving the wash a really vigorous stir to degas the liquid. This stage is quite important as the carbon dioxide is one of the elements that is keeping the micro-particles in suspension.
Once you have degassed the liquid, add Part A of the kit and stir this in thoroughly. Replace the lid of the bucket and allow this to stand for 60 minutes.
After the standing time, sprinkle Part B over the surface of the bucket. Use your stirrer top-stir Part B across the surface.
Replace the lid and leave the bucket undisturbed for 24 hours.
The following day, rack the cleared liquid off into the Grainfather boiler.
Add 5ml of Still Spirits distilling conditioner… this prevents foaming and improves the quality of the run.
Pour the boiling enhancer saddles into the boiler. These will give you nice even boil, instead of violent bubbling.
Undo the large nut from the condenserand attach the condenser to the dome lid.
Make sure the silicon seal is in place by crimping it firmly into the surround of the lid.
Place the lid on the boiler and fasten the spring clips to hold it in place.
Attach the water inlet pipe to the lower connector, and the outlet pipe to the upper connector.
Drop the probe thermometer into the thermometer housing at the top of the condenser.
Attach the distillate outlet pipe to the end of the condenser.
Turn on the main switch to the boil position at the base of the boiler, followed by the switch on the control box, also to the boil position.
Press the set button and adjust the temperature target to 95c using the plus button. To confirm the setting, press the set button again.
As the temperature reaches around 45c, the first drips will start emerging from the distillate outlet. Turn on the water flow.
As the temperature reaches 60c the flow will increase. Collect the first 100ml of distillate. This is made up of methanol and acetone and is discarded.
Collect the distillate in batches, measuring the ABV of each batch as you go. This will start out in the 80’s and gradually decrease as the run progresses. When the ABV drops below 40% it is time to call it a day.
The distillate up to this point will be the base for your product.
Blend your batches as discussed in our blending episode and if necessary, dilute the resulting blend to 60% ABV.
This is the optimum strength for oak aging.
Place the distillate in suitable bottles and add a teaspoon of French wine barrel oak chips per liter of distillate. I am using 500ml bottles and adding about a half teaspoon to each one.
There is no formula for how long it will take to age. When you are happy with the color, aroma and flavor of the whisky, it is ready to strain and bottle.
Next week, in our final distilling episode, we will discuss the equipment, a whole bunch of distilling tips and tricks and my personal views on Still Spirits and Grainfather.
Thanks for joining us today, please subscribe to our channel, give us a thumbs up and share this with your family and friends, and we’ll see you again tomorrow.
Visit the Brewcraft website at http://Brewcraft.co.za
Hi and welcome to episode 554 with Whats4Chow.com and anothe episode in our series, Serious Distilling with Brewcraft, Still Spirits and Grainfather.
In our previous distilling episode we unboxed and assembled the mighty Grainfather.
Today we’re going to put it through its paces as we mash a full load of grain to make a classic all-grain whisky.
To make this simple whisky, we need 3 kilograms of peated malt and 4 kilograms of pale malt.
You will also need a sachet of Still Spirits whisky distillers yeast, a Still Spirits Turbo clearing kit and 4 kilograms of sugar or dextrose.
Before starting, make sure the thermometer housing is properly fastened and that the joint at base of the recirculation riser pipe is secure.
Add 20 liters of water to the pot. Set the temperature on the controller to 68c and flip the switch for the element to the boil position. To get everything going, switch the main switch on at the base of the unit.
Pour the sugar into the pot and give it good stir until totally dissolved.
Position the extendable overflow pipe in the boiler sleeve, place the sleeve in the boiler and fit the overflow stopper to the top of the pipe. This prevents grain from spilling into the overflow pipe as we pour it into the pot.
Pour the grain into the pot in small batches, stirring between each addition to make all of the grain is wet and there are dry clumps.
Once all of the grain is added, remove the overflow stopper and insert the top mesh plate. Press the plate down until it just touches the mash. Don’t go any further as compressing the mash will impede circulation of the wort through the grain.
Seat the overflow inlet sleeve onto the overflow pipe. This will keep the perforated plate level.
Place the lid on the boiler and attach the recirculation bridge making sure the tube goes through the hole in the lid.
Turn on the pump. By this stage the temperature will have stabilized at around 68c and this process needs to continue as is for 60 minutes. Set the switch at the base of the unit to the mashing position.
At first the overflow will be very apparent. As the grain gets saturated, more and more of the wort will drop through the perforated plate and will filter through the grain instead going directly through the overflow.
After 60 minutes, turn off the pump, allow the recirculation bridge to drain and remover the the recirculation bridge.
Remove the lid and use the stainless steel handle to lift the boiler sleeve upwards. Swivel the boiler sleeve and rest the small triangular feet on the rest inside the top of the boiler.
at this stage the grain will have settled considerably. Press the upper perforated plate down until it sits on top of the grain.
Pour in 5 liters of water to rinse or sparge the grain. Do this a little at a time, as flooding the top grain will cause the process to block.
Once all of the water has been added, allow the grain to drain for 60 minutes.
Once the draining has completed, re-attach the recirculation bridge with the bridge facing outwards.
Place the plastic tube in the fermentation vessel and turn on the pump.
Allow the wort to cool to 35c then add the Still Spirits ewhisky yeast.
Give it a good stir, then screw on the lid with the airlock in place.
Transfer the fermentation vessel to a warm shady place to ferment. Depending on the ambient temperature, this could take anything from 7 to 10 days to complete.
To purger the pump on the Grainfather, fill the boiler with 15 liters of water. Place an empty container under the recirculation pipe and switch on the pump. This will effectively wash out the pump and the recirculation riser and bridge.
Rinse out the boiler and wash the inside with a mild detergent. Rinse again and you’re done.
Join us next week for part 2 of this whisky saga when we clarify the wort and distill this in the Grainfather using the alembic lid.
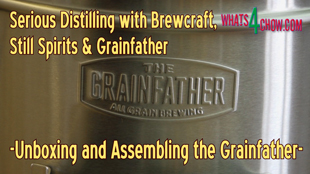
Grainfather Unboxing and Assembly – Serious Distilling with Brewcraft, Still Spirits & Grainfather
Hi and welcome to episode 548 with Whats4Chow.com and the next episode in our short course, Serious Distilling with Brewcraft, Still Spirits and Grainfather.
Up until now we have covered everything with regard to the Still Spirits equipment and products. Today we move on to look at the Grainfather brewing and distilling system, as we find out what comes in the box and how it all fits together.
The core of the system is an excellent quality brushed stainless steel boiler, the cooler coil, the computer controller, all the necessary flow pipes and filters, and the stainless steel boiler sleeve.
Step 1 in assembly… attach the hose to the recirculation bridge. Also make sure that the silicon seal is seated correctly on the threaded side of the bridge. Put this aside for now.
Unwrap the ties from the power cable and thermometer probe attached to the computer controller. On the back of the controller you will find 2 large studs. Feed the power cable and thermometer lead through the cage on the side of the boiler.
Insert the studs into the face plate and lower the computer module into the cage to secure.
You will notice that the lid has a built-in self closing mechanism which is a nice touch.
Unwrap the cables that emerge from the pump housing and the base of the boiler. The cables are clearly marked… plug these into their corresponding inputs on the underside of the computer module.
Insert the thermometer probe into the thermometer housing near the base of the boiler.
Next up is the recircultion system. This pipe rising from the pump module is the riser for the recirculation system.
Make sure the end-cap is securely fitted to the filter. Press the silicon T-connector from the filter onto the nipple that leads to the filter located next to the thermometer receiver inside the boiler.
Make sure that all of the shipping packaging has been removed from the boiler before doing this.
Take one of the perforated filter plates and the internal flow drainage pipe.
Make sure the silicon seal is seated correctly on the surround of the plate.
Insert the plate into the boiler sleeve. It is a fairly tight fit, but with a little patience, it does go in. Push this all the way to the bottom of the boiler sleeve.
Unscrew the threaded nut from the one end of the overflow pipe, insert the threaded end of the pipe through the plate from the inside of the boiler sleeve and secure this with the nut.
Place the extendable riser onto the overflow pipe and cap this off with the end stopper.
Insert the boiler sleeve by rotating it until the little triangular feet at the bottom of the sleeve fit past the sleeve rest at the top of the boiler. We will only insert the second perforated once the grain has been added to the boiler, which will be covered in consequent episodes.
Place the glass lid on the boiler, screw the recirculation bridge onto the recirculation riser pipe, with the flexible hose dropping the hole in the center of the lid.
Please take heed that the spring clips are not used to secure the glass lid. They are only used when distilling with the alembic dome lid.
To attach the cooling coil for cooling the mash, unpack all of the tubes from the center of the cooling coil.
The blue tube attaches to your cold water tap and a collection of different fittings is supplied to achieve this.
The top clear tube attaches to the recirculation riser pipe, while the bottom clear tube runs the mash back through the glass lid into the boiler.
The red tube runs the waste water to the sink or drain.
Unscrew the recirculation bridge from the riser pipe.
Run the lower clear tube up the outside of the cooling coil and drop it through the center hole of the unit.
Place the cooling coil on the lid of the boiler making sure to run the clear tube through the lid.
Attach the upper clear tube to the recirculation riser.
Attach the blue tube to your tap, and place the red tube in your runoff and you’re done.
Just note before we close, the recirculation bridge is used to circulate the mash during mashing or cooking, and the cooler is used to cool the cooked mash. This will be covered in episodes to come.
Thanks for joining us today, please give us a thumbs up, subscribe to our channel, and share this with your family and friends, and we’ll see you again tomorrow.
Serious Distilling with Brewcraft, Still Spirits and Grainfather - How to Make Flavoring Essences
Author: Whats4Chow
Recipe type: Home Distilling
In our previous distilling episode we looked at the range of Still Spirits essences used to create commercial grade liquor products. Today we're going to get creative and look at how to make these essences from scratch, and flavor the high quality alcohol batch from the Still Spirits T500 reflux distiller. This technique can be used to extract essence from any liquid, including fruit juices, herb infusions, coffee, tea and spice infusions. Today we're going to use coffee to make an amazing coffee essence.
Ingredients
800ml Strong espresso
20g Gelatin
5ml Vanilla extract
To Make "Kahlua" Coffee liqueur
250g Corn syrup
Instructions
To start, we need to brew 4 double shots of really strong espresso.
Pour these into a large heat proof jug.... the total volume will bee 800ml.
Pour the gelatin into the hot espresso and stir it thoroughly until dissolved. You can use either bovine or plant based gelatin.
Add the vanilla extract and stir this in.
Allow the mixture to cool and transfer it to your freezer for a full 24 hours.
The following day, place a colander over a large bowl. Line the colander with cheese cloth, or use a new kitchen wipe as I am doing.
Remove the frozen coffee mixture from the freezer. Dip the bottom of the jug in a sink of hot water and turn the frozen block out into the colander.
Allow this to stand and drip for a few hours. Once the block is soft and spongy, lift the edges of the cloth and squeeze out any remaining liquid trapped in the gelatin.
The yield from 800ml of espresso will be 500ml.
This is the essence. From this point you can reduce and sweeten the essence, or use it as is.
To Use it As Is
Dilute 375ml alcohol to 40% ABV.
Mix 375ml of the coffee essence with the alcohol.
Bottle the alcohol in suitable bottles and you're done.
To Make Kahlua-Style Coffee Liqueur
Dilute 250ml of alcohol to 60% ABV.
Place 500ml essence in a small saucepan, bring it to a simmer and allow to continue until it has reduced by 50%
Combine the alcohol and reduced essence with 250g of corn syrup. Mix thoroughly to combine.
Bottle the liqueur in suitable bottles and you're done!!!