How to Pickle Eggs – Perfect Spicy Pickled Eggs Recipe – Bar Style – Pub Style Pickled Eggs

How to Pickle Eggs


How to Pickle Eggs - Perfect Spicy Pickled Eggs Recipe - Bar Style - Pub Style Pickled Eggs
Author: 
Recipe type: Eggs
Serves: 30
 
In today’s episode we’re going to make spicy pickled eggs. These Easy Pickled Eggs are a delicious and healthy snack that everyone will enjoy! They make an amazing snack, make egg salads a breeze, and look awesome on a charcuterie board.
Ingredients
  • 1500ml White vinegar
  • 500ml Water
  • 10ml Himalayan rock salt
  • 2 Large onions
  • 3 Bay leaves
  • ⅔ Cup caster sugar
  • 5 Allspice / pimento berries
  • 1Tbs Black peppercorns
  • 1Tbs Dried chilli flakes
  • 30 Eggs
Instructions
  1. In today’s episode we’re going to make spicy pickled eggs.
  2. These Easy Pickled Eggs are a delicious and healthy snack that
  3. everyone will enjoy! They make an amazing snack, make egg
  4. salads a breeze, and look awesome on a charcuterie board.
  5. In addition to this, it is a safe and practical way to preserve your
  6. eggs if you have more than you can use immediately… let’s get
  7. started.
  8. Take 30 eggs and use a needle to prick the flat end of each egg.
  9. This will allow the air-pocket to escape when the contents of
  10. the egg expand under heat. This helps prevent the shells from
  11. cracking, and gives a better formed egg once boiled. It will not
  12. totally negate the deformation of the base of the egg, but it
  13. certainly does help.
  14. Place all of the eggs in a large pot and cover them with cold
  15. water. Heat the pot over high heat until boiling, then start your
  16. timer. You want the eggs to boil for 10 minutes. Use a slotted
  17. spoon to give them gentle stir once every few minutes. This will
  18. ensure even cooking.
  19. After 10 minutes, transfer the eggs to a large bowl filled with ice
  20. cold water. Allow the eggs to stand for 30 minutes to cool
  21. completely.
  22. While the eggs cool, let’s start with the pickling brine. Slice 2
  23. large onions thinly and add them to a medium size pot, along
  24. with 2 teaspoons of Himalayan rock salt, a tablespoon of dried
  25. chilli flakes, a tablespoon of black peppercorns, 3 bay leaves, 5
  26. all-spice or pimento berries, 2 thirds of a cup of caster sugar,
  27. ml water, and 1500ml white vinegar.
  28. Heat this all until boiling, then reduce the heat and simmer the
  29. mixture for 5 minutes, then remove it from the heat.
  30. By stage the eggs have cooled and it’s time to peel them. Tap
  31. the shells around the circumference of the egg on your work
  32. surface to crack them. Peel away a little of the shell, grab the
  33. membrane and pull on this. The membrane will literally pull the
  34. shell away from the egg.
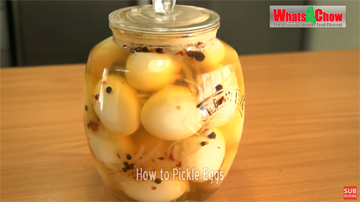
  35. Pack a layer of eggs into a large pickling jar and top this with
  36. some of the onion and spices. Pack another of eggs on top of
  37. this and continue in this fashion until all the eggs are packed.
  38. Pour the pickling brine over the eggs until it is covering the eggs
  39. completely. Put the lid on the container and allow it all to cool
  40. completely.
  41. Once cooled, transfer the eggs to your refrigerator for at least 7
  42. days before enjoying your delicious pickled eggs. This gives the
  43. brine and spices a chance to really permeate the eggs making
  44. for a memorable meal.
  45. The eggs will last for months under refrigeration.
  46. That’s it for today folks, please like, subscribe and share, and
  47. we’ll see you again real soon.


Crustless Spinach & Feta Quiche

Crustless Spinach & Feta Quiche


Crustless Spinach & Feta Quiche
Author: 
Recipe type: Quiche
Serves: 6
 
Crustless spinach and feta quiche is one of the easiest and tastiest treats. It can be eaten hot or cold for breakfast, lunch or supper, making a perfect all-year-round meal.
Ingredients
  • 500g Finely shredded spinach
  • 150g Feta cheese
  • 15ml Dried garlic granules
  • 80ml Dried onion flakes
  • 5 eggs
  • 160ml Cream
  • 80g Shredded Parmesan cheese
  • Salt & pepper to season
  • 30g Butter
Instructions
  1. Crustless spinach and feta quiche is one of the easiest and tastiest treats. It can be eaten hot or cold for breakfast, lunch or supper, making a perfect all-year-round meal.
  2. To start, finely shred 80g of good quality Parmesan cheese, and melt about 30g butter.
  3. You will need 6 by 300ml pie foils as well.
  4. Brush one of the foils generously with melted butter.
  5. Drop a small handful of the Parmesan into the foil and give it a gentle shake. Shake out the cheese that does not stick to the butter. Fill in any spots where the cheese did not stick with a little more cheese, then continue with the remaining foils.
  6. For the filling, place 500g well drained, defrosted shredded spinach in a large mixing bowl.
  7. Beat 5 eggs, weigh out 150g feta cheese, pour 160ml cream, and measure 80ml dried onion flakes and 15ml dried garlic granules.
  8. Place the garlic and onion into the mixing bowl.
  9. Follow this by crumbling the feta cheese.
  10. Pour in the beaten eggs and cream and proceed to mix this all until well combined.
  11. Season to taste with salt and cracked black pepper and we're almost done.
  12. Spoon the filling into the prepared foils until it reaches just below the rims of the foils.
  13. Bake the quiches in a preheated oven at 180c or 350f for 50 minutes. The egg will be set and skewer pressed into the quiche will come out clean.
  14. Allow the baked quiche to rest for 15 minutes before turning out and serving with the accompaniments of your choice.
  15. Alternatively, allow the quiches to cool, and refrigerate them wrapped in cling wrap for up to 10 days.


Devilled Lamb’s Kidneys with Brown Mushrooms and Creamy Garlic Glaze – Superb Kidney Recipe!!!

kidney recipe,kidney recipes,suate'ed kidneys,suate'ed kidneys recipe,lamb kidney recipe,how to,how to cook,kidneys,entree',best kidney recipe,making kidneys at home,homemade kidneys,kfc chicken recipe,recipe,cooking,how to make,kfc recipe,food,homemade,kfc secret recipe,recipes,burger bun recipe,kfc hot wings,how to make apple cider vinegar at home,how to make kfc chicken,spring roll wrapper recipe,alternative cuts of meat


Devilled Lamb's Kidneys with Brown Mushrooms and Creamy Garlic Glaze - Superb Kidney Recipe!!!
Author: 
Recipe type: Lamb
Serves: 2
 
Devilled Lamb's Kidneys! In today's episode we're going to fry up a delicious meal of devilled lamb kidneys with brown mushrooms and an amazing creamy garlic glaze.
Ingredients
  • 5 Lamb's kidneys
  • Milk to soak (enough to cover)
  • 35ml All-purpose flour
  • 3.75ml Cayenne pepper
  • 3.75ml Hot mustard powder
  • 15ml + 15ml Olive oil
  • 50g Butter
  • 2 Spring onions
  • 5ml Garlic, finely chopped
  • 4 Brown mushrooms
  • 50ml Chicken stock
  • 50g Cream cheese
  • Parsley to garnish
  • Salt and pepper to taste
  • Crusty rolls to serve
Instructions
  1. To start, soak 5 lamb kidneys in milk for 60 minutes. This tempers the gamey flavor that kidneys sometimes have.
  2. Use a sharp scissors to remove the connective tissue in the center of each kidney, and cut each kidney into quarters.
  3. Measure out 35ml of all-purpose flour, 3.75ml or 3 quarters of a teaspoon of cayenne pepper and the same quantity of hot mustard powder.
  4. Mix the flour, mustard and cayenne together thoroughly.
  5. Dredge the kidney quarters in the flour mixture to coat them all over and transfer these to a platter.
  6. Roughly chop 2 spring onions, finely chop a clove of garlic, quarter 4 brown mushrooms, measure out 50g of cream cheese and 50ml of chicken stock.
  7. Heat a large pan over medium high heat and add 50g of butter and 15ml of olive oil. Add the kidneys to the pan and fry these for 4 minutes, turning every minute, until they nice and golden brown with crispy edges.
  8. Remove the kidneys from the pan and put these aside.
  9. Add the mushrooms to the pan and pour in another 15ml of olive oil.
  10. Stir fry these for 60 seconds, then add the spring onions and garlic.
  11. Stir-fry this for a further 60 seconds and add the stock and the cream cheese. Stir the cheese around until it has melted into the stock.
  12. Return the kidneys to the pan and stir these around the pan until everything is well coated with the sauce.
  13. Serve your masterpiece on toasted crusty rolls garnished with fresh parsley and the accompaniments of your choice.


Breakfast Hotdog Recipe! How to Make a Breakfast Hotdog – A Full Breakfast in One Neat Package!!!

hot dog,hotdog,hot dog recipe,hotdog recipe,breakfast hotdog,breakfast hot dog,how to make,how to,breakfast,recipe,food,recipes,cooking (interest),cook,how,at home,cooking,kfc chicken recipe,cooking,kfc recipe,food,homemade,kfc secret recipe,recipes,burger bun recipe,kfc hot wings,how to make kfc chicken,kentucky fried chicken,how to make apple cider vinegar at home,spring roll wrapper recipe,gourmet hot dog recipes,best hot dog recipes,homemade hotdog


Breakfast Hotdog Recipe! How to Make a Breakfast Hotdog - A Full Breakfast in One Neat Package!!!
Author: 
Recipe type: Fast Food
Serves: 2
 
In today's episode we're going to be making a hot dog that really stands out from the crowd. Frankfurter sausage with crispy fried streaky bacon, flipped egg and salad all served on a length of crusty baguette makes for a breakfast of note.... this is the breakfast dog.
Ingredients
For 2 Breakfast Hotdogs
  • 2 Frankfurter sausages
  • 4 Rashers streaky bacon
  • 2 Eggs
  • 30ml Butter for frying
  • Salad greens
  • 1 French baguette
  • Tomato sauce and mustard (or sauces of your choice)
Instructions
  1. To start, cut your baguette at an angle into lengths just a bit shorter than the frankfurters.
  2. Turn these length-ways and make 2 cuts downward, 1 third of the width of the roll in from either edge.
  3. Remove the center section of the roll.
  4. Butter the flat faces on the inside of the roll.
  5. Place a generous dose of salad leaves into the channel of each roll and put these aside.
  6. Cut angled incisions into the frankfurters with each incision going about 2 thirds of the way through the sausage.
  7. In addition, unpack 4 rashers of streaky bacon and 2 eggs.
  8. Heat a large pan over medium high heat and add 30g or 2 tablespoons of butter. Add the sausages and bacon to the pan.
  9. Fry the bacon until it is crispy and golden, and the sausages until the crisp up on the edges.
  10. When the bacon and sausages are almost ready, crack the eggs into the pan.
  11. Use your lifter to break the yolks and spread them across the whites of each egg.
  12. Also press in or fold the edges of the whites to form a long rectangular shape.
  13. By this stage the bacon can be removed from the pan and kept warm.
  14. Flip the eggs to cook the top side. The tops only need to fry for 30 seconds.
  15. Lift one of the eggs from the pan and place length-ways on one of the baguettes.
  16. Line the inside edges of the baguette with 2 slices of crispy bacon and fill the remaining space with a frankfurter. Continue with remaining dog.
  17. And there it is... a full breakfast in a crispy baguette. Simply garnish with the condiments of your choice and serve.


How to Make Long Eggs – Long Cylindrical Eggs Made Easy!!!

long eggs, cylinder eggs, how to, how to make, how to make long eggs, homemade long eggs, easy long eggs, simple long eggs, making long eggs at home, make long eggs for slicing, long eggs for salads, best way to make long eggs, eggs, long, cooking, recipes, food, recipe, make long eggs without special equipment, making cylinder eggs, eggs in a cylinder, how to stretch eggs, uniform egg slices for salads,


How to Make Long Eggs - Long Cylindrical Eggs Made Easy!!!
Author: 
Recipe type: Eggs / Breakfast / Salads
 
Long eggs allow you to slice uniform cooked egg slices to dress salads, garnish breakfast, and simply confuse your guests. After visiting a long egg factory, I decided to see whether it was possible, and practical to make these at home without all the fancy equipment.
Ingredients
  • 4 x Large eggs
Equipment Required
  • 1 x Elastic band (long, or more joined)
  • 1 x 100ml Measuring cylinder
  • 1 x 250ml Hi-ball tumbler
  • 1 x Digital pot or pot on induction range
Instructions
  1. To start, separate the egg yolks from the whites and whisk both thoroughly.
  2. Loop the elastic over one handle of your pot, stretch it across the pot and loop it over the other handle.
  3. Place the high-ball tumbler in the center of the pot.
  4. Invert the measuring cylinder and position this in the center of the tumbler.
  5. Lift the elastic band and position this across the center of the measuring cylinder. This will prevent the the tumbler and cylinder from floating when the pot is filled with water.
  6. Pour the egg white into the space between the cylinder and the tumbler.
  7. Fill the pot with hot water until the water level is about a half inch above the level of the egg white.
  8. When I say hot water, the water must be around 60c or 120f. If it is too hot, the tumbler could crack. This heat also prepares the tumbler for the heat to come.
  9. Set the temperature of your pot or induction cooker to 85c.
  10. Place a thermometer into the pot to monitor the temperature. When the temp hits 80c,start your timer. 30 minutes after this point, the egg white will be sufficiently set.
  11. Remove the elastic band. Carefully remove the measuring cylinder from the egg white leaving the set egg white with a gaping tunnel all the way through it.
  12. It helps the jiggle the cylinder back and forth to allow a little air down the side of the cylinder to break the vacuum below.
  13. Place a funnel into the center of the egg white and pour in the egg yolk until it is level with the top of the white.
  14. By this stage the temperature of the water will be at your target of 85c.
  15. Allow this to cook for a further 35 to 40 minutes.
  16. Towards the end of this time, you can test the egg yellow with a skewer. When it comes out of the yellow dry, the yolk has set properly.
  17. Remove the tumbler from the water.
  18. Using the handle of a dessert spoon press the handle carefully down the side of the egg. Work your way all the way around the edge of the egg.
  19. This will allow air into the glass and the egg will slide out much easier.
  20. All that remains is to slice your cylinder egg slices....


How to Make Egg Rolls – Egg Rolls au Gratin – Superbly Tasty Egg Rolls

egg rolls recipe, cooking, breakfast, cocktail snacks, finger snacks, finger foods, how to, how to make, homemade, egg rolls, japanese omelette recipe, sliced egg rolls, easy egg roll recipe, egg roll recipe youtube, egg roll recipe video, rolls, egg, recipe, food, egg recipes, best egg roll recipe, omelette recipe, best omelette recipe, cheesy egg roll, 2 cheese egg roll, salami and cheese egg roll, breakfast recipes, cocktail party recipes, snack platter recipes, best recipes,


How to Make Egg Rolls - Egg Rolls au Gratin - Superbly Tasty Egg Rolls
Author: 
Recipe type: Eggs / Breakfast
 
Egg rolls are an all-time favorite. These eggs rolls reign supreme in the realm of egg rolls, and whether you serve them as finger snacks or as an accompaniment to breakfast, you will never be disappointed.
Ingredients
  • 4 Large eggs
  • 1 Tomato
  • 50g Good quality aged salami
  • 50g Finely shredded Parmesan cheese
  • 100g finely shredded mature cheddar cheese
  • 45ml Snipped garlic chives
  • 15ml Butter for frying
  • Salt and cracked black pepper to taste
  • Cayenne pepper for garnishing
Instructions
  1. To start, slice the tomato into thin slices.
  2. Slice the cured, aged salami into 1mm slices.
  3. Finely shred the Parmesan cheese.
  4. Whisk the eggs thoroughly... there must be no albumen visible in the egg.
  5. Finely shred the mature cheddar cheese, and snip about 3 tablespoons of fresh garlic chives.
  6. Add a tablespoon of butter to a 32cm pan. When the butter is sizzling, spread it around to coat the base of the pan.
  7. Pour in the egg and swirl it around to spread it evenly across the pan.
  8. Sprinkle 2 thirds of the chopped chives over the egg, followed by half of the shredded Parmesan cheese.
  9. Spread the thinly sliced salami across the egg, followed by the second half of the Parmesan cheese.
  10. Arrange the thinly sliced tomato around the edge of the pan with any leftover slices in the center.
  11. Season the whole lot with salt and cracked black pepper and remove the pan from the heat.
  12. Slide the egg from the pan onto a large chopping board.
  13. Sprinkle half of the mature cheddar cheese over the egg.
  14. For this part, you need teflon fingers.... starting on one side, roll the egg up as tightly as you can. If you don't have heat-proof fingers, allow the egg to cool for a few minutes first.
  15. Trim off the ends of the roll. This step is the most important of all.... put the ends in your mouth and enjoy the first taste.
  16. Cut the remaining roll into slices of 15mm or 3 quarter inch thick.
  17. These can be served just the way they are, but going the extra mile makes them extra special....
  18. Transfer the rolls to a baking sheet and sprinkle the second half of the cheddar cheese over the rolls.
  19. Place the pan in the center of your oven with just the grilling element on full blast for 5 minutes.
  20. Serve the egg rolls au gratin sprinkled with dusting of cayenne pepper and garnished with the remaining snipped chives.


Superbowl 2017 Special Recipes – Mac ‘n’ Cheese Bites – the Ultimate Mac ‘n’ Cheese Snack

mac 'n' cheese, recipe, how to, how to make, mac n cheese bites, mac n cheese snacks, how to make mac n cheese, how to make mac n cheese snacks, cheese, mac, snack, macaroni and cheese, super bowl, superbowl recipe, superbowl snacks, quick mac n cheese recipe, easy mac n cheese recipe, homemade mac n cheese, simple mac n cheese recipe, mac n cheese snack for superbowl, snacks for superbowl, superbowl 2017 recipes, catering for the superbowl,


Superbowl 2017 Special Recipes - Mac 'n' Cheese Bites - the Ultimate Mac 'n' Cheese Snack
Author: 
Recipe type: Superbowl / Pasta
Cuisine: Italian American
Serves: 12
 
With Superbowl just a few days away, here is a quick, easy and delicious recipe to feed the crowds. These mac 'n cheese bites are simply outstanding... crispy on the outside and sumptuous on the inside.
Ingredients
  • 60g Butter
  • 60ml All-purpose flour
  • 400ml Milk (full cream)
  • Salt and pepper to taste
  • 175g Grated mature cheddar cheese
  • 240g Elbow macaroni
  • 12 Rashers streaky bacon
  • 2 Eggs
  • Finely shredded Parmesan cheese
Instructions
  1. To start, measure out the butter, all-purpose flour and milk, and boil the elbow macaroni according to the package instructions while reducing the cooking time by 2 minutes so that it is not quite cooked.
  2. Shred the mature cheddar cheese and beat the eggs.
  3. Heat a pan over medium high heat and add the butter. When the butter is melted and bubbling, add the flour. Stir this into the flour to get a smooth paste and allow this to cook for 60 seconds.
  4. Pour in the milk bit by bit, stirring continuously until all of the milk is added.
  5. Use a whisk to beat this to smooth sauce while it continues to cook.
  6. Once the sauce is smooth, turn off the heat and add the cheddar cheese and continue to stir until all of the cheese has melted into the sauce.
  7. Add the par-cooked macaroni and stir this in until everything is evenly coated.
  8. Add the egg and stir this in until completely combined.
  9. Season with salt and pepper and put this aside.
  10. Lightly oil a muffin pan and line the holes of the pan with streaky bacon.
  11. Divide the macaroni mixture equally among the 12 holes.
  12. Top each mac 'n cheese bite with finely shredded Parmesan cheese and bake the bites in a pre-heated oven at 180c or 350f for 20 minutes until crispy and golden on top.
  13. And there we have it.... an amazingly easy, quick and super-tasty Superbowl snack.
  14. Click the onscreen link to see dozens of other fantastic Superbowl recipes.
  15. Thanks for joining us today, please give us a thumbs-up, subscribe if you haven't done so already, and share this with your friends and family, and we'll see you again tomorrow.


The Best Omelette EVER! An Omelette Made with Noodles – is it a Nomlette???

omelette, how to, how to make, noodle omelette, omelette made from noodles, breakfast recipes, recipes, brunch recipes, fancy breakfast recipes, homemade noodle omelette, using noodles to make an omelette, 2 minute noodles recipe, best omelette recipe, special occasions breakfast recipes, special breakfast recipes, 5 star breakfast recipe, gourmet omelette recipe, unusual omelette recipe, cooking, home cooking, best recipes, fancy recipes, video cooking recipes, video recipe,


The Best Omelette EVER! An Omelette Made with Noodles - is it a Nomlette???
Author: 
Recipe type: Breakfast / Brunch
 
Today's episode is a good fun recipe. This super-tasty omelette made with 2 minute noodles is quick and easy to make, and makes for the perfect breakfast or brunch. It will serve 2 people, one one very hungry giant.
Ingredients
  • 4 Eggs
  • 1 Pack Two minute noodles
  • 6 Rashers streaky bacon
  • Handful of garlic chives, roughly chopped
  • 100g Mozzarella cheese
  • 6 Cocktail tomatoes
  • 60g Butter (2 x 30g)
  • Finely shredded Parmesan cheese
  • Fresh basil to garnish
  • Salt and pepper to taste
Instructions
  1. To start, whisk the eggs in a jug and place the 2 minute noodles in a bowl.
  2. Pour boiling water over the noodles to submerge and cover the bowl.
  3. Cut the streaky bacon across the grain into thin strips.
  4. Roughly chop the garlic chives.
  5. Slice the mozzarella cheese and cut the cocktail tomatoes into halves.
  6. By this time the noodles are ready. Drain the excess water and put these aside.
  7. Heat a 30cm or 12 inch pan over medium high heat and add 30ml of butter.
  8. Add the bacon and fry for 6 to 8 minutes until it has taken on a nice golden color.
  9. Add the chives and tomatoes and fry these for about 60 seconds.
  10. Remove everything from the pan and put this aside.
  11. Add another 30ml of butter to the pan. Spread this evenly over the base of the pan.
  12. Add the noodles to the pan and spread these evenly across the pan.
  13. Allow this to fry for 2 minutes undisturbed.
  14. Pour in the egg making sure to spread it around evenly.
  15. Allow this to cook and set of 2 minutes undisturbed.
  16. Top half of the pan with some of the cheese and the bacon chives and tomato.
  17. Use the remaining cheese on top of the bacon mixture.
  18. Season with salt and cracked black pepper and allow this to fry for a further 2 minutes.
  19. Slide the whole omelette from the pan onto a large platter and flip the empty side of the omelette over the filling.
  20. Cut the omelette in half and slide the halves onto serving platters.
  21. Top the omelettes with finely shredded Parmesan, garnish with fresh basil and serve immediately.
  22. And there we have it... breakfast fit for a hungry king.


Best Dinner Rolls Ever – Savory, Soft, Slightly Chewy & Super Tasty Buns

dinner rolls, savory rolls, spinach and feta bread rolls, bread rolls, how to, how to make, how to bake, homemade, dinner rolls recipe, best dinner rolls recipe, quick dinner rolls recipe, easy dinner rolls recipe, how ro bake dinner rolls, soft dinner rolls, chewy dinner rolls, tasty dinner rolls, how to make dinner rolls, rolls, soft, dinner, roll, recipe,


Best Dinner Rolls Ever - Savory, Soft, Slightly Chewy & Super Tasty Buns
Author: 
Recipe type: Bread
Cuisine: Mediterranean
Serves: 12
 
These delicious little buns have a totally unique texture. Super soft, slightly chewy and insanely tasty, these little rolls will do justice to any great feast.
Ingredients
  • 360g All purpose / cake flour
  • 5ml Salt
  • 45ml Sugar (first batch)
  • 5ml Sugar (second batch)
  • 60ml Oil
  • 10g Active dried yeast
  • 250ml Warm water
  • 1 Egg, beaten
  • 125ml Chopped baby spinach
  • 75g Feta cheese
Instructions
  1. Chop the baby spinach and crumble the feta cheese into this and mix until combined.
  2. In your mixer bowl, measure out the all purpose flour, salt and first batch of sugar.
  3. Pour the warm water into a jug and add the yeast and second measure of sugar.
  4. Whisk this together until the sugar is dissolved, cover the jug and allow this to activate for 15 minutes.
  5. After this time the yeast mixture will be very frothy. Pour in the beaten egg and the oil.
  6. Whisk this until totally combined.
  7. Place your mixer bowl on your mixer with beater attached.
  8. Pour in the liquids, close the mixer and run the machine on slow for 2 minutes.
  9. Increase the speed to medium high and continue for a further 10 minutes.
  10. Stop the machine. The dough will be shiny and smooth and stretchy like melted mozzarella.
  11. Scrape the paddle down, close the machine and let the dough stand for 5 minutes undisturbed. If your machine doesn't have a splash guard, cover the bowl with a towel.
  12. After 5 minutes, add the spinach and feta cheese.
  13. Close the machine and mix on high speed for 60 seconds.
  14. Divide the soft dough equally between the holes of a 12 portion muffin pan.
  15. Cover the pan with a large inverted roasting tin to rise for 20 minutes.
  16. Brush the buns with a light coating of full cream milk and top each bun with a good pinch of finely shredded Parmesan.
  17. Bake the buns in a preheated oven at 200c or 400f for 12 to 15 minutes until well risen, golden brown and crispy on top.
  18. Remove the buns from the oven and allow them to cool in the muffin pan for 20 minutes before turning them out onto a cooling rack.
  19. And there it is.....a supremely soft, airy, springly and tasty roll... the best dinner roll ever.


How to Make Spicy, Cheesy Turkey Sausage – Full-Flavor Homemade Turkey Sausage!!!

turkey, sausage, turkey sausage, how to make turkey sausage, homemade turkey sausage, turkey sausage recipe, turkey sausage youtune, turkey sausage recipe video, make turkey sausage at home, spicy turkey sausage recipe, turkey cheese sausage recipe, best turkey sausage reciep, how to, sausage, poultry sausages recipes, hand crafted turkey sausage,


How to Make Spicy, Cheesy Turkey Sausage - Full-Flavor Homemade Turkey Sausage!!!
Author: 
Recipe type: Sausage
Cuisine: Mexican
Serves: 3kg
 
This spicy turkey cheese sausage is out of this world. Tender juicy ground turkey, spiced with Mexican spice blend and loads of mature cheese will have you guests lining up for more.
Ingredients
  • 2.6kg Turkey meat, cubed
  • 300g Well matured cheddar or Monterey Jack
  • 250ml Chilled water
  • 22mm Collagen casings
For the Spice Blend
  • 30ml Ground cumin
  • 30ml Ground coriander seed
  • 30ml Paprika
  • 30ml Oregano
  • 10ml Chilli powder
  • 10ml Garlic powder
  • 50g Salt
Instructions
  1. Starting with the spice blend, place the ground cumin, ground coriander seed, paprika, oregano, chilli powder, garlic powder and salt on a bowl and mix this until combined.
  2. Place the cubed turkey meat in a large roasting tin. You can use any part of the turkey, however the drumstick meat will yield the best result.
  3. Sprinkle the spice mixture over the meat and mix this in thoroughly.
  4. Transfer the pan to your freezer for 45 minutes to firm up. This is absolutely necessary as it aids your grinder to get a good clean grind with no fat smearing, resulting in a much better texture of sausage.
  5. Remove the meat from your freezer and and run it through the grinder with a 4mm plate fitted.
  6. Add the coarsely grated cheese to the meat and mix this in briefly.
  7. Pour in the well chilled water and mix everything together until all of water has been absorbed by the meat.
  8. Load the meat mixture into the hopper of your sausage stuffer.
  9. Fit an 18mm funnel to the stuffer and feed the 22mm collagen casing onto the funnel.
  10. Crank the stuffer until the meat reaches the end of the funnel, then twist off the casing.
  11. Apply gentle pressure to the casing at the end of the funnel and start cranking the handle.
  12. When the end of the casing is almost reached, stop cranking, remove the casing from the funnel and twist off the end.
  13. Continue with this process until all of the filling has been used.
  14. To make up individual sausages, crimp the sausage between your thumb and forefinger.
  15. Twist the sausage a few times, then snip it off in the center of the twisted section. Continue until all of the sausages are formed.
  16. Wrap the sausages and transfer them to your refrigerator overnight for the flavors to fully develop before cooking and serving.
  17. To cook the sausage, fry them gently in butter over medium heat until golden on all sides.
  18. Serve immediately with the accompaniments of your choice.


How to Make Venison Liver Pate’ – Amazing, Tasty Homemade Venison Liver Pate’ at Home!!!

venison liver pate',how to make venison liver pate',homemade venison liver pate',venison liver pate' recipe,venison liver pate' youtube,venison liver pate' video recipe,make venison liver pate' at home,best venison liver pate' recipe,how to make venison liver pate' at home,venison liver pate' with brandy and cream,easy venison liver pate',gourmet venison liver pate' recipe


How to Make Venison Liver Pate' - Amazing, Tasty Homemade Venison Liver Pate' at Home!!!
Author: 
Recipe type: Venison & Pate'
Cuisine: French
Serves: 500g
 
Apologies for my absense over the past 3 weeks. My wife suffered a massive heart attack and almost died. Very fortunately she pulled through and was welcomed back home over this past weekend. So now we're back on track and will continue with our normal programing, as well as continuing with our distilling series and molecular gastronomy series. In today's episode we're going to make a masterpiece venison liver pate'.
Ingredients
Group 1
  • 450g Venison liver
  • 250ml Cultured buttermilk
Group 2
  • 4 Spring onions
  • 1 Clove garlic
  • 2.5ml Roughly chopped fresh thyme
  • 5ml Roughly chopped fresh rosemary
  • 15g Butter
Group 3
  • 3.75ml Crushed Juniper berries
  • Pinch of ground nutmeg
  • Pinch of ground cinnamon
  • Pinch of ground coriander seed
  • Pinch of ground clove
  • Pinch of ground black pepper
Group 4
  • 50ml Brandy
  • 30ml Cream (plus extra for thinning)
  • 60ml Melted butter
  • Extra melted butter for sealing
  • Salt and pepper to taste
Instructions
  1. I am using kudu liver, but any large deer liver is good.
  2. Rinse the liver, then use a sharp paring knife to remove the sinews from the liver.
  3. The easiest way to do this is to grab any visible sinew with one hand and scrape the flesh from the sinew using your knife edge with the other hand.
  4. Once the sinew is removed, cut the liver into half inch cubes.
  5. Place the cubed liver in a container and pour in enough cultured buttermilk to cover the liver.
  6. Place the lid on the container and let this stand in you refrigerator for an hour to 2 hours.
  7. After this time, place this liver in a colander and rinse it thoroughly under cold running water, then pat the cubes dry with a dish towel.
  8. In the next stages you will need to roughly chop the rosemary and thyme, slice the garlic, cut the spring onion into rounds and measure out the butter.
  9. In addition, you will need a pinch each of ground nutmeg, ground cinnamon, ground coriander seed, ground clove and ground black pepper and 3.75ml crushed juniper berries.
  10. Measure out the brandy, the cream and the melted butter.
  11. Heat a large pan over medium heat and add the un-melted butter.
  12. When the butter starts to sizzle, add the livers, garlic, rosemary, thyme and spring onions.
  13. Saute this for 5 minutes until the whites of the onion are softened and the liver is browned all over.
  14. After this time, add the dry spices and stir these in until well combined.
  15. Pour the brandy in at the edge of the pan and use your gas lighter or blowtorch to set it alight. Make sure you're standing slightly away from the pan to avoid burning yourself.
  16. Allow the flames to burn down, then stir everything carefully until they extinguish completely, then remove the pan from the heat.
  17. Pour in the melted butter and cream.
  18. Use your stick blender to machine this until fine. You can also do this in a regular blender or food processor.
  19. Add extra cream to thin the paste as you go. You want to end up with a very soft paste, similar to anchovy spread.
  20. Remember that the pate' will firm up considerably on refrigeration and if you don't thin it sufficiently and this stage you will find difficult to spread the finished product.
  21. Once you're happy with the consistency, season the pate with salt and pepper to taste and stir these in.
  22. Tip the pate' out into a sieve placed over a bowl.
  23. Use a spatula to scrape and force the pate' through the sieve.
  24. Transfer the pate' to suitable bowls and flatten out the surface.
  25. Melt enough butter to pour over the pate' in order to seal the tops of the bowls, then transfer the pate' to your refrigerator to set for at least 2 hours.
  26. And there it is.... an amazing, delicious venison liver pate'.


Biker Bar Pancakes – Diner Style Pancakes – Awesome Beer Flapjacks for Hungry People!!!

diner-style pancakes,giant flapjacks recipe,flapjacks with beer,diner style flapjacks,how to make flapjacks,how to make crumpets,light flapjacks with beer batter,beer batter flapjacks,making flapjacks at home,biker bar flapjacks,biker bar pancakes,flapjacks made with beer batter,buttermilk flapjacks,buttermilk pancakes


Biker Bar Pancakes - Diner Style Pancakes - Awesome Beer Flapjacks for Hungry People!!!
Author: 
Recipe type: Dessert
Cuisine: American
Prep time: 
Total time: 
Serves: 8
 
Today's episode is and easy, fun and delicious treat that will result in the best flapjacks you have ever tasted. These things are huge... they are light and fluffy.... and they have an amazing flavor that is second to none.
Ingredients
  • 365g All-purpose flour
  • 45ml Sugar
  • 6.25ml Baking powder
  • 6.25ml Bicarbonate of soda
  • 6.25ml Salt
  • 2 Eggs
  • 430ml Cultured buttermilk
  • 125ml Beer or stout
  • 5ml Vanilla extract
  • 45ml Butter melted
  • Extra melted butter for frying and serving
  • Maple syrup
Instructions
  1. Combine the vanilla extract, melted butter, beaten eggs, cultured buttermilk and beer in a jug. Stir this well until completely combined.
  2. In a mixing bowl, combine the all purpose flour, baking powder, bicarbonate of soda, salt and sugar. Stir this together until well combined.
  3. Pour the wet ingredients into the bowl. Use a ball whisk to mix this all together until you have a lumpy batter.
  4. Heat a frying pan over medium heat. Brush the pan with melted butter and drop a half cup of the batter into the pan.
  5. Allow this to fry for 2.5 to 3 minutes until bubbles open on the top of the pancake.
  6. Use a spatula to lift the edge of the pancake. These are bigger normal, so you really have to get the spatula well underneath the pancake before attempting to flip it.
  7. Flip it over and continue to fry for a further 2.5 minutes.
  8. Remove the pancake from the pan and continue with the remaining pancakes. Keep the cooked pancakes warm in a low oven.
  9. Serve the pancakes brushed with melted butter and drizzled with maple syrup.


Scroll to top

Kitchen Conversions

Convert:
Masses
to:
Volumes
to:
Temperatures
to:
Lengths
to: