Revolutionary New Deep-Fried Chicken Coating

Revolutionary New Chicken Coating Website


Revolutionary New Deep-Fried Chicken Coating
Author: 
Recipe type: Poultry / Chicken
Cuisine: South African
Prep time: 
Cook time: 
Total time: 
Serves: 4
 
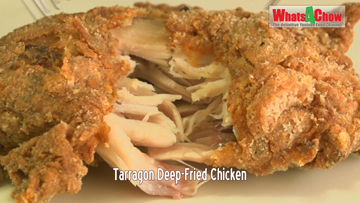
Today we’re going to take a look at a revolutionary new coating method I have developed to make crispy deep-fried chicken. Although I have used chicken strips in the demonstration, this will work just as well with chicken pieces. The process is quicker and cleaner than regular coating methods. Towards the end of the demo, I will give you a couple of tips and tricks to ensure superior results every time.
Ingredients
  • 600g Chicken breast fillets
  • 60ml Light soy sauce
  • 2 Large eggs
  • 120ml Cornstarch (1/2 cup)
  • 1/24 tsp Xanthan gum
  • 2 Cups all purpose flour
  • 1 Tbs white pepper
  • Oil for frying
Instructions
  1. To start, cut your chicken breast fillets into strips of 8mm thick and put these aside. You can also use the fillet’ from the breasts as well.
  2. For the pre-coating, measure the cornstarch and light soy sauce into a jug and add 2 eggs.
  3. Use a whisk to combine these until smooth. It will be a bit difficult at first, but as the cornstarch loosens up it will get easier. Blend until smooth.
  4. Transfer this mixture to a tall jug for blending. Add a third of a ⅛th teaspoon of xanthan gum to the mixture and shear this into the mixture using your stick blender. You can also do this in a regular stand blender. This step cannot be done by hand as the xanthum gum will not emulsify properly.
  5. The result will be a glossy, light brown syrupy liquid. Add the chicken strips to the mixture, mix them in and put this aside.
  6. Place 2 cups of all-purpose flour in a food grade plastic container and mix in a tablespoonful white pepper.
  7. Add a few strips of the chicken to the flour, put the lid on and shake from side to side to coat the chicken. Remove the lid and add a few more strips and continue this process until all of the chicken is in the flour, and nicely coated.
  8. Heat your oil to 150c or 302f. We are using a slightly lower temperature than normal to ensure that the coating does not over-brown before the chicken is cooked through.
  9. Fry the chicken in batches until lightly golden, about 3-4 minutes per batch and you’re done.

And now for the tips and tricks…


  • You can scale this recipe up to any size, and you are only limited by the size of your blender and plastic shaking container.
  • When you have sheared the xanthan gum into the mixture, make sure you have a syrup-like texture that coats the chicken well. If not, add a tiny bit more xanthan gum and shear this in to get the desired consistency. However, do not overdose the xanthan gum as this will lead to a mucus-like consistency which is not your goal.
  • Allow the oil to return to 150c for each batch you fry in order to achieve a consistent result from batch to batch.
  • Use a good quality light soy sauce like Kikkoman or Lee Kum Kee for the best results. An inferior soy sauce will give an inferior result, while dark soy sauce will simply not be suitable.
  • It is not necessary to add salt to the pre-coating or the flour. There is more than enough seasoning in the soy sauce.

Better Than KFC! – Quicker, Easier & Better Than KFC!

Better Than KFC S


Better Than KFC! - Quicker, Easier & Better Than KFC!
Author: 
Recipe type: Chicken
Cuisine: USA
Serves: 16-20
 
Today’s episode brings something really exciting. These Deep-Fried Hot Chicken Wings are quicker, easier and better than KFC hot wings. With only 6 ingredients and a super-short 3 minute frying time, you’ll be enjoying these incredibly crispy, golden hot wings in a flash.
Ingredients
  • 3 Tbs Aromat / Aromex / Flavormate
  • 1-6 Tbs Dried chilli flakes
  • 120g Packer Salt & Vinegar chips / crisps
  • 2 Cups all-purpose flour
  • 4 Eggs
  • 8-10 Whole chicken wings
Instructions
  1. To start, measure out 3 tablespoons of Aromat. This is also called Aromex, Flavormate and a number of other trade names, depending on where you live.
  2. Measure out 1-6 Tablespoons of dried chilli flakes. One tablespoon will give you a mild burn, with the burn increasing as add extra chilli. The choice is up to you.
  3. You will also need a 120g packet of salt and vinegar potato chips or crisps.
  4. Place the Aromat and chilli flakes in your spice grinder and machine these to a fine powder.
  5. Place the potato crisps in your food processor and pulse them 3 to 4 times until quite fine.
  6. Measure 2 cups of all purpose flour into a large mixing bowl. Add the powder Aromat, dried chilli and crushed potato chips and mix these well to combine.
  7. Put this aside until required.
  8. Crack 4 eggs into another mixing bowl and whisk these briefly and put this aside.
  9. Take 8-10 whole chicken wings. Cut the tips from the wings and discard these.
  10. Slice through the center joint, giving a total of 16-20 winglets.
  11. At this stage, start heating your oil over over high heat with a target temperature of 180c or 350f.
  12. Sprinkle some of the coating over a couple of large platters. This is where the coated wings will rest, and the layer of powder prevents the coating on the wings from sticking to the platters and getting damaged.
  13. Dredge one of the winglets in the powder mixture. Transfer this to the egg and coat it all over. Return the wing to the powder mixture and dredge it well to get a good solid coating. Transfer this to the platter to rest while you continue with the remaining winglets.
  14. By the time you’re finished coating the wings, the oil should be close to reaching 180c.
  15. When it reaches 180c, fry the chicken wings in batches for 3 minutes per batch, until crispy and golden.
  16. Use a slotted spoon to remove the wings from the oil, and continue with the remaining wings.
  17. It is now time to dig in and feast on your amazing crispy fried, golden chicken wings.
  18. That’s it for today folks, please like subscribe and share, and we’ll see you again real soon!


Tarragon Deep-Fried Chicken — The Crispiest, Most Tender & Juicy Deep-Fried Chicken Ever!

Tarragon Deep-Fried Chicken


Tarragon Deep-Fried Chicken --- The Crispiest, Most Tender & Juicy Deep-Fried Chicken Ever!
Author: 
Recipe type: Chicken
Cuisine: French
 
Today we’re making crispy tarragon deep-fried chicken. The manner in which this dish is prepared results in a juicy, super-tender chicken with tons of flavor and an aroma that will have your guests clamoring for more and more.
Ingredients
For the Flavoring
  • 6 Chicken Pieces
  • 2Tbs Dried Tarragon flakes
  • 1Tbs Dried garlic flakes
  • 2Tbs Dried chilli flakes
  • 30g Softened butter
  • 175ml Chicken stock
  • 50ml White wine
For the Coating
  • 10ml Baking Powder
  • 1 Cup Strong white bread flour
  • 1 Cup Corn starch
  • 1Tbs Himalayan rock salt
  • 1.5ml / 0.25Tsp MSG
  • 3 Eggs
  • 150ml Full cream milk
  • Oil for frying
Instructions
  1. Today we’re making crispy tarragon deep-fried chicken. The manner in
  2. which this dish is prepared results in a juicy, super-tender chicken with
  3. tons of flavor and an aroma that will have your guests clamoring for
  4. more and more.
  5. The technique we use is suited for any size batch, but certainly makes it
  6. much easier for you when making large batches for bigger crowds, as
  7. the frying time is much shorter than for regular fried chicken.
  8. Before we begin, please remember to subscribe if you haven’t done so
  9. already, also give us a thumbs-up, and share this with your family and
  10. friends --- every little bit helps us to grow the channel, and your
  11. support is much appreciated.
  12. To start, preheat your oven to 200c or 400f.
  13. Measure out 2 tablespoons dried tarragon flakes, 1 tablespoon dried
  14. garlic flakes and 2 tablespoons of dried chilli flakes.
  15. You also need 175ml chicken stock, 50ml dry white wine, and 30g of
  16. softened butter.
  17. Pour these all into one jug and mix them all until well combined.
  18. Place your chicken pieces in a large baking pan and pour the flavoring
  19. mixture over the chicken pieces. Cover the pan with foil and bake the
  20. chicken pieces for 80 minutes.
  21. After 80 minutes, remove the chicken from the oven, carefully remove
  22. the foil and transfer the chicken to a cooling rack in another pan to
  23. cool for 30 minutes.
  24. While the chicken cools, place 2 tablespoons of Himalayan rock salt
  25. and 1.5ml of pure MSG in your spice grinder. Machine this until you
  26. have a very fine powder. This will only take a few seconds. The powder
  27. must be as fine, if not more refined than the flour it is going to be
  28. combined with. This helps to get a very even distribution of the powder
  29. through the flour coating.
  30. In another pan, measure out 1 cup of corn starch and one cup of strong
  31. white bread flour. Add 2 teaspoons baking powder, and the powdered
  32. MSG and salt.
  33. Mix this all until thoroughly combined.
  34. In a large jug, combine 3 egg with 150ml full cream milk. Whisk this
  35. briefly and put it aside.
  36. Use a little of the flour mixture to sprinkle over a large platter. This is
  37. where the coated chicken will rest before being fried. The layer flour
  38. prevents the coating on the chicken from sticking to the platter and
  39. getting damaged.
  40. To oat the chicken, drop a few pieces of the chicken into the flour
  41. mixture and mix them around until they are coated.
  42. Dip them in the egg and transfer them directly back to the flour
  43. mixture. Dredge these in the flour until well coated. Transfer them to
  44. the platter to rest before frying, and continue with the remaining
  45. pieces.
  46. Heat your oil to 180c or 350f. Fry the chicken pieces in batches for 5
  47. minutes per batch until crisp and golden. Remove the pieces from the
  48. oil and drain any excess oil on kitchen paper.
  49. Allow these to stand for a couple of minutes before serving.
  50. Here we can plainly see just how moist and tender the chicken is when
  51. prepared in the manner. In addition, if you’re catering for a large
  52. crowd, the chicken can be broiled the day before and refrigerated,
  53. leaving only the coating and frying for the day of the occasion.
  54. That’s it for today folks, please like, subscribe and share, and we’ll see
  55. you again real soon.


Deep-Fried Buttermilk Chicken – Southern Fried Chicken with a Twist!!!

buttermilk chicken,deep-fried buttermilk chicken,crispy deep-fried chicken,juicy deep-fried chicken,tender deep-fried chicken,how to,how to make buttermilk chicken,homemade buttermilk chicken,best buttermilk chicken recipe,crispy buttermilk chicken,recipes,cooking,deep-fried,chicken recipes,take-out recipes,catering recipes,cultured buttermilk recipes


Deep-Fried Buttermilk Chicken - Southern Fried Chicken with a Twist!!!
Author: 
Recipe type: Chicken
Cuisine: American
 
Deep-fried buttermilk chicken is all-time favorite, and this recipe gives it a whole new twist. The process is quite drawn out, but easy, however as a result this recipe is more suited to bulk production for parties and catering.
Ingredients
  • 8-12 Pieces chicken
  • 400ml Cultured buttermilk
  • 30ml Dijon mustard
  • 15ml Salt
  • 10ml White pepper
  • 10ml Cayenne pepper
  • 1¾ Cups All-purpose flour
  • ¼ Cup Corn starch
  • 15ml Garlic powder
  • 15ml Onion powder
  • 15ml Fine salt
  • 4 Eggs
Instructions
  1. To start, measure 400ml buttermilk and30ml Dijon mustard into a jug.
  2. Measure out a tablespoon salt, 2 teaspoons white pepper and 2 teaspoons cayenne pepper and add these to the jug.
  3. Mix this all until well combined.
  4. Place 8 to 12 chicken pieces on a chopping board and use your carving fork to perforate the pieces all over.
  5. Open a large vacuum packing bag and fold the top section inside out. This prevents messing on the bag and helps to keep the bag open.
  6. Place the chicken pieces in the bag and pour in the buttermilk mixture.
  7. Fold the top of the bag back and vacuum seal the bag.
  8. Notice that I have elevated the vacuum packer. This allows all of the air to escape while inhibiting the flow of the liquid upward and into the machine. As soon as the liquid starts to rise, hit the stop button and then the seal button.
  9. It is good idea to double seal the top and bottom of the bag.
  10. Place the bag of chicken in your refrigerator overnight for the buttermilk to do its magic.
  11. The following day, remove the bag from the refrigerator.
  12. For this step you need a large pot on an induction range, a slow cooker, or a digital pot like this one.
  13. Half-fill the pot with water and set the temperature to 76c or 169f.
  14. When the water has reached this temperature, place the bag of chicken pieces in the pot. Set your timer for 2 hours and go and drink coffee.
  15. After 2 hours, remove the bag and cut it open. Place a rack in a large pan and pour the chicken onto the rack. All of the liquid will drain through the rack, and can be discarded.
  16. Transfer the chicken pieces to a clean dish towel, and pat them dry using another dish towel.
  17. For the coating combine 1 and three quarter cups of all-purpose flour with a quarter cup of corn starch and 15ml of fine salt.
  18. Whisk 4 eggs thoroughly and pour these into a second bowl.
  19. Add a tablespoon of garlic powder and a tablespoon of onion powder to the flour and mix this in.
  20. Take a lityle of the flour mixture and sprinkle it over a large platter. This is where the coated chicken will rest, and the flour prevents the chicken from sticking to the platter and damaging the coating.
  21. Working with one piece of chicken at a time, dunk the chicken in the egg to wet it all over.
  22. Transfer it to the flour and dredge it to get its first coating.
  23. Back to the egg to wet all of the flour.
  24. And again into the fliur to get a good solid coating all over.
  25. Continue until all of the chicken pieces are complete.
  26. Allow the coated chicken to set for 20 minutes before continuing.
  27. Half fill a wok or large pan with oil and heat it to 170c or 340f.
  28. Carefully add the chicken pieces to the oil and fry these for 6 to 8 minutes until the coating is crispy and golden. The chicken is already cooked, so the frying process is purely to crisp the coating and reheat the chicken.
  29. Remove the pieces from the oil and drain any excess oil on kitchen paper.
  30. Serve the chicken piping hot with the accompaniments of your choice and enjoy.


KFC Crunch Burger – How to Make the KFC Crunch Burger at Home!!!

KFC, recipe, how to, how to make, KFC crunch burger, KFC burger, homemade, KFC secret recipe, kfc crunch burger secret recipe, burger, crunch, fried chicken, kfc chicken recipe, cooking, how to make, kfc secret herbs and spices, simple kfc recipe, making kfc at home, best kfc recipe, kfc double crunch burger, kfc double crunch burger recipe, how to make a double crunch burger,


KFC Crunch Burger - How to Make the KFC Crunch Burger at Home!!!
Author: 
Recipe type: KFC
Cuisine: Chicken
Serves: 4
 
The KFC Crunch burger is one of the most recent additions to the KFC menu. Crispier and crunchier than the regular KFC burger, and almost as spicy as the KFC Zinger, the Crunch Burger is outstanding. This is how to make your own amazing Crunch Burger at home.
Ingredients
For the Curing Brine
  • 3 Liters water
  • 90g Prague powder #2
  • 35ml White pepper
  • 15ml Cayenne pepper
For the Coating
  • 5ml Citric acid
  • 500ml All purpose flour
  • 80ml Tapioca flour (or cornstarch if you cannot find tapioca)
  • 30ml White pepper
  • 30ml Cayenne pepper
  • 30ml Salt
  • 4 Eggs
For the Sauce
  • 60ml Tangy mayonnaise
  • 30ml Thin pepper sauce (Tabasco or Lea & Perrins)
Other
  • 4 Burger buns
  • Lettuce
  • 4 Slices processed cheese
Instructions
  1. Pour 3 liters of water into a medium size pot. Measure out the Prague powder, white pepper and cayenne pepper and add these to the pot.
  2. Place the pot over medium high heat, bring it to a boil, reduce the heat and allow it to simmer for 10 minutes.
  3. Quick cool the brine by floating the pot in a sink of cold water.
  4. When the brine has cooled significantly, pour it into a non-reactive container.
  5. Place the chicken breasts in the brine, clip the lid on the container and transfer it to your refrigerator for 24 hours to cure.
  6. The following day, make up the coating mixture by combining the all-purpose flour, tapioca flour, citric acid, salt, cayenne pepper and white pepper.
  7. Whisk the eggs thoroughly and pour these into a large bowl.
  8. Remove the chicken breasts from the brine and pat them dry using a clean kitchen cloth.
  9. Trim away the fillets from the breasts. Save these for stir-fry or KFC Popcorn.
  10. Place the breast smooth side up on your board and gently flatten them out with your meat mallet.
  11. Before coating the breasts, sprinkle some of the seasoned flour over a large platter. This is where the coated chicken will set, and the flour will prevent the coating from sticking to the platter and getting damaged.
  12. Working with one breast at a time, dredge the breast in the flour to coat the surface.
  13. Transfer it to the egg to wet all of the flour.
  14. Then back to the flour to get a good coating all over.
  15. Then back to the egg to wet all of the flour....
  16. Then a third and final coating of flour.
  17. Transfer the breast to the platter to set and continue with the remaining breasts.
  18. While the coating sets, combine the hot pepper sauce and the mayonnaise. You can use any thin hot pepper sauce like Tabasco or Lea and Perins.
  19. Cut the burger buns, unwrap the cheese slices and portion the lettuce.
  20. Half fill a wok or large pan with oil and heat this to 160c.
  21. Carefully lower the chicken breasts into the oil and fry these for 6 minutes, turning them every 90 seconds.
  22. Remove the breast from the oil and drain any excess oil on kitchen paper.
  23. To make up the burger, spread a little sauce on the lower bun an place a breast on top of this.
  24. Top the bun with the processed cheese slice and a generous dose of lettuce.
  25. Give lettuce a generous dollop of sauce and you're done.
  26. And there it is.... simple genius from KFC.... made at home.


How to Make REAL KFC – The Simplified Version – The REAL KFC Fried Chicken Recipe

kfc secret recipe, kfc secret spice recipe, kfc spice blend, how to make kfc fried chicken, kfc fried chicken secret recipe, copycat kfc chicken, homemade kfc fried chicken, the real kfc fried chicken recipe, kfc secred blend of 11 herbs and spices, how to make real kfc at home, how to real kfc fried chicken at home, real homemade kfc fried chicken, secret kfc coating, what is the secret to kfc, fried chicken, kfc fried chicken recipe video, kfc fried chicken recipe leaked,


How to Make REAL KFC - The Simplified Version - The REAL KFC Fried Chicken Recipe
Author: 
Recipe type: Chicken / Fast Food
Cuisine: KFC Fried Chicken
Prep time: 
Cook time: 
Total time: 
Serves: 6-12
 
How to make REAL KFC Fried Chicken at Home!!! The Real KFC Fried Chicken Recipe!!! Some time ago, I published the real KFC recipe. The response to this recipe was amazing, and judging by the feedback, it truly is the only KFC copycat recipe that is not a copy... it is the real thing. You can check out the entire KFC series by clicking the onscreen link now. Unfortunately this original KFC recipe takes 2 days to prepare and requires some specialized ingredients like saltpeter or Prague powder. Over the last few months, I have been working on a new version of this recipe that is far easier and user-friendly for the home cook. A few notes before we start.... I have adjusted and even changed some of the ingredients to compensate for the fact that the chicken is not cured and brined. You will need to own or at least have access to a vacuum packer, and you will need a dishwasher, or a large digital pot with temperature control.
Ingredients
  • 8-12 Chicken pieces (drums and thighs)
  • Oil for frying
For the Herb & Spice Blend
  • 15ml Paprika
  • 30ml Onion flakes
  • 5ml Dried Sage
  • 10ml Garlic powder
  • 5ml Dried Oregano
  • 15ml Cayenne pepper
  • 10ml White pepper
  • 5ml Dried basil
  • 5ml Dried marjoram
  • 15ml Dried and powdered coriander leaf
  • 5ml Ground ginger
  • Salt (2% of the weight of the chicken)
For the Rest
  • 2 Cups all purpose flour
  • 30ml Salt
  • 60ml Cornstarch
  • 250ml Chicken stock (or 3-4 eggs, beaten to replace the cornstarch and stock)
Instructions
  1. Starting with herbs and spices. Place the paprika, onion flakes, sage, garlic powder, dried oregano, cayenne pepper, white pepper, dried basil, dried marjoram, dried coriander leaf and ground ginger in a bowl and mix until combined.
  2. Transfer this to your spice blender and zap it all to a fine powder.
  3. Place 3 tablespoons of the powder in a sprinkle bottle.
  4. Weigh the chicken pieces and calculate 2 percent of this weight.
  5. This weighs 1200g, so I need 24 grams of salt.
  6. Measure this out and pour it into the shaker bottle. Shake it up to combine with the spice blend.
  7. Place the chicken pieces in a large roasting pan and sprinkle the spice blend over the chicken to get a good coating all over.
  8. This means on both sides and on the edges. This quantity of spice blend is sufficient for 12 pieces. I am only powdering 8 pieces, so will have a little spice left over. Add any leftover to the other half of spice blend.
  9. Place the chicken pieces in a large vacuum bag in a single layer. Vacuum pack the chicken. It is good idea to double seal both ends of the bag.
  10. Place bag in your dishwasher on the high setting which is worldwide standard 70c or 158f, for 2 full cycles or about 2 hours.
  11. Alternatively you can use a digital pot set to 70c, filled with water.
  12. While the chicken slow-cooks and absorbs all of the amazing flavors of the herbs and spices, we can mix the coating.
  13. Place the flour and the remaining spice blend in a large bowl.
  14. Add 30ml of salt and mix this together thoroughly.
  15. After 2 hours, remove the chicken from the dishwasher or pot, cut the bag and transfer the pieces to a large pan to cool for a few minutes. Notice that we have lost less the 2 percent of the original weight in juices. All of that yummy is still inside the chicken.
  16. To coat the chicken, you can beat 3 to 4 eggs, which is still my favorite, or here is an alternative. Whisk 4 tablespoons of cornstarch into 250ml of cold chicken stock. This will bond the coating very well, but as I said, I still prefer using egg.
  17. Pour the liquid into a flat bowl.
  18. Before continuing, sprinkle a layer of the flour mixture over 2 large platters. This is where the coated chicken will set, and the flour prevents the coating from sticking to the plate and getting damaged.
  19. Working with one piece of chicken at a time, dunk the chicken in the liquid to wet it all over.
  20. Transfer this to the flour and dredge it to coat all over.
  21. Back to the liquid to wet all of the flour....
  22. Then back to the flour to get a good solid coating.
  23. Transfer this to a platter and continue with the rest of the chicken.
  24. Allow the coating to set for 20 minutes before frying.
  25. Half fill a wok or large pan with oil and heat this to 160c or 320f.
  26. Carefully lower the pieces into the oil in batches and fry for 6 minutes, turning halfway through to ensure even browning.
  27. Remove the pieces from the oil and drain any excess oil on kitchen paper. Continue with the next batch.
  28. And there it is, an amazing batch of KFC...


KFC Fried Chicken Secret Recipe – Original Recipe / Secret Ingredients / How to Make KFC – Part 2

kfc secret recipe,kfc secret spice recipe,kfc spice blend,how to make kfc fried chicken,kfc fried chicken secret recipe,copycat kfc chicken,homemade kfc fried chicken,the real kfc fried chicken recipe,KFC secred blend of 11 herbs and spices,how to make real kfc at home,how to real kfc fried chicken at home,real homemade kfc fried chicken,secret kfc coating,what is the secret to kfc fried chicken,kfc deep-fried chicken recipe,Making KFC using Prague powder


KFC Fried Chicken Secret Recipe - Original Recipe / Secret Ingredients / How to Make KFC - Part 2
Author: 
Recipe type: Chicken / Fast Food / Take-Out
Cuisine: American
 
Some time ago we launched the first of our KFC series and have been overwhelmed at the response. One of the main questions that arose from this was where to buy saltpetre. This updated version of the recipe uses Prague powder to replaces the saltpetre, the salt and the bicarbonate of soda.
Ingredients
  • 8-12 Chicken pieces
For the Secret Herb & Spice Blend
  • 15ml Paprika
  • 10ml Onion Salt
  • 5ml Dried Sage
  • 5ml Garlic Powder
  • 5ml Dried Oregano
  • 5ml Cayenne Pepper
  • 5ml Cracked black pepper
  • 5ml Dried basil
  • 5ml Dried marjoram
  • 5ml Ground Coriander seed
For the Curing Brine
  • 3lt Water
  • 5ml Whole black peppercorns
  • 1 Whole allspice
  • 5ml Ground ginger
  • 50g Sugar
  • 105g Prage powder / pink curing salt (NOT Instacure)
For the Coating
  • 2 Cups all-purpose flour
  • 4-6 eggs, beaten
Instructions
  1. Some time ago we launched the first of our KFC series and have been overwhelmed at the response. One of the main questions that arose from this was where to buy saltpetre. This updated version of the recipe uses Prague powder to replaces the saltpetre, the salt and the bicarbonate of soda.
  2. Prague powder, or pink curing salt is available worldwide from butchery suppliers, and you may even buy it directly from any butcher that processes cured meats and sausages.
  3. Prague powder is not to be confused with Instacure which is a totally different formulation and cannot be substituted.
  4. Before continuing, if you have not viewed the original video, please do so now as it contains all of the introductory information about the process.
  5. To make up the curing brine, place all of the brine spices, excluding the prague powder into a large pot. Add half of the secret spice blend to the pot as well, then pour in 3 liters of water.
  6. Bring this to a boil, lower the heat and allow this to simmer for 10 minutes.
  7. Quick-chill the brine by floating it in a sink of cold water. Changing the sink water every few minutes will speed this up as well.
  8. While the brine cools, use a carving fork or skewer to punch holes through the skin of the chicken pieces. This enables the curing brine to penetrate the chicken more efficiently.
  9. Place the chicken pieces in a large non-reactive food-safe container.
  10. Remove the cooled brine from the sink and add the Prague powder. Stir this thoroughly until totally dissolved.
  11. Pour the brine over the chicken pieces and pop a couple of side plates on top of the chicken pieces to keep them submerged.
  12. Put the lid on the container, transfer it to your refrigerator and allow the chicken to cure for a full 24 hours.
  13. Place the all-purpose flour in a large bowl and add the remaining half of the secret herbs and spices. Mix this until combined, then cover the bowl with cling-wrap.
  14. The following day, remove the chicken from the brine and pat it dry with a clean kitchen towel.
  15. Before coating the chicken, sprinkle a layer of the seasoned flour over a large platter. This is where the coated chicken will set, and the layer of flour prevents the coating from sticking to the platter.
  16. Working with on piece of chicken at a time, dredge the chicken in tbe seasoned flour to coat all over.
  17. Dunk the the chicken in the egg to wet all of the flour.
  18. Return the chicken to the flour, making sure to get a good solid coating all over. Transfer the coated chicken to the platter to set, then continue with the remaining pieces.
  19. Allow the coated chicken to set for 20 minutes.
  20. Half-fill a large pan with oil and heat this to 160c or 320f.
  21. Carefuly drop the chicken into the oil and fry for a full 20 minutes turning halfway through. If you have chicken wings among your pieces, half the frying time for these.
  22. Remove the chicken from the oil and drain any excess oil on kitchen paper.
  23. The chicken does benefit from standing for a while before serving. Five to ten minutes is ideal.
  24. And there it is.... golden, crispy and aromatic KFC deep-fried chicken.


KFC Zinger Burger. KFC Secret Recipe Zinger Burger – How to Make KFC at Home!!!

KFC secret recipe fried chicken,KFC secret recipe burger,KFC Secret Recipe Zinger Burger,how to make kfc fried chicken at home,homemade KFC fried chicken,how to make a kfc zinger,how to make a kfc zinger burger,secret recipe kfc zinger burger,kfc secret herbs and spices zinger burger,how to make kfc,kfc secret recipe zinger burger,zinger burger secret kfc recipe,kfc secret recipe chicken zinger burger


KFC Zinger Burger. KFC Secret Recipe Zinger Burger - How to Make KFC at Home!!!
Author: 
Recipe type: KFC Secret Recipes
Cuisine: American
 
KFC has to be the all-time great when it comes to creating an unmistakable franchise taste. The KFC Zinger burger arrived sometime down the line in their history, and has carved its own little niche in the history of awesome meals.
Ingredients
  • 8-12 Chicken breasts, deboned, skin removed
For the Curing Brine
  • 3lt Water
  • 45g Prague powder
  • 45g Salt
  • 60g Sugar
  • 5ml Ground ginger
  • 6 Whole allspice (pimento)
  • 15ml Whole black peppercorns
  • ½ of the spice mix below
For the Spice blend
  • 45ml Cayenne pepper
  • 5ml Dried sage
  • 5ml Garlic powder
  • 5ml Dried oregano
  • 5ml Cracked black pepper
  • 5ml Dried basil
  • 5ml Dried marjoram
  • 5ml Ground coriander seed
For the coating
  • 2 Cups all-purpose flour
  • 4-6 Eggs, lightly beaten
Other
  • Burger buns
  • Sliced Tomato
  • Lettuce leaves
  • Mayonnaise
Instructions
  1. For the basic brine you need 45g of Prague powder, 45g of salt, 60g sugar, 5ml ground ginger, 6 allspice berries, and 15ml whole black peppercorns.
  2. For the spice blend, combine the cayenne pepper, dried sage, garlic powder, dried oregano, cracked black pepper, dried basil, dried marjoram and dried coriander.
  3. Divide the herb and spice blend in half.
  4. Fill a pot with 3 liters of water and add the Prague powder mixture along with half of the herb and spice blend.
  5. Bring this to a simmer for 10 minutes, stirring every minute then quick chill the brine by floating the pot in a sink of cold water.
  6. Once the brine has cooled, pour enough brine into a large pan to cover the base. (you must use a stainless steel for food grade plastic pan - you can not use aluminum) Place the chicken breasts in the pan in a single layer, then pour in the remaining brine to completely cover the chicken.
  7. Cover the pan and refrigerate this for a full 24 hours.
  8. After the curing time, remove the breast from the brine and pat them dry with a clean dish cloth or kitchen paper.
  9. If the breast are large like these, about 250g each, cut them in half, otherwise use them as is. Fold each piece, or whole breast if they're small, in cling-wrap and tap them down with a meat mallet until they are 10mm or just less than a half inch thick.
  10. To mix the coating, combine the all-purpose flour with the remaining half of spices. You will also need 4 to 6 eggs lightly beaten.
  11. Before coating the chicken, sprinkle some of the seasoned flour over a large platter. This is where the coated chicken will set and the layer of flour prevents the coating from sticking to the plate and getting damaged when it is lifted.
  12. To coat the chicken, dredge each piece in the flour. Dunk the chicken in the egg to wet all of flour. Then back into the flour to get a good solid coating. Transfer the coated chicken to the platter. Repeat with all the remaining chicken then allow the coating to set for 20 minutes before continuing.
  13. While the coating sets, cut and butter the buns. Spread the lid of the bun generously with plain or chilli mayonnaise. Place a generous layer of lettuce and 2 tomato slices on the bottom of each bun.
  14. Half fill a large pan with oil and heat this to 160c or 325f. Fry the chicken for a full 20 minutes turning halfway through. It is advisable to use a deep-frying thermometer to monitor the temperature.
  15. Drain the chicken on kitchen paper and transfer to the buns. Put the lids on the buns and voila.... you have the iconic KFC Zinger.


Vegetarian & Vegan KFC “Chicken” Strips. Deep-Fried Gluten Strips KFC-Style!!!

vegetarian kfc,vegan kfc,vegetarian kfc chicken strips,vegan kfc chicken strips,deep-fried gluten,deep fried gluten kfc-style,how to make vegetarian kfc,how to make vegan kfc,moch chicken vegetarian kfc,mock chicken vegan kfc,how to make kfc without chicken,vegetarian recipes,vegan recipes, vegetarian kfc recipe, vegetarian kfc chicken recipe, vegetarian kfc recipe, vegetarian kfc - meatless recipe


Vegetarian & Vegan KFC "Chicken" Strips. Deep-Fried Gluten Strips KFC-Style!!!
Author: 
Recipe type: Vegetarian / Vegan
Cuisine: American
Prep time: 
Cook time: 
Total time: 
Serves: 4-6
 
Some time ago I did a popular recipe using gluten called mock duck. Today we're going to use gluten to replace the chicken in a vegetarian rendition of KFC chicken tenders.
Ingredients
The Herb & Spice Mix
  • 7.5ml Paprika
  • 5ml Salt
  • 2.5ml Dried sage
  • 2.5ml Garlic powder
  • 2.5ml Dried oregano
  • 2.5ml Cayenne pepper
  • 2.5ml Crushed black pepper
  • 2.5ml Dried basil
  • 2.5ml Dried marjoram
  • 2.5ml Dried coriander leaf
  • 5ml Ground allspice
The Rest...
  • 1 Portion prepared gluten (350g)
  • 1½ Cups All-purpose flour
  • Milk (or substitute for cold vegetable stock)
Instructions
  1. Flatten the gluten out across a platter. Mill the herbs and spices in your spice mill until fine and pour the powder into a sprinkle bottle. Sprinkle an even coating of the herbs and spices across both sides of the gluten.
  2. Place the gluten in your refrigerator for at least 30 minutes to marinate.
  3. In a bowl combine the flour with the remaining herb and spice mixture. Half fill a second bowl with full cream milk (or cold vegetable stock)
  4. In addition, sprinkle a layer of the seasoned flour over the surface of a large platter. This layer will prevent the coated gluten from sticking to the platter while it sets.
  5. Remove the gluten from your refrigerator and cut it into manageable strips of about an inch in width and 3 to 4 inches in length.
  6. To coat the strips, dip them in the milk (or cold stock), dredge them in the seasoned flour to get a good solid coating, then transfer them to the coated platter to set. Allow the coated strips to set for 20 minutes.
  7. Half fill a wok or pot with oil and heat this to 160c or 320f.
  8. Carefully drop the strips into oil in batches and fry them for 4 to 5 minutes until the are golden. Remove the strips from the oil, drain any excess oil on kitchen paper and serve immediately.


How to Make KFC Coleslaw – KFC Coleslaw Recipe, The REAL DEAL!!!

kfc coleslaw recipe, kfc coleslaw salad recipe, kfc coleslaw calories, kfc coleslaw carbs, kfc coleslaw recipe without buttermilk, kfc coleslaw nutrition info, kfc coleslaw secret recipe, copycat kfc coleslaw recipe, copycat kfc coleslaw, kentucky fried chicken, kentucky fried chicken coleslaw,how to make kfc coleslaw at home,homemade kfc coleslaw,kfc coleslaw salad recipe easy,quick kfc coleslaw


How to Make KFC Coleslaw - KFC Coleslaw Recipe, The REAL DEAL!!!
Author: 
Recipe type: KFC / Fast Food / Salad
Cuisine: American
Prep time: 
Total time: 
Serves: 6-10
 
KFC coleslaw is quite unique in its flavor, with a thin, tangy sauce that barely glazes the cabbage. This is how to make it at home!!!
Ingredients
  • 600g Green cabbage, cut into blocks, thick bits removed
  • 100g Carrot, peeled and chopped
  • 30ml Yogurt or cultured buttermilk
  • 30ml Apple cider vinegar
  • 90ml Tangy mayonnaise
  • 2.5ml Salt
  • 5ml Sugar
Instructions
  1. Cut the cabbage into blocks, roughly chop the carrots, measure out the yoghurt or cultured buttermilk, the tangy mayonnaise, salt, sugar and apple cider vinegar.
  2. In a jug, combine all of the ingredients except the carrot and cabbage. Stir this until the salt and sugar have dissolved.
  3. Place the carrot in your food processor and chop this until fine. Add the cabbage to the processor and pulse this until almost fine.
  4. Pour in the sauce and continue to pulse this until it is finely chopped.
  5. The added peppery flavor comes from allowing this to age overnight covered in the refrigerator.
  6. Like any coleslaw, this is best served well chilled.


KFC Mash & Gravy – How to Make KFC Mash & Gravy at Home!!! The REAL Deal!!!

kfc, gravy, kfc mash gravy, kfc mash gravy ingredients, kfc mash gravy recipe, kfc mash potato gravy, kfc mash n gravy recipe, kfc mash and gravy uk, kfc mash n gravy, kfc mash n gravy ingredients, how to make KFC gravy,how to make KFC mash and gravy,recipe and ingredients for KFC mash and gravy,kentucky mash and gravy,kentucky fried chicken gravy recipe,make kfc gravy at home,homemade kfc gravy,kfc mash & gravy


KFC Mash & Gravy - How to Make KFC Mash & Gravy at Home!!! The REAL Deal!!!
Author: 
Recipe type: KFC / Fast Food
Cuisine: American
Prep time: 
Cook time: 
Total time: 
Serves: 4-6
 
Here's another legendary KFC Dish - KFC Mash & Gravy!!! This recipe is the REAL deal - FIRST from Whats4Chow.com!!!
Ingredients
For the Herb & Spice Mix
  • 15ml Paprika
  • 10ml Salt
  • 5ml Dried Sage
  • 5ml Garlic powder
  • 5ml Dried oregano
  • 5ml Cayenne pepper
  • 5ml Ground black pepper
  • 5ml Dried basil
  • 5ml Dried marjoram
  • 5ml Dried coriander leaves
For the Gravy
  • 35g Butter
  • 20g All-purpose flour
  • 5ml of the powdered herb & spice mix (above)
  • 150ml Chicken stock
  • 150ml Beef stock
Instructions
  1. Combine all of the herbs and spices and mill them to a fine powder in your spice mill. Take 1 teaspoonful of the powder and mix it into the all-purpose flour. The remaining spice powder can be stored in an airtight container.
  2. In addition, measure out the butter and combine the chicken and beef stock.
  3. Heat a small saucepan over low to medium heat and add the butter. Once the butter has melted, pour in the seasoned flour. Stir this in until smooth and allow it cook for 60 seconds when it starts bubbling.
  4. Remove the pan from the heat and pour in the stock. Stir this until smooth, then return the pan to the heat.
  5. Bring this to a simmer stirring continuously until the gravy has thickened. This should only take about 3 minutes. Remove the pan from the heat. Remember that different brands of flour may thicken differently. If your gravy is too thick, thin it down to the desired consistency with a little more stock.
  6. To serve, mix your mash according to the package instructions and serve this to 4 bowls. Pour the gravy over each portion and serve immediately.


KFC Popcorn Chicken Secret Recipe – How to Make KFC Popcorn Chicken – The REAL Deal!!!

kfc popcorn chicken, popcorn chicken, kfc popcorn chicken recipe, kfc popcorn chicken calories, kfc popcorn chicken ingredients, kfc popcorn chicken fill up, kfc popcorn chicken howtobasic,how to make popcorn chicken,home made kfc popcorn chicken,original KFC popcorn chicken recipe,kfc popcorn chicken recipe secret,secret recipe kfc popcorn chicken,how to make kfc popcorn chicken at home


KFC Popcorn Chicken Secret Recipe - How to Make KFC Popcorn Chicken - The REAL Deal!!!
Author: 
Recipe type: Fast Food / KFC Secret Recipe
Cuisine: American
 
KFC Fried chicken is legendary!!! KFC Popcorn Chicken, unlike most other KFC products does appear different from country to country, however it all has that legendary KFC flavor and aftertaste. In some markets it appears that the popcorn is coated with corn meal instead of the normal flour coating. This recipe covers the traditional and original KFC Popcorn Chicken Recipe, using wheat flour coating.
Ingredients
For the Spice Mix
  • 15ml Paprika
  • 10ml Salt
  • 5ml Dried Sage
  • 5ml Garlic powder
  • 5ml Dried oregano
  • 5ml Cayenne pepper
  • 5ml Ground black pepper
  • 5ml Dried basil
  • 5ml Dried marjoram
  • 5ml Dried coriander leaves
For the Curing Brine
  • 100g Non-Iodated salt
  • 1 Tsp whole black peppercorns
  • 5 Whole allspice
  • 12.5g Saltpeter
  • 5ml Ground ginger
  • 50g Sugar
  • 15g Bicarbonate of soda
  • 2.5lt Filtered water
The Rest....
  • 4 Chicken breasts
  • 2 Cups all-purpose flour
  • 1 Extra cup all-purpose flour
  • 3 Eggs, beaten
  • Oil to deep-fry
Instructions
  1. To make the curing solution, place the salt, whole peppercorns, whole allspice, saltpeter, ground ginger, sugar and bicarbonate of soda in a pot along with half of the herb and spice mix.
  2. Add 2.5lt of filtered water and bring this to a simmer over medium heat. Allow this to simmer for 5 minutes, then remove from the heat and quick cool the pot by floating it in a sink of cold water.
  3. While the brine cools, cut the chicken into small cubes of about 8mm or a third of an inch.
  4. Place the chicken in a large non-reactive container and pour the cooled curing brine. Put the lid on the container and allow this to cure overnight in your refrigerator.
  5. The following day, combine the other half of the herb and spice blend with 2 cups of all-purpose flour.
  6. In addition, pour 1 cup of plain all-purpose flour into another dish and beat the eggs. Sprinkle a light layer of flour onto a large platter where the coated chicken will set.
  7. Use a slotted spoon to lift the chicken from the brine. To coat the popcorn, dust the chicken bits in the plain flour.
  8. Dunk each one in the egg, the toss them in the seasoned flour to get a good coating.
  9. Transfer these to the platter and continue with the rest. Allow the coating to set for 20 minutes.
  10. Half fill a large pan with oil and heat this to 160c or 320f.
  11. Carefully drop the popcorn into the oil and fry this in batches for 5 minutes per batch. Use a slotted spoon to remove the chicken from the oil and drain it on kitchen paper before serving


Scroll to top

Kitchen Conversions

Convert:
Masses
to:
Volumes
to:
Temperatures
to:
Lengths
to: