Curry Pickled Eggs

How to Make Curry Pickled Eggs


Curry Pickled Eggs
Author: 
Recipe type: Eggs
Cuisine: Indian
Serves: 3 liters
 
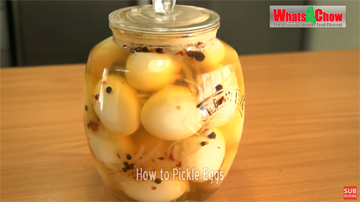
In today’s episode we’re making a batch of curry pickled eggs. These spicy pickled eggs will be the rage of your party. They are reasonably quick and easy to make, and will last for months in your refrigerator, if you can resist the temptation to shnack them all down, that is.
Ingredients
  • 30 Medium size eggs
  • 9 Bay leaves
  • 800g Onions, peeled and cut into quarter rounds
  • 600ml Brown vinegar
  • 375ml Filtered water
  • 225g Brown sugar
  • 22.5ml Turmeric
  • 75ml Curry powder
  • 7.5ml Himalayan rock salt
  • 12 Whole black peppercorns
  • 6 Whole allspice
  • 60ml / 4Tbs Cornstarch dissolved in a little water
Instructions
  1. To start, prick the base of each egg with a pin. This allows the egg to expand in the shell without cracking the shell while it is boiling.
  2. Place the eggs in a large pot and pour in enough water to cover them by an inch over the top.
  3. Place the pot over high heat and bring it to a boil. As it starts to boil, start your timer and boil the eggs for 8 minutes. After this time, remove the pot from the heat and transfer the eggs to a sink filled with cold water.
  4. I have used a full tray of 30 eggs, knowing that I might lose a few on the way due to breakage, or damage while peeling. And, yes, I have already lost one due to breaking while pricking the shells.
  5. Allow the eggs to cool in the sink while you continue with the curry pickling sauce.
  6. Chop the onions into quarter rounds. You want 800g onion after it has been cleaned and chopped.
  7. You’ll need 9 bay leaves.
  8. Measure out 600ml brown vinegar.
  9. ml Filtered water.
  10. Weigh out 270g brown sugar.
  11. Measure 22.5ml turmeric.
  12. ml Curry powder. You can use the curry powder of your choice, mild, medium or hot.
  13. And last, but not least, 7.5ml Himalayan rock salt, 12 black peppercorns, and 6 whole allspice.
  14. Place all of these ingredients in a large pot. Bring the pot to a boil, lower the heat and simmer for 10 minutes, stirring occasionally.
  15. Towards the end of this time, dissolve 60ml, or 4 tablespoons cornstarch in a little water.
  16. When the 10 minutes is up, add the cornstarch slurry to the pot and stir it in. Allow this to cook for a further 2 minutes while the sauce thickens.
  17. Remove the pot from the heat.
  18. By this stage, the eggs will be cool enough to handle. Peel the eggs and rinse them under cold water to get rid of any small shell fragments. During this process, I lost another egg which did not peel properly. That leaves 28 eggs.
  19. You will need two 1.5 liter bottles, or a single larger 3 liter bottle.
  20. I have sterilized my bottles in the dishwasher. Start bottling by pouring an inch of the curry sauce into each bottle. Top this with 4 eggs, followed by another inch of the sauce, and so on until the bottles are full. Push the last eggs at the top of the bottles down to ensure they are covered by the pickling sauce.
  21. Any sauce that is left in the pan, I normally bottle in a another bottle to use with the eggs when I serve them. I like a lot of sauce, so it never goes to waste.
  22. Place the lids on the bottles, and allow the bottles to cool completely before refrigerating. Although you can enjoy these immediately, the flavor and color of the eggs will improve dramatically by allowing them to age for a few days before serving.


Crispy Fried Cauliflower

spicy bufallo cauliflower wings


Crispy Fried Cauliflower
Author: 
Recipe type: Vegetable
Cuisine: Mexican
Prep time: 
Cook time: 
Total time: 
Serves: 4
 
This spicy deep-fried cauliflower is absolutely amazing. Once you have tried it, there is no going back!
Ingredients
  • 1 x Medium cauliflower
  • 2 Large eggs
  • 100ml Milk
  • 1 Cup all-purpose flour
  • 2tsp Dried garlic granules
  • 3tsp Paprika
  • 2tsp Oregano
  • 1.5tsp Cumin
  • 2tsp Dried onion flakes
  • 0.5tsp Cayenne pepper
  • 0.5tsp Salt
  • 1tsp Black pepper corns
  • 1tsp Chilli flakes (optional, or more if desired)
Instructions
  1. Crispy Deep-fried Cauliflower Recipe
  2. To make this amazing crispy fried cauliflower, start by inverting the cauliflower and cutting through the stems that join the florets to the core of the cauliflower.
  3. Once all the florets are free of the core, you will notice that some of the florets are much larger than others. To trim these down, use your paring knife to cut longitudinally through the stems of the florets. It is important to only cut the stem section so as not to damage the florets. Once the stem is cut, gently untangle the one half of the floret from the other half.
  4. Transfer the cauliflower florets to your steamer and steam these for 20 minutes until tender.
  5. Remove the cauliflower from the steamer and transfer this to a platter lined with paper towel to absorb any excess water and cool.
  6. Combine all the dried herbs and spices and place these in you spice grinder. Pulse the grinder until you have a reasonably fine powder, then put this aside.
  7. Crack 2 large eggs into a medium size bowl and add 100ml of milk. Whisk the mixture until well combined.
  8. Measure one cup of all-purpose flour into another bowl and add the herb and spice blend. Mix this well until combined.
  9. Sprinkle an even layer of the herb and spice blend onto a large platter. This will be where the coated cauliflower will rest until it is fried, and the layer of seasoned flour prevents the coated cauliflower from sticking to the platter and damaging the coating.
  10. Working with a few pieces of cauliflower at a time, dip the florets into the egg mixture to wet them all over, then dredge them in the flour mixture to coat. Be sure to shake off any loose flour before transferring the coated florets to the floured platter.
  11. Heat your oil to 180c and carefully drop the florets into the oil, piece by piece. Fry the cauliflower for 2-3 minutes until crispy and golden.
  12. Remove the cauliflower from the oil using a slotted spoon and transfer to a bowl lined with paper towel to absorb any excess oil.
  13. Serve these delicious treats as a snack, or as any accompaniment to any meal and enjoy!
  14. If you have any requests for recipes on our channel, please send these through to my email, ctpro@whats4chow.com and I will do my best to accommodate these.
  15. Please like, share and subscribe and we’ll see you again real soon.


The Quickest Way to Tenderize Steak – How to Tenderize Steak with a Meat Mallet

How to Tenderize Steak


The Quickest Way to Tenderize Steak - How to Tenderize Steak with a Meat Mallet
Author: 
Recipe type: Steak
 
Tenderizing steak with a meat mallet is probably the easiest way to tenderize steak. It certainly beats using enzymes and chemicals which at best produce inconsistent results. Almost every kitchen has a meat mallet, most of which have never been used. The reason for this is that no-one has ever showed you how to use it.
Ingredients
  • Steak
Instructions
  1. How hard do you hit? How long do you hit? Do you season the meat before or after tenderizing? Will the steak still look good if you beat the daylights out of it? These are all questions that this video will answer today.
  2. For this demonstration I am using sirloin steaks. The sirloin is an average cut that is certainly not revered for being tender, in the way that tenderloin is.
  3. We are going to season the meat before the tenderizing process. For the purpose of keeping things simple, I am only going to use salt and cracked black pepper. Whatever you decide to use, if it contains salt, then you have to add one extra ingredient, and that is sugar. Salt toughens meat, especially if the meat in question is not going to stand for anything longer than a few minutes before cooking it. The sugar counteracts the toughening effect of salt, with added bonuses… it also gives a wonderful crispy edge crust to meat when it is cooked and results in a rich deep flavor.
  4. Once you have seasoned both sides of the steaks, fold them in bread film of clingwrap and start with the tenderizing. This is where a bit of finesse comes in. You want to hit the meat medium to hard, certainly not hard enough to make holes in it, but hard enough to start flattening the meat out. This process breaks down the connective tissue in the flesh of the meat, resulting in a more tender steak.
  5. You also want to bash the fat cap as well as this is attached to the meat with the same connective tissue. Continue with the tenderizing until everything is uniform and the resulting steak is around half the thickness of the original.
  6. Now you are probably saying to yourself… “This is never going to look like the steak I started with when it’s cooked” --- all I can say is “hang around until the end of the video when you will see just how good it looks”.
  7. To cook the steaks, I have added 2 tablespoons of butter and a dash of oil to my pan. The pan is heated to 210c. You will see a time-lapse of the steak cooking where it will become clear how the tenderized steaks return to their original shape and size when cooked, but without the nasty tough connective tissue.
  8. Here we go…. These are only going to grill for 2 minutes per side…
  9. The steaks are a few seconds from coming out of the pan….. here is an overlay of the steaks that went into the pan, compared to the same steaks 4 minutes later. They have returned to almost exactly the same size and shape as they were before they were tenderized.
  10. Allow the steaks to rest for 2 minutes before serving.


How to Pickle Eggs – Perfect Spicy Pickled Eggs Recipe – Bar Style – Pub Style Pickled Eggs

How to Pickle Eggs


How to Pickle Eggs - Perfect Spicy Pickled Eggs Recipe - Bar Style - Pub Style Pickled Eggs
Author: 
Recipe type: Eggs
Serves: 30
 
In today’s episode we’re going to make spicy pickled eggs. These Easy Pickled Eggs are a delicious and healthy snack that everyone will enjoy! They make an amazing snack, make egg salads a breeze, and look awesome on a charcuterie board.
Ingredients
  • 1500ml White vinegar
  • 500ml Water
  • 10ml Himalayan rock salt
  • 2 Large onions
  • 3 Bay leaves
  • ⅔ Cup caster sugar
  • 5 Allspice / pimento berries
  • 1Tbs Black peppercorns
  • 1Tbs Dried chilli flakes
  • 30 Eggs
Instructions
  1. In today’s episode we’re going to make spicy pickled eggs.
  2. These Easy Pickled Eggs are a delicious and healthy snack that
  3. everyone will enjoy! They make an amazing snack, make egg
  4. salads a breeze, and look awesome on a charcuterie board.
  5. In addition to this, it is a safe and practical way to preserve your
  6. eggs if you have more than you can use immediately… let’s get
  7. started.
  8. Take 30 eggs and use a needle to prick the flat end of each egg.
  9. This will allow the air-pocket to escape when the contents of
  10. the egg expand under heat. This helps prevent the shells from
  11. cracking, and gives a better formed egg once boiled. It will not
  12. totally negate the deformation of the base of the egg, but it
  13. certainly does help.
  14. Place all of the eggs in a large pot and cover them with cold
  15. water. Heat the pot over high heat until boiling, then start your
  16. timer. You want the eggs to boil for 10 minutes. Use a slotted
  17. spoon to give them gentle stir once every few minutes. This will
  18. ensure even cooking.
  19. After 10 minutes, transfer the eggs to a large bowl filled with ice
  20. cold water. Allow the eggs to stand for 30 minutes to cool
  21. completely.
  22. While the eggs cool, let’s start with the pickling brine. Slice 2
  23. large onions thinly and add them to a medium size pot, along
  24. with 2 teaspoons of Himalayan rock salt, a tablespoon of dried
  25. chilli flakes, a tablespoon of black peppercorns, 3 bay leaves, 5
  26. all-spice or pimento berries, 2 thirds of a cup of caster sugar,
  27. ml water, and 1500ml white vinegar.
  28. Heat this all until boiling, then reduce the heat and simmer the
  29. mixture for 5 minutes, then remove it from the heat.
  30. By stage the eggs have cooled and it’s time to peel them. Tap
  31. the shells around the circumference of the egg on your work
  32. surface to crack them. Peel away a little of the shell, grab the
  33. membrane and pull on this. The membrane will literally pull the
  34. shell away from the egg.
  35. Pack a layer of eggs into a large pickling jar and top this with
  36. some of the onion and spices. Pack another of eggs on top of
  37. this and continue in this fashion until all the eggs are packed.
  38. Pour the pickling brine over the eggs until it is covering the eggs
  39. completely. Put the lid on the container and allow it all to cool
  40. completely.
  41. Once cooled, transfer the eggs to your refrigerator for at least 7
  42. days before enjoying your delicious pickled eggs. This gives the
  43. brine and spices a chance to really permeate the eggs making
  44. for a memorable meal.
  45. The eggs will last for months under refrigeration.
  46. That’s it for today folks, please like, subscribe and share, and
  47. we’ll see you again real soon.


Baby Back Ribs * Fall-off-the-Bone-Tender Superbowl Special!

Classic Baby Back Ribs Recipe


Baby Back Ribs * Fall-off-the-Bone-Tender Superbowl Special!
Author: 
Recipe type: Pork
Serves: 4-6
 
The Superbowl is upon us, and these magnificent fall-off-the-bone baby back ribs are the star attraction. The ribs are slow-roasted, but despite the extended cooking time, there really is very little prep time and effort required to enjoy this masterpiece.
Ingredients
  • 3-4 Full racks pork loin ribs
  • Salt and cracked black pepper
For the Basting:
  • 30ml Olive oil
  • ½ Cup chopped onion
  • 5ml Ground cumin
  • 125ml Tomato sauce
  • 15ml Hot chilli sauce
  • 30ml Light brown sugar
  • 15ml Apple cider vinegar
  • Salt and pepper to taste
Instructions
  1. The Superbowl is upon us, and these magnificent fall-off-the-bone baby back ribs are the star attraction. The ribs are slow-roasted, but despite the extended cooking time, there really is very little prep time and effort required to enjoy this masterpiece.
  2. You will need 3 to 4 full racks of pork loin ribs, otherwise known as baby back ribs.
  3. Place the racks in a baking pan and season both sides of the ribs liberally with salt and pepper.
  4. Cover the pan with foil, making sure the ribs are meaty-side up.
  5. Bake the ribs in a preheated oven at 135c or 275f for 3.5 hours until absolutely tender.
  6. A half hour before the baking time is up, measure out 30ml olive oil, chop a half cup of onion, measure a teaspoon of ground cumin, 125ml tomato sauce, 15ml hot chilli sauce, 30ml light brown sugar and 15ml apple cider vinegar.
  7. Place a pan over medium heat and saute the chopped onion in the olive oil until translucent, about 2 to 3 minutes.
  8. Add the cumin and stir this until fragrant.
  9. Add all of the remaining ingredients and stir to combine.
  10. Allow this to cook for 2 to 3 minutes then remove from the heat and put it aside.
  11. Remove the ribs from the oven and preheat the grill element of your oven to maximum.
  12. Uncover the ribs and brush the basting liberally onto both sides of the racks. Be careful when turning them as they will literally fall apart.
  13. Place the ribs under the grill for 4 to 5 minutes to caramelize.
  14. Remove the ribs from the oven and serve piping hot with the accompaniments of your choice, and loads of serviettes.


Monkey Gland Sauce Recipe – How to Make Monkey Gland at Home!😛

Original Monkey Gland Sauce Recipe


Monkey Gland Sauce Recipe - How to Make Monkey Gland at Home!😛
Author: 
Recipe type: Sauce
Cuisine: South African
 
Monkey gland sauce is one of South Africa's favorite condiments. The name has very humorous and interesting origins, and I will leave a link below for those interested in reading about the origins of monkey gland sauce, and its name. Monkey gland sauce is rich, thick and dark, with a deep, tart flavor that will liven up any burger or steak. This is the original recipe dating back to the 1950's.... here it goes...
Ingredients
  • 10ml Ground ginger
  • 60ml Onion flakes
  • 5ml Dried chilli flakes
  • 10ml Dried garlic granules
  • 5ml Cayenne pepper
  • 125g Brown sugar
  • 450g Ripe firm tomatoes, chopped
  • 125ml Worcestershire sauce
  • 225ml Tomato puree
  • 30ml Cider vinegar
  • 30ml Whisky
Instructions
  1. Monkey gland sauce is one of South Africa's favorite condiments. The name has very humorous and interesting origins, and I will leave a link below for those interested in reading about the origins of monkey gland sauce, and its name.
  2. Monkey gland sauce is rich, thick and dark, with a deep, tart flavor that will liven up any burger or steak.
  3. This is the original recipe dating back to the 1950's.... here it goes...
  4. Measure out 10ml ground ginger, 60ml dried onion flakes, 5ml chilli flakes, 10ml dried garlic flakes, 5ml cayenne pepper and 125g brown sugar.
  5. The wet ingredients include 450g ripe firm tomatoes roughly chopped, 250ml Worcestershire sauce, 225ml tomato puree, 30ml apple cider vinegar and 30ml whisky.
  6. Place the chopped tomatoes in your food processor and machine until quite fine.
  7. Transfer the tomatoes to a large pan.
  8. Add all of the other ingredients and turn the flame on to medium heat.
  9. Bring the sauce to a boil, stirring often.
  10. Reduce the heat to a simmer and allow this to reduce to half of its quantity over 20 to 30 minutes, stirring every few minutes.
  11. You will know the sauce is ready when it bubbles like molten lava, letting off little puffs of steam. There will also be absolutely no runny liquid component in the sauce either.
  12. Turn of the gas and bottle the sauce in sterilized bottles. There is no need to pressure can the product, as the sugar and acid content is high enough to guarantee a safe result.
  13. Enjoy your sauce on burgers, hot dogs, steaks and even pasta.
  14. You can find out about the origins of Monkey Gland Sauce here


Caramel Popcorn – How to Make Caramel Popcorn with 3 Ingredients! Caramel Popcorn Recipe!


Caramel Popcorn - How to Make Caramel Popcorn with 3 Ingredients! Caramel Popcorn Recipe!
Author: 
Recipe type: Sweets / Snacks
Cuisine: American
 
Today we're going to make a batch of caramel popcorn with just a few simple ingredients. The recipe is quick and easy, and really tasty!
Ingredients
  • 200g Sugar
  • 135g Unpopped popcorn
  • 30ml Oil
  • Salt (optional)
Instructions
  1. To start, measure out 200g sugar and 135g of unpopped popcorn.
  2. You will also need 30ml oil, and Himalayan rock salt, should you want your caramel popcorn salted.
  3. Place the corn in a pan large enough for the seeds to lie in a single layer.
  4. Add the oil to the pan and stir the pan briefly to coat the popcorn with the oil.
  5. Flatten the seeds into a single layer and put the lid on the pan.
  6. Light the gas and set it to medium high.
  7. In about 2 minutes, the corn will start to pop.
  8. Give the pan a gentle shake intermittently to achieve even cooking and avoid burning.
  9. When the popping subsides, turn off the heat and remove the lid.
  10. Transfer the popped corn to a large heatproof bowl, making sure leave any unpopped kernels behind.
  11. Wipe out your pan and pour in the sugar.
  12. Place this over medium high heat.
  13. After 2 to 3 minutes the sugar will start to melt, and this is your cue to start stirring.
  14. More and more of the sugar will melt until you have a golden mass of molten sugar.
  15. Bring the molten sugar to a boil. As it starts to foam up, turn off the heat.
  16. Give the molten caramelised sugar a final stir to knock down the foam, and pour it over the popcorn. Be very careful when working with molten sugar as spilling or splashing this on your body can cause horrific burns.
  17. Give the popcorn a thorough stir, making sure to dig to the bottom of the bowl to lift the caramel that has run through.
  18. Transfer the coated popcorn to alarge baking pan. Break the pieces apart and allow it cool for a few minutes before serving, or storing it in an airtight container.
  19. If you want your caramel popcorn salted, grind your salt over the popcorn at this stage.


How to Make Sweet Italian Chicken Sausage Patties – Making the Best Burger at Home!

How to Make Sweet Italian Chicken Sausage Patties - Making the Best Burger at Home!
Author: 
Recipe type: Burgers / Patties / Sausages
Cuisine: Italian
Serves: 8
 
Burgers are so good that you could almost call them the staple food of the universe. Once in a while a really exceptional burger comes along to prove you have not tasted it all. This patty is one of the really outstanding, super tasty recipes that takes the burger to a whole new level.
Ingredients
  • 800g Chicken fillet
  • 30ml Garlic powder
  • 45ml Dried Italian herb blend
  • 15ml Fennel seed
  • 15ml Coarsely ground black pepper
  • 7.5ml Salt
  • 30ml Oil
  • 30g Butter
Instructions
  1. To start, cut 800g of chicken breast into cubes.
  2. Place the chicken in a large shallow pan and transfer this to your freezer for 45 to 60 minutes until it is partially frozen.
  3. Measure out 30ml garlic powder, 45ml dried Italian herb blend, 15ml fennel seeds, 15ml coarsely ground black pepper, and 7.5ml salt.
  4. Run the partially frozen chicken through your mincer using a 4mm plate.
  5. Transfer the ground chicken to a large mixing bowl and add all of the dry ingredients.
  6. Mix this thoroughly by hand for about 5 minutes until everything is well combined and the mixture is a uniform color throughout.
  7. To press the patties, place a breadfilm bag over your scale and measure out a 100g portion of the chicken.
  8. Remove the scale and fold the film over the chicken.
  9. Use a flat bottom plate to press the patty to your desired thickness and diameter.
  10. Use you dough scraper to round off any uneven bulges in the patty and smooth it of to an absolutely even thickness.
  11. If you have patty press, go agead and press the patties.
  12. Once again, you can resize the diameter of the patties by pressing them again with a flat plate.
  13. Place 30g butter and 30ml oil in a large pan and heat this over medium high heat.
  14. Add the patties to the pan and fry them for 2 minutes.
  15. Flip the patties and fry for a further 2 minutes.
  16. Flip them again and fry for a further 60 seconds.
  17. And one final flip and another 60 seconds.
  18. Lift the patties from the pan and transfer them to your buns and you're ready to go.


Crispy Deep Fried Sous Vide Chicken – Tender & Juicy Deep-Fried Chicken Recipe


Crispy Deep Fried Sous Vide Chicken - Tender & Juicy Deep-Fried Chicken Recipe
Author: 
Recipe type: Chicken / Deep-Fried
Cuisine: American
Serves: 12
 
Today we're going to sous vide a batch of chicken pieces. The cooked chicken will then be coated and briefly deep-fried to crispy perfection.
Ingredients
For the Chicken
  • 12 Chicken pieces
  • 30ml Caster sugar
  • 90ml Cayenne pepper
  • 15ml Garlic powder
  • 30ml Chicken stock powder
  • 30ml Vegetable stock powder
For the Coating
  • 400g All-purpose flour
  • 100g Rice flour
  • 15ml Aromat / aromex / flavormate
  • 15ml White pepper
  • 60g Cayenne pepper (NOT 60ml)
Instructions
  1. To season the chicken, you will need 30ml caster sugar, 90ml cayenne pepper, 15ml garlic powder, 30ml good quality chicken stock powder and 30ml good quality vegetable stock powder.
  2. Combine these all thoroughly.
  3. Pat the chicken pieces dry with kitchen towel and place them in a large pan.
  4. Sprinkle half of the seasoning over the pieces, flip them over and coat the reverse side with the remaining powder.
  5. Allow this to stand for 30 minutes before continuing.
  6. Fold the tops of 2 medium size vacuum bags open and place half of the chicken into each bag, making sure to keep it all in a single layer.
  7. Fold the tops of the bags back and proceed to vacuum pack the chicken, making sure to double seal the bags.
  8. Half fill your pot with water and heat it to 75c. You can use a digital pot like this one, or a dedicated sous vide pot, or even a regular pot on an induction range.
  9. Once the water has reached 75c, place the packed chicken in the water. Use a plate or a pot lid to keep the bags submerged, as they will want to float as they heat up.
  10. Set your timer for 3 hours and find something else to do to pass the time.
  11. Remove the bags from the bath and cut them open.
  12. This chicken is now perfectly cooked through, well seasoned, juicy and supremely tender.
  13. The juices from the bags can be used to make really good gravies, sauces or used as a soup base.
  14. For the coating, combine 400g all-purpose flour, 100g rice flour, 15g Aromat / Aromex or equivalent, 15ml white pepper and 60g of cayenne pepper.
  15. Mix this all until well combined.
  16. Use kitchen paper to pat the chicken pieces dry.
  17. Whisk 6 eggs in a large measuring jug.
  18. To coat the chicken, dunk a piece of chicken in the egg to wet it all over.
  19. Drop it into the flour mixture and give it a good solid coating.
  20. Transfer this to a plate and continue with the remaining pieces.
  21. Heat a large pan of oil to 180c or 350f. Carefully drop the chicken into the oil piece by piece. Depending on the size of your pan you may have to fry multiple batches.
  22. Fry yhe chicken for 4 minutes, turning halfway through.
  23. Remove the chicken from the oil, drain on kitchen paper and continue with the next batch.
  24. Here you can see just how juicy and tender the chicken is, with a super-crispy coating. This coating recipe will fry noticeably darker than most coatings as a result of the cayenne pepper. This is quite normal. The result is a deep, rich, full flavor that will have your guests coming back for more.


Perfect Burger Buns – How to Bake the Best Burger Buns Ever – Independence Day 2018 Special


Perfect Burger Buns - How to Bake the Best Burger Buns Ever - Independence Day 2018 Special
Author: 
Recipe type: Burgers & Barbecue
Cuisine: American
Serves: 24 x 100g
 
After a short holiday following episode 600, I'm back. Tangzhou milk buns have a supremely soft, light and feathery texture all their own, however they are actually too soft to be used as burger buns. I have adjusted the original tangzhou recipe, keeping the technique, to make a firmer bun with the same light and airy texture, that makes for the perfect burger bun. In addition, these buns have a much better shelf-life, and freeze exceptionally well too.
Ingredients
  • Group 1:!
  • 1.35kg All-purpose flour
  • 15ml Salt
  • 10g Active dry yeast
  • 30ml Sugar
  • Group 2:!
  • 375ml Water
  • 75g All-purpose flour
  • Group 3:!
  • 450ml Full cream milk
  • 3 Eggs, beaten
  • 90ml Sunflower oil
Instructions
  1. To start, place 1.35kg of all-purpose flour in your stand mixer bowl along with 15ml of salt, 10g of active dry yeast and 30ml of sugar.
  2. Give these a quick stir to combine.
  3. Add 75g of all-purpose flour to a medium size pot and pour in 375ml of water.
  4. Use a whisk to mix until smooth.
  5. Measure out 450ml of full cream milk, 90ml of sunflower oil and beat 3 eggs. Put these aside for later.
  6. Place the pot over medium low heat and gently heat the flour water mixture. Whisk the mixture continuously.
  7. As the mixture heats up it will start to thicken. Continue whisking to keep the mixture smooth.
  8. The mixture will soon thicken to a porridge consistency, and will become slightly translucent.
  9. Remove the pot from the heat and whisk in the milk.
  10. Pour in the eggs and whisk these in.
  11. And finally, whisk in the oil.
  12. Pour this mixture into the mixing bowl on your stand mixer.
  13. Start the mixer kneading on medium slow speed, and allow this to continue kneading for 15 minutes until the dough is nice and smooth.
  14. Remove the bowl from the machine, cover with clingwrap and allow the dough to rise in a warm place for 90 minutes until at least doubled in size.
  15. Turn the dough out onto you work surface. Do not dust the surface or dough with flour. It will not be necessary, and will actually harm the texture of the buns.
  16. Knead the dough briefly to knock any large air bubbles out.
  17. Using your scale, divide the dough into 100g portions for regular burger buns, 120g portions for large buns, and 150g potions for giant buns. I am making regular sized buns which are perfect for 100g or quarter pound patties.
  18. To form the buns, stretch the dough from the top of the portion of dough to the bottom, working around the edge of the dough.
  19. Circle the dough in your index finger and thumb and crimp the bottom of the bun together.
  20. Place the bun on the work surface, cup your hand over the bun and finish rounding it with a circular motion.
  21. Press the bun flat and transfer it to a baking sheet lined with baking parchment.
  22. Continue with the remaining buns, leaving about a half inch of space between each one.
  23. Cover the buns loosely with clingfilm and allow the buns to rise in a warm place for 45 minutes until they are touching as they are here.
  24. minutes into this rise, start preheating your oven to 200c or 400f.
  25. Brush the buns with beaten egg and sprinkle the tops liberally with hulled sesame seeds.
  26. Bake the buns in the center of your oven for 15 to 20 minutes until golden on top.
  27. Remove the buns from the oven and transfer them to cooling racks.
  28. If we cut one of these beauties open, we see the amazing light airy, feathery texture, with excellent oven spring and an improved firmness, making these buns the perfect burger buns.
  29. Thanks for joinig us today, please like, subscribe and share, and we'll see you again soon.


Grissini Sticks – Pencil Crackers – Pretzel Sticks – Thanksgiving Special 2017

grissini,grissini sticks,pencil crackers,pretzel sticks,bar snacks,pub snacks,how to make,recipes,cooking baking,thanksgiving starters,how to make grissini sticks,how to make pretzel sticks,homemade


Grissini Sticks - Pencil Crackers - Pretzel Sticks - Thanksgiving Special 2017
Author: 
Recipe type: Bread
 
With Thanksgiving just days away, these grissini sticks make a perfect entre' to grace the start of your feast. Sometimes called pencil crackers or pretzel sticks, you can coat the snacks with salt, sesame seeds or poppy seeds, or any combination of these.
Ingredients
  • 500g All-purpose flour
  • 2 Tsp Sugar
  • 2 Tsp Salt
  • 2 Tsp Baking powder
  • 140ml Water
  • 60ml Sunflower oil
  • 2 Eggs (plus 1 for spraying)
Instructions
  1. To start, measure out 500g of all-purpose flour, 2 eggs, 2 teaspoons salt, 2 teaspoons sugar, 2 teaspoons baking powder, 140ml water and 60ml sunflower oil.
  2. Place all of these in your food processor.
  3. Pop the lid on and process on high speed for about 60 seconds.
  4. Tipping the processor from side to side helps to achieve a more even mix.
  5. You will end up with a fine crumbly dough that resembles cous cous.
  6. When pressed, the mixture will hold together very well.
  7. Tip the dough out onto your work surface and compress it into a block.
  8. Wrap the block in cling-wrap and allow this to stand for 30 minutes before continuing.
  9. After this time, unwrap the dough and cut it into 4 pieces.
  10. Working with 1 piece at a time, flatten a piece out.
  11. Run this through your pasta roller.
  12. Continue folding the dough after each pass and running it through on setting 1 until you have a tidy sheet. This will take 3 to 4 passes.
  13. Reduce the setting to 2 and run it through again.
  14. If the dough starts to feel sticky, sprinkle will flour and rub this into the surface.
  15. Reduce the setting to 3 and run the dough through twice on this setting.
  16. Square off the ends and continue with the remaining 3 pieces.
  17. The offcuts can be rerolled to make a fifth sheet.
  18. Run the sheets through the 6mm pasta cutter to cut the sheets into strips.
  19. Line 3 large baking sheets with baking parchment and arrange the strips on the trays with just a few millimetes between each strip.
  20. Whisk a large egg with 50ml of water and pour this into a misting bottle. Spray the egg wash over the pastry.
  21. Grind salt over the damp strips and you're ready to go.
  22. Here you can also use seeds as previously mentioned.
  23. Bake the strips in a preheated oven at 220c or 450f for 10 to 15 minutes until golden and crispy.
  24. Transfer the sticks to a tall pilsner glass to create a fantastic table display.
  25. Have a wonderful Thanksgiving, please like, subscribe and share and we'll see you again tomorrow.


How to Make Tempura Onion Rings – Gourmet Deep Fried Onion Rings

tempura onion rings,deep-fried onion rings,how to,recipe,cooking,fried food,onion rings,tempura onion rings recipe,how to make,homemade tempura onion rings,easy gourmet onion rings,gourmet fried onions,best onion ring recipe,best deep fried onions,making deep-fried onion rings,barbecue accompaniments,grill accompaniments,crispy onion rings


How to Make Tempura Onion Rings - Gourmet Deep Fried Onion Rings
Author: 
Recipe type: Vegatables / Onions
 
Onion rings can be absolutely awesome, or they can be sloppy, oily and terrible. This tempura onion recipe is one of the best I have tried, and really takes the humble onion ring into the realm of gourmet cuisine.
Ingredients
  • 500ml Buttermilk
  • 15ml Tabasco sauce
  • 5ml Salt
  • 2-3 Large onions
  • 2 Eggs
  • 475ml Soda water (well chilled)
  • 1 Cup all purpose flour
  • 1 Cup Rice flour
  • 2.5ml Salt
  • 2.5ml Black pepper
  • 2 Cups all purpose flour
Instructions
  1. To start, add 15ml or a tablespoon of Tabasco sauce to a jug.
  2. Pour in 500ml of buttermilk, and add 5ml or a teaspoon of salt.
  3. Give this a good stir and set it aside.
  4. Cut 2 large onions into rings of about 10mm or a half inch thick. Place these in a large pan.
  5. Pour the buttermilk mixture over the onions, and rearrange the rings so that they are in a single layer.
  6. Cover the pan with cling-wrap and transfer it to your refrigerator for a few hours, preferably overnight. Make sure to turn the onions a few times during this time.
  7. The following day, remove the onions from the refrigerator, and measure 2 cups of all-purpose flour into a bowl.
  8. Start preheating your oil to 180c or 350f.
  9. Whisk 2 eggs in another bowl.
  10. Pour 475ml of soda water into the eggs and mix this briefly.
  11. Add a cup of sifted all-purpose flour and a cup of sifted rice flour to the egg soda mixture. Whisk this until smooth.
  12. Add a generous gring of salt and cracked black pepper and mix these in.
  13. Use a skewer to lift an onion ring from the marinade and dredge it in the flour.
  14. Drop this into the batter, and continue until you have coated about a dozen rings.
  15. Make sure to submerge the rings in the batter while doing this.
  16. Use the skewer to hook the rings out of the batter and drop them in the oil. Allow the rings to fry for 5 minutes, turning halfway through.
  17. The rings will be superbly crispy and lightly golden.
  18. Use a slotted spoon to lift them from the oil before continuing with the next batch of rings.
  19. When frying, make sure you oil is up to temperature, and that you don't overcrowd the pan. This will drop the temperature and will result in overly oily onion rings.
  20. Serve your creation piping hot as a snack, or accompaniment to your main course and enjoy.
  21. Thanks for joining us today, please like, subscribe and share and we'll see you again tomorrow.


Scroll to top

Kitchen Conversions

Convert:
Masses
to:
Volumes
to:
Temperatures
to:
Lengths
to: