Bacon & Blue Cheese Savory Muffin.

savory muffin recipe,savory cheese muffin recipe,savory bacon muffin recipe,savory bacon and blue cheese muffin recipe,how to make savory muffins, easy savory muffin recipe,savory muffins with bacon and blue cheese,, savory muffin recipes healthy, savory muffin recipes uk, recipes for a picnic, easy picnic recipes, savory muffin recipe breakfast, make ahead picnic recipe, lunch box recipe, cheese muffin recipe


Bacon & Blue Cheese Savory Muffin.
Author: 
Recipe type: Muffins / Baking
 
The combination of bacon and blue cheese is formidable. This savory muffin recipe is totally flop-proof, fail-proof and fool-proof, and these bacon and blue cheese muffins will go down in history as the yummiest savory muffins ever!
Ingredients
  • 240g Self-Raising flour
  • 3ml Salt
  • 10ml Baking powder
  • 1 Egg
  • 225ml Milk
  • 50ml Melted butter
  • 200g Blue cheese
  • 6 Rashers of streaky bacon, chopped
Instructions
  1. Chop the bacon into bits and fry this over medium heat for 8-10 minutes until well browned and crisp. Remove and drain on kitchen paper.
  2. Sift the flour, salt and baking powder into a large mixing bowl.
  3. In a jug, whisk the egg into the milk, then pour this into the flour.
  4. Whisk this to a thick batter, then mix in the melted butter.
  5. Crumble the blue cheese into the batter, and add the bacon bits.
  6. Stir this until everything is evenly distributed in the batter.
  7. Cut 6 pieces of baking paper into 15cm / 6 inch squares, and press these into the muffin pan. Spoon equal amounts of batter into each hole.
  8. Bake the muffins at 180c / 350f for 25-30 minutes. Press a tooth-pick into the center of a muffin, if it comes out clean, the muffins are ready. If it does not, return the muffins to the oven for a few more minutes, then test again.
  9. When ready, remove the pan from the oven, remove the muffins from the pan and let the muffins cool on a wire rack for 15 minutes before serving.


Blue Cheese Rib-eye Turnovers. Rib-eye schnitzel, folded with blue cheese, crumbed and crisp fried.

blue cheese rib-eye steak,blue cheese rib-eye steak schnitzel,blue cheese rib-eye beef schnitzel,blue cheese stuffed rib-eye,rib-eye steak recipes,blue cheese rib-eye recipe, stuffed ribeye steak, stuffed ribeye steak recipe, butterflied ribeye, butterflied ribeye steak recipe, ribeye stuffed with, how to cook stuffed ribeye steak, learn to stuff ribeye steak, filling for stuffed ribeye steak,rib-eye steak schnitzel


Blue Cheese Rib-eye Turnovers. Rib-eye schnitel, folded with blue cheese, crumbed and crisp fried.
Author: 
Recipe type: Steak
Prep time: 
Cook time: 
Total time: 
Serves: 2-4
 
This crispy rib-eye schnitzel is folded and filled with creamy blue cheese, crumbed then butter-fried to crispy, golden perfection.
Ingredients
  • 4 Rib-eye steaks cut from the center of the rib-eye, each 16mm / ¾ inch thick
  • 100g Creamy blue cheese, cut into 8mm / ⅓ inch slices
  • ½ Cup Tapioca flour
  • ½ Cup finely crushed corn flakes mixes with ½ cup all-purpose flour
  • 2 Eggs, lightly beaten
  • 100g Butter for frying
Instructions
  1. Working with one steak at a time, place a steak in the center of a piece of cling-wrap , fold the plastic over, and tap the steak down with your meat mallet until it is half its thickness. Repeat with the remaining steaks.
  2. Place the steak on a platter, cover half the steak with blue cheese, leaving 10mm / just less then half an inch open around the edges.
  3. Fold the open half over the cheese and press this down firmly to compress the cheese and the steak. Repeat with the remaining steaks.
  4. Drench the steaks in the tapioca flour, the the egg, making sure all of the tapioca is wet.
  5. Drench the steaks in the cornflake mixture to get a good solid coating. Transfer the steaks to a platter and allow the the coating to set for 20 minutes.
  6. Heat your pan over medium heat and melt the butter.
  7. When the but starts to bubble, carefully slide the steaks into the pan.
  8. Fry the steaks for 4 minutes per side, then an extra minute on the folded edge.
  9. Remove the steaks from the pan and serve immediately with the accompaniments of your choice.


Cheesy Chicken Nuggets. Crispy fried chicken nuggets with a wonderful cheesy flavor.

homemade chicken nuggets, Chicken Nuggets, chicken nuggets recipe, fried chicken nuggets, Chicken McNuggets, chicken mcnuggets nutrition, chicken nuggets video, chicken nuggets recipe mcdonalds, chicken nuggets how its made, cheesy chicken nuggets,chicken nuggets with cheese,deep-fried chicken nuggets, how to make chicken nuggets, healthy chicken nuggets, gourmet chicken nuggets, mcdonald's chicken nuggets


Cheesy Chicken Nuggets. Crispy fried chicken nuggets with a wonderful cheesy flavor.
Author: 
Recipe type: Cocktail Snacks / Chicken / Poultry
Prep time: 
Cook time: 
Total time: 
 
These cheesy chicken nuggets make a great cocktail snack, and they are quick and easy to make. The cheese melts into the chicken resulting in a wonderfully tender cheesy flavored chicken nugget.
Ingredients
  • 2 x Large skinless, boneless chicken breasts
  • 50g Mature cheddar cheese
  • ½ Cup Tapioca flour
  • ½ Cup finely crushed corn flakes mixed with ½ cup all-purpose flour
  • 2 Eggs Lightly beaten
  • Skewers
  • Dipping sauce of your choice
Instructions
  1. Cut the chicken into 25mm cubes (1 inch)
  2. Cut the cheese into pieces 6mm x 6mm (1/4 inch) x 15mm (just over ½ inch)
  3. Using your olive pitter, punch a hole through the center of each chicken piece.
  4. Pull a chopstick through each hole to open the holes up.
  5. Press the cheese pieces into the holes, the press a skewer through each piece of cheese.
  6. Dredge the nuggets in the tapioca flour to get a good coating.
  7. Dunk them in the egg, making sure that all of the tapioca flour is wet.
  8. Dredge them in the cornflake mixture to get a good solid coating.
  9. Transfer the nuggets to a platter and allow the coating to set for 20 minutes.
  10. Half-fill your pan with oil and heat this to 180c / 350f
  11. Carefully drop the nuggets into the oil and fry them for 3 minutes per side.
  12. Remove and drain on kitchen paper.
  13. Serve immediately on platters with the dipping sauce of your choice.

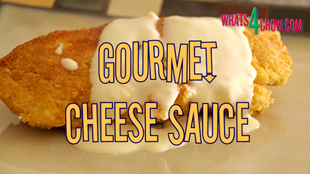
Gourmet Cheese Sauce. How to make silky smooth, flavorful cheese sauce!

cheese sauce recipe,gourmet cheese sauce,easy cheese sauce recipe,how to make cheese sauce,cheese sauce for cordon bleu recipe,best cheese sauce recipe,, How to make nacho cheese dip, Nacho cheese sauce recipe, cheese sauce without flour, cheese sauce recipe pasta, cheese sauce for steak, cheese sauce recipe south africa, cheese sauce with cream, cheese sauce recipe without flour, cheese sauce for fish, cheese sauce for macaroni, cheese sauce for fries


Gourmet Cheese Sauce. How to make silky smooth, flavorful cheese sauce!
Author: 
Recipe type: Sauces
 
This gourmet cheese sauce is second to none.... the trick is in not using roux as the base. This cheese sauce is comprised of stock, cheese, and tapioca flour to thicken and gloss. The flavor of this sauce is ALL CHEESE!
Ingredients
  • 30g Mature cheddar cheese, grated
  • 30g Mozzarella cheese, grated
  • 200ml Chicken stock
  • 60ml Sour cream
  • 10ml / 2 Tsp Tapioca flour, mixed with a little water
Instructions
  1. Heat your saucepan over medium high heat and add the stock.
  2. Bring this almost to a boil, then add the the cheese. At this stage you do not want the sauce to boil - control the heat by raising and lowering the pan over the heat.
  3. Stir the cheese until it melts and becomes stringy.
  4. Add the sour cream and stir this in.
  5. Mix the tapioca flour with a little water and pour this into the pan. Bring the pan to a low boil while stirring continuously. Once the sauce boils, stir for 60 seconds, then remove the pan from the heat.
  6. Serve immediately or store under a cartouche in your refrigerator.


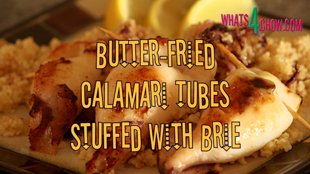
Butter fried Calamari / Squid Stuffed with Brie Served with Lemon Butter Couscous.

butter-fried calamari,pan-fried calamari,butter-fried stuffed calamari,pan-fried stuffed calamari,butter-fried squid,pan-fried squid,butter-fried stuffed squid,pan-fried stuffed squid,calamari stuffed with brie cheese,squid stuffed with brie cheese,stuffed calamari recipe,stuffed squid recipe,how to stuff calamari,how to stuff squid, stuffed calamari in a pan, grilled calamari stuffed with feta and herbs, stuffed calamari tubes recipes, stuffed squid recipe,episode 105 What4Chow.com


Butter fried Calamari / Squid Stuffed with Brie Served with Lemon Butter Couscous.
Author: 
Recipe type: Seafood
Prep time: 
Cook time: 
Total time: 
Serves: 2
 
This recipe for butter-fried calamari stuffed with brie, is quick and simple. The recipe will make 2 starter portions, but can be scaled up to any quantity required. The calamri tubes are stuffed with brie cheese, then pan-fried in butter, served on a bed of lemon-butter couscous.
Ingredients
  • 6 Young calamari tubes
  • 6 Young calamari tentacles (optional)
  • 100g Brie cheese
  • 50g Butter
  • 1½ Cups cooked couscous (see recipe here)
  • 1 Medium lemon
Instructions
  1. Cut the brie cheese into batons.
  2. Press 2 cheese batons into each calamari tube, then secure the ends of the tubes with toothpicks.
  3. Heat your pan over medium high heat and add the butter.
  4. When the butter is bubbling, add the calamari tubes.
  5. Fry the tubes for 3 minutes per side, then remove from the pan.
  6. If you have the tentacles, add them to the pan now and fry for 60 seconds.
  7. Add the couscous to the pan and stir this to heat it through, and to absorb all of the butter.
  8. Squeeze the juice of the 2 lemon halves over the couscous, stir it in, and remove the pan from the heat.
  9. Divide the couscous between 2 starter size platters, top each with 3 of the calamari tubes and serve with lemon wedges.


Crispy Crumbed Pork Loin Chops Stuffed with Brie & Strawberry Jam

Crumbed Stuffed Pork Loin Chop,crispy crumbed pork chop recipe,how to stuff a pork loin chop,how to crumb a pork loin chop,deep-fried pork loin chop recipe,how to deep fry a pork loin chop,pork chop stuffed with brie and strawberry jam,stuffed pork chop recipe,best pork chop recipe,, pan-fried crusted pork chops, grilled crusted pork chops,how to fry pork chops,pork loin chop stuffed recipe


Crispy Crumbed Pork Loin Chops Stuffed with Brie & Strawberry Jam
Author: 
Recipe type: Pork
Prep time: 
Cook time: 
Total time: 
Serves: 2
 
Crumbed Stuffed Pork Loin Chop. Tender, succulent pork loin chops stuffed with brie and strawberry jam, then crumbed and crisp fried to perfection. This demonstration shows you exactly how to stuff and crumb a pork loin chop.
Ingredients
  • 2 Pork loin chops, deboned
  • 2 Slices Brie cheese, 8mm x 25mm x 50mm
  • 3 Tbs Whole strawberry jam
  • 2 Eggs
  • ½ Cup Tapioca flour
  • ½ Cup finely crushed corn flakes mixed with ½ cup all purpose flour
  • Oil to fry
Instructions
  1. Cut the base rind from the wedge of brie, then slice 2 slices 8mm thick.
  2. Using a very sharp knife, slice laterally through the center of the pork chops up to the fat.
  3. Flap the chops open ans spread some of the jam on the lower half of the inside.
  4. Place a slice of brie on top of the jam, then spread a little more jam on top of the brie.
  5. Flap the chops closed and press the edges closed.
  6. Drench the chops in the tapioca flour to get a good coating all over.
  7. Drench the chops in the eggs, making sure everything is well covered.
  8. Drench the chops in the cornflake mixture to get a good thick coating.
  9. Transfer the chops to a platter and lets the coating set for 20 minutes.
  10. Half fill your pan with oil and heat this to 180c or 350f.
  11. Carefully slide the chops into the oil. Fry for 3 minutes per side.
  12. Remove the chops and drain excess oil on kitchen paper.
  13. Serve immediately with a little extra strawberry jam and the accompaniments of your choice.


Parmesan Crusted Baby Sole

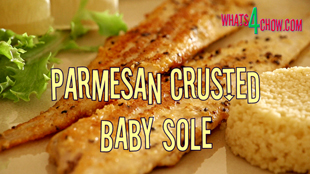
Parmesan Crusted Baby Sole Recipe. Baby sole fried in butter with a crispy parmesan crust.


Parmesan Crusted Baby Sole
Author: 
Recipe type: Seafood
Cuisine: Mediterranean
Prep time: 
Cook time: 
Total time: 
Serves: 2
 
Parmesan Crusted Baby Sole. This simple recipe will receive accollades from your friends and family. Bay sole lightly coated in parmesan and lemon pepper, then butter-fried to crispy perfection fits the bill as the perfect starter, or as a main course by doubling the recipe.
Ingredients
  • 4 x Baby sole, 60-80g each
  • 1 Egg lightly beaten
  • 20g Parmesan, finely grated
  • 2½g Lemon pepper
  • 50g Butter
Instructions
  1. Pat the sole dry with kitchen paper, then paint with the egg.
  2. Combine the lemon pepper and parmesan, then sprinkle a thin layer of the mix onto a plate.
  3. Working with one sole at a time, press the sole into the mixture to get an even coating on each side of the fish. Repeat this with the remaining fish.
  4. Heat your pan over medium high heat, add the butter and fry the sole for 2 minute per side until crispy and golden.
  5. Transfer the sole to platters and serve with lemon wedges and the accompaniments of your choice.


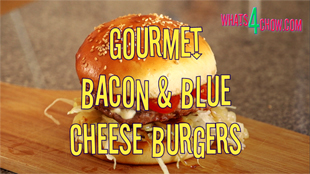
Gourmet Blue Cheese & Bacon Burgers

Gourmet Bacon and Blue Cheese Burger


Gourmet Blue Cheese & Bacon Burgers
Author: 
Recipe type: Burgers
Cuisine: American
Prep time: 
Cook time: 
Total time: 
Serves: 4
 
This burger is good enough to go to war for. A beef and bacon combo patty stuffed with blue cheese, and served on our special homemade buns.
Ingredients
  • 600g Lean beef mince
  • 100g Streaky bacon
  • 5 ml Salt
  • 60g Blue cheese
  • 50g Butter
  • 4 x Gourmet burger buns (Click here for recipe)
  • Shredded crispy lettuce
  • Caramelized onion
  • Sliced pickled gherkin
  • Sliced cocktail tomatoes
Instructions
  1. In a large bowl, combine the beef, bacon and salt. Massage this together using your hands until it is well combined.
  2. Slice the blue cheese into 2mm thin slices.
  3. Toast the buns and prepare all of the other topping ingredients.
  4. Set your burger press to its thinnest setting and press out 8 burger patties.
  5. Working with 2 patties at a time, top one of the patties with some of the sliced blue cheese, leaving just enough space on the edge to seal.
  6. Place the other patty on top of this and gently press the edges down to seal the burger.
  7. Repeat with the remaining patties.
  8. Heat your pan over medium high heat, add the butter and fry the patties for 4 minutes per side. Remove from the pan and serve on the toasted buns with the other prepared toppings.


Baked Camembert in Fillo Pastry

Bake Cambembert in Fillo Pastry Recipe


Baked Camembert in Fillo Pastry
Author: 
Recipe type: Cheese
Prep time: 
Cook time: 
Total time: 
 
This baked camembert in fillo pastry is a winner. Not onlt does it look beautiful, but it tastes like heaven. The recipe is quick and easy. Give baked camembert in fillo a try today! This recipe is suitable as a starter course, or as a dessert. ps- "fillo", "filo", "phyllo", are all the same thing -- a very thing pastry, and the word is pronounced "fee-low"
Ingredients
Ingredients per serving
  • 1 x 125g Camembert round
  • 2 x 30cm Square sheets fillo pastry (12 inch sq)
  • 2 Tbs Whole fruit quince jelly (or the whole-fruit jelly of your choice)
  • A pinch of fresh thyme leaves
Instructions
  1. Cut the camembert in half laterally to make 2 rounds
  2. Oil the first sheet of fillo lightly
  3. Place the second sheet on top of this at a 90 degree angle, and oil as well
  4. Place one half of the camembert in the center of the pastry and top it with 1 Tbs of the jelly
  5. Place the other half camembert on top of this, followed by another Tbs of the jelly
  6. Sprinkle a pinch of fresh thyme leaves on top of this.
  7. Gather up the corners of the top fillo sheet and crimp the fillo lightly above the cheese to close
  8. Repeat this with the second sheet
  9. Lightly grease a baking tray, place the parcel on the tray and bake it in a preheated oven at 160c or 310f for 20-25 minutes until golden and crispy
  10. Remove from the oven and serve


Mediterranean Garlic & Herb Cream Cheese in Olive Oil

How to make Mediterranean cream cheese


Mediterranean Garlic & Herb Cream Cheese in Olive Oil
Author: 
Recipe type: Cheese
Cuisine: Mediterranean
 
This unique garlic and herb cream cheese is rolled into little balls and preserved in olive oil. This cheese compliments any table and is also a great gift for friends and loved ones. This recipe makes a full kilogram or 2.2 pounds of cream cheese at a fraction of the cost of store bought products. For more great "Learn to Cook" video demonstrations, please subscribe to our channel!
Ingredients
  • 4lt Full cream milk
  • 4Tsp Citric acid, dissolved in 250ml of hot water
  • ½ Tbs Cheese salt (or Kosher salt / non-iodated sea salt)
  • 1Tsp Garlic powder
  • Olive oil
  • Dried Italian herb mix
  • 250ml / 1 cup Cultured sour cream
  • 4 x 330ml Glass preserving jars
Instructions
  1. In a large pot, heat the milk over medium low heat until the temperature reaches 90c or 194f
  2. Remove the pot from the heat and pour in half of the citric acid solution while stirring the milk
  3. The curds will start to separate from the whey, but the whey will still be cloudy
  4. Continue to add small amounts of the citric acid, little by little, stirring continuously, until the whey is totally clear
  5. Line a large colander with cheese cloth or butter muslin and strain the curds from the whey. Discard the whey.
  6. Fold the cloth over the cheese, place a plate on top of the cloth, place a weight on top of the plate. A weight of around 2-2.5kg (4.4-5lb) will be fine. A bag of sugar, rice or salt will do.
  7. Allow the cheese to press and drain for 20 minutes
  8. Transfer the cheese to a large mixing bowl and briefly break up the curds with a spatula
  9. Pour in the sour cream and mix it in thoroughly
  10. Add the salt and garlic powder and mix them in thoroughly
  11. Sterilize the jars in your dishwasher on the hottest setting
  12. Pour a little olive oil into the bottom of each jar
  13. Sprinkle a thin layer of Italian herb mix onto a flat plate
  14. pick up a slightly heaped teaspoon of cheese with 2 teaspoon and compress the cheese
  15. Drop the cheese onto the plate and using your fingers, lightly press the cheese into a ball, then drop it into one of the jars. Repeat this until all the jars are full, topping up the oil as you go.
  16. Top all of the jars up until all of the cheese is covered with oil and close the jars.
Notes
  1. This cheese will last indefinitely in your refrigerator, and will improve with age.


Fettuccine with Creamed Spinach, Crispy Bacon & Feta

Pasta with creamed spinach, bacon and feta. Creamed spinach recipe.


Fettuccine with Creamed Spinach, Crispy Bacon & Feta
Author: 
Recipe type: Pasta
Cuisine: Italian
Serves: 4
 
This pasta dish is creamy and full of awesome flavor. Creamed spinach, bacon and feta make a perfect combination.
Ingredients
  • 500g Packet of fettuccine pasta
  • 300g Spinach, stalks and main veins removed
  • 300g Streaky bacon, chopped
  • 150g Feta cheese
  • 4 Cloves garlic, finely chopped
  • 250ml Cream
  • Parmesan cheese to garnish
Instructions
  1. Follow the package instructions and cook the fettuccine. Keep warm.
  2. Heat a pan over medium high heat and fry the bacon for 8-10 minutes, stirring regularly, until it is crispy and golden.
  3. Just before removing the bacon from the pan, add the garlic and stir it in for about 30 seconds, until it is fragrant
  4. Scoop the bacon and garlic from the pan leaving as much of the fat behind as possible
  5. Add the spinach to the pan and stirfry until it is totally wilted and tender. Depending on the size of your pan, you may have to do this in 2 batches.
  6. Remove the spinach from the heat and transfer it to a large mixing bowl. Using your stick blender, puree the spinach until smooth
  7. Crumble the feta into the spinach and mix in well.
  8. Add the bacon and stir in, then pour in the cream and mix until everything is totally combined.
  9. Re-heat your pan to medium high heat, add the creamed spinach sauce to the pan, bring to the boil and boil briefly until the cream thickens slightly.
  10. Share the fettuccine among four pasta bowls, top each one with the creamed spinach sauce.
  11. Grate a little parmesan cheese over the top of each bowl and serve immediately.


Traditional Grilled Haloumi Recipe. How to Grill Haloumi Cheese.

Traditional Grilled Hamoumi Cheese Recipe


Traditional Grilled Haloumi Recipe. How to Grill Haloumi Cheese.
Author: 
Recipe type: Cheese
Cuisine: Greek
Prep time: 
Cook time: 
Total time: 
Serves: 6
 
Haloumi Cheese is one of few cheese that do not melt, making it perfect for frying, grilling and hot pasta meals. This traditional Greek grilled haloumi recipe is a real crowd-pleaser and will impress the heck out of your friends and family!
Ingredients
  • 300g Block of Haloumi cheese
  • 50g Butter
  • 2 Tbs of finely diced green pepper
  • 2 Tbs of finely diced red pepper
  • 2 Tbs of finely diced yellow pepper
  • 1 Clove garlic, finely chopped
  • 6 Pitted calamata olives, cut into rounds
  • 1 Lemon, topped and tailed and cut into 6 wedges
Instructions
  1. Heat your pan over medium high heat, melt the butter and fry the haloumi for 3 minutes per side
  2. Remove the haloumi from the pan and keep it warm
  3. Add the peppers, garlic and olives to the pan and fry for 60 seconds
  4. Transfer the haloumi to platters. Share the sauce out evenly between the plates
  5. Garnish the plates with the lemon and serve


Scroll to top

Kitchen Conversions

Convert:
Masses
to:
Volumes
to:
Temperatures
to:
Lengths
to: