Snack Platter Catering – Part 14 – Traditional Indian Sev – Spicy Deep-Fried Chickpea Noodles

sev,traditional indian sev,sev recipe,traditional indian sev recipe,how to make sev,how to make traditional indian sev,make sev at home,how to make homemade sev,finger foods,snack foods,cocktail snack foods,cocktail party food recipes,superbowl recipes,party snack foods,spicy indian sev,how to make spicy indian sev,chickpea noodles,deep-fried chickpea noodles,how to make dough for sev,sev dough recipe


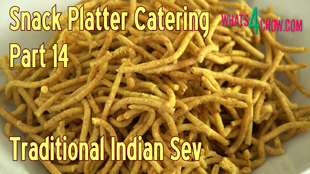
Snack Platter Catering - Part 14 - Traditional Indian Sev - Spicy Deep-Fried Chickpea Noodles
Author: 
Recipe type: Snack Food / Finger Food / Party Food / Superbowl Snacks
Cuisine: Indian
Prep time: 
Cook time: 
Total time: 
 
In the realm of snack platter catering, Sev is another lifesaver recipe that can be made way in advance in any quantity. This spicy deep-fried chickpea noodle is an all-time favorite at parties!!!
Ingredients
  • 1 Cup Chickpea flour
  • 1.25ml Tsp Fine black pepper
  • 2.5ml Salt
  • 1.25ml Turmeric
  • 1.24ml Chilli powder
  • 15ml Hot oil
  • 60ml Water
Instructions
  1. Place the chickpea flour, black pepper, salt, turmeric, and chilli powder in a mixing bowl. Stir this together until combined.
  2. Measure the oil in a small measuring glass. Place the glass in a bowl and pour boiling water into the bowl to surround the oil. Allow the oil to heat up for 3 minutes.
  3. Pour the oil into the flour mixture and stir this in until totally combined, and the flour resembles rough breadcrumbs.
  4. Pour in half of the water and stir this in until totally combined.
  5. Pour in the rest of the water and stir this in until you have a thick sticky paste, resembling peanut butter.
  6. Rub your hands with oil and compress and work the dough into a smooth ball. For the best results, let this rest for 30 minutes before continuing.
  7. In the meantime, half fill a large pan with oil and heat this to 190c or 375f and rub a coating of oil onto the inside and outside of your potato ricer.
  8. Once the oil reaches temperature, load the dough into the ricer and press this over the oil. As the dough comes to an end, you may have to cut the hanging strands off from the surface of the ricer using a knife.
  9. Allow the noodles to fry for 2 minutes, turning halfway through.
  10. Remove the noodles using a slotted spoon and drain them on kitchen paper.
  11. Allow the sev to cool for 15 minutes before separating and breaking into manageable strands. Some of strands may be stuck together, but they will come apart during this process.
  12. If you double or triple this recipe, divide the dough accordingly and process in batches.
  13. Transfer the sev to serving nowls and serve as required. To store pre-prepared sev, place it in air tight containers in a cool place.


How to Make Lemon Cheese. Homemade Lemon Cheese / Paneer – Quick and Easy!!!

how to make lemon cheese,homemade lemon cheese,homemade paneer,cheese made using lemon juice,cream cheese without rennet,lemon cheese for cheesecake,how to make lemon cheese paneer,how to make cream cheese,, how to make lemon cheesecake topping, cream cheese pound cake,how to make cheese curds,lemon cheese curds,homemade cream cheese,lemon cheese recipe,lemon cheese recipe video,best lemon cheese recipe


How to Make Lemon Cheese. Homemade Lemon Cheese / Paneer - Quick and Easy!!!
Author: 
Recipe type: Cheese
Prep time: 
Cook time: 
Total time: 
 
Lemon cheese is quick and easy to make at home, and requires no specialised equipment or ingredients. You can use lemon cheese as you would use any cream cheese, or for the most amazing cheesecake.
Ingredients
  • 4lt / 1 Gallon + 1 cup full cream milk
  • Approx. 150ml lemon juice
  • Cheese salt / Kosher salt (optional)
  • Herbs (optional)
  • 100ml Cream or Cultured sour cream (optional)
Instructions
  1. Pour 4 liters or 1 gallon plus a cup full of full cream milk into a large pot over medium heat. Heat this stirring regularly until the milk reaches a temperature of 80c or 175f.
  2. Pour in half of the lemon juice. You will see the curds forming almost immediately. Pour in the remaining lemon juice little by little until there is a clear separation between the curds and whey. Turn the heat off.
  3. The whey must be clear. Allow the curds to set undisturbed for 10 minutes.
  4. Place a large colander in your sink and line it with cheese cloth or butter muslin. If you don't have either of these, you can use any finely woven, clean fabric.
  5. Pour the curds and whey into the colander. Fold the corners of the cloth over the curds, place a clean plate on top of this and weigh it down with about 5 lbs of weight, or about 2.5kg.
  6. Leave this to drain for 30 minutes.
  7. After the draining time, unwrap the cheese and place it in a bowl. Add cheese salt or kosher salt to taste, and any herbs or spices of your choice. If you intend using the cheese for cheesecake, leave the cheese unsalted and unflavored. If you want the cheese to be spreadable, add 100ml of cream or cultured sour cream and stir this in thoroughly.
  8. As a serving suggestion, use your burger press to mold the cheese on a serving platter. Scatter the platter with crisps and drizzle the cheese with a splash of fruit chutney or sweet chilli sauce and serve immediately.


How to Make the Best Yorkshire Pudding!!! Simply the Best Yorkshire Pudding Recipe to go with Your Roast!!!

yorkshire pudding,yorkshire pudding recipe,how to make yorkshire pudding,yorkshire pudding batter recipe, Yorkshire Pudding (Dish), yorkshire pudding recipe easy, yorkshire pudding recipe jamie oliver, roast beef with yorkshire puddings and gravy recipe, yorkshire pudding nigel slater, yorkshire pudding james martin, yorkshire pudding delia, yorkshire pudding gordon ramsay, yorkshire pudding alton brown


How to Make the Best Yorkshire Pudding!!! Simply the Best Yorkshire Pudding Recipe to go with Your Roast!!!
Author: 
Recipe type: Accompaniments
Cuisine: English / British
Prep time: 
Cook time: 
Total time: 
Serves: 6-12
 
Yorkshire pudding is an all-time favorite accompaniment to any roast meal. In Yorkshire it is even served on its own as a starter with a thick gravy.
Ingredients
  • 200g All-purpose flour
  • 4 Eggs
  • 200ml Full cream milk
  • 2.5ml Salt
Instructions
  1. Sift the flour into a large mixing bowl. In a jug, lightly whisk 4 eggs and add this to the flour along with 200ml of milk and a pinch of salt. Whisk this thoroughly until you have a smooth, silky batter.
  2. Fill the end hollows of your muffin pan with oil and tip the pan up so that oil runs down to the lower hollows. When the bottom hollows fill at an angle, level the pan, and all of the hollows will have exactly the same amount of oil.
  3. Place the muffin pan into a roasting tin. This catch any spillage while the puddings bake. Place this in an oven at 200c or 400f for 15 to 20 minutes and the oil is really hot.
  4. Remove the pan from the oven and pour batter into each hollow. For regular sized puddings, fill them up halfway. For giant sized puddings fill them almost all the way.
  5. Return the pan to the oven for 20 to 25 minutes until the puddings are well risen and browned. Do not open the oven while the puddings are baking. This will cause them to drop back and you will have a flop.
  6. Remove the pan from the oven and marvel at the beautifully golden and crispy, puffed up and hollow Yorkshire puddings.
  7. Transfer these to platters and serve with the roast of your choice and a rich gravy.


Traditional Greek Pitta Bread. Make Your Own Flavorful, Chewy Greek Pitta Bread at Home!!!

pita bread, tzatziki, Greek Food (Dish),traditional greek pitta bread,how to make pitta bread,how to make traditional greek pitta bread, homemade greek pitta bread,pitta bread recipe,, how it's made pita bread, Greek Cuisine (Cuisine), chicken souvlaki pita bread, flat bread making, producing greek pita,how to make greek pitta bread,prefect homemade pitta bread,pitta bread for souvlaki,real greek pitta bread recipe


Traditional Greek Pitta Bread. Make Your Own Flavorful, Chewy Greek Pitta Bread at Home!!!
Author: 
Recipe type: Bread / Dough
Cuisine: Greek
Prep time: 
Cook time: 
Total time: 
Serves: 8
 
Traditional Greek Pitta Bread is absolutely out of this world! Slightly salty, with its trademark chewy texture, pitta bread is a must-have with any Greek meal.
Ingredients
  • 500g Strong white flour
  • 300ml Warm water
  • 12.5ml Instant yeast
  • 15ml Salt
  • 15ml Olive oil
Instructions
  1. Place the flour, dried yeast, salt and oil in your mixing bowl. Mix this to combine, and pour in the water.
  2. Mix this with a wooden paddle until a dough comes together and comes away from the sides of the bowl.
  3. Turn the dough out onto your work surface and knead it for 3 minutes until reasonably smooth.
  4. Place the dough back in the bowl, cover the bowl with cling wrap and allow the dough to rise for 60 minutes in a warm place.
  5. After an hour, turn the dough back out onto your work surface and knead it for 10 minutes until it is smooth and elastic.
  6. Place the dough back in the bowl, cover with cling wrap and allow this to rise again for 60 minutes.
  7. Turn the dough out again, roll it into a cylinder shape and divide it into 8 equal pieces.
  8. Flatten each piece into a disc and roll the discs out into circles of 20cm or 8 inches in diameter.
  9. Heat a heavy pan over medium high heat and give it a light rubbing of oil.
  10. Working with one pitta at a time, fry the pitta for 30 seconds and bubbles start popping up on the top surface.
  11. Turn the pitta over and fry for a further 60 seconds. Turn the pitta over and fry for a further minute. One final turn and a further 90 seconds frying before transferring the pitta to a platter.
  12. Continue with the remaining pitta breads.


How to Make Mayonnaise. Easy and Tasty Homemade Mayonnaise Recipe.

mayo, mayonnaise, how to make mayonnaise, food processor mayonnaise, mayonnaise recipe, how to make mayo, how to make mayonnaise at home, how to make mayonnaise easy, how to make mayonnaise with olive oil, how to make mayonnaise from scratch, how to make mayonnaise sauce, how to make mayonnaise in a blender, how to make homemade mayonnaise, homemade mayonnaise recipe, great tasting mayonnaise, the best mayonnaise


How to Make Mayonnaise. Easy and Tasty Homemade Mayonnaise Recipe.
Author: 
Recipe type: Mayonnaise / Sauce
Cuisine: French
Prep time: 
Total time: 
 
Making real mayonnaise is quick and easy, and certainly tastes 100% nicer than the store-bought mayonnaise. This demonstration shows you how to make great mayonnaise in under 7 minutes using your food processor or hand mixer.
Ingredients
  • 2 Egg yolks
  • 45ml White wine vinegar
  • 2.5ml Worcestershire sauce
  • 750ml Oil (sunflower or olive)
  • 5ml Kosher salt
  • 5ml Garlic powder
  • 5ml Mustard powder
  • (5ml salpeter - optional preservative)
Instructions
  1. Pour the egg yolks, white wine vinegar, Worcestershire sauce and mustard powder into your food processor. You can also use a hand mixer, or even a blender.
  2. Process this for 2 minutes until completely combined and light and creamy.
  3. With the mixer still running, slowly drizzle in the oil in a very thin stream. The mayonnaise will start to combine and form almost immediately. Allow the mixer to run for 4 minutes until you have a very smooth, glossy and thick mayonnaise.
  4. Add the salt and garlic powder. If you are not using the mayonnaise within 7 days, it is advisable to add 5ml of saltpeter to the mixture as well. Saltpeter inhibits the growth of bacteria, and considering the mayonnaise contain raw egg, this is a good safety precaution.
  5. Turn the mixer back on and mix for a further 60 seconds.
  6. You will notice how well emulsified the mayonnaise is by the beater tails left In the surface of the sauce.
  7. Store the mayonnaise in sterilized jars in your refrigerator.
  8. Makes 850ml


Best Burger Relish – Famous Wimpy Burger Relish. Amazing Piquant Tomato & Gherkin Burger Relish.

burger relish,burger relish recipe,hamburger relish,hamburger relish recipe,wimpy burger relish,wimpy hamburger relish,wimpy burger relish recipe,wimpy hamburger relish recipe,how to make wimpy hamburger relish,how to make wimpy burger relish,the best burger relish recipe,famous wimpy burger relish,wimpy franchise burger relish, burger relish recipe jamie oliver, burger relish recipe bbc,burger relish recipe tomato


Best Burger Relish - Famous Wimpy Burger Relish. Amazing Piquant Tomato & Gherkin Burger Relish.
Author: 
Recipe type: Sauce / Relish / Burgers
Prep time: 
Cook time: 
Total time: 
 
This burger relish is absolutely outstanding. This is a close copy of the original Wimpy franchise burger relish, which is famous across the globe.
Ingredients
  • 150g Finely chopped onion
  • 15g Finely chopped garlic
  • 600g Peeled and chopped tomato
  • 150ml Red wine vinegar
  • 75g Sugar
  • 100g Finely chopped gherkin
  • 50g Butter
  • 15ml Paprika
  • 15ml Tapioca flour or cornflour mixed with 30ml water
Instructions
  1. Heat a pan over medium heat, melt the butter and fry the onion and garlic for 5 minutes until the onion is soft and translucent.
  2. Add the tomato and continue to fry for a further 10 minutes and most of the tomato has disintegrated. Add the paprika and fry for a further 2 minutes.
  3. Pour in the sugar and the red wine vinegar. Stir this until the sugar has dissolved, bring it back to a boil, reduce the heat and simmer the relish for 30 minutes, stirring every minute or so.
  4. By this stage the relish will be approaching the consistency of a runny jam. Stir the tapioca flour or cornflour into a little water and add this to the pan. Bring back to a boil and stir continuously for a minute until thickened.
  5. Remove the pan from the heat, stir in the finely chopped gherkin and season with salt to taste.
  6. Transfer the relish to a sterilized jar. The relish will last for months stored in your refrigerator.
  7. In the commercial version of this relish, food coloring is added to achieve the deep red color. Whether you add coloring is entirely up to you.


Egg Foo Yong / Yung / Young. How to Make Classic Egg Foo Yong. Chinese Foo Yong.

egg foo yong,egg fu yong,egg foo yung,egg foo young,chinese egg foo yong,how to make egg foo young,egg foo young recipe,making egg foo yong at home,easy egg foo yong recipe,Egg Foo Young (Dish), egg foo young gravy, egg foo young sauce, shrimp egg foo young,chicken egg foo young,Vegetable Egg Foo Young,egg foo young recipes easy,egg foo young calories,egg foo young gravy recipe,egg foo young sauce


Egg Foo Yong / Yung / Young. How to Make Classic Egg Foo Yong. Chinese Foo Yong.
Author: 
Recipe type: Egg / Vegetable
Cuisine: Chinese
Prep time: 
Cook time: 
Total time: 
Serves: 4-8
 
Chinese Egg foo / fu yong / yung / young is a classic and is served both as a starter or as an accompaniment to the main course. Essentially it is a Chinese omelette, however the thickness & shape differs due to the fact that it is cooked in a wok.
Ingredients
  • 6 Eggs
  • 3 Spring onions
  • 3 Tbs Diced peppers
  • 5ml Salt
  • 5ml Finely chopped garlic
  • 5ml Finely chopped ginger
  • 15ml Light soy sauce
  • 15ml Hoisin sauce
Instructions
  1. Cut the spring onion into rounds, dice the red pepper, mince the garlic and ginger, lightly beat the egg with the salt, then mix the light soy sauce with the hoisin sauce.
  2. Heat the oil in your wok over medium high heat and add the spring onion and red pepper. Stir-fry this for 30 seconds.
  3. Add the garlic and ginger and continue to stir-fry for a further 30 seconds.
  4. Pour in the egg. The egg will force the vegetables to the edges of the pan. Use your wok shovel to redistribute the vegetables evenly across the egg.
  5. Allow the bottom of the egg to set for 60 seconds. It will start to bubble up as it starts yo set.
  6. Slide your shovel under the egg and flip it over. Allow the second side to set for another minute. Remove the foo yong from the heat.
  7. Slice it into 6 or 8 wedges and transfer to platters.
  8. Drizzle a little of the soy hoisin sauce over each wedge and serve immediately.


Chinese Shrimp Fried Rice. Chinese New Year Recipes 2015 – Delicious, Aromatic Shrimp Fried Rice.

Chinese Shrimp Fried Rice,fried rice,fried rice recipe,how to make fried rice,shrimp fried rice recipe,shrimp fried rice recipe,how to make shrimp fried rice,chinese new year recipes,recipes for chinese new year,shrimp fried rice,how to make fried rice, chinese shrimp fried rice with egg, chinese shrimp fried rice ingredients, chinese shrimp fried rice recipe video, how to cook chinese shrimp fried rice,


Chinese Shrimp Fried Rice. Chinese New Year Recipes 2015 - Delicious, Aromatic Shrimp Fried Rice.
Author: 
Recipe type: Rice / Seafood
Cuisine: Chinese
Prep time: 
Cook time: 
Total time: 
Serves: 4
 
With Chinese New Year starting on the 19th of February, this Chinese shrimp fried rice is the first of a 3 part Chinese Cuisine Mini-Series.
Ingredients
  • 4 Eggs
  • 4 Spring onions
  • 3 Cups cooked Jasmine rice (preferably cooked the day before)
  • 1 Tsp Finely chopped garlic
  • 1 Tsp Finely chopped ginger
  • 240g Shrimp meat
Instructions
  1. Defrost the shrimp and pat it dry. Chop the spring onions into rounds, keeping the green and white rounds separate.
  2. Mince the garlic and ginger and lightly beat the eggs. You will also need to measure out the cooked rice, preferably from the day before.
  3. Heat 2 tablespoons of oil over medium high heat and add the garlic, ginger and spring onion whites. Stir these briefly until fragrant, about 15 seconds.
  4. Add the shrimp to the wok and stir-fry these for 3 minutes.
  5. Pour in the egg, allow it to start setting for 15 seconds, then start to turn the egg.
  6. After about 90 seconds the egg will almost all be set. Add the rice to the pan and continue to stir-fry this for 3 minutes, breaking the egg up into bits while doing this.
  7. Remove the wok from the heat, add the spring onion greens and stir these in to combine.
  8. Keep the rice warm until your main course is ready to serve.


Crispy Oven Baked Potato Croquettes. Easy Golden Baked Herbed Potato Croquettes.

potato croquettes, Croquette (Food), potato croquettes baked, potato croquettes jamie oliver, potato croquettes italian, potato croquettes calories, potato croquettes recipe, potato croquettes recipe laura vitale, potato croquettes by sanjeev kapoor,easy potato croquettes recipe,herbed potato croquettes,how to make potato croquettes,crispy potato croquettes,potato croquettes in your oven,herb flavored potato croquettes


Crispy Oven Baked Potato Croquettes. Easy Golden Baked Herbed Potato Croquettes.
Author: 
Recipe type: Accompaniment / Potato
Prep time: 
Cook time: 
Total time: 
Serves: 4-6
 
Potato croquettes make the perfect accompaniment to any roast dish. These baked croquettes can be flavored with any herb of your choice to match your main course. This quick and easy potato croquette recipe will have the crowds cheering for more!!!
Ingredients
  • 4 Medium Potatoes
  • 2 Eggs
  • 30ml Sour cream
  • 30ml Chopped herbs of your choice
  • 2.5ml Salt
  • 15ml Water
  • 15ml Cornflour
  • 2 Cups fine breadcrumbs or finely crushed corn flakes
Instructions
  1. Peel and quarter the potatoes and boil them for about 20 minutes until soft. Add the sour cream, salt and herbs and mash the potatoes until smooth.
  2. Add one of the eggs and continue to mash until the egg is totally combined.
  3. Refrigerate the mashed potato for at least 30 minutes to firm it up.
  4. For the coating, whisk the second egg with the cornflour and water. Measure out 500ml of fine bread crumbs or finely crushed corn flakes.
  5. Remove the potato from the refrigerator. Lift a heaped tablespoon of the mash and shape it into a cigar shape.
  6. Dip the cigar in the egg mixture, then dredge it gently in the flour to get a good coating all over.
  7. Transfer the croquette to a greased baking sheet. Continue shaping and coating until all of the potato is used.
  8. Bake the croquettes in a preheated oven at 180c or 350f for 30 minutes, turning halfway through.
  9. The croquettes will be crisp and golden with a creamy smooth interior. Serve these immediately as an accompaniment to your main course.


Beetroot Chutney. How to Make Beetroot Chutney at Home

bramley apple; beetroot; chutney; homegrown apples and beetroot;, Chutney (Consumer Product), beetroot, beetroot chutney, Indian recipes, beetroot chutney recipe south africa, beetroot chutney jamie oliver, beetroot chutney recipe south indian, beetroot chutney tamil, beetroot chutney recipe uk, beetroot chutney by vahchef, beetroot chutney recipe, how to make beetroot chutney, how to prepare beetroot chutney


Beetroot Chutney. How to Make Beetroot Chutney at Home
Author: 
Recipe type: Chutney / Accompaniments
Cuisine: Indian
 
Beetroot chutney is a fantastic accompaniment to curries and just about any meat dish, including chicken and seafood. It is easy to make, and although the cooking time is on the longer side, it is well worth the effort.
Ingredients
  • 400g Beetroot, peeled and finely diced
  • 250ml Water
  • 1 Onion, finely chopped
  • 400ml Cider vinegar
  • 50ml Balsamic vinegar
  • 400g Sugar
  • 5ml Ground cinnamon
  • ½ Tsp Fresh ginger paste
Instructions
  1. Place the finely diced beetroot, water, finely chopped onion, cider vinegar, balsamic vinegar, sugar, cinnamon and ginger in a large pan.
  2. Bring to a boil, reduce the heat and simmer for 60 to 90 minutes stirring every 10 minutes.
  3. After about 60 minutes you will notice that the liquid has reduced considerably and is starting to become syrupy.
  4. Continue to reduce the liquid until a clean trail is left when you drag the bottom of the pan.
  5. Remove the chutney from the heat and allow it to cool for 15 minutes before transferring it to sterilized jars. Allow the chutney to age for 2 weeks in a cool, dark place before serving.


Thai Green Curry Potatoes. Rich & Spicy Thai Green Curry with Potatoes

how to cook thai food, how to make thai food, easy thai food, Green Curry (Food), bbc thai green curry potatoes, vegetarian thai green curry potato, how to make thai green curry with potatoes, Vegetarian Thai Green Curry, thai green curry new potatoes green beans, easy thai green curry with potatoes, thai green curry sweet potato chicken, thai food cooking video, thai food video, thai cooking video


Thai Green Curry Potatoes. Rich & Spicy Thai Green Curry with Potatoes
Author: 
Recipe type: Thai Green Curry / Vegetarian / Vegan
Cuisine: Thai
Prep time: 
Cook time: 
Total time: 
Serves: 4-6
 
Thai Green Curry with Potatoes is really easy and really tasty. This makes for a perfect accompaniment or main course. Although this is not authentically Thai in origin, this dish displays all of the flavors and aromas of Thai green curry.
Ingredients
  • 2 Medium onions, peeled and cut into eighths
  • 2 Tbs Chopped Garlic
  • 6 Medium Potatoes, peeled and cubed
  • 45ml Oil
  • 2 Tbs Green Curry Paste (you can adjust this if you prefer hotter or cooler)
  • 400ml Coconut cream
  • 2 Tbs Chopped coriander or garlic chives
Instructions
  1. Place the cubed potatoes, onion and garlic in a large pan along with the oil. Place the pan over medium heat and saute for 7 minutes until the onion is tender.
  2. Add the Thai green curry paste and stir this in for 30 seconds until fragrant.
  3. Add the coconut cream and stir this in. Bring the pan to a boil, reduce the heat to a simmer and allow this to simmer for 20 to 30 minutes until the potato is tender.
  4. Season with salt to taste and transfer the potato to serving bowls. Garnish with fresh coriander or snipped chives and serve immediately.


Pickled Shredded Beetroot. How to Pickle Beetroot at Home – Homemade Pickled Beetroot & Onion.

pickled beetroot,pickled shredded beetroot,pickled beetroot and onion,pickled shredded beetroot with onion,spicy pickled shredded beetroot, pickled grated beetroot, grated pickled beetroot recipe,how to pickle beetroot,how to preserve beetroot,how to picle and bottle beetroot,how to pickle and can beetroot,how to make beetroot chutney,how to make beetroot relish,pickled beetroot relish,chilli pickled beetroot


Pickled Shredded Beetroot. How to Pickle Beetroot at Home - Homemade Pickled Beetroot & Onion.
Author: 
Recipe type: Vegetable / Preserves
Prep time: 
Total time: 
 
Pickled shredded beetroot is quick and easy to make. This recipe uses shredded beetroot and onion, and you can choose whether to make it hot and spicy or plain. If you prefer plain, simply omit the chilli and pepper from the recipe.
Ingredients
  • 2 Medium onions, halved and thinly sliced into half-rounds
  • 4 Medium beetroot, peeled, topped & tailed and grated with the grain
  • 3 Tbs Pickling salt (or Kosher salt)
  • 1 Green chilli sliced thinly (optional)
  • 1 Tsp Black peppercorns (optional)
  • 1½ Cups White wine vinegar
  • ⅓ Cup Cane syrup (or honey)
Instructions
  1. Top and tail and peel the beetroot. The grain of the beetroot runs from top to bottom, so when you grate it make sure you follow the grain otherwise it will disintegrate into small bits as it pickles.
  2. Cut the onions in half, then into thin half rounds. Combine the beetroot and onion in a large mixing bowl. Add the salt and mix this in thoroughly. The salt extracts the excess water from the vegetables. Allow this to stand for 20 minutes.
  3. Whole the veges stand, combine the vinegar, cane syrup, black peppercorns, and sliced chilli in a small saucepan.
  4. Bring this to a boil, remove it from the heat and allow it stand until the vegetables have completed sweating.
  5. Place a colander over a large mixing bowl and pour the beet and onion into the colander. Pick up handfuls of the veg and squeeze out as much liquid as you can, transferring the dry veg back to its original mixing bowl as you go.
  6. Transfer the beet and onion to a sterilized jar and pour the vinegar solution over the vegetables until it is just covered.
  7. Place the lid on the jar and allow this to age for at least a few days before serving.


Scroll to top

Kitchen Conversions

Convert:
Masses
to:
Volumes
to:
Temperatures
to:
Lengths
to: