Easy Chicken Parmesan Burger Recipe - How to Make Chicken Parmesan Burgers at Home!
Author: Whats4Chow
Recipe type: Burger
Cuisine: Italian
Serves: 2
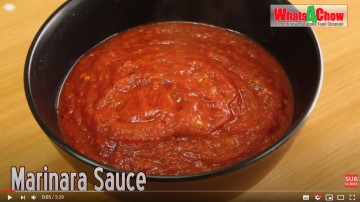
In our previous episode we made a rich thick marinara sauce. (https://www.youtube.com/watch?v=QMmVF...) Today we're going one step further making a magnificent chicken Parmesan burger, where Parmesan cheese and marinara sauce are the 2 primary flavoring ingredients.
Ingredients
- 2 x Chicken breasts
- 70g Shredded Parmesan cheese
- Salt
- 2 Eggs beaten
- 250ml Fine breadcrumbs
- 10ml Italian herb blend
- 2 Burger buns
- Salad greens
- Marinara sauce
- 6 Slices Mozzarella cheese
Italian Herb Blend:
- 45ml Dried savory
- 45ml Dried basil
- 45ml Dried marjoram
- 45ml Dried oregano
- 45ml Dried chives
- 30ml Dried rosemary
- 15ml Dried thyme
- 15ml Dried sage
- 15ml Dried parsley
Instructions
- Chicken Parmesan Burger Recipe - Homemade Chicken Parmesan Burger - How to Make Chicken Parmesan Burgers
- In our previous episode we made a rich thick marinara sauce. (https://www.youtube.com/watch?v=QMmVF...) Today we're going one step further making a magnificent chicken Parmesan burger, where Parmesan cheese and marinara sauce are the 2 primary flavoring ingredients.
- To start, you will need 2 skinless, boneless chicken breasts. I am using big 120mm diameter burger buns, and am using large breasts, however you're using smaller buns, user smaller breasts.
- Whisk 2 large eggs.
- You will also need about 10ml of Italian herb blend. You can find this in your supermarket, if not, the recipe is in the description.
- Next up is salt.
- Finely shred 70g of Parmesan cheese.
- And pour out a cup of fine breadcrumbs.
- Working with one breast at a time, fold the breast in bread film or cling wrap and use your mallet to tap this down to about half of its original thickness.
- Place the 2 flattened breasts on a plate and fold in any stray edges.
- Paint the tops of the chicken liberally with egg.
- Sprinkle a liberal dose of the dried herbs evenly over the chicken, followed by a good grind of salt.
- Spread a quarter of the shredded Parmesan cheese over each breast and press this firmly into the surface of the chicken.
- Brush another dose of egg onto the breast to wet all of the compressed cheese.
- Sprinkle a good layer of breadcrumbs over the wet Parmesan and press this firmly into the surface.
- Sprinkle a layer of breadcrumbs over a large platter. This will protect the coated side of the chicken while we coat the other side.
- Lift the breasts from the plate and transfer them to the platter with the coated side facing downwards.
- Repeat the entire coating process and put the breasts aside to set for 15 minutes.
- Half fill a large pan with oil and heat this to 180c or 350f.
- Carefully transfer the breasts to the oil and fry them for 3 to 4 minutes until golden, turning every minute to ensure even browning.
- Lift the chicken from the oil and transfer it to a baking sheet lined with baking parchment.
- Top each breast with a heaped tablespoon of marinara sauce, followed by 3 slices of mozzarella cheese.
- Place the baking sheet under your oven grill to melt the cheese.
- While the breasts grill, cut your buns and spread a heaped tablespoonful of the marinara sauce on each base.
- Top the marinara with the greens of your choice. You can use fresh basil, baby spinach or even mixed lettuce.
- Place a breast onto each bun and you're ready to go.