Recipes & Videos

Marinated Mushrooms. The Magic Ingredient for Toasted Sandwiches, Pizzas and Salads!!!!

marinated mushrooms,how to marinate mushrooms,marinated mushrooms recipe,marinated mushrooms for toasted sandwiches,marinated mushrooms for pizzas,marintaed mushrooms for pizzas, italian marinated mushrooms, marinated mushrooms recipe, marinated mushrooms gordon ramsay, marinated mushrooms for steak, marinated mushrooms calories, marinated mushrooms grilled, marinated mushrooms raw, how to make marinated mushrooms


Marinated Mushrooms. The Magic Ingredient for Toasted Sandwiches, Pizzas and Salads!!!!
Author: 
Recipe type: Accompaniment / Vegetable
Prep time: 
Total time: 
 
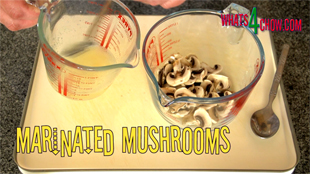
How to make quick marinated mushrooms. This ingredient is absolutely magic - it makes pizzas, toasted sandwiches and salads come to life.
Ingredients
  • 6 Mushrooms, sliced
  • 1 Tbs Caster sugar
  • ¼ Tsp Salt
  • ½ Tsp Garlic powder
  • 100ml White wine vinegar
Instructions
  1. Slice the mushrooms and place them in a jug or bowl.
  2. In a separate jug, combine all of the other ingredients and stir until totally combined.
  3. Pour this over the mushrooms, stir together, and allow to marinate for at least 60 minutes before using.


How to Make 5 Spice Powder. Homemade 5 Spice Powder Recipe. Episode #201 with Whats4Chow.com

homemade 5 spice powder,five spice powder, Chinese Food (Cuisine), Five-spice Powder (Ingredient), Chinese 5 spice, Chinese five spice powder, making five spice powder, Chinese Cuisine (Cuisine), homemade chinese 5 spice powder, five spice substitute, how to make chinese 5 spice, five spice ingredients, whats in five spice, five spice in a grinder, chinese seasoning, asian seasoning, what is 5 spice, Szechuan Food (Cuisine), szechuan, sichuan pepper, szechuan peppercorn


How to Make 5 Spice Powder. Homemade 5 Spice Powder Recipe. Episode #201 with Whats4Chow.com
Author: 
Recipe type: Spice Blends
Cuisine: Chinese
Prep time: 
Total time: 
 
5 Spice is used in a multitude of Eastern dishes. It is quite useful to know how to make your own 5 Spice Blend. The homemade 5 spice powder also tastes much better then the commercial equivalent, which contains far too much cinnamon, however if you prefer more cinnamon, feel free to add extra.
Ingredients
  • 1 Tsp Szechuan Peppercorns
  • 1 Tsp Cloves
  • 1 Tsp Fennel Seeds
  • 3g Star anise
  • 3 Tsp Cinnamon
Instructions
  1. Heat a small pan over medium high heat and dry fry the Szechuan peppercorns for about 60 seconds and they are strongly fragrant.
  2. Place the Szechuan peppercorns, cloves, ground cinnamon, fennel seed and star anise in your spice grinder and zap them until fine.
  3. Store the powder in airtight spice bottle in a cool dry place.


French Fried Onions. Deep-fried Shoe-string Onions. Glorious Crispy Fried Onions.

french fried onions,deep-fried shoe-string onions,crispy fried onion rings,crispy fried onions,deep-fried onions, onion rings recipe, fried onions, onion strings, french fried onions recipe, french fried onions chicken, french fried onions calories, french fried onions meatloaf, how to make french fried onions, onion strings recipes, beer battered onion rings, beer batter onion rings, onion rings batter


French Fried Onions. Deep-fried Shoe-string Onions. Glorious Crispy Fried Onions.
Author: 
Recipe type: Deep-fried / Vegetable
Cuisine: French
Prep time: 
Cook time: 
Total time: 
Serves: 4-6
 
Crispy,golden French fried onions make a perfect accompaniment, garnish or snack. Lightly coated then fried to golden perfection, these will have people lining up for seconds. Sometimes called shoe-string onions, these crispy fried onion rings have become the thing of legends!!!
Ingredients
  • 1 Large onion
  • Milk to cover
  • 2 Cups all-purpose flour
  • Oil to deep-fry
Instructions
  1. Top and tail the onion and remove the outer layer.
  2. Place onion on its end and cut down through the onion to split the rings, then place it on its side and slice rings as thinly as you can.
  3. Place the rings in a mixing bowl and pour in enough full cream milk to cover. Allow these to stand for 60 minutes.
  4. After the soaking time, dredge the rings in the flour and fry them at 190c or 375f until they are crisp and golden.
  5. Remove the onions from the oil with a slotted spoon and drain any excess oil on kitchen paper before serving.


Mexican Meatloaf Stuffed with Cheddar and Topped with Chipotle Glaze. How to Make Single Portion Meatloaf Recipe

how to make meatloaf,how to make single portion meatloaf,how to make single serving meatloaf,meatloaf stuffed with cheddar,stuffed meatloaf recipe,mexican style meatloaf,glazed meatloaf recipe , meat loaf recipe, meatloaf recipe, Meatloaf (Dish), easy meatloaf recipe, meatloaf recipe food network, meatloaf recipe with bacon, meatloaf recipe with oatmeal, meatloaf recipe jamie oliver, meatloaf recipe with oats, meatloaf recipe best


Mexican Meatloaf Stuffed with Cheddar and Topped with Chipotle Glaze. How to Make Single Portion Meatloaf Recipe
Author: 
Recipe type: Beef
Cuisine: American
Prep time: 
Cook time: 
Total time: 
Serves: 4
 
Mexiacn Meatloaf Recipe - stuffed with mature cheddar, topped with chipotle glaze. Meatloaf is an all-time favorite, however it can be a bit boring doing the same thing time and again. This meatloaf is spiced up, stuffed with mature cheddar and glazed with a chipotle glaze. The loaves are made in single portions, making serving and portion control much easier.
Ingredients
  • 450g / 1 pound Ground lean beef
  • ½ Cup Chopped onion
  • ⅓ Cup Finely crushed tortilla chips (plain or chilli flavor)
  • 1 Large egg, lightly beaten
  • 2 Tbs Ketchup / Tomato sauce
  • 2 Tsp Cayenne pepper
  • 1 Tsp Ground cumin
  • ¼ Tsp Salt
  • ½ Cup Shredded mature cheddar or Monterey Jack
For the Glaze
  • ½ Tsp Ground chipotle (can substitute smoked paprika)
  • 4 Tbs Ketchup / Tomato sauce
Instructions
  1. Place the beef mince, chopped onion, finely crushed tortilla chips, ketchup, chilli powder, ground cumin, lightly beaten egg, salt and freshly ground black pepper in a mixing bowl and massage this until totally combined.
  2. Using an oil soaked cloth, wipe out the mini loaf pans. Fill the pans with equal amounts of the beef mixture.
  3. Using your fingers, make a deep furrow down the center of each lot of beef. Fill the furrow with the mature cheddar and press the beef back until the cheese is almost covered.
  4. Mix the second lot of ketchup with the chipotle powder and spread this over the loaves.
  5. Place the loaves in a roasting pan and bake them at 200c or 400f for 30 minutes.
  6. Remove the meatloaves from the oven, run a toothpick around the edges and turn them out onto platters to serve.


How to Make Garlic Bread. Make the Most Delicious Garlic Bread Using Baguettes.

how to make garlic bread,how to make garlic bread with baguettes,how to make garlic french bread,, garlic bread recipe, Garlic Bread (Dish), how to make, homemade, homemade garlic bread recipe, healthy garlic bread, cheesy garlic bread recipe, how to make garlic bread from scratch, how to make garlic bread in oven, how to make garlic bread at home, how to make garlic bread from scratch


How to Make Garlic Bread. Make the Most Delicious Garlic Bread Using Baguettes.
Author: 
Recipe type: Bread
Cuisine: French
Prep time: 
Cook time: 
Total time: 
Serves: 4-8
 
In our previous video we baked two stunning traditional French Baguettes. This video show you how to make Garlic Bread using these 2 loaves.
Ingredients
  • 2 x 14 inch Baguettes
  • 100g Butter
  • 30g Minced garlic
  • ½ Tsp Salt (optional)
Instructions
  1. Mix 30g of minced garlic into 100g of softened butter and the salt.
  2. Working with one loaf at a time, slice the loaves leaving the bases intact.
  3. Open up the slices and spread a generous dose of garlic butter between each slice.
  4. Place each loaf on a sheet of foil and spread any remaining butter over the top of the baguettes.
  5. Fold the foil over the top and twist the ends.
  6. Bake the loaves in a preheated oven at 180c or 350f for 20 minutes.
  7. Remove the loaves from the oven, unwrap them and serve immediately.


French Baguette – How to Make Baguettes at Home – Traditional French Bread Recipe

french baguettes,how to make french baguettes at home,easy french baguettes recipe,traditional french baguettes recipe,homemeade french baguettes recipe,french bread recipe,how to make french bread,homemade french bread recipe, cold-fermented baguette recipe, how to shape a baguette, how to make french baguette by hand, how to make french baguette without bread machine, how to make french baguette bread video


French Baguette - How to Make Baguettes at Home - Traditional French Bread Recipe
Author: 
Recipe type: Bread / Dough
Cuisine: Dough
Prep time: 
Cook time: 
Total time: 
 
Despite the long rising times, French Baguettes are really easy to make. This demonstration will show you how to make French Baguettes at home.
Ingredients
For the Sponge
  • 100g Strong white flour
  • 5g Yeast
  • 300ml Warm water
To finish the dough
  • 300g Strong white flour
  • 10g Yeast
  • 1 Tsp Salt
Instructions
  1. Place 100g of the strong white bread flour and 5 grams of the yeast in a mixing bowl. Stir them to combine, then pour in the warm water.
  2. Mix this well until everything is totally combined. Cover the bowl with clingwrap and allow this to stand for 60 minutes.
  3. After 60 minutes, the yeast will have developed extensively and you will have bubbling mass.
  4. Add the remaining flour, yest and salt and mix this in.
  5. Mix this until a dough starts to come together, then use your hands to work the dough in the bowl until all of the loose flour has been incorporated into the dough ball.
  6. Turn the dough out onto a lightly floured work surface and knead this for 5 minutes until it is smooth and elastic. Sprinkle the dough with a little flour every time it becomes too sticky.
  7. Sprinkle dough into the bottom of the mixing bowl.
  8. Roll the dough into a smooth ball and return it to the bowl. Cover the bowl with clingwrap and allow this to rise for 30 to 40 minutes until it has doubled in size.
  9. Once risen, don't knock the dough down. You want to leave as much air in the dough as possible.
  10. Dump the dough out onto the work surface and using a large knife, cut it into 2 pieces.
  11. Working as gently as possible, roll each half into a long loaf.
  12. Transfer the loaves to a baking sheet and sprinkle lightly with flour before covering loosely with a damp kitchen towel.
  13. Allow the baguettes to rise for another 60 minutes.
  14. Remove the towel and sift a light layer of flour over the top of the loaves.
  15. Using a sharp thin blade knife, slash the surface of the loaves every 20mm at an angle.
  16. Bake the baguettes in a preheated oven at 220c for 20 minutes.
  17. Remove the loaves from the oven and transfer them to a wire rack to cool.


The Most Awesome Toasted Sandwich. A Gourmet Toasted Sandwich Inspired by the East.

A Gourmet Toasted Sandwich Inspired by the East,gourmet toasted sandwich,gourmet grilled sandwich,the best toasted sandwich,how to make a gourmet toasted sandwich, gourmet toasted sandwiches, gourmet toasted sandwich ideas, gourmet toasted sandwiches recipes, gourmet toasted cheese sandwiches, gourmet toasted sandwiches wellington, gourmet chicken toasted sandwich,fancy toasted sandwich recipe,fancy toasted sandwich ideas


The Most Awesome Toasted Sandwich. A Gourmet Toasted Sandwich Inspired by the East.
Author: 
Recipe type: Toasted Sandwiches Recipes
Prep time: 
Cook time: 
Total time: 
Serves: 2
 
A Gourmet Toasted Sandwich Inspired by the East. Across China, Thailand and Vietnam it is quite normal to combine seafood, smoked pork and peanuts or roasted sesame oil in a meal - with remarkable results. This toasted sandwich is inspired by this amazing combination!
Ingredients
For 2 Gourmet Sandwiches
  • 6 Slices white farmhouse bread, 4 of them buttered on 1 side
  • 100g Mashed sardines
  • 100g Fried streaky bacon, chopped
  • 2 Heaped tablespoons of crunchy peanut butter
  • 2 Eggs, scrambled
Instructions
  1. Turn the buttered slices upside down. Spread a generous layer of the peanut butter onto 2 of the slices.
  2. Top each of these with the chopped bacon, and press This into the peanut butter.
  3. Top this with the 2 un-buttered slices of bread and press it down to make sure it is well bonded.
  4. Top the un-buttered slices with the mashed sardine, followed by the sloppy scrambled egg.
  5. Close the sandwiches with the 2 remaining buttered slices, with butter facing outward.
  6. Heat your pan or sandwich grill and fry the sandwiches until crispy and golden.
  7. Quarter the sandwiches and transfer them to platters to serve.


How to Debone & Stuff a Whole Turkey. Thanksgiving Recipe Special. Turkey Galantine / Ballotine.

how to debone a turkey,how to debone a whole turkey,how to debone & stuff a whole turkey,how to debone and roll a turkey,deboning and rolling a turkey,stuffed turkey recipe,thanksgiving recipe,christmas turkey recipe,thanksgiving turkey recipe, how to debone and stuff a whole turkey, roll a turkey, stuff a turkey, xmas turkey, gourmet turkey, thanksgiving, debone turkey video, How to Debone Turkey for Turducken


How to Debone & Stuff a Whole Turkey. Thanksgiving Recipe Special. Turkey Galantine / Ballotine.
Author: 
Recipe type: Poultry / Thanksgiving / Christmas / Festive Season
Cuisine: American
Prep time: 
Total time: 
Serves: 6-8
 
How to Debone & Stuff a Whole Turkey. With Thanksgiving and the festive season just around the corner, here is a fantastic deboned stuffed turkey recipe for the occasion!!! A while back we demonstrated deboning a whole chicken in a few easy steps - deboning the turkey is just as simple, but requires a little more strength owing to the turkey having much stronger connective tissue than a chicken. The bird is stuffed with a rich filling of bacon, feta, olives and baby spinach.
Ingredients
  • 1 x 3kg / 6.6lb Turkey (if you use a larger bird, simply scale up the filling and recalculate the cooking time using my formula below)
For the Filling / Stuffing
  • 200g Baby spinach
  • 200g Streaky bacon
  • 140g Feta cheese
  • 12 Olives
Instructions
  1. Starting with the stuffing, cut the bacon thinly across the grain. Roughly chop the baby spinach, and pit and slice the olives into rounds. In addition take out 2 rounds or 140g of feta cheese.
  2. Heat your wok or pan over medium high heat and fry the bacon until lightly golden.
  3. Add the spinach and fry this until spinach is totally wilted and tender.
  4. Turn off the gas or remove the wok from the heat, add the olives and crumble in the feta cheese. Put this aside to cool.
  5. To debone the turkey, cut off the tail, then cut off the wings at the elbow.
  6. Turn the bird onto its breast and pull back the skin on the shoulder. Feel for the articulation in the shoulder and slice through the joint. Repeat this with the other wing.
  7. Slice all the way down the back of the turkey and then pull the wings and the skin away from the carcass all the way down to the oysters.
  8. Stand the bird up on its butt, and put your fingers under the skin on either side of the sternum. Pull the skin and the breasts away from the front of the carcass.
  9. Lie the bird on its sternum then cut the oysters free from the carcass.
  10. To free the legs, move one of the legs sideways and upwards then pull it over and straight downwards to snap and expose the hip joint. Use your knife to cut through the connective joint tissue. Repeat this with the other leg.
  11. Pull the carcass free from the bird. Do not dispose of this yet as any bits of meat left on the carcass will be used to fill up blank spots later.
  12. Open the turkey up with the skin side down.
  13. To debone the leg, cut around the hip joint then scrape the meat down the bone to the knee joint.
  14. Cut around the knee joint then scrape the meat down the drumstick.
  15. Press the bone back into the drumstick and break the bone just above the knuckle using the back of your cleaver. Pull the leg bone free, tuck the flesh back into the skin and continue with the other leg.
  16. To debone the wing, cut around the wing joint. Grab the joint and scrape the flesh down the bone. Pull the bone free, tuck the flesh back into the skin, and then continue with the other wing.
  17. The turkey is now totally deboned. Use the flesh recovered from the carcass to patch the blank spots between the legs and breasts.
  18. Cut at an angle through the thick upper breasts and flap the flesh forward.
  19. To stuff the bird, fill the legs and wings with the stuffing to plump them up. Spread all the remaining fill evenly across the bird.
  20. Fold one half of the turkey across the center-line, then fold the other half over this to entirely enclose the filling.
  21. Using butchers twine tie the legs together. Using half hitch loops close up the rest of the bird. Bring the twine back down to the legs and tie to secure.
  22. Place the turkey on a rack in a roasting pan and rub it all over with butter. Season with salt and cracked black pepper and roast the bird for 45 minutes plus 15 minutes per pound.
  23. At the end of the cooking time, remove the turkey from the oven and allow it to stand for 5 minutes before slicing into thick slices and serving with the accompaniments of your choice.


Baked Chilli Chicken Drumsticks. Great for the Big Game or Served Cold!

Chilli Chicken Drumsticks,baked chilli cjicken drumsticks,hot drumsticks,roasted chilli drumsticks,how to make chilli drumsticks,chilli chicken drumsticks recipe,chicken snack for superbowl,spicy chicken drumsticks, spicy chicken recipes, sauces for chicken, sticky chilli chicken drumsticks, garlic chilli chicken drumsticks, hot chilli chicken drumsticks, superbowl chicken


Baked Chilli Chicken Drumsticks. Great for the Big Game or Served Cold!
Author: 
Recipe type: Chicken / Poultry / Snack Food
Prep time: 
Cook time: 
Total time: 
Serves: 4-8
 
These spicy hot chicken drumsticks are perfect snack-food for the big game, or simply served cold at a picnic. Simple and quick to make, these will have your fans raving for more!
Ingredients
  • 8 Chicken drumsticks
  • 1 Medium onion, roughly chopped
  • 2 Cloves Garlic
  • 1 Tbs dried chilli flakes
  • 15ml paprika
  • Juice of 1 lemon
  • 30ml White wine vinegar
  • 15ml Worcestershire sauce
  • 100ml Oil
Instructions
  1. Place the onion, garlic, dried chilli flakes, paprika, lemon juice, white wine vinegar, Worcestershire sauce and olive oil in a jug. Using your stick blender zap these until smooth.
  2. Make three deep cuts into the thickest part of the flesh of each drumstick. Place the drumsticks in a roasting pan and pour the sauce over the chicken.
  3. Bake the chicken in a preheated oven at 180c or 350f for 75 minutes. Turn and re-coat the chicken twice during this time - after the first 30 minutes then after the second 30 minutes.
  4. Remove the chicken from the oven, allow it to stand for 5 minutes before transferring it to baskets or platters and serving.


How to Make Sous Vide Burger Patties in Your Dishwasher! Quick and Easy Sous Vide Burger!

sousvide, sous-vide, sous vide, sousvide supreme, sous vide machine, sous vide cooking, sous vide recipes, how to sous vide, burgers sous vide, sous-vide burgers, sousvide burgers, how to sous vide burgers, sous vide burger recipe, hamburgers, sous vide hamburger recipe ,sous vide burger patties,sous vide burgers,cooking in your dishwasher, sous vide hamburger patties, Sous-vide, SousVide Supreme, Hamburger (Food)


How to Make Sous Vide Burger Patties in Your Dishwasher! Quick and Easy Sous Vide Burger!
Author: 
Recipe type: Burgers / beef
Cuisine: American
Prep time: 
Cook time: 
Total time: 
Serves: 4-6
 
Sous Vide Burger Patties / Sous vide burgers Sous vide involves cooking vacuum packed foods in a water bath at low temperature for an extended period of time. This normally involves buying an expensive circulating water bath, however your dishwasher will do a pretty good job of this for free! Check out the video and see how.
Ingredients
  • 600g Beef mince
  • ½ Tsp Salt
Instructions
  1. Combine half a teaspoon of salt with 600g of beef mince, then press your patties, or form them by hand.
  2. Vacuum pack your patties in single packs, making sure that the vacuum packs are properly sealed.
  3. Pack the sealed patties flat in your dishwasher and run them for a full cycle at 65c. Almost all dishwashers have 2 temperature cycles, 65c and 75c. Consult the user manual for your machine.
  4. Remove the patties from the washer. They are completely and thoroughly cooked. Remove them from their packets and serve immediately, or if you prefer to add a little color, flash fry them in a smoking hot pan to singe the outside of the patty. To speed things up you can also use a blowtorch.
  5. The texture of these patties is quite pleasant, more on the side of actual steak, than that of regular patty. Considering you could probably fit at least about 60 patties in you dishwasher at a time, this is the ideal way to bulk cater for parties, providing your menu choice is burgers, or burgers, or burgers.


The Gourmet Breakfast. Bacon on Egg with Caramelized Pears, Blue Cheese, Camembert and Feta.

gourmet breakfast,how to make a gourmet breakfast,3 cheese gourmet breakfast,best breakfast recipe,, gourmet breakfast menu, gourmet breakfast foods, gourmet breakfast menu ideas, gourmet breakfast basket, gourmet breakfast recipes with eggs, gourmet breakfast ideas, perfect breakfast,best breakfast recipe,easy fancy breakfast,impress your girlfriend breakfast


The Gourmet Breakfast. Bacon on Egg with Caramelized Pears, Blue Cheese, Camembert and Feta.
Author: 
Recipe type: Breakfast
Prep time: 
Cook time: 
Total time: 
 
Bacon, blue cheese and caramelized pear slices make a formidable combination. Add a Chinese Egg Omelette, a crumble of Feta and a couple of slices of Camembert.... that gives you THE Gourmet Breakfast!!!
Ingredients
For Each Serving you will need
  • 3 Rashers streaky bacon
  • 8 Slices of fresh pear
  • 25g Feta cheese
  • 25g Creamy blue cheese
  • 4 Small wedges Camembert cheese
  • 2 Eggs, lightly beaten
Instructions
  1. Heat a 20cm or 8 inch pan over medium high heat and fry the bacon until lightly golden, then remove it from the pan and keep it warm.
  2. Add the pear slices to the pan and fry these for 6 to 8 minutes turning halfway through. The pears should be well browned and tender. Remove these from the pan and keep them warm with the bacon.
  3. Pour in the egg and fry this for 3 minutes per side until golden.
  4. Place the egg in the center of a platter and arrange the fried pears around the edge of the egg.
  5. Place the bacon in the center in such a way that it stznds up on its edges giving the meal some height.
  6. Arrange the Camembert around the bacon at every quarter of the circle. Crumble the feta cheese over the bacon, then crumble the blue cheese over the caramelized pears.
  7. Season with cracked black pepper and serve immediately. There is no need to season with salt as the feta and the blue cheese provide more than enough salt.


How to Make Deep-Fried Beetroot Crisps. Crispy Delicious Beetroot Chips – The Perfect Snack!

beetroot crisps,beetroot chips,how to make beetroot crisps,how to make beetroot chips,beetroot crisps make perfect garnish,how to deepfry beetroot crisps,healthy crisps,healthy chips,how to fry beetroot chips,how to make crisps at home, beetroot crisps calories,beetroot chips recipe,beetroot chips recipe,homemade beetroot chips recipe,homemade beetroot crisps recipe,how to make beetroot crisps at home,how to make beetroot chips at home


How to Make Deep-Fried Beetroot Crisps. Crispy Delicious Beetroot Chips - The Perfect Snack!
Author: 
Recipe type: Vegetable / Vegetarian / Vegan / Snacks
Prep time: 
Cook time: 
Total time: 
 
The beetroot crisps / chips are delicious on their own, or served as an accompaniment or as an attractive and tasty garnish. They are quick and easy to make and cost a fraction of store bought crisps. Beetroot crisps will also be an interesting conversation piece at your next party, as almost no-one will have had them before!!!
Ingredients
  • Fresh beetroot (as many as you need for your requirements)
  • Oil for deep-frying
  • Coarse salt and fresh rosemary to garnish
Instructions
  1. Wash and dry the beetroot thoroughly, then top and tail them.
  2. Using a very sharp knife or a mandolin, cut the beetroot into thin slices of 1 to 2 mm in thickness.
  3. Fill a large pan with oil to a depth of 25mm or 1 inch and heat this to 170c or 325f.
  4. Carefully drop the slices one by one into the oil until the surface of the pan is covered in a single layer of frying beet.
  5. Fry the chips for 8 to 10 minutes until the surface of the crisps is bubbled. The slices will not crisp entirely until they cool, so at this stage, remove them from the oil and drain on kitchen paper.
  6. Repeat this until all of your chips are cooked.
  7. As a serving suggestion, transfer the crisps to platters, sprinkle with a little coarse salt and some roughly chopped fresh rosemary.


Scroll to top

Kitchen Conversions

Convert:
Masses
to:
Volumes
to:
Temperatures
to:
Lengths
to: