How to Smoke Peppers – How to Make Smoked Chilli Flakes at Home

how to smoke chilli peppers,how to smoke jalapeno peppers,how to make smoked chilli flakes,homemade smoked chilli flakes,how to smoke and dry chillis,how to smoke and dry peppers at home,making smoked chilli flakes,makiing smoked pepper flakes,using the smoke daddy vortex,smoked chilli recipe,smoked peppers recipe,how to smoke chillis video,how to smoke peppers video,how to smoke chillis youtube,how to smoke peppers youtube


How to Smoke Peppers - How to Make Smoked Chilli Flakes at Home
Author: 
Recipe type: Smoking / Drying
 
Smoked chilli flakes add a whole new flavor to your food while also adding the heat. I am using Jalapeños, but you can use and peppers of your choice. To Provide the smoke, I am using the Smoke Daddy Vortex.
Ingredients
  • Jalapeño peppers
  • 20ml Bicarbonate of soda
  • 1 lt Water
Instructions
  1. Dissolve 20ml of bicarbonate of soda in a liter of cold water. The chillis will be soaked in this solution the preserve their color. Green and red chillis will darken as they smoke and dry, but will retain their characteristic color instead of turning an unsightly black.
  2. To prepare the peppers, cut of the stems and quarter them length-ways. Transfer the peppers to the bicarb solution and allow them to soak for 5 minutes.
  3. Drain the chillis and transfer them to stainless steel mesh sieves or spatter screens.
  4. A while back, I unboxed and introduced the Vortex passive smoke generator. This is what we're using today.
  5. Place the peppers on the right hand side of your barbecue, and the Vortex smoker near the center. Use your blow torch or a heat gun to set the Vortex smoking. In addition ignite the left hand side burner.
  6. Aldo note the probe thermometer on the right hand side. This helps to monitor the target temperature of 67c or 153f.
  7. Let the peppers smoke for a total of 4 hours.
  8. Remove the peppers from the barbecue. You will notice that they have shriveled significantly, but are not totally dried.
  9. At this stage, you can store the chillis in oil, or continue with the drying process by placing the peppers in an oven at 67c or 153f until totally dried. This can take anything from 4 to 10 hours.
  10. Once totally desiccated, chop the chillis into flakes and store indefinitely in an airtight container.

 

How to Make Authentic Falafel – Crispy Fried Garbanzo Bean/Chickpea Fritter Recipe!!!

falafel,recipe,hummus,falafel (dish),falafel recipe,chickpeas,falafel recipe easy,falafel ingredients,how to make falafel,how to make falafel at home,homemade falafel,falafel recipe lebanese,chickpea fritters,garbanzo beans,vegan recipes,vegetarian recipes,vegetarian food (cuisine),best falafel recipe,traditional falafel,falafel with tahini,best falafel with tahini,authentic falafel,best falafel with tahini sauce


How to Make Authentic Falafel - Crispy Fried Garbanzo Bean/Chickpea Fritter Recipe!!!
Author: 
Recipe type: Vegan / Vegetarian
Cuisine: Middle Eastern / Mediterranean
 
In our previous 2 episodes we covered tahini paste and hummus. Today we're making falafel with tahini sauce and hummus.
Ingredients
  • 450g Dry chickpeas / garbanzo beans
  • 1 Onion, chopped
  • 60ml Parsley
  • 5 Cloves garlic, chopped
  • 25ml All-purpose flour
  • 7.5ml Salt
  • 10ml Ground cumin
  • 5ml Ground coriander
  • 2.5ml Fine black pepper
  • 2.5ml Cayenne pepper
  • 1.25ml Ground cardamom
  • Oil for frying
  • Tahini paste and olive oil to thin
  • Hummus
Instructions
  1. Place the chickpeas in a large bowl and cover with twice the depth of water. You cannot use canned chickpeas, the recipe will fail. This recipe can be challenging and as a result, I have included a troubleshooting addendum below. Be sure to read this before starting.
  2. Cover the bowl with cling-wrap and allow this to stand overnight.
  3. The following day, drain the chickpeas and rinse them thoroughly.
  4. Transfer the chickpeas to your food processor along with the chopped onion, parsley, garlic, flour, salt, ground cumin, ground coriander, pepper, cayenne and cardamom.
  5. Process the mixture until it resembles couscous. Place it in a bowl, cover with cling-wrap and refrigerate for 2 hours.
  6. To form the falafel, use a 30ml measuring scoop. Compress the mixture into the scoop and shake the molded shape out into your hand. Gently shape it into a ball and transfer this to a platter.
  7. To make sesame coated falafel, roll the formed ball in sesame seeds scattered across a platter.
  8. Continue until all of the balls are formed.
  9. Half fill a large pan with oil and heat this over medium heat to 160c or 320f.
  10. Carefully drop the falafel into the oil and fry for 2 to 3 minutes per side until crispy and golden.
  11. Remove the falafel from the oil and drain and drain on kitchen paper.
  12. Serve the falafel on a bed of hummus. Thin the sesame paste with extra olive oil and pour this over the falafel. Garnish the plate with fresh coriander and serve immediately.
Troubleshooting
  1. If the balls will not hold together:
  2. ) Your chickpeas are too old
  3. ) The mixture has not been processed fine enough
To fix this
  1. ) Return the mixture to your processor and process until it resemble couscous
  2. ) If it still does not hold together, add 2-3 tablespoons of flour and 1-2 eggs and mix this into the mixture thoroughly


How to Make Authentic Hummus – Middle Eastern Chickpea Dip – Homemade Hummus Recipe!!!

hummus,recipe,how to make hummus,homemade hummus,how to make hummus dip,how to make hummus from scratch,how to make hummus with chickpeas,best hummus recipe,how to make hummus at home,how to make hummus south africa,how to make hummus easy,how to make hummus sauce,how to make hummus vegan,how to make hummus with tahini,how to make hummus from canned garbanzo beans,video recipe,simple hummus recipe,easy hummus recipe


How to Make Authentic Hummus - Middle Eastern Chickpea Dip - Homemade Hummus Recipe!!!
Author: 
Recipe type: Dipping Sauce
Cuisine: Middle Eastern
 
In our previous episode we made authentic tahini paste. Today we're going to use this to make authentic hummus.
Ingredients
  • 400g Can of chickpeas, drained and rinsed
  • 30ml Tahini paste
  • 1 Clove garlic
  • 2.5ml Salt
  • 45ml Olive oil
  • 25ml Lemon juice
  • Chopped coriander leaf and lemon zest to garnish
Instructions
  1. Thoroughly rinse the canned chickpeas and measure out the tahini paste, salt, extra virgin olive oil and lemon juice. Peal and roughly chop 1 clove of garlic.
  2. Place all of these ingredients into a tall jug and process until smooth using your stick blender. You can also do this in your food processor. If you're using stick blender lift the head of the blender to clear the blades after each pulse to avoid damaging the unit.
  3. Once you're happy with the texture, transfer the thick paste to a bowl. Drizzle this with a little extra olive oil and mix this in. Continue adding oil until you achieve your desired consistency.
  4. Serve dressed with a little chopped coriander, fresh lemon zest and a drizzle of olive oil.
  5. Stay tuned for our next episode where we're making authentic falafel, accompanied with sesame sauce and hummus.


How to Make Authentic Tahini Paste – Homemade Tahini, Quick & Easy!!!

vegetarian,tahini,mediterranean,how to make,middle east,tahini sauce,sesame,tahini paste,homemade tahini,how to make tahini paste,how to make tahini paste at home,how to make tahini paste video,how to make tahini paste from sesame seeds,how to make tahini paste youtube,how to make tahini paste from scratch,how to make tahini paste for hummus,olive oil,tahini (food),tahini (ingredient)


How to Make Authentic Tahini Paste - Homemade Tahini, Quick & Easy!!!
Author: 
Recipe type: Sauce
Cuisine: Middle Eastern / Mediterranean
 
Tahini paste originates in the Middle East and has gained wide popularity in almost every country of the world. It is one of the main ingredients in hummus, and can be thinned further to make a pourable sauce.
Ingredients
  • 125ml Hulled sesame seeds
  • 30ml Extra virgin olive oil
Instructions
  1. Measure the hulled sesame seeds and the extra virgin olive oil. I am going to process this with a stick blender which is ideal for small quantities, however you can do this in a small food processor, or of you have a large processor, double or triple the recipe to do this.
  2. Place the sesame in a pan over medium heat. Stir the seeds continuously to avoid burning. The toasting process will take 5 to 6 minutes. About halfway through, you will notice the seeds starting to clump together as a result of the oil being released.
  3. Towards the end, the seeds will be very fragrant and will have darkened to a golden color.
  4. Place the sesame in a tall jug and pour in 2 thirds of the oil. Process this with your blender until smooth.
  5. You will notice here that the paste is still a little thick, so Add the remaining oil. Process again to combine this.
  6. Pour the paste into a bowl for immediate use, or store it in an air-tight container in your refrigerator for a few months.
  7. Stay tuned for our next episode where we're using this sesame paste to make hummus.


Smoked Garlic Powder using Smoke Daddy’s Vortex Smoke Generator

how to smoke garlic,how to make smoked garlic powder,smoking garlic using the smoke daddy vortex,hot-smoked garlic,smoking and drying garlic,making smoked garlic in your smoker,using the vortex to smoke garlic,smoke daddy vortex smoker making smoked garlic,using the smoke daddy vortex smoker to make smoked garlic powder,smoked garlic powder recipe,smoked garlic powder video recipe,smoked garlic powder youtube,homemade smoked garlic powder,easy smoked garlic powder


Smoked Garlic Powder using Smoke Daddy's Vortex Smoke Generator
Author: 
Recipe type: Smoking
Prep time: 
Cook time: 
Total time: 
 
Okay, we've just had a look at the Smoke Daddy Vortex coming out of the box, now let's give it a test run. To do this, I am going smoke some garlic. Using a bit of heat from the barbecue, I am also going to dry the garlic out, then grind it to a powder.
Ingredients
  • Garlic (at least 2 full heads to make it worth your while)
Instructions
  1. To start, separate the heads of garlic. There are easier ways to this, but you actually want to remove the skins exactly like this for this procedure.
  2. To skin the cloves, cut the stem end off. Place the clove on the board and crush it by banging the knife blade down on the clove. Grab the pointed end of skin and the entire skin will simply slip off. Transfer the crushed clove to a mesh strainer or a splatter screen.
  3. Place the Vortex near the center of the barbecue. The burner to the left of the Vortex will be the only burner running. Notice my probe thermometer on the right. This will help me monitor my target temperature of 67c or 168f.
  4. Using a blow torch or heat gun ignite the one side of the circle on the Vortex. Swing the unit around 180 degrees and ignite the other side to get the double burn. Depending on your wood pellets, you may have to repeat this a couple of times.place the mesh basket of garlic near the thermometer, ignite the left-hand burner, close the lid, and you're on your way.
  5. Set a timer for 4 hours to time the process.
  6. After 4 hours, remove the garlic from the barbecue. It will be lovely and golden, with an aroma from heaven. Most of the garlic will be pretty dry by this stage, however, some of the thicker bit might still be a bit spongy. Pop this into your oven at 67c or 168f with the door slightly open and continue to desiccate the garlic until completely dry.
  7. Run the dried garlic bits in your spice grinder for a few seconds to reduce it to a powder.
  8. And here is all that is left of the pellets in the Vortex.... just a little clean ash. Simply empty this out, give the unit a rinse, and it's as good as new.


How to Pickle Jalapeño Peppers – Homemade Pickled Jalapeño Peppers Quick & Easy

How to Pickle Jalapeño Peppers,Homemade Pickled Jalapeño Peppers,quick pickled jalapeno peppers,easy pickled jalapeno peppers,make pickled peppers at home,bottled jalapeno peppers,pickling jalapeno peppers at home,how to bottle peppers,how to pickle peppers,making pickled jalapenos at home,pickled jalapenos easy recipe,pickled jalapenos video recipe,pickled jalapenos youtube


How to Pickle Jalapeño Peppers - Homemade Pickled Jalapeño Peppers Quick & Easy
Author: 
Recipe type: Pickles / Preserves
Cuisine: Mexican
 
Pickled jalapeños are a great way to preserve your crop. Apart from the preserving aspect, pickled jalapeños have an amazing flavor that only pickling reveals.
Ingredients
  • 200g Jalapeño Peppers
  • 200ml White wine vinegar
  • 30g White sugar
Instructions
  1. Snip off the stems from the jalapeños. Use a sharp paring knife to slice lengthways down the side of the chilies.
  2. Pack the chillies tightly into a suitable clean glass jar.pack the as tightly as possible.
  3. Add the sugar and wine vinegar to a small saucepan and bring this to a boil. Remove this from the heat and put it aside.
  4. Place the jar of chillies in a saucepan of hot water. This will acclimatize the glass to receiving the boiling hot vinegar syrup. If you skip this step, the jar may crack.
  5. Pour the syrup into the jar until the chillies are covered. Carefully put the lid on the jar, then allow this to cool in the hot water.
  6. Once cooled, place the pickled jalapeños in your refrigerator for at least a month before opening.


Homemade Apple Cider Vinegar – Make Real, Healthy Apple Cider Vinegar at Home!!!

Homemade Apple Cider Vinegar,how to make apple cider vinegar,simple homemade apple cider vinegar,how to make apple core vinegar,real homemade apple cider vinegar,proper apple cider vinegar recipe,recipe for making apple cider vinegar,video recipe apple cider vinegar,how to make apple cider vinegar youtube,youtube apple cider vinegar,making apple cider vinegar at home,easy apple cider vinegar recipe


Homemade Apple Cider Vinegar - Make Real, Healthy Apple Cider Vinegar at Home!!!
Author: 
Recipe type: Vinegar / Condiments
 
Apple cider vinegar is used in tons of different cuisines and despite the fact that there is a permanent glut of apples in the marketplace, cider vinegar is stupidly expensive. This is how to make it at home.
Ingredients
  • 1.5kg Apples (your favorite variety)
  • 1.5lt Pure water / mineral water (non-chlorinated)
  • 120g Sugar
Instructions
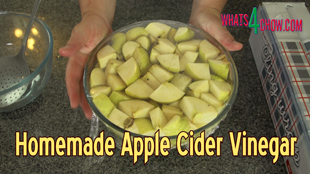
  1. Cut your apples into blocks, including the cores, and place this in a large non-reactive bowl. In another bowl, combine the sugar and mineral water. Don't use tap water as the chlorine in the water will inhibit the fermentation process. Stir the mixture until all of the sugar has dissolved.
  2. Pour the sugar solution over the apple and add a little more mineral water to top up if necessary. Cover the bowl with cling-wrap and prick a few tiny holes in the plastic to allow the CO2 to escape.
  3. Place this out of the way on your counter at room temperature. Let this stand for 7 to 10 days, stirring each day.
  4. Every day you will notice a froth on top of the bowl. This is the fermentation in progress. After 7-10 days, the mixture will have the aroma of an apple cider.
  5. Strain the fermented mixture to remove all of the solids. Pour the liquid into suitable sterilized containers.
  6. Cover the containers using multiple layers of cloth, secured with elastic bands. Place the jars in a dark cupboard for 6 weeks to mature.
  7. And there you have it, home made apple cider vinegar.


Honey Roasted Sweet Potato – Sticky Roasted Sweet Potato – Best Sweet Potato Recipe

sweet potatoes recipe,roasted sweet potatoes recipe,how to roast sweet potatoes,sticky sweet potatoes,sticky roast sweet potatoes,honey roast sweet potatoes,crispy sugar sweet potatoes,honey and cinnamon sweet potatoes,how to make sticky sweet potatoes,how to roast honey sweet potatoes,honey glazed sweet potatoes,best sweet potato recipe


Honey Roasted Sweet Potato - Sticky Roasted Sweet Potato - Best Sweet Potato Recipe
Author: 
Recipe type: Vegetable / Potatoes
Prep time: 
Cook time: 
Total time: 
Serves: 4
 
These golden sticky sweet potatoes will make a perfect accompaniment to any roast. Flavored with honey and cinnamon, all I can say is yum, yum....
Ingredients
  • 2 Large sweet potatoes
  • 60ml Olive oil
  • 60ml Honey
  • 10ml Cinnamon
  • Salt & Cracked Black Pepper to taste
Instructions
  1. To start, peel and cut the sweet potato into 1 inch cubes. Place the cubes in a large roasting pan.
  2. Combine the honey and olive oil in a jug.
  3. Heat this briefly in your microwave to thin it out and pour it over the potatoes. Stir the the pan until everything is well coated.
  4. Sprinkle the ground cinnamon over the potatoes and mix the pan again.
  5. Give this a generous grind of salt and cracked black pepper before popping it into a preheated oven at 190c or 375f.
  6. Roast the potatoes for 25 to 30 30 minutes, giving them a good stir every 10 minutes.
  7. Remove the potatoes from the oven and serve immediately.


How to Pickle Onions – Homemade Pickled Onions Recipe – Make Pickled Onions at Home!!!

how to pickle onions,homemade pickled onions,how to make pickled onions,making pickled onions at home,pickled onions recipe,homemade pickled onions recipe,making pickled onions in spicy vinegar,best pickled onions recipe,pickled onions recipe video,how to make pickled onions video,making crispy pickled onions at home recipe, easy pickled onions, how to pickle onions and cucumbers, how to pickle onions youtube


How to Pickle Onions - Homemade Pickled Onions Recipe - Make Pickled Onions at Home!!!
Author: 
Recipe type: Pickles and Preserves
 
With the festive season just over 2 months away now is the perfect time to start making pickled onions. These make a simple and tasty accompaniment to any meal and are the perfect ingredient to liven up salads.
Ingredients
  • 750g Pickling onions
  • 3 Tbs Salt
For the Spiced Vinegar
  • 750ml White wine vinegar
  • 110g Sugar
  • ½ Tsp Coriander seeds
  • ½ Tsp Mustard seeds
  • ½ Tsp Black peppercorns
Instructions
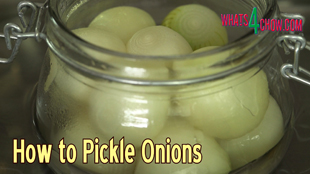
  1. To start, top and tails the onions. Place the onions in a large heat-proof bowl and pour boiling water over them until covered. Allow these to stand for 15 to 20 minutes.
  2. After this time the skins will slip from the onions with ease.
  3. Transfer the skinned onions to a dish cloth and pat them dry.
  4. Place the onions in a clean, dry bowl and sprinkle the salt over them. Cover the bowl with cling-wrap and allow these to stand for at least 8 hours, preferably overnight.
  5. The following day, combine the sugar, coriander seed, mustard seed and black peppercorns. Place these in a pot along with the white wine vinegar. Bring this to a boil, lower the heat and allow it to simmer for 30 minutes.
  6. In the meantime, unwrap the onions and rinse the salt off with cold water. Transfer the onions to sterilized jars.
  7. Strain the vinegar mixture through a sieve. Place the jars of onions in a pan of hot water and pour the vinegar solution into the jars until the onions are covered.
  8. Close the jars and allow them to cool in the pan. Once cooled, place the jars in a cool, dry place to age for at least 2 months before opening. After opening the jars, they should be stored in the refrigerator.


How to Make KFC Coleslaw – KFC Coleslaw Recipe, The REAL DEAL!!!

kfc coleslaw recipe, kfc coleslaw salad recipe, kfc coleslaw calories, kfc coleslaw carbs, kfc coleslaw recipe without buttermilk, kfc coleslaw nutrition info, kfc coleslaw secret recipe, copycat kfc coleslaw recipe, copycat kfc coleslaw, kentucky fried chicken, kentucky fried chicken coleslaw,how to make kfc coleslaw at home,homemade kfc coleslaw,kfc coleslaw salad recipe easy,quick kfc coleslaw


How to Make KFC Coleslaw - KFC Coleslaw Recipe, The REAL DEAL!!!
Author: 
Recipe type: KFC / Fast Food / Salad
Cuisine: American
Prep time: 
Total time: 
Serves: 6-10
 
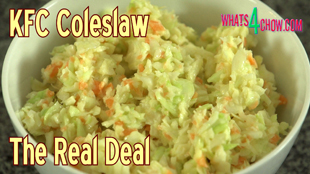
KFC coleslaw is quite unique in its flavor, with a thin, tangy sauce that barely glazes the cabbage. This is how to make it at home!!!
Ingredients
  • 600g Green cabbage, cut into blocks, thick bits removed
  • 100g Carrot, peeled and chopped
  • 30ml Yogurt or cultured buttermilk
  • 30ml Apple cider vinegar
  • 90ml Tangy mayonnaise
  • 2.5ml Salt
  • 5ml Sugar
Instructions
  1. Cut the cabbage into blocks, roughly chop the carrots, measure out the yoghurt or cultured buttermilk, the tangy mayonnaise, salt, sugar and apple cider vinegar.
  2. In a jug, combine all of the ingredients except the carrot and cabbage. Stir this until the salt and sugar have dissolved.
  3. Place the carrot in your food processor and chop this until fine. Add the cabbage to the processor and pulse this until almost fine.
  4. Pour in the sauce and continue to pulse this until it is finely chopped.
  5. The added peppery flavor comes from allowing this to age overnight covered in the refrigerator.
  6. Like any coleslaw, this is best served well chilled.


KFC Mash & Gravy – How to Make KFC Mash & Gravy at Home!!! The REAL Deal!!!

kfc, gravy, kfc mash gravy, kfc mash gravy ingredients, kfc mash gravy recipe, kfc mash potato gravy, kfc mash n gravy recipe, kfc mash and gravy uk, kfc mash n gravy, kfc mash n gravy ingredients, how to make KFC gravy,how to make KFC mash and gravy,recipe and ingredients for KFC mash and gravy,kentucky mash and gravy,kentucky fried chicken gravy recipe,make kfc gravy at home,homemade kfc gravy,kfc mash & gravy


KFC Mash & Gravy - How to Make KFC Mash & Gravy at Home!!! The REAL Deal!!!
Author: 
Recipe type: KFC / Fast Food
Cuisine: American
Prep time: 
Cook time: 
Total time: 
Serves: 4-6
 
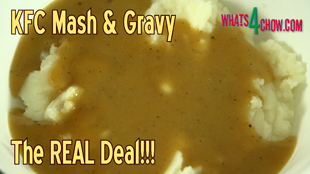
Here's another legendary KFC Dish - KFC Mash & Gravy!!! This recipe is the REAL deal - FIRST from Whats4Chow.com!!!
Ingredients
For the Herb & Spice Mix
  • 15ml Paprika
  • 10ml Salt
  • 5ml Dried Sage
  • 5ml Garlic powder
  • 5ml Dried oregano
  • 5ml Cayenne pepper
  • 5ml Ground black pepper
  • 5ml Dried basil
  • 5ml Dried marjoram
  • 5ml Dried coriander leaves
For the Gravy
  • 35g Butter
  • 20g All-purpose flour
  • 5ml of the powdered herb & spice mix (above)
  • 150ml Chicken stock
  • 150ml Beef stock
Instructions
  1. Combine all of the herbs and spices and mill them to a fine powder in your spice mill. Take 1 teaspoonful of the powder and mix it into the all-purpose flour. The remaining spice powder can be stored in an airtight container.
  2. In addition, measure out the butter and combine the chicken and beef stock.
  3. Heat a small saucepan over low to medium heat and add the butter. Once the butter has melted, pour in the seasoned flour. Stir this in until smooth and allow it cook for 60 seconds when it starts bubbling.
  4. Remove the pan from the heat and pour in the stock. Stir this until smooth, then return the pan to the heat.
  5. Bring this to a simmer stirring continuously until the gravy has thickened. This should only take about 3 minutes. Remove the pan from the heat. Remember that different brands of flour may thicken differently. If your gravy is too thick, thin it down to the desired consistency with a little more stock.
  6. To serve, mix your mash according to the package instructions and serve this to 4 bowls. Pour the gravy over each portion and serve immediately.


4th of July Cookout – Cheesy Potato Bombs on the Barbecue – Grilled Cheese & Bacon Potatoes

barbecue baked potatoes,baked potatoes on the barbecue,cheesy barbecue potatoes,cheese and bacon barbecue potatoes,how to bake potatoes on the barbecue,easy barbecue baked potatoes, barbeque side dish recipes, cook barbeque side dishes, barbeque side dishes, barbeque side dish grilling, barbecue baked potatoes weber, grill baked potatoes, grill baked potatoes in foil, grill baked potatoes time, baked potato (dish)


4th of July Cookout - Cheesy Potato Bombs on the Barbecue - Grilled Cheese & Bacon Potatoes
Author: 
Recipe type: Potato / Barbecue
Prep time: 
Cook time: 
Total time: 
 
Awesome Barbecue baked potatoes filled with cheese & wrapped in bacon!!! These barbecue baked potatoes are quick and easy and will grace any occasion!!!
Ingredients
  • Medium size potatoes
  • 1 Slice streaky bacon for each potato
  • A Block of mature cheddar cheese
  • Salt and pepper to season
  • Foil to wrap
Instructions
  1. Place the potatoes in a pot, cover with water, and bring these to a boil over high heat. Allow these to boil for 10 minutes.
  2. Drain the potatoes in your colander and cool them under cold running water.
  3. Cut a block of cheese to the average thickness of the potatoes, and count out as many slices of bacon as you have potatoes.
  4. Use your apple corer to make a tunnel through the potatoes. Save the potato core.
  5. Use the corer to press out a core of cheese and press this into the potato.
  6. Wrap a slice of bacon around the potato to cover both holes and contain the cheese. Continue until all of the potatoes are assembled.
  7. Wrap the potato bombs in foil and put these aside until you're ready to barbecue.
  8. Heat your barbecue to medium high heat and grill the potatoes over direct heat for 10 minutes, turning once halfway through.
  9. While these grill, heat a half filled pan of oil to 180c or 350f and deep fry the potato cores until golden.
  10. Unwrap the potatoes, transfer to serving platters and top each one with its own crispy deep fried core before serving.


Scroll to top

Kitchen Conversions

Convert:
Masses
to:
Volumes
to:
Temperatures
to:
Lengths
to: