Oven Baked Mashed Potatoes – Crispy on the Outside, Tasty and Creamy on the Inside!!!!!

oven baked mashed potatoes, crispy oven baked mash potatoes, how to make oven baked mashed potatoes, crisp oven baked mash potatoes, home made oven baked mash potatoes, oven baked mash potatoes recipe, oven baked mash potatoes youtube, oven baked mash potatoes video recipe, best oven baked mash potatoes recipe, oven baked mash potatoes with salami,


Oven Baked Mashed Potatoes - Crispy on the Outside, Tasty and Creamy on the Inside!!!!!
Author: 
Recipe type: Potatoes
Prep time: 
Cook time: 
Total time: 
Serves: 8
 
Today we're baking a very special accompaniment to grace your plate along your main dish. These oven baked mash potatoes are beautifully crispy on the outside, and super-creamy and tasty on the inside.
Ingredients
  • 800g Potatoes
  • 2 Eggs
  • ½ Onion, diced
  • 250ml Salami, diced
  • 30g Butter
  • Salt and pepper to season
  • 60ml Fine breadcrumbs
Instructions
  1. Peel the potatoes and cut them into cubes. Transfer them to a pot and pour in enough boiling kettle water to cover.
  2. Place the pot over high heat, bring it to a boil and let this to continue until the potatoes are very tender. The timing for this step will vary depending on the variety of potatoes you're using.
  3. While the potatoes cook, peel and dice the onion. Fry this gently in a little butter until tender, about 5 to 6 minutes.
  4. Cut the salami into small cubes, measure out the butter and crack 2 eggs.
  5. You will also need salt and pepper to season.
  6. Once the potatoes are tender, drain the water and transfer the potatoes to your food processor. Add all of the other ingredients as well, and season liberally with salt and pepper.
  7. Process this until the mash is smooth. Notice that most of the salami bits are still in tact.
  8. Transfer the mash to piping bag fitted with a large star nozzle.
  9. Place a cylinder mold on a baking sheet and sprinkle fine breadcrumbs into mold until the base in the cylinder is covered.
  10. Pipe the mash into the cylinder until it is half filled, about an inch thick.
  11. Sprinkle more breadcrumbs over the top, this time more sparingly so as not to hide the piping pattern.
  12. Lift the mold upwards leaving the mash behind, then continue with next tower.
  13. Bake the mash towers in a preheated oven at 250c or 480f for 15 to 20 minutes until lightly golden and crispy.
  14. And there it is.... tasty, crispy oven baked mash towers.


Cilantro Pesto Spaghetti – Simple Molecular Gastronomy – Perfect Garnishes using Agar Agar!!!

agar agar,molecular gastronomy,molecular gastronomy spaghetti,how to make spaghetti from liquids,agar agar spaghetti,how to use agar agar,simple molecular gastronomy,using agar agar to make spaghetti,fancy garnishes,fancy plate dressings,cilantro pesto spaghetti,molecular gastronomy at home,homemade molecular gastronomy pesto spaghetti


Cilantro Pesto Spaghetti - Simple Molecular Gastronomy - Perfect Garnishes using Agar Agar!!!
Author: 
Recipe type: Molecular Gastronomy
 
This molded spaghetti works brilliantly as garnish on steaks, chicken and salads. The process falls into the category of molecular gastronomy, however it is nowhere as complicated as it sounds. This process will work with any liquid, including liqueurs, wines, vinegars and syrups, provided you keep to the ratio of 200ml liquid to 2.5ml agar agar. Agar agar is a specialized thickener, and can be found at almost any health store.
Ingredients
  • 100ml Clear chicken stock
  • 70ml Mayonnaise
  • 30ml Worcestershire sauce
  • 2.5ml Cayenne pepper
  • Generous handful fresh cilantro / coriander
  • 2.5ml Agar Agar
Instructions
  1. Combine the chicken or vegetable stock, mayonnaise, Worcestershire sauce, agar agar, cayenne pepper and cilantro.
  2. Use your stick blender to zap this until fine.
  3. Transfer this to a small saucepan and bring it to a simmer for 60 seconds.
  4. Take a length of polyethylene piping and coil it up.
  5. Fill another container with very cold water.
  6. Place one end of the coiled pipe in the pesto and suck the pesto up the pipe. You can use your mouth or a suitably sized syringe to do this.
  7. Stop when you have sucked up half of the liquid.
  8. Plunge the coil into the cold water bath for 3 minutes, holding the ends out of the water.
  9. Remove the pipe from the water.
  10. Serve your main ingredient, be it steak or otherwise and spoon some of the leftover pesto over the steak.
  11. Hold one end of the pipe over the platter and start blowing on the other end.
  12. As the pesto spaghetti emerges from the pipe, direct the front end of the pipe to place the spaghetti where you want it.
  13. Finish the garnish with a little extra cilantro and you're done.
  14. And there we have a succulent steak topped with 3 totally different textures of cilantro pesto. This quantity of pesto will garnish 2 steaks.


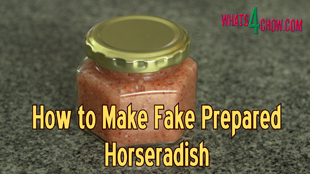
How to Make Fake Horseradish – Fake Prepared Horseradish Recipe

prepared horseradish,how to make prepared horseradish,how to pickle horseradish,how to make fake horseradish,how to make fake pickled horseradish,how to make fake prepared horseradish,homemade horseradish,horseradish sauce,making fake horsradish at home,preserving horseradish,feaux horseradish,cheap horseradish


How to Make Fake Horseradish - Fake Prepared Horseradish Recipe
Author: 
Recipe type: Sauce
Prep time: 
Total time: 
 
Prepared horseradish is pretty hard to find in some countries, and when you can find it, it's ridiculously expensive. This is largely due to the labor that goes into the cleaning and preparation before pickling. Today we're looking at a way to make fake horseradish that tastes just like the real thing, and apart from the difference in color, nobody will be able to tell the difference.
Ingredients
  • 500g Garden radish (regular radishes)
  • 200ml White wine vinegar
  • 2.5ml Salt
  • 1.25ml Citric acid
  • 45ml Wasabi powder
  • 50ml Sherry
Instructions
  1. Top and tail the radishes and cut them into quarters.
  2. Measure out the citric acid, salt, white wine vinegar, sherry and wasabi powder.
  3. Place all of the ingredients in your food processor and process until fine.
  4. Package the horseradish in suitable sterilized bottles and place in your refrigerator to mature for at least a week before consuming.


How to Make Mushroom Jerky – How to Make Mushroom Biltong – Vegan and Vegetarian Mushroom Jerky

how to make mushroom jerky,how to make mushroom biltong,homemade mushroom jerky,homemade mushroom biltong,vegetarian mushroom jerky,vegetarian mushroom biltong,vegan mushroom jerky,vegan mushroom biltong,making mushroom jerky at home,making mushroom biltong at home,mushroom jerky snack,mushroom biltong snack


How to Make Mushroom Jerky - How to Make Mushroom Biltong - Vegan and Vegetarian Mushroom Jerky
Author: 
Recipe type: Mushroom / Jerky / Biltong
 
Mushroom jerky makes a great tasty snack, and works brilliantly chopped and sprinkled over salads and soups. With the exception of the drying time, mushroom jerky is quick and really simple to make.
Ingredients
  • 4 Large brown mushrooms (or Porcini)
  • 45ml Worcestershire sauce
  • 45ml Light soy sauce
  • 60ml Maple syrup (can substitute regular golden syrup)
  • 60ml Cider vinegar
  • 10ml Chilli powder
  • 2.5ml Smoked paprika
Instructions
  1. Combine the Worcestershire sauce, light soy sauce, maple syrup, cider vinegar, chilli powder and smoked paprika in a jug and stir this until well combined.
  2. You will need large brown mushrooms, or porcini mushrooms as the have a well defined, robust flavor.
  3. Cut the mushrooms into slices 12mm or a half inch thick.
  4. Place the mushroom slices in a large non-reactive pan and pour the marinade mixture over the mushrooms.
  5. Use a basting brush to pick up marinade from the pan and brush this over any spots you may have missed.
  6. Cover the pan with cling-wrap and place this in your refrigerator overnight.
  7. The following day, transfer the mushroom slices to a rack in another pan.
  8. Set the temperature of your oven to 50c or 122f and place the tray in the oven.
  9. Leave the oven door slightly open.
  10. It will take around 10 hours for the mushrooms to dry. You want to be pliable and chewy, not bone dry.
  11. And there we have it, a tasty, chewy wonderful batch of mushroom jerky.


How to Make Fake Roast Potatoes – The Quickest Roast Potatoes Ever!

how to make roast potatoes,quick roast potatoes,easy roast potatoes,fake roast potatoes,the quickest way to make roast potatoes,perfect roast potatoes,perfect fake roast potatoes,fried roast potatoes,rustic roast potatoes,rough roast potatoes,crispy roast potatoes,golden roast potatoes


How to Make Fake Roast Potatoes - The Quickest Roast Potatoes Ever!
Author: 
Recipe type: Potatoes
Prep time: 
Cook time: 
Total time: 
Serves: 4-8
 
A few episodes back when we quick roasted a sugar chilli pork neck, I mentioned that I'd share the secret to quick roast, or fake roast potatoes. The question is why would you do this? Firtsly, when your main roast is big, you may not have space in the roasting pan for roast potatoes. Secondly, if your roasting time is shorter than normal, it is not practical to roast potatoes.... this solves the problem. Thirdly, some potatoes are just not meant for roasting, whether it be that they are glassy, or too wet. And finally, these potatoes are just simply awesome.
Ingredients
  • 8 x Medium potatoes (any variety)
  • 15ml Kosher or Himalayan rock salt
  • 15ml Dried garlic granules
  • 15ml Dried chilli flakes
  • Oil for frying
Instructions
  1. To start, peel and cut your potatoes into chunks. I've used medium size potatoes and cut them into quarters.
  2. Place the potatoes in a pot and add 15ml of kosher salt, 15ml of dried garlic granules, and 15ml of dried chilli flakes.
  3. Pour in enough boiling kettle water to cover the potatoes.
  4. Place the pot over high heat and boil the potatoes until very tender. This can take anything from 15 to 25 minutes.
  5. Test the tenderness with a toothpick. When the toothpick slides easily through past the center of a potato chunk you're ready.
  6. Place the lid on the pot slightly offset and pour off the liquid.
  7. Place the lid back on the pot and shake the potatoes back and forth in the pot to rough them up.
  8. From this point you can finish your potatoes off in 2 ways. If your doing a short roast, place the potatoes in your roasting tin with your main ingredient and roast in a preheated oven at 250c or 480f for 60 minutes until crisp and golden. You can see an example of this in our salt and vinegar roast potatoes video.
  9. For true fake roast potatoes, heat a half filled wok of oil to 180c or 350f.
  10. Carefully scoop the potatoes into the oil and allow them to fry for 15 to 20 minutes until super-crispy and golden. Give the potatoes a gentle stir just after adding them to the oil, to separate the pieces, then simply let them fry away, stirring gently every 5 minutes.
  11. And there it is... the most amazing fake roast potatoes with a super crispy outside and a beautifully smooth, soft and silky inside.
  12. All that remains is to serve.


Moroccan Style Potato Salad using Ras al Hanout – Creamy Middle Eastern Potato Salad

potato salad,potato salad recipe,potato salad recipe video,potato salad youtube,moroccan potato salad,moroccan style potato salad,how to make potato salad,middle eastern potato salad,potato salad ras al hanout,ras al hanout spice blend,how to make ras al hanout,best potato salad recipe,homemade potato salad,making potato salad at home,making ras al hanout,moroccan spice blend recipe


Moroccan Style Potato Salad using Ras al Hanout - Creamy Middle Eastern Potato Salad
Author: 
Recipe type: Potatoes
Cuisine: Moroccan
 
A couple of episodes back I featured Moroccan chicken tagine using the signature Moroccan spice blend Ras al Hanout. Today we're using the same spice blend to make an amazing Moroccan flavored potato salad.
Ingredients
For the Ras al Hanout Spice Blend (Grind everything until fine in your spice grinder)
  • 7.5ml Ground cumin
  • 7.5ml Ground ginger
  • 7.5ml Turmeric
  • 7.5ml Salt
  • 6.25ml Ground cinnamon
  • 10ml Whole black peppercorns
  • 5ml Ground white pepper
  • 3.75ml Ground coriander seed
  • 7.5ml Chilli powder
  • 7.5ml Whole allspice berries
  • 3.75ml Ground nutmeg
  • 2.5ml Ground cloves
For the Recipe
  • 6 Medium potatoes (about 1kg)
  • Handful of garlic chives
  • 150g Caramel condensed milk
  • 150g Tangy mayonnaise
  • 150g Cultured sour cream
  • 1 Medium onion
  • Parsley to garnish
  • 45ml of the Ras al Hanout spice blend
  • 5ml Dried chilli flakes
  • Zest of 1 large lemon
  • 30ml Butter
Instructions
  1. Peel the potatoes and cut them into bite-size cubes.
  2. Place these in a medium size pot and pour in enough boiling kettle water to cover.
  3. Place the pot over high heat and cook the potatoes until tender. You can check the tenderness with a skewer.
  4. Drain the potatoes and put them aside.
  5. Dice the onion and chop the chives.
  6. Use your scale to weigh out the caramel condensed milk, mayonnaise and sour cream.
  7. Measure out the Ras al Hanout, dried chilli flakes and butter.
  8. Use the fine grated to grate the zest of one large lemon.
  9. Heat a pan over medium heat and add the butter.
  10. Once the butter is bubbling add the Ras al Hanout and chilli flakes. Stirfry this until very fragrant.... about 30 seconds.
  11. Add the lemon zest and stir this in.
  12. Pour in the caramel, mayonnaise and sour cream and stir this around until everything is well combined. This will take a minute or 2.
  13. Add the onions and chives and stir these in.
  14. Season the sauce with salt and cracked black pepper to taste.
  15. Pour the sauce into the potatoes and stir it in until everything is well coated.
  16. Cover and refrigerate until well chilled before serving.
  17. Serve garnished with a generous dose of fresh parsley and enjoy.


Carrot & Ginger Soup – The Perfect Soup for Winter or Summer.

carrot soup,carrot and ginger soup,carrot and ginger soup vegan,carrot and ginger soup rachel allen,carrot and ginger soup calories,carrot and ginger soup paleo,carrot and ginger soup jamie oliver,carrot and ginger soup test kitchen,carrot and ginger soup recipe,healthy carrot ginger soup,vegetable soup recipes,carrot soup recipe,carrot and ginger soup spicy,carrot and ginger soup with coconut milk


Carrot & Ginger Soup - The Perfect Soup for Winter or Summer.
Author: 
Recipe type: Soup
Prep time: 
Cook time: 
Total time: 
Serves: 4-6
 
This soup is smooth, creamy and thick and can be served hot or cold. This makes it perfect for warming winter nights or cooling summer days.
Ingredients
  • 30g Coconut oil
  • 1 Large onion finely chopped
  • 10cm (4 inches) Ginger peeled and thinly sliced
  • 3 Cloves garlic, peeled and thinly sliced
  • 1kg Carrots, roughly chopped
  • 1lt (4 cups) Chicken stock (or vegetable stock if you're vegetarian or vegan)
  • 500ml (2 cups) Water
  • Sour cream and fresh dill to garnish
Instructions
  1. Finely chop the onion and thinly slice the garlic and fresh ginger.
  2. Roughly chop the carrots and measure out the chicken stock and coconut oil.
  3. Melt the coconut oil over medium high heat and add the onion, garlic and ginger. Reduce the heat to medium low and sauté the vegetables for 8 to 10 minutes until the onion is absolutely tender.
  4. Add the carrots, stock and 2 cups of water to the wok.
  5. Increase the heat to bring this to a boil, reduce the heat and simmer the mixture for 35 to 40 minutes until the carrot is absolutely tender.
  6. Turn off the gas, or remove the wok from the heat.
  7. Use your stick blender to machine the soup until it is very smooth. You can also do this in a stand blender, however you will need to cool the mixture substantially before doing this, and then reheat it after blending.
  8. Serve the soup hot or chilled topped with sour cream and sprigs of fresh dill.


How to Make TVP Vegetarian Burger Patties – Textured Vegetable Protein Burger Patties

tvp burger patties,textured vegetable protein burger patties,how to make tvp burger patties,how to make burger patties using textured vegetable protein,how to use tvp,how to use texture vegetable protein,using tvp to make vegetarian burger patties,making vegetarian burger patties using tvp,making vegan burger patties using tvp,using tvp to make vegan burger patties,how to make vegetarian burger patties,how to make vegan burger patties,tvp burger patty recipe,textured vegetable protein burger patty recipe,recipe using tvp,guide to using tvp,textured vegetable protein burgers


How to Make TVP Vegetarian Burger Patties - Textured Vegetable Protein Burger Patties
Author: 
Recipe type: Vegetarian / Vegan
Serves: 6
 
TVP or textured vegetable protein has become an important source of protein for vegetarians and vegans. It is also used in sausages and other meat products as a moisture retainer, as well as in powdered form in many breads. Today we're making TVP burger patties.
Ingredients
  • 2⅔ Cup TVP
  • 500ml Vegetable stock
  • 60ml Tomato sauce / ketchup
  • 20ml Marmite / Vegamite (Yeast extract spread)
  • 10ml Garlic granules
  • 10ml Chilli flakes
  • 30ml Light soy sauce
  • 10ml Salt
  • ½ Cup Strong white bread flour
Instructions
  1. Combine the tomato sauce, Marmite or Vegamite, garlic granules, chilli flakes, salt and light soy sauce with the vegetable stock.
  2. Pour the mixture into the TVP, stir to combine, cover the mixing bowl and allow this to stand for 30 minutes.
  3. After 30 minutes all of the liquid will have been completely absorbed by the TVP.
  4. Start adding the flour bit by bit, stirring it in thoroughly after each addition.
  5. Once all the flour is added you will notice that the TVP is quite sticky, and looks and behaves almost like real minced meat.
  6. Use your burger press to press out patties a half inch thick by 4 inches in diameter. You can also form the patties by hand but this will take far longer and is quite messy.
  7. Drop the patties onto squares of foil or baking parchment and transfer them to a platter.
  8. Cover the platter with cling-wrap and transfer this to your freezer.
  9. Once the patties are totally frozen, you can fry them over medium heat in a little butter for 4 to 5 minutes per side and they are nicely browned.
  10. Transfer the fried patties to buns and serve immediately.


Super Crispy McDonald’s Style Hash Browns – Golden Crispy Hash Browns at Home!!!

hash browns,how to make hash browns,hash browns recipe,hashbrowns,how to make,hash browns mcdonalds,hash browns food wishes,hash browns from scratch,hash browns homemade,mcdonalds,fast food,hash browns (dish),hash brown recipe,homemade hash browns,how to make fast food stlye hash browns,nicko's kitchen hash browns,mcdonalds hash browns,potato hash browns,hash browns best,breakfast hash browns


Super Crispy McDonald's Style Hash Browns - Golden Crispy Hash Browns at Home!!!
Author: 
Recipe type: Potatoes / Fast Food
Cuisine: American
 
Hash browns make an amazing snack, accompaniment or garnish while adding a delicious crunch to any meal. These hash browns are particularly crispy and crunchy and unlike most hash browns the crispiness lasts for ages.
Ingredients
  • 4 Medium potatoes
  • 60ml White vinegar
  • 60ml Corn starch
  • 60ml Rice flour
  • 5ml Ground white pepper
  • 5ml Garlic flakes
  • 5ml Salt
  • Oil for frying
Instructions
  1. Peel the potatoes and grate them using the coarse side of the grater.
  2. Place the grated potato in a mixing bowl and add the vinegar. Mix this in briefly and allow the potato to stand for a couple of minutes.
  3. Pour in enough boiling kettle water to cover the potato and allow this to stand for 5 minutes. The vinegar liberates the starch from the potato while the hot water dissolves the separated starch. You will actually see the milky starch in the water.
  4. Drain the shredded potato and rinse it thoroughly under cold running water. Squeeze most of the excess water from the potato and return it to the mixing bowl.
  5. Pour in the cornstarch and rice flour a little at a time, mixing it in thoroughly after each addition.
  6. Pour in the ground white pepper, garlic flakes and salt and mix these in thoroughly.
  7. Pour the potato out into an 8 inch or 20cm square baking tin.
  8. Spread the mixture out evenly compressing it and flattening it as you go.
  9. Use the back of a spoon to smooth out the surface.
  10. Transfer the pan to your refrigerator for 60 minutes. This chills the mixture while the flour autolyses.
  11. After 60 minutes transfer the pan to your freezer for 30 minutes.
  12. Remove the pan from the freezer and turn the potato out onto a chopping board.
  13. Use a sharp knife to cut the potato into 9 equal squares. You can leave them as squares, or cut each one in half diagonally to make triangles.
  14. Fill a large pan with oil to a depth of a half inch and heat this to 180c or 350f.
  15. Carefully drop the hash browns into oil and fry them for 15 to 20 minutes turning every few minutes to ensure even coloring.
  16. Remove the hash browns from the oil using a slotted spoon and drain any excess oil on kitchen paper.
  17. Season the hash browns with fine salt and serve immediately.


Super-Crispy Deep-Fried Onion Rings. How to Make Perfect Fried Onion Rings!!!

crispy onion rings,how to make onion rings,deep fried onion rings,deep fried onion rings recipe,deep fried onion rings without batter,deep fried onion rings panko,deep fried onion rings calories,deep fried onion rings recipe with buttermilk,deep fried onion rings beer batter,deep fried onion rings recipes by paula deen,deep fried onion rings flour coating,how to make crispy fried onion rings,how to make homemade onion rings


Super-Crispy Deep-Fried Onion Rings. How to Make Perfect Fried Onion Rings!!!
Author: 
Recipe type: Vegetables / Deep-fried
 
Onion rings can be the best or worst accompaniment for burgers or grills. Unfortunately more often than not battered onion rings turn out as oil soaked UFO's that repeat on you for days afterwards. This recipe gives the foolproof solution, and the perfectly crispy, tasty and aromatic onion rings ever.... with much less oil residue.
Ingredients
  • 1 Large onion
  • 250ml Full-cream milk
  • 45ml Cornflour
  • Oil for frying
For the Coating
  • 250ml All purpose flour
  • 10ml Garlic powder
  • 5ml Hot smoked paprika
  • 5ml Salt
  • 2.5ml Hot English Mustard powder
  • 2.5ml Ground white pepper
Instructions
  1. Top and tail and peel the onions and slice them into half inch thick rings. Carefully remove the first three rings from each round. You can use the inner rings for salads or soups.
  2. For the coating, combine the all purpose flour, garlic powder, hot smoked paprika, salt, hot English mustard powder and ground white pepper.
  3. In a jug, whisk together the cornflour and milk and pour this into a dish.
  4. Dip each onion ring into the milk solution then dredge it in the flour mixture. Transfer the rings to a platter.
  5. Once the first coating is complete, sprinkle some of the flour mixture over a large platter. This is where the coated onions will set, and the layer of flour prevents the coating from sticking to the platter and getting damaged.
  6. Dip each ring in the milk solution again, then into the flour to get a good solid coating. Transfer the coated rings to the platter. Allow the coated onions to set for 20 minutes.
  7. Fill a large pan with oil to a depth of 1 inch and heat this to 180c or 350f.
  8. Carefully drop the rings into the oil and fry them for 5 to 6 minutes turning halfway through.
  9. Remove the rings from the oil with a slotted spoon and drain any excess oil on kitchen paper.
  10. Serve the onion rings immediately, or keep them warm in your oven at 70c or 158f until required.


Salt & Vinegar Roast Potatoes – How to Make the Best Roast Potatoes Ever!!!

salt and vinegar roast potatoes,how to make salt and vinegar roast potatoes,salt & vinegar roast potatoes recipe,salt and vinegar roast potatoes video,roast salt and vinegar potatoes,best roast potatoes recipe,how to roast the best potatoes,roasting salt and vinegar potatoes,how to make the best roast potatoes,make salt & vinegar roast potatoes at home,simple salt and vinegar roast potates recipe,easy salt and vinegar roast potatoes recipe


Salt & Vinegar Roast Potatoes - How to Make the Best Roast Potatoes Ever!!!
Author: 
Recipe type: Vegetable / starch / roast
Serves: 4-6
 
I am sure everyone will agree that one the best things about a roast is the roast potatoes. These roast potatoes raise the bar to new heights.... super creamy on the inside, super crispy outside, and infused throughout with a wonderful salt and vinegar flavor and aroma.
Ingredients
  • 6-8 Medium potatoes
  • 1lt Chicken stock
  • 200ml Brown grape vinegar
  • 80ml Oil
  • Salt for seasoning
Instructions
  1. Peel the potatoes and cut them into blocks. Place the potatoes in a 1 gallon pot and pour in the brown grape vinegar and chicken stock.
  2. Place the pot over high heat and bring it to a boil. Boil the potatoes until they are very tender. This can take anything from 15 to 30 minutes depending on what cultivar of potatoes you're using.
  3. Place the lid on the pot, just slightly off-center and drain the liquid from the pot.
  4. Place the lid securely on the pot and shake it up to roughen the surface of the potatoes.
  5. Pour in the oil and shake it up again to coat all of the potatoes.
  6. Pour the potatoes out of the pot into a roasting tin.
  7. Spread them out evenly and grind a generous dose of salt over the potatoes.
  8. Roast the potatoes in a preheated oven at 250c or 480f for 30 minutes.
  9. Remove the potatoes from the oven and stir them around. Grind a little more salt over the pan and return to the oven.
  10. Continue to roast for a further 30 minutes. After 20 minutes open the oven door slightly. This allows moisture to escape and helps to really crisp the potatoes.
  11. Remove the potatoes from the oven and serve immediately.


How to Make Jalapeno Tabasco Sauce – Making Green Tabasco Sauce at Home!!!

how to make tabasco sauce,how to make jalapeno tabasco sauce,how to make green tabasco sauce,tabasco sauce recipe,tabasco sauce how to make it,making homemade tabasco sauce,making tabasco sauce at home,homemade tabasco,hot chilli sauce recipe,hot pepper sauce recipe,jalapeno pepper sauce recipe,jalapeno sauce recipe video,jalapeno sauce youtube,best tabasco sauce recipe


How to Make Jalapeno Tabasco Sauce - Making Green Tabasco Sauce at Home!!!
Author: 
Recipe type: Sauce / Hot Pepper Sauce / Tabasco
Cuisine: American
 
Tabasco sauce is legendary and has become a household name in just about every country across the world. Today we're going to make the Jalapeño version of Tabasco, but if you have access to Tabaso chillis, you can use these if you prefer. This recipe does not take 3 years like the original Tabasco recipe does, but will yield a sauce that tastes almost exactly the same as the legend.
Ingredients
  • 375g Jalapeno peppers
  • 7g Prague powder #2
  • 190ml White grape vinegar
  • 30ml White grape vinegar
  • 15ml Tapioca flour (if you use xanthum gum, follow the package instructions)
  • Extra vinegar for the relish (to use the pulp)
Instructions
  1. Weigh out the peppers and the Prague powder. The Prague powder will inhibit and growth of unfriendly bacteria and preserve the color of the chillis during fermentation.
  2. Cut the stems away from the peppers and slice them into rings. If you have sensitive skin, you may want to wear gloves. Whatever you do, don't rub your eyes or nose.
  3. Place the chopped peppers and the Prague powder in your food processor and process until fine.
  4. Transfer the processed chillis to a large mouth glass jar. Using a canning funnel really helps when doing this.
  5. Place a double layer of kitchen paper over the top of the jar and tie this securely in place with a length of butcher's twine. And elastic band will also do fine.
  6. Place this in a dark place at a temperature of around 22 - 25c or 72 - 77f for 4 weeks to ferment.
  7. After fermenting, you will notice that the flesh of the peppers is quite mushy. You may also have a little white fungus growing on the surface of the chilli. This is friendly bacteria and can simply be stirred into the chilli.
  8. Pour in 190ml of white grape vinegar, put the lid on and give it a good shake from a minute or two. Place the jar back in its dark home and allow this to stand for 2 weeks. Give it good shake every day or two as this helps the vinegar to break down the solids.
  9. After 2 weeks, transfer the peppers to a tall jug and use your stick blender to liquidize any solids that remain. Place the smooth liquid back into its jar, put the lid on and allow this to stand for a further 2 weeks in a dark place, giving it shake-up every day or two.
  10. After 2 weeks, strain the pulp through a fine filter and gently press the pulp down to extract as much of the liquid as possible. From this quantity you will get about 250ml of liquid.
  11. Transfer the pulp to another sterilized jar and add just enough white grape vinegar to cover the pulp along with 10ml of white sugar. Stir this together, put the lid on, and in 2 weeks you will have an amazing pickled jalapeño relish.
  12. Now on the the sauce.... you will notice that it is still quite thin and if allowed to stand, the solids in the liquid, as fine as they are, will settle to the bottom of the liquid.
  13. To stabilize this and to make the sauce syrupy like the original calls for a very special thickening agent. Tapioca flour does the job perfectly. Xanthum gum also does a great job as it has the same properties as tapioca. You cannot use flour or cornflour.
  14. Mix the tapioca flour with 30ml of white grape vinegar and stir this into the pepper sauce. You will notice a color change. This is temporary as when the tapioca cooks it turns transparent and will not affect the color of the sauce at all.
  15. Pour the sauce into a small pot and bring this to a boil over medium heat, stirring continuously.
  16. You will notice as it comes to a boil how it suddenly turns syrupy and the sauce will coat the back of the spoon.
  17. Remove from the heat and allow this to cool for 15 minutes.
  18. Use a funnel to transfer the sauce to suitable miniature bottles, pop the corks or caps on and you're done.


Scroll to top

Kitchen Conversions

Convert:
Masses
to:
Volumes
to:
Temperatures
to:
Lengths
to: