Crispy Fried Apple Cider Pork Ribs. Crispy Deep Fried Pork Belly Ribs, Apple Cider Infused.

deep fried ribs,deep fried pork ribs,apple cider ribs,apple cider pork ribs,pork ribs flavored with apple,how to tenderise ribs,how to cook pork ribs,deep fried ribs recipe,deep fried pork ribs recipe,apple cider pork ribs recipe,how to deep-fry ribs,deep fried pork belly,fried pork belly,pork belly recipes,apple cider pork belly,how to cook pork belly,how to tenderise pork belly ribs,best pork belly recipe,easy pork belly recipe,easy pork ribs recipe


Crispy Fried Apple Cider Pork Ribs. Crispy Deep Fried Pork Belly Ribs, Apple Cider Infused.
Author: 
Recipe type: Pork
Prep time: 
Cook time: 
Total time: 
Serves: 2
 
Perfectly tenderised and flavored with apple cider, then coated with a light batter and deep fried perfection, these deep fried ribs are outstanding. Simmered in apple cider and sherry to tenderize and flavor, then dipped in a light batter, this deep fried ribs recipe is unforgettable.
Ingredients
  • 800g Pork Belly, bone in, skin on
  • 660ml Apple cider
  • 140ml Full cream sherry
  • Water to cover
  • 2 Spring onions
  • 2 Bird's eye chillies
  • 2 Eggs
  • 4 Tbs Tapioca or cornflour
Instructions
  1. To start, you will need 800g of pork belly with the bone in and skin on. Have your butcher cut the belly into short ribs, 75mm or 3 inches in width.
  2. Cut the ribs apart and place them in a large pan. Pour over the apple cider and the sherry. Pour in enough water to almost cover the ribs.
  3. Bruise the spring onions with the back of your cleaver, and cut the chillis into quarters length-ways, then put these in the pan.
  4. Heat the pan over medium heat, bring it to a boil, reduce the heat and simmer for 45 minutes.
  5. Remove the pork from the pan and place it in a large mixing bowl.
  6. Combine the egg and the tapioca or cornflour in a jug and pour this over the ribs. Mix this thoroughly until the ribs are well coated.
  7. Fill your wok with oil to a depth of 50mm or 2 inches and heat this to 180c or 350f.
  8. Carefully lower half of the ribs into the oil and deep fry these for 2 to 3 minutes until crisp and golden, turning once during cooking.
  9. Remove these and drain on kitchen paper. Repeat with the remaining ribs.
  10. Transfer the ribs to platters and serve immediately with the accompaniments of your choice.


Grissini – Italian Bread Sticks. How to make Crispy Italian Grissini Bread Sticks.

grissini - italian bread sticks,how to make grissini,how to make bread sticks,how to make italian bread sticks,Grissini,breadsticks with antipasta,italian bread recipe,italian breadstick recipes,italian grissini recipe,make homemade grissini,homemade italian breadsticks, bread sticks,italian bread recipes,how to make italian bread,rustic grissini breadstick recipe,grissini with sesame,grissini with herbs


Grissini - Italian Bread Sticks. How to make Crispy Italian Grissini Bread Sticks.
Author: 
Recipe type: Bread
Cuisine: Italian
Prep time: 
Cook time: 
Total time: 
 
This simple recipe video will chow you how to make traditional Italian Grissini bread sticks. These are served at the beginning of a meal with antipasta, soup or the entre'. This quick and easy Grissini - Italian bread sticks recipe makes 32 grissini.
Ingredients
  • 475g Strong white flour
  • 1½ Tsp sugar
  • 1 Tsp Salt
  • 1¼ Tsp Dried yeast
  • 3 Tbs Olive oil
  • 275ml Water
  • 50ml Unhulled sesame seeds
  • 20ml Fennel seeds
  • 1 Egg yolk lightly beaten with 15ml water
  • Salt flakes to season
Instructions
  1. Add the flour, sugar, salt and yeast to a large mixing bowl.
  2. Mix in the olive oil, then gradually add the water to make a soft dough.
  3. Turn the dough out onto a lightly floured work surface and knead for 5 minutes until it is smooth and elastic.
  4. Place the dough back in the bowl, cover with a towel and allow this to rise for 60 minutes.
  5. Tip the dough out, and knead again for 2 minutes, then divide the dough in half.
  6. Working with the first half, knead the sesame seeds into the dough until all of the seeds are incorporated and evenly distributed.
  7. Repeat this with the second half of the dough using the fennel seeds.
  8. Roll one half into a sausage and cut this into 4. Roll each of these into a sausage and divide these into 4. Repeat this with the second half of dough.
  9. Roll each of the 32 pieces into a thin rope of 25cm or 10 inches long.
  10. Transfer these to lightly grease baking sheets, cover loosely with cling film and allow the grissini to rise again for 30 minutes.
  11. Uncover the grissini and brush with egg yolk mix, then sprinkle lightly with salt flakes.
  12. Bake the grissini in a preheated oven at 200c or 400f for 6 to 8 minutes, until lightly golden and crispy.
  13. Remove the grissini from the oven and transfer them to wire racks to cool.


Skate Wing Mousse. Superb Seafood Mousse Recipe using Skate Wing Meat.

seafood mousse recipe,fish mousse recipe,how to make seafood mousse,how to make fish mousse,seafood mousse made with gelatin,fish mouse made with gelatin,molded seafood mousse,molded fish mousse,salmon mousse recipe, mousse made with gelatin, fish mousse, salmon mousse, salmon mousse starter, salmon mousse recipe using canned salmon, salmon mousseline, salmon mousse mold,skate wing mousse recipe,how to make mousse from skate wings


Skate Wing Mousse. Superb Seafood Mousse Recipe using Skate Wing Meat.
Author: 
Recipe type: Seafood / Fish
Prep time: 
Cook time: 
Total time: 
Serves: 8
 
Skate wing is one of the most under-rated seafoods. Its superb texture and amazing flavor lends it perfectly to to making the most incredible seafood mousse. This recipe is a catering lifesaver as it can be prepared way ahead of time provided it is refrigerated.
Ingredients
  • 4 Cups / 1kg Skate wing meat, cooked and chopped
  • ½ Cup onion, chopped
  • ½ Cup Tangy mayonnaise
  • ¼ Cup Tomato sauce
  • ¼ Cup Pickled gherkin, chopped
  • Salt and pepper to season
  • 1½ Tbs Gelatin
  • ¼ Cup Cold water
  • 1½ cups Boiling chicken stock
Instructions
To cook the skate wings
  1. Heat a pan over medium high heat and add 30g butter. When the butter starts to bubble, add the skate wings. Fry these for 3-4 minutes per side, then remove from the pan.
  2. Flake the meat from the center bone and chop the meat into small pieces.
Prepare the gelatin
  1. Mix the gelatin with the cold water, then pour it into the hot stock. Stir until this had dissolved, then place it in your refrigerator to chill.
To continue
  1. In a large mixing bowl combine the chopped skate wing with the onion, pickled gherkin, tomato sauce and mayonnaise. Season with salt and pepper and mix this all together.
  2. When the gelatin mixture is about to set, pour this into the bowl and mix it in thoroughly.
  3. To mold the mousse you will need 8 by 125ml ramekins. Dip a ramekin in water, place a lemon slice into the ramekin, then proceed to fill the ramekin with the mousse, almost to the top.
  4. Continue this process until all 8 ramekins are filled. Place these in your refrigerator for 3 hours until well set.
  5. To serve the mousse, stand the ramekin in hot water for 15 to 20 seconds, lift the ramekin and dry the base, then turn the mousse out onto the serving platter.
  6. Garnish with a little dill and serve immediately.


Deep-Fried Jalapeño Chilli Poppers – Chillies Rellenos. Stuffed Jalapeños Deep Fried in Batter.

Jalapeno Poppers, Red Hot Chilli Poppers, chilli poppers, how to make chilli poppers, how to make jalapeno poppers, recipe for jalapeno poppers, how to make deep fried jalapeno poppers, how to make baked jalapeno poppers, how to make deep fried cheese jalapeno poppers, homemade jalapeno poppers, jalapeno poppers recipe, how to make fried jalapeno poppers, chilli poppers wrapped in bacon, chilli poppers phyllo pastry, chilli poppers recipe baked, chilli poppers recipe south africa


Deep-Fried Jalapeño Chilli Poppers - Chillies Rellenos. Stuffed Jalapeños Deep Fried in Batter.
Author: 
Recipe type: Starter / Entre / Snack / Cocktail / Accompaniment
Cuisine: Mexican
Prep time: 
Cook time: 
Total time: 
Serves: 6-8
 
Deep-fried Jalapeño Chilli Poppers stuffed with cheese make a perfect cocktail snack, entre or accompaniment to a main meal. The chillies can be stuffed with anything from spiced pork to cream cheese. I have used processed cheese spread. You can use pickled jalapenos or fresh.
Ingredients
For the Batter (makes enough for 24 chilli poppers)
  • 150g All purpose flour
  • 75ml Tapioca flour
  • 7.5ml Baking powder
  • 235ml Water
  • 2.5ml Salt
  • 30ml Oil
Other
  • 24 Pickled or fresh jalapeno peppers
  • 240ml Processed cheese spread
Instructions
  1. Add the flour, tapioca flour and baking powder to a large mixing bowl. Add the water and whisk this until smooth. Put this aside for 30 minutes to rest.
  2. While the batter rests, slice one side of each chilli open along the length and scrape the seeds out.
  3. Measure out the filling, in this case processed cheese spread. If it is a bit stiff, warm it in your microwave to soften it.
  4. Load the filling into your piping bag, or icing gun and inject about 2 teaspoons of the cheese into each chilli. Use your finger to wipe away any excess.
  5. To finish off the batter, pour in the oil and salt and whisk these in thoroughly until well combined.
  6. Fill your wok or pan with oil to a depth of 1 inch or 25mm and heat this to 190c or 375f.
  7. Dip the cillis in the batter to coat, then carefully drop them into the oil in batches of 6. Fry these for 3 minutes per side then remove and drain on paper towel. Repeat until all of the chillis are fried.
  8. Transfer to platters and serve immediately.


Vietnamese Escargot. How to Make Traditional Vietnamese Snails.

escargot recipes,snail recipes,how to cook escargot,how to cook snails,vietnamese escargot recipe,vietnamese snail recipe,recipes for snails,recipes for escargot,video recipe,escargot eastern style,escargot recipe in the shell,food of vietnam,vietnamese recipes,best snail recipes,best escargot recipes, vietnamese style escargot, french food(cuisine),french vietnamese cooking


Vietnamese Escargot. How to Make Traditional Vietnamese Snails.
Author: 
Recipe type: Snails / Escargot
Cuisine: Vietnamese
Prep time: 
Cook time: 
Total time: 
Serves: 4
 
Vietnamese Escargot - Vietnamese Snails. The influence of the French occupation of Vietnam is evident in the Vietnamese cuisine. Despite this, the way in which the Vietnamese prepare snails / escargot is distinctly different from the French. This step-by-step demonstration will show show you exactly how to produce this spectacular dish.
Ingredients
  • 24 Burgundy Snails
  • 225g Extra lean pork, finely minced
  • 3 Lemon grass stalks, outer leaves in strips, insides finely minced
  • 4 Tbs Garlic chives, finely chopped
  • 25g Ginger, finely chopped
  • 1 Birds Eye chilli, de-seeded and finely chopped
  • 10ml Roasted sesame oil
  • Salt and pepper to season
Instructions
  1. To start, you will need very lean, finely minced pork. Rinse the snails thoroughly, then chop them finely.
  2. Mince the garlic chives, the ginger, the chilli, and the inner stalks of the lemon grass.
  3. Take the outer leaves of the lemongrass and shred these lengthways.
  4. In addition measure out sesame oil.
  5. Place everything, except the shredded lemongrass, in a large mixing bowl. Season with salt and pepper, then mix until totally combined.
  6. Working with one snail shell at a time, bend a piece of the shredded lemongrass double and press it into the shell as far as it will go. Using your fingers, press some of the filling into the shell until the shell is full. Repeat this until all of the shells have been filled.
  7. Transfer the shells to your steamer, leaning them against one another to keep them as upright as possible.
  8. Put the lid on the steamer and steam over rapidly boiling water for 10 minutes.
  9. Remove the steamer from the heat, transfer the snails to platters and serve immediately with light soy sauce spiked with a little finely chopped chilli.


Deep-Fried Chicken Lollipops. Crispy, Golden & Delicious Cocktail Snack Chicken Wings.

fried chicken, Chicken Lollipop, how to make chicken lollipops, Chicken Lollipops, chicken wings, buffalo wings, finger food recipe, deep fried chicken lollipops, deep fried chicken lollipop recipe, alternatives to chicken wings, how to make popcorn chicken, spicy chicken lollipop, how to cook chicken wings, fried chicken wings, spicy chicken wings, southern fried chicken,chicken cocktail snack recipes,cocktail party recipes,finger snack recipes chicken,Deep-Fried Chicken Lollipops


Deep-Fried Chicken Lollipops. Crispy, Golden & Delicious Cocktail Snack Chicken Wings.
Author: 
Recipe type: Chicken / Poultry
Prep time: 
Cook time: 
Total time: 
 
Deep-Fried Chicken Lollipops. Chicken wings are notoriously messy to eat, especially at a cocktail party. Making the wings into lollipops and chicken V's takes all the mess and hassle away.
Ingredients
  • 12 Chicken Wings
  • ½ Cup Tapioca flour (or corn flour)
  • 3 Eggs, lightly beaten
  • ½ Cup finely crushed corn flakes mixed with ½ cup all-purpose flour
  • Light soy sauce to season
  • Garlic powder to season
Instructions
  1. Cut off and discard the wing tips, then slice through the center joint of each wing.
  2. To make the lollipops, take the buffalo wing, that's the piece with a single bone, and using a kitchen towel, pull the skin down off the knuckle.
  3. Holding the knuckle with one hand and using your blade, scrape the skin and flesh downward from the bone to create the lollipop.
  4. To make the V's, place the wing forearm, the piece with 2 bones on the chopping board with the inside of the wing facing upwards.
  5. Using a sharp knife cut through the wing length-ways between the bones, leaving the elbow joint in tact.
  6. Place all of the wing pieces in a tray, drizzle liberally with light soy sauce, then season liberally with garlic powder. Allow these to stand for 15 minutes.
  7. To coat the wing, dredge the pieces in the tapioca flour, or you can substitute corn flour.
  8. Dip the pieces in the egg making sure to wet all of the flour, then dredge the pieces in the cornflake mixture to get a good solid coating.
  9. Transfer all of the coated chicken to a platter and allow the coating to set for 20 minutes.
  10. Half fill your pan with oil and heat this to 170c or 325f.
  11. Carefully drop the pieces into the oil and fry them for 3 minutes per side until crispy and golden. Remove the wings from the oil and drain on paper towel. Repeat this with any remaining wings.
  12. Transfer the wings to platters and serve immediately with dipping sauce of your choice.


Deep Fried Tobasco Chicken Wings. Crispy Deep Fried Chicken Wings Infused with Tobasco.

crisp fried chicken wings,deep fried chicken wings,crispy deep fried chicken wings,crisp fried buffalo wings, crispy deep fried buffalo wings,deep fried tobasco chicken wings,tobasco chicken wings, tobasco buffalo wings,crispy deep fried tobasco buffalo wings,crisp deep fried chicken recipe, crisp deep fried chicken wings recipe,how to make crisp deep-fried chicken,how to make cripy deep fried buffalo wings, battered chicken wings, Buffalo Wild Wings, crispiest chicken wings, crunchiest wings


Deep Fried Tobasco Chicken Wings. Crispy Deep Fried Chicken Wings Infused with Tobasco.
Author: 
Recipe type: Chicken / Poultry
Prep time: 
Cook time: 
Total time: 
 
The flavor of Tobasco is legendary. This recipe infuses this flavor into a batch of crisp deep fried chicken wings. Ths sugar in the recipe tempers the burn, so if you like your wings a little hotter, omit the sugar from the recipe.
Ingredients
  • 12 Chicken wings
For the Tapioca Flour Mix - mix together
  • 2 Tbs Fine salt
  • 1 Tbs Caster sugar
  • ⅔ Cup Tapioca flour
For the Cornflake Mix - mix together
  • ½ Cup finely crushed cornflakes
  • ½ Cup all-purpose flour
For the Egg Mix - mix together
  • 3 Eggs lightly beaten
  • 30ml Tobasco sauce
Other
  • Oil for deepfrying
Instructions
  1. Cut off and discard the wing tips, then cut through the center joint of each wing.
  2. Dredge the wings in the tapioca flour mix.
  3. Dip the wings in the egg making sure all of the tapioca mix is wet.
  4. Dredge the eggs in the cornflake mix.
  5. Transfer the wings to a platter and allow the coating to set for 20 minutes.
  6. Half fill your pan with oil and heat to 170c or 325f.
  7. Carefully add the wings to the pan and fry for 3 minutes per side.
  8. Remove and drain on paper towel. Serve immediately.


Chinese Steamed Prawn Custards. Succulent prawn meat steamed in a creamy custard, flavored with chives and soy.

chinese steamed prawn custards,chinese prawn recipes,chinese shrimp recipes,chinese starter recipes,chinese egg recipes,chinese seafood recipes,how to steam chinese prawns,how to steam chinese shrimp,Salted Egg Yolk Custard Bun, Chinese Steamed Bun Recipe, Homemake Chinese Steamed,homemade chinese steamed recipes,how to use your chinese steamer, chinese steamed prawns, How To Steam Shrimp, Chinese Steamed Eggs Recipe


Chinese Steamed Prawn Custards. Succulent prawn meat steamed in a creamy custard, flavored with chives and soy.
Author: 
Recipe type: Prawns / Seafood / Egg
Cuisine: Chinese
Prep time: 
Cook time: 
Total time: 
Serves: 4
 
Not only do Chinese steamed prawn custards look amazing, but they taste just as good. Thea flavor and aroma and texture of these treats will get your dinner off to a great start.
Ingredients
  • 200g Prawn meat
  • 4 Large eggs
  • 300ml Chicken stock, cooled
  • 60ml / 4 Tbs Garlic chives, finely chopped
  • Light soy sauce to garnish
Instructions
  1. In a jug, combine the eggs and the chicken stock. Whisk these together.
  2. Add half of the chives, and season with salt and cracked black pepper.
  3. Roughly chop the prawn meat and divide among 4 bowls.
  4. Pour equal amounts of the egg mixture into each bowl.
  5. Place the bowls in your steamer and steam over rapidly boiling water for 10 minutes until the center of the egg is set.
  6. Using s paring knife, score an X into the center of each custard.
  7. Drizzle a little soy sauce onto each custard, then top with the remaining chives and serve immediately.


Chinese Barbecue Pork Ribs. Tender succulent spare ribs in an aromatic Hoisin barbecue glaze.

chinese barbecue pork ribs,bbq pork ribs,chinese glaed pork ribs,chinese barbecue spare ribs,how to make chinese barbecue spare ribs,spare ribs with barbecue sauce,chnese barbecue sauce recipe, bbq sauce spare ribs,barbecue sauce marinated spare ribs,spare ribs in barbecue sauce recipe,barbecue pork ribs recipe oven, barbecue pork ribs in the oven, barbecue pork ribs marinade, barbecue spare ribs recip, Chinese Style Spareribs, Chinese BBQ Pork Spareribs


Chinese Barbecue Pork Ribs. Tender succulent spare ribs in an aromatic Hoisin barbecue glaze.
Author: 
Recipe type: Pork
Cuisine: Chinese
 
These Chinese barbecue pork ribs are outstanding! Perfectly tender, flavored with hoisin, soy, garlic and ginger, they are truly unforgetable. This recipe is super-easy, and it is a sure winner!
Ingredients
  • 1kg Pork ribs
For the marinade
  • 125ml Hoisin sauce
  • 45ml Light soy sauce
  • 45ml Rice wine, or dry sherry
  • 30ml Sugar
  • 45ml Tomato sauce
  • 3 Tbs finely chopped garlic
  • 3 Tbs finely chopped ginger
Instructions
  1. Get your butcher to cut the rack of ribs into 3 strips of short ribs.
  2. Place the ribs in your wok, or a large pan, cover with water and bring this to a boil.
  3. Reduce the heat to a simmer, and continue to simmer for 20 minutes.
  4. While the pork simmers, combine all of the marinade ingredients and stir until the sugar has dissolved completely.
  5. Remove the pork from the pan and cut the ribs apart.
  6. Place the ribs in a roasting pan and pour the marinade in. Stir the ribs around the pan until everything is coated with the marinade.
  7. Place the pan in your refrigerator and allow the ribs to marinate for at least 4 hours, preferably overnight.
  8. Heat your oven to 180c / 350f and bake the ribs for 25 minutes.
  9. Remove the pan from the oven, stir the ribs around the pan to re-coat with the marinade.
  10. Return the pan to the oven and bake for a further 20 minutes.
  11. Remove the pan from the oven, transfer the ribs to platters and serve immediately.


Mayo Batter Deep Fried Chicken Wings. Crispy Deep-fried chicken wings with a unique mayo batter.

mayo-batter deep-fried chicken wings,deep-fried chicken wings recipe,famous brand deep fried chicken wings,deep-fried wings in batter,crisp deep-fried wings,deep-fried wings batter recipe,how to deep-fry chicken wings,best buffalo wings recipe,super bowl recipes chicken wings,, deep fried chicken wings batter, deep fried chicken wings time, deep fried chicken wings calories, deep fried chicken wings recipe food network, deep fried chicken wings temperature, deep fried chicken wings recipe easy, deep fried chicken wings no flour


Mayo Batter Deep Fried Chicken Wings. Crispy Deep-fried chicken wings with a unique mayo batter.
Author: 
Recipe type: Chicken / Poultry
 
Crispy deep-fried chicken wings with the most unique flavor and texture. The combination of spices, mayonnaise and crispy coating make this a sure winner.
Ingredients
  • 12 Chicken wings, tips discarded, cut through middle joint into buffalo wings
For the batter
  • ½ Cup Tangy mayonnaise
  • 3 Tbs Chicken spice
  • 3 Tbs Tapioca flour (can substitute cornflour)
To coat
  • ½ Cup finely crushed corn flakes mixed with ½ cup all-purpose flour
Instructions
  1. Cut the wing-tips from the wings and discard.
  2. Cut through the center joint of the wings.
  3. Mix the chicken spice and the tapioca flour together.
  4. Place the mayonnaise in a large mixing bowl and add the spice-flour mixture. Mix this together until you have a thick, smooth paste.
  5. Add the chicken wings to the bowl and stir until all the wings are well coated with the batter.
  6. Dredge the wings in the cornflake mixture to get a good solid coating.
  7. Transfer the wings to a platter and allow them to marinate and set in your refrigerator for at least 4 hours - preferably over night.
  8. Half-fill your pan with oil. Heat the oil to 170c / 325f.
  9. Carefully drop the wings into the oil and fry them for 3 minutes per side. Depending on the size of your pan, you may have to a few batches.
  10. Remove the wings from the oil and drain on kitchen paper before serving.


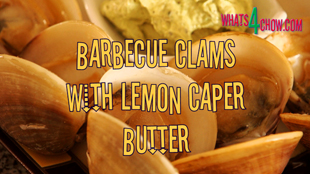
Barbecue Clams with Lemon Caper Butter. How to cook clams on the barbecue. Grilled clam recipe.

bbq clams, bbq clam recipe, how to cook clams on the barbecue,how to grill clams,grilled clams recipe,cook clams on the bbq,cook clams on the fire,cook clams on a gas barbecue,cook clams on a gas grill,cook clams over coals, barbecue razor clams,charcoal grilling clams,charcaol grilled clams recipe,clams on the bbq,clams and mussels on the barbecue,best clam recipe,simple clam recipe,easy bbq clam recipe,easy clam recipe,barbecue clams


Barbecue Clams with Lemon Caper Butter. How to cook clams on the barbecue. Grilled clam recipe.
Author: 
Recipe type: Seafood / Shellfish
Prep time: 
Cook time: 
Total time: 
 
Barbecue Clams are quick and easy to cook, especially on your barbecue. There is no guess-work with this recipe, simply follow the steps and the timing and you'll have a perfect batch of clams.
Ingredients
  • 1kg / 2.2lbs Clams
  • 1 Cup Salt
  • ½ Cup Butter, softened
  • 2 Tsp Lemon zest
  • 1 Tsp Cracked black pepper
  • 2 Tbs Capers, drained
  • 1 Tbs Garlic chives, chopped
Instructions
  1. Half-fill a large mixing bowl with cold water and add ⅓ cup of salt. Stir until dissolved.
  2. Add the clams to the bowl and allow to soak for 15 minutes. Drain and repeat twice more.
  3. While the clams soak, add all of the other ingredients to a jug. Using your stick blender, mix these until smooth.
  4. Heat your barbecue until medium hot and grill the clams for 5-8 minutes. Reomve the clams from the heat as soon as they have opened more than 12mm / ½ inch.
  5. Discard any clams that do not open within 8 minutes.
  6. Transfer the clams to serving platters and serve with the caper butter.


Chicken, Bacon and Parmesan Pinwheels. Rolled chicken and and bacon with a crispy parmesan crust.

chicken bacon parmesan pinwheels,chicken bacon and parmesan pinwheels,rolled chicken bacon and parmesan,chicken and bacon roll,parmesan chicken roll,chicken bacon parmesan roulade,chicken bacon parmesan recipes,chicken and bacon recipe,bacon parmesan recipes,chicken bacon parmesan crowns,crowned chicken bacon parmesan,recipes for chicken and bacon,chicken breast and bacon recipe,chicken breast and parmesan recipe,chicken bacon and parmesan pinwheels recipe


Chicken, Bacon and Parmesan Pinwheels. Rolled chicken and and bacon with a crispy parmesan crust.
Author: 
Recipe type: Chicken / Poultry
Prep time: 
Cook time: 
Total time: 
Serves: 2-4
 
This chicken, bacon and parmesan pinwheels recipe is great as a cocktail snack, entre, or as a main course. The flavor combination of chicken, bacon and parmesan is supreme.
Ingredients
  • 2 Chicken breasts
  • 6-8 Rashers streaky bacon
  • 20g Powdered parmesan
  • Butchers twine
  • Salt, cracked black pepper and paprika
  • 1 Egg lightly beaten
Instructions
  1. Cut 40cm of clinkwrap (16 inches)
  2. Lie one of the breasts in the center of the plastic, fold the plastic over and use your meat mallet to tap the breast down to a thickness of 4mm / ⅙ inch
  3. Repeat with the second breast
  4. Lie one of the breasts on a board and top this with enough bacon to cover. The bacon must run from side to side.
  5. Season liberally with salt, black pepper and paprika.
  6. Roll the breast up from bottom to top as firmly as possible.
  7. Tie the breast with butchers twine at 20mm intervals (just less than an inch)
  8. Cut the loose ends off the twine.
  9. Trim the ends of the chicken to within 10mm (just less than ½ inch)
  10. Cut the roll into pieces, through the centers between each twine.
  11. Repeat this with the second breast.
  12. Place all of the wheels onto a board and brush them liberally with the egg.
  13. Sprinkle liberally with parmesan, then turn the wheels over and repeat.
  14. Heat your pan over medium high heat and add the butter.
  15. When the butter begins to bubble. add the wheels to the pan.
  16. Fry for 5 minutes per side, remove from the pan, snip and remove the strings and serve immediately.


Scroll to top

Kitchen Conversions

Convert:
Masses
to:
Volumes
to:
Temperatures
to:
Lengths
to: