Mini Seafood Platter – Valentine’s Special Part 4 – Grilled Sole, Prawn & Pink Salmon Combo

seafood platter, seafood platter recipes, seafood platters cape town, seafood platter recipes south africa, seafood platters durban, seafood platter ideas, seafood platter menu, seafood platter sydney, how to make a seafood platter,5], best seafood platter, grilled seafood platter, how to cook seafood platter,valentine's day seafood platter,valentine's day recipes,valentines day seafood recipes,valentines day grill seafood


Mini Seafood Platter - Valentine's Special Part 4 - Grilled Sole, Prawn & Pink Salmon Combo
Author: 
Recipe type: Seafood / Valentine's Day
Prep time: 
Cook time: 
Total time: 
 
This seafood platter is sure to create a stir! Grilled baby sole topped with prawn hearts, garnished with a rose of pink salmon, and an artistic drizzle of rich dill sauce. This is Part 4 of our Valentine's Special!
Ingredients
Ingredients per Person
  • 1 Baby sole (80-100g)
  • 2 Medium prawns (16-20 size)
  • 60g Norwegian or Atlantic salmon
For the Sauce (2 Portions)
  • 50ml Cream
  • 50ml Plain yoghurt
  • 2 Tbs finely chopped dill
  • A dash of ketchup for color
To Garnish
  • Lemon wedges
Instructions
  1. Slice the salmon into thin strips at an angle across the grain. Put this aside.
  2. Season the baby sole liberally on both sides with salt and cracked black pepper.
  3. Cut the prawns down the spine and using a skewer, remove the veins.
  4. Using a sharp knife cut through the flesh along the spine, all the way through, but not through the bottom shell. Open the prawns up.
  5. Finely chop the fresh dill and combine it with the cream, mayonnaise and a dash of ketchup for color.
  6. Heat your pan over medium high heat, add the butter and grill the prawns for 3 minutes per side. Encourage the tails to curl up while they are grilling.
  7. After 6 minutes, turn the prawns onto their spines and grill for a further 2 minutes, then remove them from the pan.
  8. Add a little extra butter if necessary, then grill the sole for 3 minutes per side. Remove these from the pan.
  9. To plate, place a sole in the center of a platter. Create the prawn heart on top of the sole, and top this with half of the salmon, stacked to resemble a rose.
  10. Drizzle the sauce over the plate and serve immediately.


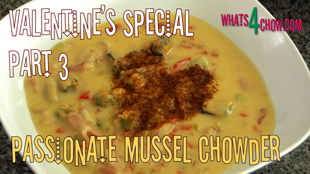
Passionate Mussel Chowder – Valentine’s Special Part 3. Thick, Creamy & Spicy Mussel Chowder.

mussels, chowder, soup, mussel chowder, Mussel, mussel chowder with cream, mussel chowder recipe jamie oliver, mussel chowder ingredients, how to make mussel chowder,creamy mussel chowder recipe,best mussel chowder recipe,valentine's day recipes,how to make valentines day mussel chowder,easy mussel chowder recipe,mussel soup recipe, how to make mussel soup, Chowder (Food), Seafood (Cuisine), mussel chowder nz


Passionate Mussel Chowder - Valentine's Special Part 3. Thick, Creamy & Spicy Mussel Chowder.
Author: 
Recipe type: Seafood /Soup
Prep time: 
Cook time: 
Total time: 
Serves: 2-4
 
Mussel chowder has long been a favorite seafood dish. This spicy mussel chowder is the perfect way to win hearts.
Ingredients
  • 200g Streaky bacon
  • 30g Butter
  • ½ Cup chopped onion
  • ¼ Cup chopped celery
  • ½ Cup chopped red pepper
  • ½ Tsp Salt (only if your using low sodium stock, otherwise omit)
  • ¼ Tsp Cayenne pepper
  • ¼ Cup all-purpose flour
  • 600ml Chicken stock
  • ½ Tsp Vietnamese fish sauce
  • ⅓ Cup cream
  • 400g Fresh mussel meat
  • Worcester sauce and Tobasco sauce
  • Smoked or plain paprika
Instructions
  1. Slice the bacon thinly across the grain, then dice the onion, red pepper and celery. Measure out the rest of the ingredients and your ready to go.
  2. Heat a pan over medium heat and saute the bacon for 10 minutes to render the fat.
  3. Add the butter and stir this briefly until melted. Pour in the chopped onion, red pepper and celery and continue to saute this for a further 10 minutes.
  4. Add the cayenne pepper and salt. Only add the salt if you're using low sodium chicken stock, otherwise omit it from the recipe.
  5. Add the flour and stir until completely combined, then continue to saute for a further 5 minutes.
  6. Pour in the chicken stock and the fish sauce and stir this to combine. Bring this to a boil, reduce the heat and simmer for 5 minutes.
  7. Add the mussels and stir these in, then add the cream. Stir until well combined and simmer this for a final 5 minutes.
  8. Splash with a dash of Worcester sauce and a dash of hot chilli / Tobasco sauce, stir these in and remove the pan from the heat.
  9. Serve the chowder to bowls. To garnish, cut a heart shape into a piece of foil. Hold the foil over the chowder and sprinkle a light coating of smoked or plain paprika over the stencil.
  10. Serve immediately with crusty farm bread.


Beet-Pickled Deviled Eggs – Valentines Special Part 1. Pickled, Deviled Eggs – a Taste of Heaven!!!

deviled eggs,how to make deviled eggs,beet pickled deviled eggs,valentine's recipe deviled eggs,valentine's recipes,how to pickle eggs,pickled deviled eggs, deviled eggs recipe, easy deviled eggs, stuffed eggs, Spicy Deviled Eggs, deviled eggs without mayo, deviled eggs with horseradish, deviled eggs recipe easiest, how do you make deviled eggs, Hors D'oeuvre (Type Of Dish), cold hors d'oeuvre, Filled Eggs


Beet-Pickled Deviled Eggs - Valentines Special Part 1. Pickled, Deviled Eggs - a Taste of Heaven!!!
Author: 
Recipe type: Starters / Cocktail Snacks / Finger Food
Serves: 8-12
 
Deviled eggs are an all-time favorite as a starter or cocktail finger-snack. In this Valentine's special recipe, we take this a step further by pickling a pink fade into the eggs, then finishing it off with a spectacular filling!!!
Ingredients
  • 8-12 Hard-boiled eggs
  • 240ml Apple cider vinegar
  • 1 Tbs Sugar
  • 1 Tbs Salt
  • 720ml / 3 Cups water
  • 1 Small beetroot, peeled and halved
For the Filling
  • 45g Horseradish sauce
  • 6 Pickled peppadews
  • Salt & pepper to taste
  • A few extra peppadews, thinly sliced to garnish
Instructions
  1. Place the cider vinegar, sugar, salt, water and beetroot in a pot. Bring this mixture to a boil, turn the heat down, and allow it to simmer for 10 minutes.
  2. Remove the pot from the heat and allow it to cool. Place the hard-boiled eggs in the mixture, place the lid on the pot and allow this to pickle overnight in your refrigerator.
  3. The following day, remove the eggs from the mixture, cut them in half length-ways and scoop the yolks out of the halves.
  4. Place the yolks in a jug along with the salt, pepper, horseradish sauce and pickled peppadews.
  5. Using your stick blender, puree this all until it is smooth.
  6. Transfer the egg halves to platters and pipe or spoon the pureed mixture into the eggs.
  7. Garnish the eggs with thinly sliced peppadews and serve immediately.


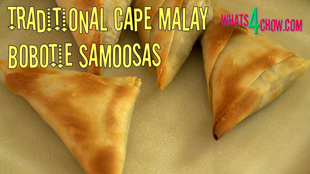
Traditional Cape Malay Bobotie Samosas. Crispy, Spicy Bobotie Samosas Wrapped with Phyllo.

traditional cape malay bobotie,tradition cape malay samosas,bobotie samosas,curry mince samosas,how to make malay samosas,how to wrap samosas,using phyllo to wrap samosas,beef samosas,curried beef samosas,curried lamb samosas, mini samosas, cocktail samosas, party samosa recipe, picnic samosa recipes, South African Food, Curry, cape malay recipes,homemade samosas,easy samosa recipe,samosas with phyllo


Traditional Cape Malay Bobotie Samosas. Crispy, Spicy Bobotie Samosas Wrapped with Phyllo.
Author: 
Recipe type: Curry
Cuisine: Cape Malay
 
Phyllo samosas filled with traditional Cape Malay Bobotie. In our previous episode we made perfect phyllo pastry. Here we use this phyllo to wrap tasty bobotie samosas.
Ingredients
  • 500g Ground Beef or Lamb
  • 1 Onion, finely chopped
  • 1 Slice white bread, crust removed, cut into blocks
  • 120ml Milk
  • Salt and pepper to taste
  • ½ Tbs Sugar
  • 15ml Lemon juice
  • 1 Egg Lightly beaten
  • 30g Butter
Instructions
  1. To start, place the milk and bread in a jug and mash the bread into the milk until you have a paste. Set this aside.
  2. Heat a wok or pan over medium high heat. Add the butter and fry the onion for 6 to 8 minutes until soft and slightly browned.
  3. Add the ground beef and chop this into the onion. Minced meat has the tendency to clump when fried. You need to chop it apart to get a nice even texture.
  4. Once the mince is separated, add the garam masala, salt, cracked black pepper, sugar and lemon juice. Stir this in until combined.
  5. Add the milk bread paste and stir this in thoroughly, then remove the wok from the heat.
  6. Pour in the lightly beaten egg and stir this in. Set the pan aside to cool.
  7. Unpack your phyllo pastry and cut it into strips. The wider the strips, the larger your samosas will be. The size is entirely up to you, but whatever width you choose, the length must be 5 times that of the width. I have cut my strips to 90mm, and the corresponding length is 450mm.
  8. Brush a strip of phyllo lightly with the melted butter. Place a heaped tablespoon of the bobotie at the end of the phyllo.
  9. Fold the pastry at 45 degrees over the boboti, then fold it straight upward, then again at 45 degrees and so on, until the samosa is formed.
  10. Continue to form the remaining samosas.
  11. Cover a baking sheet in foil and lightly grease the foil. Transfer the samosas to the baking sheet and bake them in a preheated oven at 200c or 400f for 15 minutes until crispy and lightly golden.
  12. Remove the pastries from the oven and serve immediately with fruit chutney or mango atchar.


Deep Fried Cajun Calamari Rings. How to Make Crispy Deep-Fried Cajun Calamari.

deep-fried calamari,deep fried calamari calories,deep fried calamari rings,spicy deep fried calamari,deep fried calamari recipe,fried calamari,fried calamari recipe,deep fried calamari batter recipe,squid,deep-fried squid,how to make fried calamari,crisp fried squid,learn to make deep-fried calamari,easy fried calamari,quick fried calamari recipe,how to fry calamari,how to fry calamari rings


Deep Fried Cajun Calamari Rings. How to Make Crispy Deep-Fried Cajun Calamari.
Author: 
Recipe type: Seafood
Cuisine: Cajun
Prep time: 
Cook time: 
Total time: 
Serves: 2-4
 
A while back we did a video on Crispy Deep-Fried Calamari. This recipe uses a totally different coating with cornmeal and Cajun spice. The result is an outstanding flavor explosion - crispy on the outside, meltingly tender on the inside.
Ingredients
  • 500g Calamari Rings
  • 1 Egg
  • 240ml / 1 Cup Milk
  • 60ml / ¼ Cup Fine cornmeal
  • 180ml / ¾ Cup Plain flour
  • ½ Tsp Baking powder
  • 1½ Tsp Cajun spice (see below)
  • ¼ Tsp Dried basil
  • ½ Tsp Garlic salt
For the Cajun Spice
  • 1 Tbs garlic powder
  • 1 Tbs Onion powder
  • 2 Tsp White pepper
  • 2 Tsp Cracked black pepper
  • 1½ Tsp Cayenne pepper
  • 2 Tsp Dried thyme
  • ½ Tsp Dried oregano
  • Mix the ingredients together and store in an airtight container
Instructions
  1. Cut the calamari tubes into rings of ¼ inch or 6mm thick. Pat the rings dry and put them aside.
  2. To make the batter, whisk the egg and milk together in a jug.
  3. In a large mixing bowl, combine the fine cornmeal, plain flour, baking powder, Cajun spice, dried basil and garlic salt.
  4. Pour half of the milk egg mixture into the bowl and mic this to a paste. Pour in the remaining milk and mix this to a batter. Allow this to stand for 30 minutes.
  5. Fill your pan with oil to a depth of 1 inch or 25 mm and heat this to 180c or 350f. Dip the calamari rings in the batter and carefully drop them into the oil.
  6. Fry the calamari for 3 minutes per side until lightly golden and crisp. Use a slotted spoon to remove the rings, drain any excess oil on kitchen paper, then continue this process until all of the rings are fried.
  7. Transfer the rings to platters and serve with tartare sauce or our amazing Queso Blanco dip.


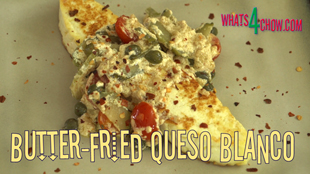
Butter-Fried Queso Blanco. Slices of Queso Blanco Fried until Golden, Topped with Heavenly Sauce.

Queso Blanco (Cheese), queso fresco, white cheese, recipe, receta, how to make cheese, como hacer queso, Mexican, queso blanco recipe, queso blanco cheese recipe, queso blanco fried, queso blanco velveeta, como hacer queso blanco, Queso Blanco Recipe, Homemade Queso Blanco, preparacion queso, elaboracion de queso, Mexican Queso Dip, Mexican Recipe, Mexican Food, Mexican Cuisine, Queso Ranchero


Butter-Fried Queso Blanco. Slices of Queso Blanco Fried until Golden, Topped with Heavenly Sauce.
Author: 
Recipe type: Cheese
Cuisine: Mexican
Prep time: 
Cook time: 
Total time: 
Serves: 2
 
In our previous episode we made fresh queso blanco or Mexican white cheese. Today we're going fry slices of this cheese in butter until golden, then top it with rich combination of cocktail tomatoes, garlic, sliced pickled gherkin, capers and a unique instant ricotta.
Ingredients
  • 2 x 20mm / ¾ inch Slices of Queso Blanco cheese
  • 40g Butter
  • 8 Cherry / cocktail tomatoes
  • 1 Tbs Chopped garlic
  • 1 Pickled Gherkin, sliced
  • 2 Tbs Pickled capers
  • 90ml Fresh cream
  • Salt to taste
  • Dried red chilli flakes to garnish
Instructions
  1. Cut 2 slices of queso blanco from the center of the round of cheese. Cut them 20mm or ¾ inch thick.
  2. Measure out the garlic, butter, red chilli flakes, cream and capers.
  3. Slice the tomatoes in half length-ways, and slice the gherkins.
  4. Heat your pan over medium high heat, add the butter.
  5. Add the cheese to the pan and wipe it around in the butter to coat all over.
  6. Fry the cheese on the flat sides for 2 to 3 minutes until golden.
  7. Turn the cheese over and fry for a further 2 to 3 minutes until golden.
  8. By this stage, the cheese will have softened, so use a spatula to remove it from the pan to avoid damaging it.
  9. Add the tomatoes to the pan and stir these around in the butter for 60 seconds.
  10. Add the garlic and stir this for further 15 seconds until fragrant.
  11. Add the capers and sliced gherkin and stir this briefly to heat it through.
  12. Pour in the cream. Almost immediately, you will see the cream react with the acid in the tomatoes, capers and gherkin.
  13. This reaction in combination with heat causes the cream to convert to full cream ricotta cheese instantly.
  14. Stir this briefly and remove the pan from the heat.
  15. Transfer the fried cheese to platters, top each with half of the sauce.
  16. Garnish the plates with a scattering of red chilli flakes and serve immediately.


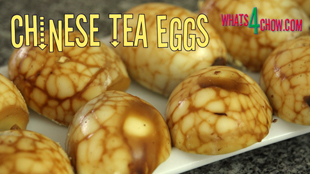
Chinese Tea Eggs – Marbled Eggs Flavored with Aromatic Chinese Tea and Spices

chinese tea eggs, chinese tea eggs recipe,how to make chinese tea eggs,homemade chinese tea eggs, tea egg recipe, tea eggs, Tea Egg (Dish), how to make tea eggs, chinese tea eggs five spice, chinese tea eggs recipe best, chinese tea eggs youtube, egg marble, black tea, dragons egg, chinese five spice, Marbled Tea Egg, how to make tea egg, Street Food, asian egg recipe, egg recipe, easy tea eggs, street snacks, streetfood, street-food, star anise


Chinese Tea Eggs - Marbled Eggs Flavored with Aromatic Chinese Tea and Spices
Author: 
Recipe type: Eggs
Cuisine: Chinese
Prep time: 
Cook time: 
Total time: 
Serves: 10
 
Chinese tea eggs are sold by street vendors and roadside stops all over China. These aromatic and tasty treats not only look beautiful, but taste like heaven.
Ingredients
  • 10 Eggs
For the Tea Mixture
  • 3 Tbs Light soy sauce
  • 3 Tbs Rice wine or dry sherry
  • 1 Whole star anise
  • 1 Tbs Brown sugar
  • 1 Cinnamon stick
  • 2 Tbs Chinese black tea or 2 teabags black tea
  • 1 Tbs 5-Spice
Instructions
  1. Place the eggs in a saucepan, cover with cold water and bring this to a boil. Lower the heat and simmer the eggs for 10 minutes.
  2. Drain the pot and cool the eggs under cold running water.
  3. Using the back of a teaspoon, tap the egg shells until the entire shell is crazed with cracks.
  4. Place the light soy sauce, rice wine, star anise, brown sugar, cinnamon stick, sliced ginger, black tea and 5 spice in a pot and pour in 1 liter of water.
  5. Bring this to a boil, lower the heat and simmer the mixture for 20 minutes.
  6. Add the eggs to the pot, bring the mixture back to a boil, lower the heat and simmer the eggs gently for 45 minutes.
  7. Remove the pot from the heat and allow the eggs to cool to a manageable temperature in the tea mixture.
  8. When they are cool enough to handle, peel the shells from the eggs to reveal the beautifully marbled and fragrant eggs.
  9. Slice the eggs into halves or quarters, transfer to platters and serve warm or cold.


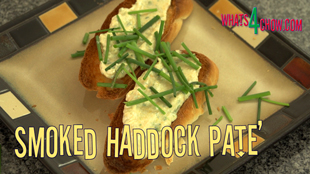
Smoked Haddock Pate’ – Smoked Haddock Dip – Smoked Haddock Mousse

smoked haddock pate',smoked haddock mousse,smoked haddock dip,smoked fish pate',smoked fish mousse,smoked fish dip, smoked haddock pate recipe, smoked haddock pate cream cheese, smoked haddock pate starter, smoked mackerel pate creme fraiche, smoked mackerel pate horseradish, smoked mackerel pate, smoked mackerel pate recipe, smoked haddock pate delia, smoked haddock pate bbc, recipe with haddock, Mackerel (Organism Classification)


Smoked Haddock Pate' - Smoked Haddock Dip - Smoked Haddock Mousse
Author: 
Recipe type: Seafood
Prep time: 
Total time: 
Serves: 6
 
Smoked Haddock Pate' or mousse is quick and easy to make, and can also be used as a dip. This recipe will make enough to serve 6 starter portions.
Ingredients
  • 350g Smoked Haddock, poached and flaked
  • 250g Cream cheese
  • 30ml Culture sour cream / creme fraiche
  • Juice from 1 medium lemon
  • 30ml Horseradish sauce
  • ¼ Cup chopped chives
  • ¼ Cup chopped parsely
Instructions
To Poach the Haddock
  1. Place the haddock in a large pan and pour in enough milk to come halfway up the side of the fish.
  2. Bring the milk to a simmer and simmer for 15 minutes, turning the fish once halfway through.
  3. Allow the fish to cool completely
To Make the Pate'
  1. Flake the fish and place it in a mixing bowl.
  2. Place all of the other ingredients in the bowl with the fish and puree the mixture with your stick blender. You can also do this in a food processor, however the result will not be as fine.
  3. Season with salt and pepper.
  4. At this stage the mixture is suitable as a dip. To thicken the pate' to spreading consistency, cover and refrigerate for 3-4 hours.


Crispy Deep-Fried Mozzarella Sticks. Deep-Fried Mozzarella, the Perfect Starter, Accompaniment or Snack!!!

deep-fried mozzarella,cheese sticks, Mozzarella (Cheese), mozzarella recipes, mozzarella cheese recipes, cooking with mozzarella cheese, Mozzarella Sticks (Food), deep fried mozzarella sticks, deep fried mozzarella, deep fried mozzarella balls, deep fried mozzarella recipe, deep fried mozzarella sticks calories, deep fried mozzarella in breadcrumbs, deep fried mozzarella sticks without bread crumbs, deep fried mozzarella cheese, deep fried mozzarella sticks nutrition


Crispy Deep-Fried Mozzarella Sticks. Deep-Fried Mozzarella, the Perfect Starter, Accompaniment or Snack!!!
Author: 
Recipe type: Cheese
Prep time: 
Cook time: 
Total time: 
Serves: 2-6
 
How to make perfect deep-fried mozzarella. The secret to perfect deep-fried mozzarella is in the triple coating - one coat of cornflour and two coats of crumb. watch the video to see just how to do it!!!
Ingredients
  • 6 Batons Mozzarella cheese (commercial block)
  • 3 Eggs, lightly beaten
  • ½ Cup Cornflour
  • ⅔ Cup Finely crushed cornflakes mixed with ⅔ cup all-purpose flour
  • Oil to fry
Instructions
  1. Using commercial mozzarella which is firmer than the good hand made stuff, cut it into batons of 20mm or ¾ inch.
  2. Before we start coating the cheese, sprinkle a good layer of the cornflake mixture onto a platter.
  3. To coat the mozzarella, dip it into the egg to wet it all over.
  4. Dredge it in the cornflour making sure to cover all of the cheese. Return it to the egg making sure to wet all of the cornflour.
  5. Dredge it in the cornflake mixture to get a good solid coating, then back into the egg making sure to wet all of the cornflake mix.
  6. Then back into the cornflake mixture for the final coating. This thick coating will help to stop the cheese oozing out when it melts.
  7. Transfer the coated cheese to the platter. The crumb layer on the platter inhibits the coating from sticking to the plate and being damaged when it is removed from the plate.
  8. Place the platter in your freezer for 2 hours.
  9. Fill your pan with oil to a depth of 20mm and heat this to 180c or 350f.
  10. Carefully lower the coated cheese into the oil and fry this for 3 minutes, turning once halfway through.
  11. Remove the sticks from the oil and drain any excess oil on kitchen paper.
  12. Transfer the crispy mozzarella to platters and serve immediately with a little fresh herb garnish and the dipping sauce of your choice.
  13. The mozzarella will be crisp and golden on the outside and soft and melted on the inside.


Baked Chilli Chicken Drumsticks. Great for the Big Game or Served Cold!

Chilli Chicken Drumsticks,baked chilli cjicken drumsticks,hot drumsticks,roasted chilli drumsticks,how to make chilli drumsticks,chilli chicken drumsticks recipe,chicken snack for superbowl,spicy chicken drumsticks, spicy chicken recipes, sauces for chicken, sticky chilli chicken drumsticks, garlic chilli chicken drumsticks, hot chilli chicken drumsticks, superbowl chicken


Baked Chilli Chicken Drumsticks. Great for the Big Game or Served Cold!
Author: 
Recipe type: Chicken / Poultry / Snack Food
Prep time: 
Cook time: 
Total time: 
Serves: 4-8
 
These spicy hot chicken drumsticks are perfect snack-food for the big game, or simply served cold at a picnic. Simple and quick to make, these will have your fans raving for more!
Ingredients
  • 8 Chicken drumsticks
  • 1 Medium onion, roughly chopped
  • 2 Cloves Garlic
  • 1 Tbs dried chilli flakes
  • 15ml paprika
  • Juice of 1 lemon
  • 30ml White wine vinegar
  • 15ml Worcestershire sauce
  • 100ml Oil
Instructions
  1. Place the onion, garlic, dried chilli flakes, paprika, lemon juice, white wine vinegar, Worcestershire sauce and olive oil in a jug. Using your stick blender zap these until smooth.
  2. Make three deep cuts into the thickest part of the flesh of each drumstick. Place the drumsticks in a roasting pan and pour the sauce over the chicken.
  3. Bake the chicken in a preheated oven at 180c or 350f for 75 minutes. Turn and re-coat the chicken twice during this time - after the first 30 minutes then after the second 30 minutes.
  4. Remove the chicken from the oven, allow it to stand for 5 minutes before transferring it to baskets or platters and serving.


Trev’s Killer Barbecue Pork Ribs. Eastern-Style Barbecue Spare Ribs.

barbecue pork ribs, barbecue pork ribs recipe, spare ribs recipe, how to cook ribs, how to bbq ribs, how to grill ribs, barbecue pork ribs oven, barbecue pork ribs grill, barbecue pork ribs cooking time, how to barbeque ribs, baby back ribs, baby back ribs recipe, bbq ribs video, barbecue ribs video, barbeque ribs video, grilling ribs video, bbq spare ribs recipe, grilling spare ribs, cooking pork spare ribs, barbecue spare ribs recipe


Trev's Killer Barbecue Pork Ribs. Eastern-Style Barbecue Spare Ribs.
Author: 
Recipe type: Pork / Barbecue
Prep time: 
Cook time: 
Total time: 
Serves: 4
 
This simple barbecue pork ribs recipe will have your friends and loved ones raving for ages. Beautifully flavored with soy, garlic, ginger and roasted sesame oil, these ribs are a sure winner.
Ingredients
  • 1.5kg Pork Belly, skin on, bone in
  • 80ml Light soy sauce
  • 3 Tsp Cornflour
  • 1 Tsp Garlic powder
  • 2 Tsp Ground Ginger
  • 2 Tsp Roasted sesame oil
Instructions
  1. You will need 1.5kg of pork belly with skin on and bone in. Have your butcher cut it into short ribs of around 75mm or 3 inches.
  2. Place the ribs in your wok and cover them with boiling kettle water. Bring this to a boil, reduce the heat and simmer the meat for 10 minutes. Turn the belly over and continue to simmer for another 10 minutes.
  3. Remove the belly from the wok and cut the ribs apart.
  4. Combine the light soy sauce, cornflour, garlic powder, ground ginger and roasted sesame oil.
  5. Place the ribs in a roasting pan and pour the marinade over the meat. Toss them until everything is well coated. Allow these to marinate for 30 minutes.
  6. Over a medium hot barbecue, grill the ribs for 6 minutes per side.
  7. Turn the ribs onto the skin side then barbecue for a further 3 minutes. Remove the ribs from the heat and serve immediately with the accompaniments of your choice.


Deep-Fried Camembert / Brie. Crispy Fried Camembert or Brie Served with Preserved Figs.

Deep-Fried Camembert / Brie,deep fried camembet,deep fried brie,how to deep-fry camembert or brie cheese,crispy deep-fried camembert,crispy deep-fried brie cheese,the secret to deepfrying camembert,how to make deep-fried camembert or brie,deep--fried camembert or brie with preserved figs, Brie (Cheese), camembert,deep-fried, recipe, how to make, brie recipes, brie appetizers, brie desserts, Camembert (Cheese), camembert cheese recipes, receta con queso brie, breaded brie cheese recipe


Deep-Fried Camembert / Brie. Crispy Fried Camembert or Brie Served with Preserved Figs.
Author: 
Recipe type: Cheese / Starter / Dessert
Cuisine: French
Prep time: 
Cook time: 
Total time: 
Serves: 2
 
Deep-Fried Camembert / Brie. Deep-fried camembert or brie is absolutely amazing - soft and runny on the inside and crisp and crunchy on the outside. The trick to getting this right is in the coating - check out the video to find out more!
Ingredients
  • 125g Camembert or Brie cheese
For the Coating
  • ½ Cup finely crushed cornflakes mixed with ½ cup all purpose flour
  • ½ Cup tapioca flour or cornflour
  • 2 Eggs lightly beaten
For the Garnish
  • 6 Preserved green figs & a little fig syrup
  • Cashew nuts
Instructions
  1. Cut the cheese into 4 wedges.
  2. Before you coat the cheese, sprinkle a layer of the cornflake crumb mix over a platter. This stops the coating on the cheese from sticking to the platter while the coating sets.
  3. To coat the cheese, dip it in the egg wetting it all over.
  4. Dredge it in the tapioca or corn flour.
  5. Then dip it in the egg again making sure to wet all of the cornflour.
  6. Then it's into the cornflake mixture making sure to get a good solid coating all over.
  7. Then back into the egg making sure to wet all of the cornflake mixture.
  8. And finally another good solid coating of the cornflake mixture.
  9. This may seem like overkill, but the cheese melts very quickly and this good coating inhibits it leaking into the oil while frying.
  10. Transfer the coated cheese to the platter and allow the coating to set for 20 minutes.
  11. Fill a saucepan with oil to a depth of 50mm or 2 inches and heat this to 170c or 325f.
  12. Deep fry the cheese for 3 minutes turning halfway through.
  13. Remove the cheese from the oil and drain on kitchen paper.
  14. Transfer the cheese wedges to platters. Serve with lightly crushed preserved figs, some of the fig syrup and salted cashew nuts.


Scroll to top

Kitchen Conversions

Convert:
Masses
to:
Volumes
to:
Temperatures
to:
Lengths
to: