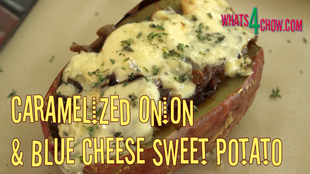
Caramelized Onion & Blue Cheese Sweet Potatoes. Baked, Stuffed Sweet Potatoes with Balsamic Onion & Blue Cheese.

stuffed sweet potatoes,filled sweet potatoes,baked stuffed sweet potatoes,how to make stuffed sweet potatoes,stuffed sweet potatoes recipe,stuffed sweet potatoes video recipe, sweet potato recipe, loaded sweet potatoes, loaded sweetpotatoes, easy sweet potato recipe, baked sweet potatoes, low fat vegan recipes, stuffed sweet potatoes paleo, stuffed sweet potatoes against all grain,stuffed sweet potatoes caramelized onion


Caramelized Onion & Blue Cheese Sweet Potatoes. Baked, Stuffed Sweet Potatoes with Balsamic Onion & Blue Cheese.
Author: 
Recipe type: Vegetarian / Vegan / Sweet Potato
Prep time: 
Cook time: 
Total time: 
Serves: 2
 
These stuffed sweet potatoes are out of this world! Filled with caramelized balsamic onions and blue cheese, the flavor combination is outstanding!!!
Ingredients
  • 2 Large sweet potatoes
  • Oil
  • 2 Large onions
  • 30ml Brown sugar
  • 15ml Balsamic vinegar
  • 15ml Fresh rosemary, finely chopped
  • 75g Strong blue cheese
  • 5ml Fresh thyme, finely chopped
Instructions
  1. Scrub the sweet potatoes clean and cut away any ugly marks.
  2. Place the potatoes in a roasting pan and brush them liberally with oil. Bake the potatoes in a preheated oven at 200c or 400f for 60 minutes until tender.
  3. Remove from the oven and allow to cool for a few minutes.
  4. While the potatoes bake, cut the onions into half rounds. Heat a pan over medium high heat and add 30ml of oil. Fry the onions for 10 to 15 minutes until well browned.
  5. Add the sugar and balsamic vinegar and continue to fry for 3 to 5 minutes until well caramelized. Remove the pan from the heat and stir in the fresh chopped rosemary.
  6. Using gloves or tongs to hold the potatoes, cut a deep valley into each potato.
  7. Spoon half of the onion into each of the potatoes.
  8. Crumble half of the strong blue cheese over each potato then melt the cheese under the grill in your oven.
  9. Remove the potatoes from the oven, transfer them to platters and serve immediately garnished with little finely chopped fresh thyme.


Deep-Fried Calamari / Squid Heads. How to Prepare, Coat and Deep-Fry Calamari Tentacles.

deep-fried squid heads,deep-fried calamari heads,deep-fried squid tentacles,deep-fried calamari tentacles,how to clean squid heads,how to cook squid heads,how to clean calamari heads,how to cook calamari tentacles,squid head recipe,calamari head recipe,calamari tentacles recipe,squid tentacles recipe,How to deep-fry calamari tentacles,how to deep-fry squid tentacles,crispy fried squid tentacles,crispy fried calamari tentacles


Deep-Fried Calamari / Squid Heads. How to Prepare, Coat and Deep-Fry Calamari Tentacles.
Author: 
Recipe type: Seafood / Calamari
Cuisine: Mediterranean
Prep time: 
Cook time: 
Total time: 
Serves: 2
 
Calamari heads / Tentacles are popular across the entire Mediterranean region. They are prepared in many ways from grilled to pickled. Here we're coating the heads in a light batter and frying them to golden perfection.
Ingredients
  • 250g Squid heads
  • 2 Eggs
  • 60g Tapioca flour
  • 2.5ml Salt
Instructions
  1. Inspect the calamari heads. In most cases, the beak will still be present. It is a hard piece of transparent material. Cut this away and discard it.
  2. In a jug, combine the tapioca flour, salt and eggs. Whisk this thoroughly until you have silky smooth batter.
  3. Place the squid heads in a bowl and pour the batter over. Mix the heads in until everything is well coated.
  4. Half fill your wok with oil and heat this to 190c or 375f.
  5. Carefully drop the heads into the oil one by one. Fry the squid for 3 minutes until crisp and lightly golden. Remove from the oil and drain on kitchen paper.
  6. Repeat this until all of the calamari is fried.
  7. Serve the calamari immediately with rice and lemon wedges and any other accompaniments of your choice.


Toad in the Hole. How to Make Traditional Toad in the Hole at Home!!!

toad in the hole,how to make toad in the hole,easy toad in the hole recipe,yorkshire pudding toad in the hole,best toad in the hole recipe,homemade toad in the hole,make toad in the hole at home,toad in the hole recipe video,toad in the hole with pork sausage and gravy, Toad In The Hole (Dish), YORKSHIRE PUDDING BATTER, toad in the hole jamie oliver, toad in the hole gordon ramsay, toad in the hole recipe south africa


Toad in the Hole. How to Make Traditional Toad in the Hole at Home!!!
Author: 
Recipe type: Yorkshire pudding
Cuisine: English / British
Prep time: 
Cook time: 
Total time: 
Serves: 2
 
Toad in the Hole is an all-time traditional favorite. Crispy pork sausages encased in golden baked Yorkshire pudding is well worth the effort!!!
Ingredients
  • 4 Pork sausages
  • 4 Eggs
  • 200ml Milk
  • 200g All-purpose flour
  • 2.5ml Salt
Instructions
  1. Place the flour and salt in your mixing bowl and pour in the milk and eggs. Whisk this by machine or hand until you have a smooth, silky batter. Transfer the batter to a pouring jug.
  2. Heat a pan over medium high heat and fry the pork sausages until almost cooked through, and nicely browned. Remove these from the heat.
  3. Place 2 single portion baking dishes in a roasting pan and pour in just enough oil to cover the base of each dish.
  4. Place the roasting tin in your oven at 200c or 400f for 15 to 20 minutes until the oil is really hot. Remove the toasting pan from the oven.
  5. Place 2 sausages into each of the dishes and pour batter into each until they are ⅔ full.
  6. Return these yo the oven and bake undisturbed for 30 minutes until well risen and browned.
  7. Remove these from the oven and marvel at the amazing hollow Yorkshire puddings surrounding the beautifully browned and crispy pork bangers.
  8. Remove these from the baking dishes and transfer them to platters. Drizzle with a generous portion of brown onion gravy and serve immediately.


Chinese-Style Pulled Pork. Succulent Flavor-Potted Pulled Pork, Served in a Top-Hat Pie!!!

pulled pork recipe, bbq pulled pork, Pulled Pork (Dish), homemade bbq pulled pork, pulled pork sandwich,chinese-style pulled pork,flavor-potted pulled pork, pulled pork recipes, pulled pork sauce, pulled pork pressure cooker, pulled pork in slow cooker, pulled pork crock pot, best pulled pork recipe,pulled pork recipe video,how to make pulled pork,tender pulled pork,slow-cooked pulled pork,pulled pork pie


Chicnese-Style Pulled Pork. Succulent Flavor-Potted Pulled Pork, Served in a Top-Hat Pie!!!
Author: 
Recipe type: Pork
Cuisine: Chinese
Prep time: 
Cook time: 
Total time: 
Serves: 4-6
 
Pulled Pork is an all-time favorite. It is extremely versatile and can be served on burger buns, sandwiches and in a hundred other ways. In this demonstration, I make Chinese flavor-potted pulled pork and serve it with golden crispy flaky pastry as a top-hat pie!!!
Ingredients
  • 2 Pork knuckles - total 1.5kg
For the Flavor Pot Ingredients
  • 2 Whole star anise
  • 2 Tsp Szechuan peppers
  • 2 Tsp Ground cinnamon
  • 2 Tsp Ground ginger
  • 2 Tsp Fennel seeds
  • 1 Tsp whole cloves
  • 1 Liter chicken stock
  • 150ml Light soy sauce
  • Water to cover
To make the Sauce
  • 200ml of the flavor pot liquid
  • 50ml Hoisin sauce
  • 1 Tsp Tapioca or cornflour mixed with a little water
Other
  • 2 Rolls Puff pastry
Instructions
  1. Take 2 pork knuckles, pickled and smoked, or plain, an cut down to the bone on both sides of each knuckle.
  2. Measure out a liter of chicken stock, and combine the star anise, Szechuan peppers, ground cinnamon, ginger, fennel seeds, cloves and cardamom.
  3. Place the pork knuckles in a pot, pour in the spice mixture and the stock. Pour in just enough water to cover the knuckles.
  4. Bring the pot to boil, reduce the heat and allow this simmer, partially covered, for 3 and a half hours.
  5. Remove the knuckles from the pot and transfer them to a chopping board. You will notice that they are fall off the bone tender.
  6. Pull the skin from the pork and the flesh from the bone. Using 2 forks, pull the pork flesh into shreds.
  7. Remove 200ml of the flavor pot sauce. Mix 1 teaspoon of tapioca or cornflour with a little water and stir this in. Measure 50ml of hoisin sauce and stir this in thoroughly.
  8. Transfer the sauce to a small saucepan and bring this to a boil. Allow it to boil for 60 seconds until thickened then remove from the heat.
  9. Pour half of the sauce into the pork and stir this in to glaze all of the meat. Keep the remaining sauce warm.
  10. Roll out your puff pastry and using a bowl as a template, cut rounds from the pastry.
  11. Transfer the pastry to a lightly greased baking sheet and glaze the rounds with and egg wash of 1 egg yolk mixed with a tablespoon of water.
  12. Bake the pastry according to the package instructions.
  13. To assemble the dish, place a round of puff pastry on the plate. Top this with a portion of pulled pork and drizzle this with some of the remaining sauce.
  14. Top the pork with another round of pastry and serve immediately with the accompaniments of your choice.


Incredible Greek Lamb Burger – Succulent Greek Lamb Burger Patty Served on Pitta with Tzatziki.

greek lamb burger,greek-style lamb burger,greek lamb burger on pitta bread,greek lamb burger with tzatziki,how to make lamb burger patties,how to make a lamb burger,mediterranean style lamb burger,lamb burger with pitta and tzatziki,greek lamb burger recipe,lamb burger patty recipe, burger recipes, lamb burger recipes, barbecue lamb burger, Gyro Burger Recipe, Greek Gyro Burger Recipe, greek lamb burgers rachael ray, greek lamb burgers feta


Incredible Greek Lamb Burger - Succulent Greek Lamb Burger Patty Served on Pitta with Tzatziki.
Author: 
Recipe type: Burgers
Cuisine: Greek / Lamb
Prep time: 
Cook time: 
Total time: 
Serves: 4
 
This one is a real winner!!! Succulent Greek Lamb Burger Patty served on a pitta bread and topped with a cascade of tzatziki. This burger really has all the tastes and flavors of the Mediterranean!!!
Ingredients
  • 600g Lamb mince
  • 2 Cloves garlic, crushed
  • ½ Onion, finely chopped
  • 1 Tbs Tomato sauce
  • 1 Egg, lightly beaten
  • 30g Fresh bread crumbs
  • 2 Tbs Finely chopped Calamata olives
  • 60g Feta cheese, crumbled
  • ½ Tsp Ground cumin
  • ½ Tsp Ground coriander
  • 1 Tsp Dried oregano
  • Salt & pepper to taste
For the Tzatziki
  • 1 Tomato, finely chopped
  • An equal amount of finely chopped Israeli cucumber
  • ½ Tsp Dried mint
  • 150ml Greek yoghurt
Instructions
  1. In a large mixing bowl, combine the lamb mince, crushed garlic, finely chopped onion, tomato sauce, egg, fresh bread crumbs, chopped Calamata olives, ground cumin, ground coriander, dried oregano and crumbled feta cheese.
  2. Season with salt and pepper and mix this thoroughly until everything is evenly distributed.
  3. Weigh the mixture and divide it into 4 equal portions of around 220g.
  4. Shape the potions into patties of about 20mm or ¾ inch thick.
  5. Place the patties on a platter and refrigerate them for 30 to 60 minutes.
  6. While the patties set, finely chop 1 tomato, and a matching amount of Israeli cucumber. Place these in a bowl and add 150ml of Greek yogurt, along with the dried mint. Mix this thoroughly and put it aside.
  7. Heat a heavy pan over medium high heat and add 30g of butter. Fry the patties for 8 minutes, turning every minute.
  8. The patties should well charred, but not burnt.
  9. Place a pitta bread on each serving platter and top each one with a patty. Arrange a cascade of tzatziki on top of each patty, garnish with snipped chives or fennel sprigs and serve immediately.


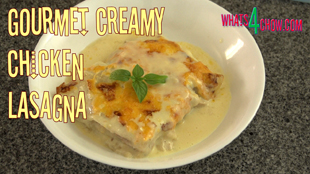
Gourmet Chicken Lasagna. Amazing Creamy Cheese Chicken Lasagna – The Best!!!

chicken lasagna,how to make lasagna,how to make chicken lasagna,creamy chicken lasagna,cheesy chicken lasagna,chicken lasagna recipe,chicken lasagna recipe video,Lasagne (Dish),Chicken and Cheese Lasagna, Creamy chicken and mushroom lasagna,chicken lasagna with white sauce,chicken lasagna recipe jamie oliver, chicken lasagna recipe sanjeev kapoor,chicken lasagna recipe italian,White Cheese Chicken Lasagna


Gourmet Chicken Lasagna. Amazing Creamy Cheese Chicken Lasagna - The Best!!!
Author: 
Recipe type: Pasta
Cuisine: Italian
Prep time: 
Cook time: 
Total time: 
Serves: 6
 
Lasagna is a cornerstone meal in many households, however the cliche'd savory mince or chicken with tomato and white sauce can be extremely tedious on the tastebuds. This creamy cheese chicken lasagna will change the way you see lasagna forever!!!
Ingredients
For the Cheese Sauce
  • 120g Mature cheddar, shredded
  • 120g Parmesan, shredded
  • 800ml Chicken stock
  • 240ml Cultured sour cream
  • 60ml Tapioca or cornflour
For the Chicken Gravy
  • 400ml Chicken stock
  • 30ml Tapioca or cornflour
The Rest...
  • 600g Roasted chicken, skin on, roughly chopped
  • 500g Fresh lasagna sheet (or quick-cook dried)
Instructions
  1. To start, we are going to make a thin gravy for the chicken. In a saucepan over medium heat, mix the tapioca or cornflour with a little water and add it to the cold chicken stock.
  2. Bring this to a boil, reduce the heat and simmer for 60 seconds until thickened. Remove the gravy from the heat and put this aside.
  3. For the creamy cheese sauce, heat the second batch of chicken stock over over medium heat. Mix the tapioca or cornflour with a little water and add this to the pot.
  4. Bring this to a boil, lower the heat and simmer for 60 seconds until thickened. Remove the pot from the heat.
  5. Stir in the shredded mature cheddar and parmesan cheeses until melted and totally combined.
  6. Pour in the sour cream and stir this in until totally combined.
  7. Place the roughly chopped chicken in a mixing bowl and pour in the gravy. Stir this until combined.
  8. Lightly grease a medium size roasting pan and line the bottom with 2 slices of lasagna sheet. I am using freshly made lasagna sheet, but you can use quick cook dried pasta as well.
  9. Top the pasta with a layer of the chicken and gravy. This is the reason we made the gravy thin. The pasta will absorb 30 percent of the liquid from the gravy as it cooks and it will thicken as a result.
  10. Add another layer of pasta to the pan.
  11. Top this with a generous layer of the creamy cheese sauce.
  12. Top this with another layer of pasta.
  13. Then another layer of chicken and gravy.
  14. A final layer of pasta topped with another generous spread of creamy cheese sauce and you're almost done.
  15. Sprinkle a generous helping of mature cheddar over the surface.
  16. Bake the lasagna in a preheated oven for 35 to 40 minutes until the cheese is crispy and well browned.
  17. Remove the lasagna from the oven and allow it to stand for 10 minutes before slicing and serving.


Hunan-Style Sweet & Piquant Deep Fried Calamari. Chinese Sweet & Sour Calamari.

Hunan-Style Sweet & Piquant Deep Fried Calamari,chinese deep-fried calamari,sweet and sour deep-fried calamari,deep-fried squid,sweet and sour deep fried squid,chinese deep fried squid,sweet and sour deep fried squid,chinese deep fried calamari, fried calamari, fried squid, fried calamari recipe, crispy fried calamari, chinese deep fried calamari recipe, asian deep fried calamari, chinese style deep fried squid


Hunan-Style Sweet & Piquant Deep Fried Calamari. Chinese Sweet & Sour Calamari.
Author: 
Recipe type: Seafood / Calamari / Deep-fried
Cuisine: Chinese
Prep time: 
Cook time: 
Total time: 
Serves: 4
 
Hunan-style sweet & piquant deep-fried calamari is out of this world!!! Battered and deep-fried, the calamari is then tossed in a sweet and piquant Hunan style sauce to glaze. Served on a bed of shrimp fried rice, this is pure heaven.
Ingredients
For the Batter
  • 150g All-purpose flour
  • 75ml Tapioca flour (or Corn flour)
  • 7.5ml Baking powder
  • 235ml Water
  • 2.5ml Salt
  • 30ml Oil
For the Sauce / Glaze
  • 30ml Caster sugar
  • 20ml White wine vinegar
  • 15ml Light soy sauce
Other
  • ½ Red pepper cut into strips
  • ½ Yellow pepper cut into strips
  • 3 Tbs Snipped chives
Instructions
  1. Place the flour, tapioca flour, baking powder and salt in a large mixing bowl. Add the water and mix this to a thick batter. Allow this to stand for 20 minutes.
  2. While the batter stands, cut the calamari into rings of around 6mm or a quarter inch in width.
  3. Transfer the rings to a clean dish towel and pat them dry.
  4. Cut the peppers into strips, and snip 3 tablespoons of chives.
  5. Once the batter has rested, pour in the oil and mix this thoroughly until combined.
  6. Half fill a large pan with oil and heat this to 180c or 350f. Dip the calamari rings in the batter and carefully drop them into the oil. Continue until the surface of the oil is covered.
  7. Fry the calamari for 3 minutes per side until light golden and crispy. Use a slotted spoon to scoop these from the oil and drain the rings on kitchen paper.
  8. Repeat this until all of the rings are fried.
  9. Heat your wok over medium high heat, add a teaspoonful of oil and fry the peppers for 2 minutes. In a jug, combine the caster sugar, white wine vinegar and light soy sauce.
  10. Stir this until the sugar has dissolved, and add this to the wok.
  11. Allow this to boil for 90 seconds, then add the calamari to the wok. Toss the calamari in the sauce until everything is well coated.
  12. Remove the wok from the heat and stir in the snipped chives.
  13. Arrange a bed of shrimp fried rice in each your serving bowls. Top this with the calamari and serve immediately.


Plaited Chicken Pie. How to Make Rustic Chicken Pie from Start to Finish. Homemade Chicken Pie.

chicken pie,chicken pie recipe,how to make chicken pie,homemade chicken pie recipe,country chiken pie recipe,plaited chicken pie recipe,braided chicken pie recipe,how to make a chicken pie at home,chicken pie in puff pastry,best chicken pie filling,best chicken pie filling recipe,how to make chicken pie filling,chicken pie filling recipe,family sized chicken pie recipe,fancy chicken pie recipe,chicken pie


Plaited Chicken Pie. How to Make Rustic Chicken Pie from Start to Finish. Homemade Chicken Pie.
Author: 
Recipe type: Chicken / Baked / Pie
Prep time: 
Cook time: 
Total time: 
Serves: 4-6
 
This amazing plaited chicken pie that really does look incredible and tastes even better. For the best result, use the best quality parmesan and salami you can find.
Ingredients
  • 500g Chicken breast
  • 8 White mushrooms
  • 1 Medium onion
  • 50g Parmesan cheese
  • 250ml Sour cream
  • 50g Salami
  • 1 Roll puff pastry
Instructions
  1. Slice the chicken breasts across the grain into thin slices.
  2. Slice the mushrooms thinly, and dice the onion.
  3. Shred the parmesan using a fine grater and mince the salami finely.
  4. Heat your pan over medium high heat and fry the onion and mushroom for 3 minutes.
  5. Add the chicken and continue to fry for a further 5 minutes until the chicken is cooked through.
  6. Remove the pan from the heat and add the shredded parmesan and salami. Stir in the sour cream and put this aside to cool completely.
  7. Lay the puff pastry out on a lightly greased baking tray and heap the filling up down the center of the pastry.
  8. Using a sharp knife, cut the pastry at an angle in 1 inch intervals from the edge of the filling to the edge of the pastry. Repeat this on the other side as well.
  9. Lift the end of the pastry closest to you to enclose the filling.
  10. Alternating with strips on the right and left, lift these to cover the filling up until the second last pair of strips. Trim the odd ends from the end strip and lift the center piece to enclose the filling.
  11. Wrap the second last strips over this to secure it.
  12. Whisk 1 egg yolk with a tablespoon of water and paint on to the entire pie.
  13. Bake the pie in a preheated oven at 200c or 400f for 30 to 35 minutes. The pie will be well puffed up, crispy and golden.
  14. Remove the pie from the oven and allow it to rest for 5 minutes before slicing and serving with the accompaniments of your choice.


Grilled Pork Loin Chops Diabolo. Spicy Grilled Pork Loin Chops with Perfect Crackling & Amazing Flavor.

pork loin chops,grilled pork loin chops,spicy grilled pork loin chops,pork chops diabolo,pork loin chops al diavolo,pork loin chops with spicy rub,pan grilled pork loin chops,, grilled pork loin chops marinade, grilled pork loin chops brine, grilled pork loin chops recipes easy, grilled pork loin chops dry rub, grilled pork loin chops time, grilled pork loin chops temperature, how to make baked porkchops, pork tenderloin recipe


Grilled Pork Loin Chops Diabolo. Spicy Grilled Pork Loin Chops with Perfect Crackling & Amazing Flavor.
Author: 
Recipe type: Pork / Grilled
Cuisine: Mexican / Spanish
Prep time: 
Cook time: 
Total time: 
Serves: 2
 
These grilled Pork loin chops with crispy golden crackling are full of spicy flavor. The Diabolo spice is straight from the hotter part of heaven!!!
Ingredients
  • 2 Pork loin chops
  • ½ Tsp Ground coriander
  • 1 Tsp Crushed red chilli flakes
  • ½ Tsp Oregano
  • ½ Tsp Mustard powder
  • ½ Tsp Garlic powder
  • ½ Tsp Hot smoked paprika
Instructions
  1. Stand the pork chops up on their skin and press 2 skewers through the chops just above the fatty strip. If the chops are cut on the thinner side, you may need a third skewer towards the top as well.
  2. Flip the chops over, spread the skin with butter and season the skin liberally with salt and pepper.
  3. Heat your pan over medium high heat add a little butter and stand the chops in the pan skin side down.
  4. Fry the skin for 8 to 10 minutes until it is well crisped and golden, and the fat has started to render.
  5. Remove the chops from the pan and remove the skewers. Combine the cracked black pepper, ground coriander, red chilli flakes, oregano, mustard, garlic powder and hot smoked paptika.
  6. Season the chops with salt and sprinkle the spice mix liberally onto both sides of the chops. Press the spices into the surface of the meat.
  7. Wipe out your pan, reheat it over medium high and add 30g of butter.
  8. Fry the chops for 3 minutes per side until crispy and well colored. Remove the chops from the heat and serve immediately with the accompaniments of your choice.


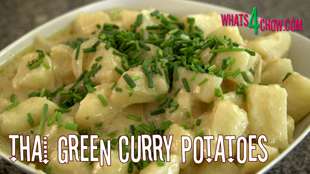
Thai Green Curry Potatoes. Rich & Spicy Thai Green Curry with Potatoes

how to cook thai food, how to make thai food, easy thai food, Green Curry (Food), bbc thai green curry potatoes, vegetarian thai green curry potato, how to make thai green curry with potatoes, Vegetarian Thai Green Curry, thai green curry new potatoes green beans, easy thai green curry with potatoes, thai green curry sweet potato chicken, thai food cooking video, thai food video, thai cooking video


Thai Green Curry Potatoes. Rich & Spicy Thai Green Curry with Potatoes
Author: 
Recipe type: Thai Green Curry / Vegetarian / Vegan
Cuisine: Thai
Prep time: 
Cook time: 
Total time: 
Serves: 4-6
 
Thai Green Curry with Potatoes is really easy and really tasty. This makes for a perfect accompaniment or main course. Although this is not authentically Thai in origin, this dish displays all of the flavors and aromas of Thai green curry.
Ingredients
  • 2 Medium onions, peeled and cut into eighths
  • 2 Tbs Chopped Garlic
  • 6 Medium Potatoes, peeled and cubed
  • 45ml Oil
  • 2 Tbs Green Curry Paste (you can adjust this if you prefer hotter or cooler)
  • 400ml Coconut cream
  • 2 Tbs Chopped coriander or garlic chives
Instructions
  1. Place the cubed potatoes, onion and garlic in a large pan along with the oil. Place the pan over medium heat and saute for 7 minutes until the onion is tender.
  2. Add the Thai green curry paste and stir this in for 30 seconds until fragrant.
  3. Add the coconut cream and stir this in. Bring the pan to a boil, reduce the heat to a simmer and allow this to simmer for 20 to 30 minutes until the potato is tender.
  4. Season with salt to taste and transfer the potato to serving bowls. Garnish with fresh coriander or snipped chives and serve immediately.


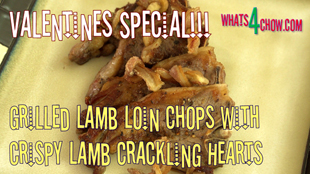
Grilled Lamb Chops with Crispy Lamb Crackling Hearts – Valentine’s Special Series – Part 2

grilled lamb loin chops with crispy lamb crackling,grilled lamb chops valentines recipe,best grilled lamb chops recipe, lamb crackling, lamb crackling recipe, roast lamb crackling, lamb belly crackling, lamb leg crackling, lamb fat crackling, lamb rack crackling,Grilled Lamb Chops with Crispy Lamb Crackling Hearts,valentine's day recipes,best valentine's day recipes,easy valentines day recipes,Grilled Lamb Chops with Crispy Lamb Crackling Hearts - Valentine's Special Series - Part 2


Grilled Lamb Chops with Crispy Lamb Crackling Hearts - Valentine's Special Series - Part 2
Author: 
Recipe type: Lamb / Grilled / Valentine's Day
Prep time: 
Cook time: 
Total time: 
Serves: 2
 
This simple grilled dish of lamb loin chops garnished with crispy lamb crackling tied to symbolize little hearts, is a sure winner. Succulent grilled lamb chops will win anyone's heart!!!
Ingredients
  • 8 Lamb loin chops
  • Salt and cracked black pepper to season
  • 30g Butter
Instructions
  1. Using a small sharp knife, cut the skin and a little of the fat from each chop.
  2. Cut each strip of skin in half length-ways, then tie each piece of skin in a simple knot. Season these with salt and pepper and set them aside.
  3. Heat a pan or wok of oil to 180c or 350f and deep-fry the knotted skin until it is crispy and golden. Scoop the crackling from the oil using a slotted spoon, drain on kitchen paper and season again with salt and pepper to taste.
  4. Keep this warm on the side.
  5. Season the chops liberally on both sides with salt and cracked black pepper. Heat a pan over medium high heat, add the butter and fry the chops for 3 minutes per side.
  6. Transfer the chops to platters, garnish them with the crispy lamb crackling hearts and serve immediately with the accompaniments of your choice.


Barbecue Mutton Ribs – Mediterranean-Style Marinated Mutton Ribs Barbecued to Perfection!

barbecue mutton ribs,mediterranean barbecue mutton ribs,marinated mutton ribs,tender marinated mutton ribs,how to barbecue mutton ribs,how to marinate mutton ribs,how to barbecue mutton ribs,barbecue lamb ribs,mediterranean barbecue lamb ribs,marinated lamb ribs,tender marinated lamb ribs, barbecue lamb ribs, barbecue lamb ribs recipe, bbq mutton ribs recipe, barbecue lamb ribs oven, mutton ribs barbecue


Barbecue Mutton Ribs - Mediterranean-Style Marinated Mutton Ribs Barbecued to Perfection!
Author: 
Recipe type: Mutton / Lamb / Barbecue
Cuisine: Mediterranean / Greek
Prep time: 
Cook time: 
Total time: 
Serves: 2-4
 
Mutton ribs are full of awesome flavor, however they do require an acidic oil marinade and an extended cooking time to tenderise. These Mediterranean-style mutton ribs will have the crowds cheering!!!
Ingredients
  • 1.5kg Mutton or Lamb ribs (skin on)
For the Marinade
  • 30ml Lemon juice
  • 60ml Oil
  • 1½ Tsp Finely chopped garlic
  • 1 Tbs Finely chopped fresh marjoram
  • 1 Tbs Salt
  • 1 Tsp Sugar
Instructions
  1. To start you will need 2 racks of mutton ribs totaling about 1.5kg. Place them on your chopping board and score the skin into blocks of 1 inch or 25mm square. The skin contracts dramatically while grilling, and this scoring stops the racks from curling up and deforming during cooking.
  2. In a jug, combine the sugar, salt, finely chopped garlic, finely chopped fresh marjoram, oil and lemon juice. Whisk this vigorously until the salt and sugar have dissolved and the mixture has totally emulsified.
  3. Place the mutton in a large pan skin side up. Pour the marinade over the racks and brush it into the meat. Place the pan in your refrigerator and allow this to marinate for at least 4 hours, preferably overnight.
  4. Heat your barbecue to medium heat and grill the mutton ribs with the lid closed for 60 minutes turning every 15 minutes. The temperature should read around 150c. Use any remaining marinade to baste the mutton during the cooking process.
  5. Be aware that the ribs have a high fat content that can lead to flare-ups. If this happens, relocate the ribs to another part of the grill surface until the flames die. Turn the heat down slightly and return them to their original position.
  6. Remove the ribs from the grill and cut them apart before serving with the accompaniments of your choice.


Scroll to top

Kitchen Conversions

Convert:
Masses
to:
Volumes
to:
Temperatures
to:
Lengths
to: