Deep Fried Cajun Calamari Rings. How to Make Crispy Deep-Fried Cajun Calamari.

deep-fried calamari,deep fried calamari calories,deep fried calamari rings,spicy deep fried calamari,deep fried calamari recipe,fried calamari,fried calamari recipe,deep fried calamari batter recipe,squid,deep-fried squid,how to make fried calamari,crisp fried squid,learn to make deep-fried calamari,easy fried calamari,quick fried calamari recipe,how to fry calamari,how to fry calamari rings


Deep Fried Cajun Calamari Rings. How to Make Crispy Deep-Fried Cajun Calamari.
Author: 
Recipe type: Seafood
Cuisine: Cajun
Prep time: 
Cook time: 
Total time: 
Serves: 2-4
 
A while back we did a video on Crispy Deep-Fried Calamari. This recipe uses a totally different coating with cornmeal and Cajun spice. The result is an outstanding flavor explosion - crispy on the outside, meltingly tender on the inside.
Ingredients
  • 500g Calamari Rings
  • 1 Egg
  • 240ml / 1 Cup Milk
  • 60ml / ¼ Cup Fine cornmeal
  • 180ml / ¾ Cup Plain flour
  • ½ Tsp Baking powder
  • 1½ Tsp Cajun spice (see below)
  • ¼ Tsp Dried basil
  • ½ Tsp Garlic salt
For the Cajun Spice
  • 1 Tbs garlic powder
  • 1 Tbs Onion powder
  • 2 Tsp White pepper
  • 2 Tsp Cracked black pepper
  • 1½ Tsp Cayenne pepper
  • 2 Tsp Dried thyme
  • ½ Tsp Dried oregano
  • Mix the ingredients together and store in an airtight container
Instructions
  1. Cut the calamari tubes into rings of ¼ inch or 6mm thick. Pat the rings dry and put them aside.
  2. To make the batter, whisk the egg and milk together in a jug.
  3. In a large mixing bowl, combine the fine cornmeal, plain flour, baking powder, Cajun spice, dried basil and garlic salt.
  4. Pour half of the milk egg mixture into the bowl and mic this to a paste. Pour in the remaining milk and mix this to a batter. Allow this to stand for 30 minutes.
  5. Fill your pan with oil to a depth of 1 inch or 25 mm and heat this to 180c or 350f. Dip the calamari rings in the batter and carefully drop them into the oil.
  6. Fry the calamari for 3 minutes per side until lightly golden and crisp. Use a slotted spoon to remove the rings, drain any excess oil on kitchen paper, then continue this process until all of the rings are fried.
  7. Transfer the rings to platters and serve with tartare sauce or our amazing Queso Blanco dip.


Super Beefy Burger Patties. Beef Jerky / Biltong Enhanced Burger Patties.

burger patties,beef burger patties,how to make the best beef burger pattie,super-beefy beef burger patties, burger patties recipe, burger patties from mince, burger patties price, burger patties recipe, burger patties making, burger party recipe, best burger recipe, Burger-Hamburger,biltong flavored burger patty,beefy jerky flavored beef burger patty,how to flavor beef burger patty,best recipe beef burger patty


Super Beefy Burger Patties. Beef Jerky / Biltong Enhanced Burger Patties.
Author: 
Recipe type: Burgers
Cuisine: American
 
Beef Jerky / Biltong is essentially concentrated beef, having lost 50 to 60% of it's mass in water. This results in burger patties that have more than twice the beef flavor when compared to raw beef. By powdering the jerky / biltong and combining it with the beef mince, you end up with a patty that has tons of super-beefy flavor --- out of this world!!!
Ingredients
  • 30g Beef Jerky / Biltong per 100g ground beef
  • Salt to taste
Instructions
  1. Thinly slice 30g of jerky for each 100g of beef mince. Once sliced, chop it even finer.
  2. Using your spice grinder, zap the chipped jerky until it is a fine fluffy powder.
  3. Place the beef mince in a large mixing bowl. Add the jerky powder along with a generous pinch of salt.
  4. Massage this together until everything is totally combined.
  5. Using you burger press, press the patties out and transfer them to a platter, separated by grease-proof paper or foil.
  6. Allow these to mature for at least 3 hours, preferably overnight in your refrigerator.
  7. When you're ready to cook your creations, make an indentation in the center of each patty and proceed.


Indian Butter Chicken. How to Make Delicious, Fragrant Butter Chicken at Home.

Butter Chicken (Dish), butter chicken recipe, authentic butter chicken recipe, how to make butter chicken, indian recipes, Indian Cuisine (Cuisine), butter chicken curry recipe, tandoori, butter chicken curry, butter chicken recipe indian, butter chicken recipe with fresh cream, butter chicken recipe sanjeev kapoor, butter chicken vahchef, butter chicken restaurant style, tandoori masala chicken tikka masala,chicken tikka butter masala, Butter Chicken Masala Recipe, Punjabi butter chicken recipe


Indian Butter Chicken. How to Make Delicious, Fragrant Butter Chicken at Home.
Author: 
Recipe type: Indian Curry
Cuisine: Indian
Prep time: 
Cook time: 
Total time: 
Serves: 4-8
 
In Today's episode we make delicious, fragrant Indian Butter Chicken, using the Tandoori Chicken we baked yesterday.
Ingredients
  • 1.2kg Cooked Tandoori chicken
  • 100g Butter
  • 160ml Cream
  • 45g Garlic, finely chopped
  • 55g Ginger, finely chopped
  • 5 Green chillies, chopped
  • 1Tsp Paprika
  • 900g Tomatoes
  • 480ml Chicken Stock
  • Salt to taste
  • Fresh coriander to garnish
Instructions
  1. Finely chop the garlic, ginger and green chillies. Measure out the paprika, butter, chicken stock and cream. Chop the tomatoes, and cut the entire chicken into bite sized pieces.
  2. Heat the butter in a pan over medium high heat and fry the garlic, ginger and chilli for 2 minutes until fragrant.
  3. Add the paprika and stir this until totally combined.
  4. Add the chopped tomato and the chicken stock. Bring this to a boil, reduce the heat and simmer the tomato for 10 to 15 minutes. The tomatoes must be soft and tender.
  5. Remove the pan from the heat and allow it to cool for 5 minutes. Using your stick blender, puree the tomatoes until smooth.
  6. Return the pan to the heat, add the chicken and bring this to a boil. Reduce the heat and simmer the chicken for 10 minutes until it is absolutely tender.
  7. Add the cream, stir this in until totally combined. Season with salt to taste and serve immediately garnished with fresh coriander. As an accompaniment, any Indian bread will serve well.


Authentic Tandoori Chicken. Tradition Indian Tandoori Chicken, Spiced and Grilled to Perfection.

tandoori chicken, Tandoori Chicken (Dish), how to make tandoori chicken, tandoori chicken masala, baked tandoori chicken, Indian style tandoori chicken, indian cooking, spicy chicken recipe, chicken tandoori, indian chicken recipe, Tandoori Chicken Recipe, tandoori chicken curry recipe, tandoori chicken tikka recipe, tandoori chicken indian recipe, tandoori chicken marinade, tandoori chicken recipe sanjeev kapoor


Authentic Tandoori Chicken. Tradition Indian Tandoori Chicken, Spiced and Grilled to Perfection.
Author: 
Recipe type: Indian Curry
Cuisine: Indian
Prep time: 
Cook time: 
Total time: 
Serves: 4
 
In this first episode of 2015 we make authentic Tandoori Chicken. This is the first in a 2-part series covering Tandoori Chicken and Butter Chicken.
Ingredients
  • 1.4kg Chicken
For the Paste
  • 50g Garlic paste
  • 10g Ginger paste
  • 30ml Lemon juice
  • 25g Chilli paste
  • 5ml Salt
For the Marinade
  • 5g Cumin Powder
  • 10g Garam Masala
  • 25g Ginger paste
  • 30ml Lemon Juice
  • 50ml Oil
  • 25g Chilli paste
  • A few strands of saffron
  • 20ml Yoghurt
To Serve
  • Sliced onion
  • Chaat Masala to sprinkle
  • Cream
  • Lemon wedges
Instructions
  1. Cut away any excess skin from the neck and butt of the chicken and remove the wing tips. Slice through the breast bone and open the chicken up.
  2. Turn the chicken oven, and with a downward thrust, dislocate the pelvis of the bird.
  3. Using a sharp knife, cut deep incisions into the thighs, drumsticks and breast of the chicken.
  4. In a bowl, combine the garlic paste, ginger paste, lemon juice, chilli paste and salt.
  5. Brush all of the paste onto the chicken making sure to get it into the incisions as well. Let this stand for 30 minutes.
  6. While the chicken stands, combine the cumin powder, garam masala, ginger paste, lemon juice, chilli paste, saffron, oil, salt and yoghurt. Mix this until the oil is totally combined.
  7. Spoon this mixture over the chicken, then allow this to marinate in your refrigerator for 6 hours.
  8. Remove the chicken from the refrigerator, scoop up any over-run marinade and pour it back onto the chicken.
  9. Lift the chicken up, slide a rack underneath, then bake the chicken in a pre-heated oven at 180c or 350f for 80 minutes.
  10. Remove the chicken from the oven, cut it into portions and serve garnished with fresh onion slices, chaat masala, a drizzle of cream and a few lemon wedges.


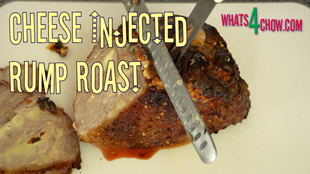
Cheese Injected Beef Rump Roast. Prime Beef Rump Injected with Cheese Wizz, Rubbed with Chilli Sugar and Roasted to Perfection.

beef rump roast,perfect beef rump roast,how to roast beef rump,how to roast beef rump in your oven,cheese injected beef rump roast,beef rump roast recipe,cheesy beef rump roast, beef rump roast recipe oven, beef rump roast marinade, beef rump roast smoker, beef rump roast pressure cooker, beef rump roast crock pot recipes, best roast beef recipe, beef rump roast slow cooker recipes, the best rump roast, tender rump roast


Cheese Injected Beef Rump Roast. Prime Beef Rump Injected with Cheese Wizz, Rubbed with Chilli Sugar and Roasted to Perfection.
Author: 
Recipe type: Beef
Prep time: 
Cook time: 
Total time: 
Serves: 4-6
 
In todays episode we're going to roast a perfect beef rump roast, injected with Cheese Wizz, rubbed with our special chilli sugar rub. You will nedd to have a meat syringe to inject the cheese. If you don't own one, never fear, they only cost about 10 dollars on eBay.
Ingredients
  • 1.4kg Beef Rump Roast
  • 100g Cheese Whizz (soft spreading processed cheese)
  • 15g Butter
  • 2 Tbs Brown sugar
  • 1 Tbs Salt
  • 1 Tbs Chilli flakes
For the Serving Suggestion
  • 6 Soft sundried tomato halves (the type in olive oil)
  • Feta cheese
Instructions
  1. To start you will need a nice 1.4kg or just over 3 pound rump roast cut. Look for a piece that has good marbling and a fair strip of fat on the edge.
  2. Place the Cheese Wizz in a bowl along with the butter and warm it up in your microwave to soften and liquify the cheese the cheese. Stir this thoroughly until the butter and the cheese are totally combined.
  3. Load half of this into your meat syringe and start injecting the meat with the cheese. Do this by pressing the needle almost all the way through the meat. Start pressing the plunger down while simultaneously withdrawing the needle from the meat. Load the other half of the cheese into the syringe and continue injecting the meat at even spaces until all of the cheese has been injected into the rump.
  4. In a bowl, combine the brown sugar, flaked salt and chilli flakes. Sprinkle these liberally all over the roast and rub them in yo the surface. Be careful not to apply to much pressure as this will force the cheese out of the meat.
  5. Place the roast on a rack in your roasting pan and bake the meat in a preheated oven at 180c or 350f for 90 minutes.
  6. Remove the roast from the oven and allow it to stand for 5 minutes.
  7. Transfer the roast to a carving board and slice the meat into thin slices at an angle across the grain.
  8. You will notice that the whole inside of the meat has been infused with the cheese, and the little cheese that has oozed out during cooking has created a beautiful cheesy crust on the top of the roast.
  9. As a serving suggestion, plate a few slices of the beef, top it with soft sundried tomato, the type preserved in olive oil, then crumble a little feta over the top before serving with the accompaniments of your choice.


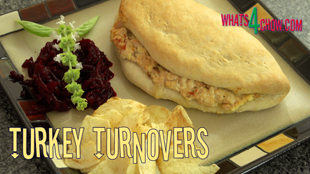
Turkey Fold-Over. How to use Turkey Left-Overs – Delicious Baked Turkey Buns.

how to use turkey left-overs,thanksgiving left-overs,christmas left-overs,turkey fold-overs,turkey turnovers,, Turkey Leftover Ideas, Turkey Leftover Recipe, Leftover Turkey, Leftover Turkey Recipe, leftover roast turkey meat, thanksgiving leftover recipes, turkey leftover recipes, thanksgiving leftovers recipes, what to do with leftovers, turkey club sandwich, thanksgiving turkey leftover idea, turkey sandwich


Turkey Fold-Over. How to use Turkey Left-Overs - Delicious Baked Turkey Buns.
Author: 
Recipe type: Left-Overs Recipe Ideas
Cuisine: American
Prep time: 
Cook time: 
Total time: 
Serves: 4
 
How to use Turkey Left-Overs. Baked turkey turn-overs are agreat way to use any left-over turkey meat. In fact you can even use any of the left-over meat in combinations, or on their own, mixed with the other ingredients.
Ingredients
For the Dough
  • 500g Strong White flour
  • 10g Instant yeast
  • 10g Salt
  • 10g Sugar
  • 300ml Lukewarm water
For the Filling
  • 250g Cooked Turkey or other left-over meat
  • 3 Tbs finely chopped pickled jalapeno
  • 200ml Sour cream
  • 80g Feta cheese
  • 6 Tbs Chopped sun-dried tomato
Instructions
  1. To make the dough, place the flour, yeast, salt and sugar in a large mixing bowl. Stir these together briefly, then pour in the warm water.
  2. Using a wooden paddle, stir this until a dough starts to come together, then using your hands in the bowl, compress the dough together to pick up and loose bits.
  3. Turn the dough out onto a lightly floured work surface and knead it for 5 minutes until it is smooth and elastic.
  4. Place the dough back in the mixing bowl, cover the bowl with cling-wrap and allow the dough to rise for 40 minutes in a warm place.
  5. While the dough rises, finely chop your cooked meat. Place this in a bowl and add the finely chopped pickled jalapeños, sour cream, feta cheese and chopped sun-dried tomato. Mix this until totally combined.
  6. Cover a wire rack with foil and give it a light coating of oil. Turn the dough out and knead it briefly.
  7. Flatten the dough into a large disc and cut it into quarters. Roll each quarter into a ball, flatten the ball, then roll into a circle of 20cm or 8 inches in diameter.
  8. Spoon a quarter of the filling across the center of the dough. Pick up the far side of the dough and pull it of the filling. Use your finger tips to tamp the edges down.
  9. This will not seal the edges, it simply thins them out, and prevents them from flying up while cooking. The edge will open during cooking, but only enough to reveal the filling.
  10. Place the completed crescents on the rack, cover the rack with and upturned roasting pan and allow this to rise for 20 minutes in a warm place.
  11. Bake the fold-overs in a preheated oven or gas barbecue at 180c or 350f for 25 minutes until lightly golden.
  12. Remove from the heat and serve immediately with the accompaniments of your choice.


Gourmet Russian Hotdogs. Footlong Russian Sausage Baked in Soft Flavored Dough.

gourmet hotdogs,gourmet russian hotdogs,hot dog recipe,how to make a russian hotdog, gourmet hot dog, gourmet hot dogs recipe, gourmet hot dogs london, gourmet hot dogs denver, gourmet hot dogs toronto, gourmet hot dogs nyc, gourmet hot dogs manly, gourmet hot dogs perth, gourmet hot dogs chicago,gourmet hotdog buns,gourmet hotdog buns recipe,soft hotdog buns,how to make the best hotdog buns,gourmet hotdog rolls


Gourmet Russian Hotdogs. Footlong Russian Sausage Baked in Soft Flavored Dough.
Author: 
Recipe type: Fast Food
Cuisine: American
Prep time: 
Cook time: 
Total time: 
Serves: 2-4
 
These gourmet hotdogs are huge! A footlong Russian sausage is wrapped in a soft bun dough flavored with sun-dried tomato and parmesan cheese, then baked to golden perfection!
Ingredients
  • 2 Footlong Russian sausages
  • 2 Cups All-purpose flour
  • 10g Instant yeast
  • 7.5ml Salt
  • 15ml Sugar
  • 250ml Warm water
  • 60ml Sun-dried tomato, finely chopped
  • 30g Parmesan cheese, shredded
  • ⅓ Cup All-purpose flour (to work the dough)
Instructions
  1. Place the flour, yeast, salt and sugar in a large mixing bowl. Mix them together briefly, then pour in the water. Mix this to a very soft and sticky dough.
  2. Add the chopped sun-dried tomato, shredded parmesan cheese and the oil.
  3. Mix this until totally combined, cover the bowl with cling-wrap and allow the dough to rise for 40 minutes in a warm place.
  4. After 40 minutes, the dough will be well risen and the gluten clearly visible. From the second batch of flour, lightly flour the work surface and turn the dough out.
  5. Sprinkle the top of the dough with flour and start to work the flour into the dough. Continue sprinkling extra flour until all of the flour has been worked into the dough. The dough will be soft, smooth, and elastic.
  6. Divide the dough in half and roll each half into a sausage of 10 inches long. Flatten the dough out until it is about 3 inches wide by 12 inches long, and oval in shape.
  7. Place a Russian sausage on the dough, lift the far edge of the dough over the sausage and stretch it down the other side.
  8. Lift the near side of the dough up and stretch over to enclose the sausage. The ends of the sausage will still protrude from the dough.
  9. Grease a piece of foil and transfer the dogs to the foil. Place the foil on top of a wire rack and using a sharp knife slash through the tops of the dogs at an angle, making sure to cut the dough and the sausage.
  10. Cover this with an upturned roasting pan and allow the dogs to rise for a further 20 minutes.
  11. Heat you gas barbecue or your oven to 180c / 350f and bake the dogs for 25 minutes and the rolls are lightly golden and sound hollow when tapped on the side.
  12. Remove from the barbecue or oven and serve immediately with the accompaniments of your choice.


Barbeue Minted Lamb Chops. Thick-cut Lamb Chops in Mint Marinade Barbecued to Perfection.

barbecue lamb chops,lamb chops on the barbecue,grilled lamb chops recipe,barbecue minted lamb chops, bbq minted lamb chops,mint marinade for lamb chops,minted lamb chops recipe,how to barbecued minted lamb chops recipe,barebue lamb recipes,lamb chops on the barbecue,how to barbecue lamb chops,barbecue mint lamb chops, Barbeque Flavoured Lamb, Barbecue Flavoured Lamb, Barbecued Marinated Lamb Leg Recipe, Butters and Marinades for the Barbecue, barbecued lamb chops marinade


Barbeue Minted Lamb Chops. Thick-cut Lamb Chops in Mint Marinade Barbecued to Perfection.
Author: 
Recipe type: Lamb / Barbecue
Prep time: 
Cook time: 
Total time: 
Serves: 2
 
How to barbecue the perfect minted lamb chops. Lamb chops need special treatment on the barbecue to be moist and tender - this will show you how to get the best results.
Ingredients
  • 4 Lamb loin chops cut 25mm / 1 inch thick
For the Marinade
  • ¼ Cup Oil
  • 30ml White wine vinegar
  • Generous handful of finely chopped mint
  • Pinch of Salt
  • ½ Tsp Ground white pepper
  • 1 Tbs Sugar
Instructions
  1. Add the finely chopped mint, oil, white vinegar, salt and ground white pepper to a jug and stir these until emulsified.
  2. Place the chops in a small roasting tin and spoon the marinade evenly over the meat. Allow this to marinate in your refrigerator for 2 to 6 hours.
  3. Remove the chops from the refrigerator and rinse most of the mint leaves off of the meat by swishing the chops in the marinade. Reserve the marinade for basting during the cooking process.
  4. Stand the chops up on their fatty side and press 3 skewers through the chops.... 2 just above the fatty strip and one towards the top of the chops.
  5. Flip the chops over and season the fat liberally with salt.
  6. Heat your barbecue to medium high heat and place the chops directly on the grid over the heat with the fatty side down.
  7. Grill the fat for 6 to 8 minutes until it charred crispy and well rendered.
  8. Remove the skewers from the chops and lay them on their sides. Baste liberally with the marinade and grill them for 4 to 6 minutes depending on your preference of doneness. 4 minutes will give you medium rare.
  9. Turn the chops over, baste liberally again and continue to grill for a further 4 to 6 minutes.
  10. Turn again, baste again and grill for 1 minute. Then 1 final turn, baste again and grill for another minute.
  11. Remove the chops from the barbecue and allow them to stand briefly before serving with the accompaniments of your choice.


KFC Chicken Tenders. KFC Chicken Strips the Real Way!!! Homemade KFC Recipes!!!

kfc chicken tenders,kfc chicken strips,deep-fried chicken strips,crispy fried chicken strips,how to make kfc at home,homemeade kfc recipes,original recipe kfc chicken,secret recipe kfc chicken,11 herbs and spices kfc secret recipe,the real kfc recipe, homemade chicken fingers, how to make chicken fingers, chicken finger recipe, chicken strips, how to make chicken strips, homemade chicken strips, kfc chicken tenders recipe


KFC Chicken Tenders. KFC Chicken Strips the Real Way!!! Homemade KFC Recipes!!!
Author: 
Recipe type: Chicken / Poultry / KFC
Cuisine: American
Prep time: 
Cook time: 
Total time: 
Serves: 8-12
 
A few weeks back we did a 3-Part series on KFC. Numerous requests have come in regarding KFC Chicken Tenders, so here it is. If you have not viewed the previous episodes in our KFC series, please click the onscreen link in the video, or the links below and view these first in order to understand the curing process.
Ingredients
  • 8 Fresh chicken breasts
For the Spice Blend
  • 3 Tsp Paprika
  • 2 Tsp Onion salt
  • 1 Tsp Dried sage
  • 1 Tsp Garlic powder
  • 1 Tsp Oregano
  • 1 Tsp Cayenne pepper
  • 1 Tsp Cracked black pepper
  • 1 Tsp Dried basil
  • 1 Tsp Dried marjoram
  • 1 Tsp Dried coriander
For the Curing Brine
  • 100g Dairy or Kosher salt (any non-iodated salt is fine)
  • 1 Tsp Whole black peppercorns
  • 1 Corn of whole allspice
  • 12.5g Saltpetre
  • 1 Tsp Ginger
  • 50g Sugar
  • 15g Bicarbonate of soda
For Coating
  • 3 Cups all-purpose flour
  • 4-6 Eggs
Instructions
  1. Combine the spices for the spice mixture, stir to combine and divide these in half.
  2. Place all of the curing ingredients in a pot along with one half of the spice mixture and pour in 2.5 lt of hot water. Stir until everything has dissolved, then bring it to a boil. Remove the pot from the heat and quick chill it by placing the pot in a sink of cold water.
  3. Place the chicken breasts in a large container and pour in the cooled curing brine. Place the lid on the container and allow this this cure for a full 24 hours in your refrigerator.
  4. After 24 hours, remove the breasts from the brine and slice it at an angle across the grain into slices of 10mm or just less than a half inch thick.
  5. To coat the chicken, combine the spice blend with the flour, and lightly whisk the eggs.
  6. Before you start coating the chicken, sprinkle a layer of the seasoned flour over a large platter. For this quantity of chicken you will need more than one platter.
  7. To continue with the coating, dredge the chicken in the flour mix, then dunk it in the egg, making sure to wet all of the flour.
  8. Dredge the chicken the flour again making sure to get a good solid coating...... then back to the egg making sure to wet all of the flour.
  9. Finally a last coating of flour finishes it off. Transfer the chicken to the platter and continue with the rest of the chicken.
  10. Allow all of the coated chicken to set for 20 minutes before frying.
  11. Fill your pan with oil to a depth of 1 inch and heat this to 160c or 310f and fry the chicken for 4 minutes per side until crispy and golden.
  12. Remove the chicken from the oil and drain any excess oil on kitchen paper. Repeat this until all of the chicken is cooked.


Cured Barbecue Chicken. How to Cure & Barbecue the Most Tender & Succulent Chicken.

barbecue chicken,barbecued chicken,how to cure chicken,cured barbecue chicken,how to barbecue the best chicken,whole barbecue chicken,the best barbecue chicken recipe,how to make tender barbecue chicken,how to make succulent barbecue chicken, bbq chicken recipes, bbq chicken marinade, spicy bbq chicken marinade, grilling chicken, great barbecue, how to prepare barbecue chicken, barbecue grill, bbq chicken BBQ Chicken, super bowl recipes, super bowl


Cured Barbecue Chicken. How to Cure & Barbecue the Most Tender & Succulent Chicken.
Author: 
Recipe type: Chicken / Barbecue
Prep time: 
Cook time: 
Total time: 
Serves: 4-6
 
How to Cure and Barbecue the Best Chicken Ever! Even on the best of days, barbecue chicken can be on the dry and stringy side. Curing the chicken results in a supremely tender and succulent chicken that wins hands down.
Ingredients
  • 1 x 1.6kg Chicken
For the Curing Brine
  • 100g Dairy or Kosher salt (any non-iodated salt is fine)
  • 1 Tsp Whole black peppercorns
  • 1 Corn of whole allspice
  • 12.5g Saltpetre
  • 1 Tsp Ginger
  • 50g Sugar
  • 15g Bicarbonate of soda
Other
  • Melted Butter
  • Salt & freshly cracked black pepper to taste
  • Other seasoning of your choice - optional
Instructions
  1. Combine the curing spices with 2.5lt of hot water. Bring this to a boil, then quick chill it by floating the pot in a sink of cold water.
  2. To spatch-cock the chicken, slice through the skin along the sternum, then cut through the breast with your shears.
  3. Open the chicken up, turn it over and dislocate the pelvis with a sharp downward thrust of your hand.
  4. Cut the wing tips from the wings and discard them.
  5. To ensure maximum penetration of the pickling brine, poke holes all over the chicken using your carving fork or any thin sharp object.
  6. Place the chicken in a large container and pour the brine over the bird. Put the lid on and allow this to cure for a full 24 hours in your refrigerator.
  7. The following day, remove the chicken from the brine and pat it dry with kitchen paper. Paint the chicken liberally with melted butter, then season with salt and fresh cracked black pepper.
  8. You can also add chilli flakes or any other seasoning of your choice.
  9. Heat your gas barbecue with burners directly beneath the chicken on minimum, and the remaining burners on maximum.
  10. Place the bird skin side up, close the lid and barbecue for 90 minutes. 15 minutes before the end, turn the chicken over to brown and crisp the skin.
  11. Remove the chicken from the heat, joint into portions and serve immediately. The first thing you will notice is just how tender it really is, along with outstanding aroma.


Rustic Gourmet Artisan Pizza. How to Make aGourmet Artisan Pizza From Start to End.

no-knead pizza,artisan pizza,rustic artisan pizza,how to make artisan pizza from start to end,best pizza recipe,how to make no-knead pizza base,sour-dough pizza,sour-dough pizza base,sour dough pizza recipe,how to make sour dough pizza,easy sour dough pizza recipe,vegetarian sour dough pizza,vegan sour dough pizza,best sour dough pizza recipe,quick sour dough pizza recipe,Rustic Gourmet Artisan Pizza


Rustic Gourmet Artisan Pizza. How to Make aGourmet Artisan Pizza From Start to End.
Author: 
Recipe type: Pizza
Cuisine: Italian
Serves: 2
 
This pizza is absolutely delicious, with a super-crispy no-knead sour-dough crust topped with marinated mushrooms, sundried tomatoes, peppers, mature cheddar and mozzarella - then garnished with crispy deep-fried shoe-string onions, fresh basil and Parmesan shavings.
Ingredients
For the Dough
  • 500g Strong white flour
  • ¼ Tsp Yeast
  • 2 Tsp Salt
  • 375ml Water
For the Topping
  • 1 Portion marinated mushrooms
  • ¼ Green pepper, thinly sliced
  • ¼ Red pepper, thinly sliced
  • ¼ Yellow pepper, thinly sliced
  • 2 Tbs Sun-dried tomato, thinly sliced
  • 1 Handful fresh basil leaves
  • 60g Mature cheddar, shredded
  • 100g Mozzarella, cut into blocks
For the Garnish
Instructions
  1. Combine the strong white flour, yeast and salt in a large container. Make well in the center and pour in the water.
  2. Mix this until a dough comes together and it comes away from the sides of the container.
  3. Put the lid on the container and let this stand overnight at room temperature.
  4. For the toppings, slice the peppers into thin strips and cut the sun-dried tomato into strips.
  5. Open up your dough container. You will see that it doubled in size, and the gluten will be very well developed.
  6. Lightly oil a 30cm pan and press half of the dough out over the surface of the pan evenly. It helps to oil your hands when doing this.
  7. Transfer the pan to a preheated range set to medium high. Cook the base until the dough is well risen and the underside is well charred. Remove the pan from the heat and transfer the pizza to a baking sheet.
  8. Cool the pan under cold running water for a minute before continuing with the second base.
  9. To make up the pizzas, spread half of the shredded cheddar across each base.
  10. Spread half the mushrooms across each base, followed by the mixed peppers and sun-dried tomatoes.
  11. Scatter the cubed mozzarella across each base along with some of the fresh basil leaves.
  12. Heat your oven to maximum...
  13. Slide the pizzas from the baking sheets directly onto the rack in your oven. Bake the pizzas until the upper crust of the pizza is golden and the cheese is well melted.
  14. Remove them from the oven, garnish with shoe-string onions, more fresh basil and shavings of Parmesan.


Mexican Meatloaf Stuffed with Cheddar and Topped with Chipotle Glaze. How to Make Single Portion Meatloaf Recipe

how to make meatloaf,how to make single portion meatloaf,how to make single serving meatloaf,meatloaf stuffed with cheddar,stuffed meatloaf recipe,mexican style meatloaf,glazed meatloaf recipe , meat loaf recipe, meatloaf recipe, Meatloaf (Dish), easy meatloaf recipe, meatloaf recipe food network, meatloaf recipe with bacon, meatloaf recipe with oatmeal, meatloaf recipe jamie oliver, meatloaf recipe with oats, meatloaf recipe best


Mexican Meatloaf Stuffed with Cheddar and Topped with Chipotle Glaze. How to Make Single Portion Meatloaf Recipe
Author: 
Recipe type: Beef
Cuisine: American
Prep time: 
Cook time: 
Total time: 
Serves: 4
 
Mexiacn Meatloaf Recipe - stuffed with mature cheddar, topped with chipotle glaze. Meatloaf is an all-time favorite, however it can be a bit boring doing the same thing time and again. This meatloaf is spiced up, stuffed with mature cheddar and glazed with a chipotle glaze. The loaves are made in single portions, making serving and portion control much easier.
Ingredients
  • 450g / 1 pound Ground lean beef
  • ½ Cup Chopped onion
  • ⅓ Cup Finely crushed tortilla chips (plain or chilli flavor)
  • 1 Large egg, lightly beaten
  • 2 Tbs Ketchup / Tomato sauce
  • 2 Tsp Cayenne pepper
  • 1 Tsp Ground cumin
  • ¼ Tsp Salt
  • ½ Cup Shredded mature cheddar or Monterey Jack
For the Glaze
  • ½ Tsp Ground chipotle (can substitute smoked paprika)
  • 4 Tbs Ketchup / Tomato sauce
Instructions
  1. Place the beef mince, chopped onion, finely crushed tortilla chips, ketchup, chilli powder, ground cumin, lightly beaten egg, salt and freshly ground black pepper in a mixing bowl and massage this until totally combined.
  2. Using an oil soaked cloth, wipe out the mini loaf pans. Fill the pans with equal amounts of the beef mixture.
  3. Using your fingers, make a deep furrow down the center of each lot of beef. Fill the furrow with the mature cheddar and press the beef back until the cheese is almost covered.
  4. Mix the second lot of ketchup with the chipotle powder and spread this over the loaves.
  5. Place the loaves in a roasting pan and bake them at 200c or 400f for 30 minutes.
  6. Remove the meatloaves from the oven, run a toothpick around the edges and turn them out onto platters to serve.


Scroll to top

Kitchen Conversions

Convert:
Masses
to:
Volumes
to:
Temperatures
to:
Lengths
to: