Cape Malay Pickled Fish – Traditional Cape Town Kerrievis, a Delicious Summer Meal!!!

pickled,fish,pickled fish,pickled fish recipe,cape malay pickled fish,cape malay pickled fish recipe,pickled fich recipe south africa,how to make pickled fish,kerrievis,kerrie vis recipe,how to make kerrie vis,kerrievis recipe south africa, pickled fish ingredients, pickled fish recipes vinegar, pickled fish cape malay recipe, white vinegar pickling


Cape Malay Pickled Fish - Traditional Cape Town Kerrievis, a Delicious Summer Meal!!!
Author: 
Recipe type: Seafood / Fish / Pickling
Cuisine: South African
Prep time: 
Cook time: 
Total time: 
Serves: 4
 
Cape Malay Pickled Fish, or Kerrievis, is a traditional South African Malay dish. Served well-chilled, this pickled fish makes and amazing summer meal or starter course.
Ingredients
  • 400g Firm white fish fillet
For the seasoned flour
  • 1 Cup all-purpose flour
  • 10ml Salt
  • 10ml Ground white pepper
For the Pickling Sauce
  • 3 Bay leaves
  • 2 Onions
  • 200ml Brown vinegar
  • 125ml Water
  • 90ml Sugar
  • 7.5ml Turmeric
  • 25ml Curry powder (your personal choice - mild or spicy)
  • 2.5ml Salt
  • 4 Whole black peppercorns
  • 2 Whole allspice
To thicken
  • 20ml Cornflour dissolved in a little water
Instructions
  1. Combine the all purpose flour, salt, and ground white pepper.
  2. Cut the fish fillets into large blocks then dredge them in the seasoned flour.
  3. Heat a large pan over medium high heat and add 30g of butter. Fry the fish for 3 to 4 minutes, turning halfway. The fish should be crispy and well bronzed.
  4. To make the pickling sauce, cut your onions in half length-ways and slice them into thin half rounds.
  5. Combine the brown vinegar with the water and measure out the bay leaves, sugar, turmeric, curry powder, salt, black pepper corns and whole allspice.
  6. In addition, dissolve the cornflour in a little water to make slurry.
  7. Add the onions, all of the spices and vinegar solution to the pan over medium heat. Bring the pan to a boil, lower the heat and allow this to simmer for 10 minutes.
  8. Pour in the cornflour slurry and continue to simmer for a minute or 2 until the sauce has thickened.
  9. Place the fried fish in a non-reactive pan and pour the pickling sauce over the fish. Allow the pan to cool, cover the pan with cling-wrap and let the fish mature in the refrigerator for one to 2 days before serving.
  10. The pickled fish will last for a few weeks under refrigeration if you can resist the temptation to eat it first. This allows you to process much bigger batches without the risk of spoilage by simply multiplying this recipe out.


Creamy Chicken Masala Stir-fry with Crunchy Vegetables. Quick & Easy Chicken Masala!!!

chicken tikka masala (dish), curry, chicken tikka masala recipe, chicken masala recipe, how to make chicken curry, chicken tikka masala,chicken tikka (dish),indian chicken recipes,chicken masala recipes,chicken masala curry,chicken masala recipe indian,chicken masala recipe easy,chicken masala curry,chicken masala fry,indian chicken tikka masala recipe,home made chicken curry,chicken masala curry


Creamy Chicken Masala Stir-fry with Crunchy Vegetables. Quick & Easy Chicken Masala!!!
Author: 
Recipe type: Chicken Curry / Spicy Chicken
Cuisine: Indian
Prep time: 
Cook time: 
Total time: 
Serves: 4
 
Today we're making a wonderful creamy chicken masala stirfry with crunchy vegetables. This meal is really quick and easy and super fragrant and tasty.
Ingredients
  • 10 x Baby corn
  • 5 x Pattie pans
  • ½ Red pepper
  • 1 x Large pickled gherkin
  • 4 x Chicken breasts
  • 30ml (2 Tbs) Garam masala spice
  • 30ml Oil
  • 5ml Chopped garlic
  • 5ml Chopped ginger
  • 250ml Plain yogurt
  • Fresh coriander leaves
  • Fruit chutney for serving
Instructions
  1. Cut the chicken breasts across the grain into thin strips. Add the masala spice mix, garlic, ginger and oil.
  2. Massages this into the meat thoroughly until everything is well coated and evenly colored. For the best result, put this aside for 30 minutes.
  3. While the chicken marinates, cut the baby corn into rounds, cut the patty pans into 8ths, dice the red pepper and dice a large pickled gherkin. In addition, measure out 250ml of plain yogurt.
  4. Heat your wok to smoking hot and pour in 15ml of oil. Add the chicken to the wok and stirfry this for 4 to 6 minutes until it is cooked through and has taken some color.
  5. Add the vegetables and continue to stirfry for a further 2 minutes.
  6. Pour in the yogurt and stir this through until everything has an even coating. Turn off the heat and stir in a large handful of fresh coriander leaves.
  7. Serve the curry to 4 serving bowls. Top the chicken with a little fruit chutney and garnish with more fresh coriander, before serving immediately.


Vegetarian & Vegan KFC “Chicken” Strips. Deep-Fried Gluten Strips KFC-Style!!!

vegetarian kfc,vegan kfc,vegetarian kfc chicken strips,vegan kfc chicken strips,deep-fried gluten,deep fried gluten kfc-style,how to make vegetarian kfc,how to make vegan kfc,moch chicken vegetarian kfc,mock chicken vegan kfc,how to make kfc without chicken,vegetarian recipes,vegan recipes, vegetarian kfc recipe, vegetarian kfc chicken recipe, vegetarian kfc recipe, vegetarian kfc - meatless recipe


Vegetarian & Vegan KFC "Chicken" Strips. Deep-Fried Gluten Strips KFC-Style!!!
Author: 
Recipe type: Vegetarian / Vegan
Cuisine: American
Prep time: 
Cook time: 
Total time: 
Serves: 4-6
 
Some time ago I did a popular recipe using gluten called mock duck. Today we're going to use gluten to replace the chicken in a vegetarian rendition of KFC chicken tenders.
Ingredients
The Herb & Spice Mix
  • 7.5ml Paprika
  • 5ml Salt
  • 2.5ml Dried sage
  • 2.5ml Garlic powder
  • 2.5ml Dried oregano
  • 2.5ml Cayenne pepper
  • 2.5ml Crushed black pepper
  • 2.5ml Dried basil
  • 2.5ml Dried marjoram
  • 2.5ml Dried coriander leaf
  • 5ml Ground allspice
The Rest...
  • 1 Portion prepared gluten (350g)
  • 1½ Cups All-purpose flour
  • Milk (or substitute for cold vegetable stock)
Instructions
  1. Flatten the gluten out across a platter. Mill the herbs and spices in your spice mill until fine and pour the powder into a sprinkle bottle. Sprinkle an even coating of the herbs and spices across both sides of the gluten.
  2. Place the gluten in your refrigerator for at least 30 minutes to marinate.
  3. In a bowl combine the flour with the remaining herb and spice mixture. Half fill a second bowl with full cream milk (or cold vegetable stock)
  4. In addition, sprinkle a layer of the seasoned flour over the surface of a large platter. This layer will prevent the coated gluten from sticking to the platter while it sets.
  5. Remove the gluten from your refrigerator and cut it into manageable strips of about an inch in width and 3 to 4 inches in length.
  6. To coat the strips, dip them in the milk (or cold stock), dredge them in the seasoned flour to get a good solid coating, then transfer them to the coated platter to set. Allow the coated strips to set for 20 minutes.
  7. Half fill a wok or pot with oil and heat this to 160c or 320f.
  8. Carefully drop the strips into oil in batches and fry them for 4 to 5 minutes until the are golden. Remove the strips from the oil, drain any excess oil on kitchen paper and serve immediately.


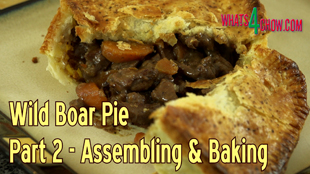
Wild Boar Pie – Rich Venison Pie – Part 2 – How to Assemble & Bake Your Game Meat Pie

wild boar pie,wild venison pie,how to cook wild boar,how to cook venison,wild boar pie filling,venison pie filling,wild boar in red wine,venison in red wine,how to make wild boar pie,how to make venison pie,best wild boar recipe,wild boar meat pie,wild boar pork pie,wild boar mince,wild boar burger,wild boar burgers,gourmet food,how to cook wild boar pie filling,wild pig pie filling,wild boar (organism classification)


Wild Boar Pie - Rich Venison Pie - Part 2 - How to Assemble & Bake Your Game Meat Pie
Author: 
Recipe type: Venison / Pork / Pies
Prep time: 
Cook time: 
Total time: 
Serves: 6-10
 
Yesterday we made the amazing filling for our wild boar pie. In today's episode we'll assemble the pies and bake them to golden perfection.
Ingredients
  • 1 x Batch wild boar pie filling from our last episode
  • 1 x Batch flaky pastry or 2 rolls store-bought puff pastry
  • 1 Egg beaten with 50ml water
  • Salt and cracked black pepper
Instructions
  1. Roll out your pastry and cut the lids about 1cm bigger all round than the top of the foil. You can use store bough pastry, but I urge you to try our flaky pastry recipe.
  2. Take another sheet of pastry and drop it over the top of one the foils. Press it lightly into the foil. Don't be too worried if it doesn't stay entirely in place.... the weight of the filling will sort this out.
  3. Spoon filling into the pie until just below the top edge. Brush the pastry with egg wash, place the lid on top and lightly run over this with your rolling pin to secure.
  4. Trim off the edges neatly with a sharp thin blade, then pattern the edges with the tines of a fork.
  5. Use a skewer to poke and enlarge 3 breather holes in the lid, then brush the lid with more egg wash. I like to season this with salt and cracked black pepper, but this is entirely up to you.
  6. Continue until all of your pies are assembled.
  7. Bake the pies in a preheated oven at 200c or 400f for 30 minutes and the pies are beautifully golden.
  8. Remove the pies from the oven and serve immediately with the accompaniments of your choice.


Wild Boar Pie – Rich Venison Pie – Part 1 – How to Make the Wild Boar Pie Filling

wild boar pie,wild venison pie,how to cook wild boar,how to cook venison,wild boar pie filling,venison pie filling,wild boar in red wine,venison in red wine,how to make wild boar pie,how to make venison pie,best wild boar recipe, wild boar meat pie, wild boar pork pie, wild boar mince, wild boar burger, wild boar burgers, gourmet food,how to cook wild boar pie filling,wild pig pie filling, wild boar (organism classification)


Wild Boar Pie - Rich Venison Pie - Part 1 - How to Make the Wild Boar Pie Filling
Author: 
Recipe type: Pie / Venison / Pork
Prep time: 
Cook time: 
Total time: 
 
Wild boar can be tough, and in most cases needs special preparation to make it tender and tasty. A little marinating and slow simmering in red wine gives you a premium result!!!
Ingredients
  • 850g Wild boar meat, cut into small cubes
  • 10g Aromat / Flavormate / Aromex
  • 2.5ml White pepper
  • 15ml Sugar
  • 5ml Ground coriander seed
  • Pinch of nutmeg
  • 50ml White wine vinegar
  • 1 x Large onion, diced
  • 2 Large carrots, roll cut
  • 50g Butter
  • 250ml Chicken stock mixed with 250ml water
  • 250ml Red wine
  • 30ml Flour dissolved in 30ml water
Instructions
  1. Place the cubed meat in a mixing bowl and add the white pepper, coriander, nutmeg, flavormate, sugar and white wine vinegar. Massage this into the meat thoroughly then allow this to marinate for 60 minutes in your refrigerator.
  2. In the meantime, roll-cut the carrots and dice a large onion.
  3. Heat a large pan over medium high heat and add the butter. Fry the meat for 15 to 20 minutes until it is almost dry.
  4. Add the onions and carrots and continue to fry this for a further 20 minutes.
  5. In a jug, combine the chicken stock with the red wine and stir this together.
  6. Add the wine mixture to the pan, bring this to a boil, lower the heat and simmer the pan for 60 minutes. The liquid will have reduced by 3 quarters at this stage.
  7. Combine the flour and water and pour this into the pan. Allow this to cook for 60 to 90 seconds, until the sauce has thickened to a thick glossy gravy.
  8. Remove the pan from the heat and allow this to cool completely before moving on to the next episode.


Glazed Pork Chops!!! Thin-Cut Pork Loin Chops Glazed with Honey & Light Soy Sauce.

glazed pork chops,honey and soy glazed pork chops,glazed pan-fried pork chops,how to make glazed pork chops,thin-cut pork chops in the pan,how to fry pork chops,sweet fried pork chops,eastern style pork chops,sweet chinese pork chops,pan-fried pork chops with glaze,best pork chops recipe,uick pork chops recipe,easy pork chops recipe, honey glazed pork chops, apple glazed pork chops, maple pork chop


Glazed Pork Chops!!! Thin-Cut Pork Loin Chops Glazed with Honey & Light Soy Sauce.
Author: 
Recipe type: Pork / Pan-fried
Prep time: 
Cook time: 
Total time: 
Serves: 2
 
Today we're pan frying an amazing meal of honey soy glazed pork loin chops. The chops are really thin cut which makes this ideal for breakfast or a light midday meal. As a garnish the chops are served with crispy fried baby potato wedges and fresh coriander leaves.
Ingredients
  • 2 x Pork loin chops, cut 8-10mm thick
For the Glaze
  • 15ml Light soy sauce
  • 15ml Honey
  • 5ml Chilli sauce
  • 5ml Apple cider vinegar
  • 30g Butter to fry
For the Garnish
  • 6 Baby potatoes
  • Fresh coriander leaves, roughly chopped
Instructions
  1. Cut each baby potato into 8 wedges.
  2. Have your butcher cut the loin chops to a thickness of 8 to 10mm thick. Season the chops liberally on both sides with salt and cracked black pepper.
  3. In a jug, combine the light soy sauce, honey, chilli sauce and apple cider vinegar.
  4. Roughly chop the fresh coriander.
  5. Half fill a pan with oil and heat this to 180c or 350f. Fry the potato wedges until golden, remove them from the oil and season with salt.
  6. Melt 30g of butter in another pan over medium high heat and fry the chops for 3 minutes. Turn the chops over and brush them with the glaze. Continue to fry for 2 minutes.
  7. Turn the chops over and brush the chops again. Fry for a further 60 seconds.
  8. Turn the chops again and fry for another 60 seconds.
  9. Remove the chops from the pan and immediately pour the remaining glaze into the pan. Lift the pan from the heat to avoid burning the glaze as it will caramelize almost immediately.
  10. Transfer the chops to serving platters, top each with half of the potato wedges and some of the glaze. Scatter the chopped coriander over the platters and serve immediately.


4th of July Cookout – Barbecue Chicken Foldover – Whole Deboned, Stuffed BBQ Chicken

whole deboned bbq chicken,deboned chicken on the barbecue,whole deboned stuffed bbq chicken,whole barbecue chicken,how to roast chicken on the barbecue, deboned bbq chicken, boneless bbq chicken, boneless bbq chicken recipe, boneless bbq chicken on the grill,stuffed deboned barbecued chicken,how to barbecue deboned chicken,how to debone a whole chicken,how to barbecue stuffed chicken


4th of July Cookout - Barbecue Chicken Foldover - Whole Deboned, Stuffed BBQ Chicken
Author: 
Recipe type: Barbecue / Chicken
Prep time: 
Cook time: 
Total time: 
Serves: 4-6
 
This awesome barbecue chicken foldover is really worth the effort and will score some serious points with your friends and family.
Ingredients
  • 1 x 1.4kg (3lb) Chicken, deboned
  • 350g Pork sausage meat
  • 15ml Smoked hot paprika
  • 5ml Garlic powder
  • Salt and cracked black pepper
Instructions
  1. Starting with the filling, squeeze the pork sausage filling from the bangers into a mixing bowl. Add the smoked paprika and massage this into the pork thoroughly.
  2. A while back I did a video on how to debone a whole chicken, if you missed this you can see it now by clicking Here.
  3. Lay the deboned chicken out flat on a board and season the flesh liberally with salt and cracked black pepper.
  4. Fill the legs and wings with some of the pork. Flatten the remaining pork across half of the chicken and fold the chicken over to enclose the filling.
  5. Oil a ribbed skillet and transfer the chicken to the skillet. If you don't have a ribbed skillet you can use a rack in a roasting pan. Season the skin liberally with salt and cracked black pepper and you're ready to go.
  6. Heat your barbecue to 180c or 350f and roast the chicken for 2 hours. Increase the heat to 200c or 400f and roast for a further 15 to 30 minutes until the skin is golden.
  7. Remove the chicken from the barbecue and allow it to stand for 5 minutes before slicing and serving.


4th of July Cookout – Brandy & Coke T Bone Steak – Perfectly Tender Barbecue T-Bone!!!

bbq t-bone,barbecue t-bone,barbecue t-bone steak,how to barbecue t-bone steak,marinated t-bone steak,how to marinate t-bone steak,how to barbecue t-bone steak,grilled t-bone steak,how to grill t-bone steak,brandy and coke t-bone steak,how to injection marinate t-bone steak,bbq grilled t-bone,thick cut t-bone barbecue, t-bone steak (food), grilling (culinary technique), barbecue t-bone steak recipe, grilled t bone steak marinade


4th of July Cookout - Brandy & Coke T Bone Steak - Perfectly Tender Barbecue T-Bone!!!
Author: 
Recipe type: Barbecue / Steak / Beef
Prep time: 
Total time: 
Serves: 4
 
This Brandy & Coke T-Bone is awesome!!! Injection marinated thick-cut t-bone is absolutely tender and will be the talk of the town!!!
Ingredients
For the Brandy & Coke Solution
  • 250ml Coke
  • 125ml Brandy
  • 15ml Salt
For the Steak
  • 1 x T-Bone steak, cut 80mm / 3¼ inch thick
  • Salt and cracked black pepper
Instructions
  1. Get your butcher to cut the t-bone, from young beef, to a thickness of 80mm or just over 3 inches.
  2. Combine the brandy, coke and salt and stir this until all of the salt has completely dissolved.
  3. Draw 50ml or 2 ounces of the solution into you meat syringe and inject this into the t-bone at intervals of 25mm or 1 inch, first through the fatty side, then on the fillet side.
  4. Place the steak in a tray, pour any overrun solution over and allow this to stand for 20 minutes.
  5. After resting, season all the sides liberally with salt and cracked black pepper.
  6. Heat your barbecue to medium high heat. Place the steak with fat side down directly over the heat and barbecue this for 5 minutes until the fat is well browned. Baste the steak often with the brandy mixture.
  7. Turn the steak to stand on the bone and cook for a further 5 minutes, basting often as you go.
  8. Turn the steak onto one side and continue to barbecue flipping the steak every five minutes.
  9. A timing of 20 minutes (4 turns) will give you a rare steak, 30 minutes (6 turns) medium rare and 40 minutes (8 turns) will result in medium.
  10. Continue to baste all the way through.
  11. Once the steak is done to your liking, remove from the heat and allow the t-bone to rest for 5 minutes.
  12. Cut both sides of meat from the bone and slice each into 4 slices before serving.


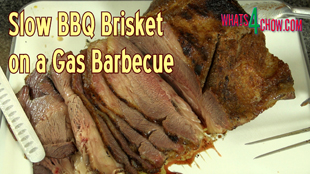
4th of July Cookout – Slow Barbecue Brisket on Your Gas Barbecue – Super Tasty, Super Tender!!!

barbecue brisket,how to barbecue brisket, smoked meat smoking bbq brisket, smoking bbq brisket, texas style bbq, barbecue brisket recipes, barbecue brisket rub, barbecue brisket temperature, barbecue brisket recipe gas grill, barbecue brisket in oven, barbecue brisket marinade, barbecue brisket calories, curing brisket for barbecue,how to cure brisket,flavoring brisket,marinating brisket,how to tenderise brisket


4th of July Cookout - Slow Barbecue Brisket on Your Gas Barbecue - Super Tasty, Super Tender!!!
Author: 
Recipe type: Barbecue / Beef Brisket
Cuisine: american
Prep time: 
Cook time: 
Total time: 
Serves: 6-8
 
Barbecue Brisket is one the tastiest meats around, provided it is prepared and cooked correctly. It certainly is a labor of love, but well worth the effort!!!
Ingredients
  • Brisket, about 6lbs or 2.7kg
For the Curing Brine
  • 5lt Filtered water
  • 25g Saltpeter
  • 90g Sugar
  • 30g Bicarbonate of soda
  • ½ Tsp black peppercorns
  • 3 Bay leaves
  • 5 Whole allspice (pimento)
  • 3ml Ground ginger
  • 3ml Garlic powder
  • 5ml Smoked hot paprika
For the sprinkle
  • 1 Tsp Garlic powder
  • 1 Tsp Ground ginger
  • 1 Tsp Cayenne pepper
  • 2 Tsp Sugar
For Smoking
  • 1 Cup Oak barrel chips, damp
Instructions
  1. To make the curing brine, add the salt to the water and pour in the saltpeter, sugar, bicarbonate of soda, black peppercorns, bay leaves, whole allspice, ground ginger, garlic powder and smoked hot paprika.
  2. Bring this to a simmer then quick cool the brine by floating the pot in a sink of cold water.
  3. While the brine cools, trim off any excess fat from the brisket.
  4. Place the meat in a large non-reactive container and pour in the curing brine. Put the lid on the container and allow this to cure for a full 48 hours in your refrigerator.
  5. After 48 hours, remove the brisket from the brine and pat it dry with kitchen paper.
  6. Combine the garlic powder, ground ginger, cayenne pepper and sugar and sprinkle half of this over both sides of the meat.
  7. Wrap the brisket in foil and place this on a rack in a roasting pan.
  8. Light one burner in you barbecue and allow the barbecue to warm up to 98c or 210f with the lid closed.
  9. Place the roasting pan on the other side of the grill, close the lid and allow this to slow roast for 10 hours undisturbed. Keep an eye on the temperature from time to time, making sure to keep it at 98c or 210f.
  10. Remove the meat from the barbecue and remove the foil. Return the meat to the rack and season it again on both sides with remaining half of seasoning.
  11. In addition, have a cup of damp smoking wood chips prepared and placed in a disposable aluminium tray.
  12. Reheat the barbecue to 300f or 150c. You may have to light a second burner. Place the wood chips directly over the lit burners, and return the meat to the grill.
  13. Close the lid and allow this to smoke for 60 minutes. Transfer the meat from the pan to the grill over direct heat and finish the process by grilling for 15 minutes per side until the meat is well colored and has formed a good crust.
  14. Remove the meat from the grill and allow it to rest for 5 minutes before carving and serving.


The Famous Bicken Churger – Laminated Chicken, Beef & Bacon Burger Patty

how to laminate meat,chicken beef bacon patty,best chicken burger patty,best burger patty recipe,best beef burger patty recipe,best bacon burger recipe,bicken churger,laminated burger patty recipe,how to make gourmet burger patties,homemade laminated burger patties,the famous bicken churger burger patty,best burger ever,chicken and bacon burger,burger patty recipes,beef burger patty recipes,bacon burger patty recipes


The Famous Bicken Churger - Laminated Chicken, Beef & Bacon Burger Patty
Author: 
Recipe type: Burgers and Burger Patties
Prep time: 
Cook time: 
Total time: 
Serves: 4
 
The Burger Patty EVER!!! This demonstration shows you how to laminate chicken fillet, tenderloin steak and bacon into a single layered patty that tastes like heaven!!!!
Ingredients
  • 2 Chicken breast fillets
  • 2 Sirloin steaks, cut 6mm thick
  • 4 Slices oak or hickory smoked bacon, lean
  • Kosher salt
  • Flour to dust
Instructions
  1. Fold the chicken breasts in cling wrap and tap them down with your meat mallet to a thickness of 3mm or 1 eight of an inch.
  2. Have your butcher cut the tenderloin into thin steaks of 6mm in thickness. Trim away the fat along the edges, fold the in cling wrap and tap them down to a thickness of 3mm using you meat mallet.
  3. So far so good. 2 Chicken breasts flattened along with 2 steaks and 4 large slices of good quality oak or hickory smoked bacon will make 4 large bicken churger patties.
  4. To assemble, salt the chicken and press a steak into the surface. Place 2 strips of bacon on top of the steak snd press these down. You don't need salt between the steak and bacon as the bacon has a high enough salt content.
  5. Repeat this with the second set of ingredients.
  6. Lightly flour 2 large platters and place one of the bicken churger sets on each. Lighly flour the tops of the bicken churgers and place them in your refrigerator for 30 minutes.
  7. Within 30 minutes, most of the magic has happened. Remove the platters from the refrigerator and cut each set in half down the center. This gives you 4 bicken churgers.
  8. Heat a large pan over high heat and add about 30g of butter. Carefully drop the bicken churgers into the pan with the bacon side down. Allow these to fry for 3 minutes.
  9. Turn the patties over and continue to fry for a further 2 minutes.
  10. Remove the bicken churgers from the pan, construct your burgers and serve immediately.


Perfect Pan-Fried Chicken. How to Pan-Fry the Absolutely Best Chicken Ever!!!

perfect pan-fried chicken,perfect pan fried chicken,how to pan-fry chicken,best pan fried chicken recipe,the best way to pan fry chicken,tender pan fried chicken, perfect pan-fried chicken thighs, perfect pan fried chicken recipe,how to cook chicken how to fry chicken,crispy skin pan fried chicken,how to pan fry chicken crispy skin,best pan fried chicken recipes,homemade pan fried chicken with crispy skin


Perfect Pan-Fried Chicken. How to Pan-Fry the Absolutely Best Chicken Ever!!!
Author: 
Recipe type: Chicken / Poultry
Cook time: 
Total time: 
 
These simple tips will have you on your way to making the best perfect pan-fried chicken possible. Your chicken will have beautifully crispy and golden skin, with the most tender meat!!!
Ingredients
  • Chicken Thighs
  • Butter
  • Salt, pepper & spices of your choice
Instructions
  1. Locate the spine bone to which the thigh bone is attached.
  2. Using a sharp knife cut under the skin along the spine to lift the skin. Lift the skin up and cut the oyster free.
  3. Using your shears, cut through the hip joint. Turn the thigh over and cut the connecting tissue to free the spine bone from the thigh.
  4. Cut through the flesh along the thigh bone. Grab the hip joint and use the edge of your blade to scrape the flesh away from the thigh bone.
  5. Cut around the knee joint and pull the bone free. Repeat this until all of the thighs are deboned.
  6. Season both sides of the thighs liberally with salt, pepper and the spices of your choice.
  7. Heat you pan over medium high heat and add a tablespoon of butter. Add the thighs to the pan skin-side down and fry them for five minutes.
  8. Turn the thighs over and fry for a further 5 minutes. Wipe the chicken around in the pan to pick up all the caramelized yummy stuff from the surface of the pan.
  9. Turn the thighs again and fry for a further 2 minutes to re-crisp the skin.
  10. Remove the chicken from the pan and serve immediately with the accompaniments of your choice.


Smoked Fish Pizza!!! Something Totally Different From Regular Run-of-the-Mill Pizza!!!

smoked fish pizza,smoked fish pizza recipe,how to make smoked fish pizza,seafood pizza,seafood pizza recipe,smoked seafood pizza recipe,smoked fish pizza recipe video,unusual pizza recipe,unusual seafood pizza recipe,unusual smoked fish pizza recipe, smoked salmon pizza,gourmet pizza recipe,gourmet smoked fish pizza recipe,homemade fish pizza recipe,how to make seafood pizza at homade,homemade pizza,best pizza recipe


Smoked Fish Pizza!!! Something Totally Different From Regular Run-of-the-Mill Pizza!!!
Author: 
Recipe type: Pizza
Cuisine: Italian
Prep time: 
Cook time: 
Total time: 
Serves: 2-4
 
This smoked fish pizza gives a whole new take on pizza. You can use cooked smoked haddock, trout or salmon to make this extra tasty pizza delight!!!
Ingredients
  • 2 x 30cm / 12 inch Pizza bases
  • 50ml Tomato paste
  • 30ml Tomato sauce
  • 300g Cooked smoked fish
  • 100g Mature Cheddar cheese, grated
  • 200g Mozzarella cheese, cut into chunky blocks
  • 10-12 White mushrooms, cut in half
  • A drizzle of olive oil
  • Salt & freshly ground black pepper to season
  • Herbs to garnish
Instructions
  1. Cut the mozzarella into chunky blocks, grate the mature cheddar cheese and flake the cooked smoked fish. I am using smoked haddock, but you can use any smoked fish.
  2. Cut the mushrooms in half. Drizzle the mushrooms with olive oil and mix them around until coated all over.
  3. For the tomato base, mix 50ml of tomato paste with 30ml of good quality tomato sauce.
  4. Roll out your dough.
  5. Using the back of a spoon, spread the tomato base over each of the pizza bases.
  6. Sprinkle half of the cheddar over each of the pizzas, followed by half of the flaked smoked fish.
  7. Spread the blocks of mozzarella evenly over each pizza, then the mushrooms.
  8. Season the pizzas with salt and ground black pepper and bake them in a preheated oven at maximum temperature for 15 minutes until the bases are well browned on the edges.
  9. The tomato base may look a little burnt, but don't worry, it is simply very much more concentrated and baked, with an insanely delicious tangy flavor.
  10. Cut the pizza into wedges and serve immediately.


Scroll to top

Kitchen Conversions

Convert:
Masses
to:
Volumes
to:
Temperatures
to:
Lengths
to: