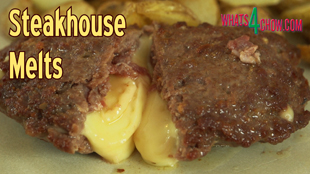
Steakhouse Melts – Grilled Beef filled with Melted Cheese!!! Spicy Stuffed Steaks!!!

steakhouse melts,cheesy stuffed beef pockets,beef stuffed with cheese,emulsified beef pockets with cheese,how to stuff beef with cheese,how to emulsify beef,how to emilsify beef mince,how to emulsify ground beef,steakhouse melts filled with cheese,make stuffed beef pockets,emulsified beef fold-overs,stuffed beef fold-overs,steakhouse melts recipe,stuffed beef fold-overs recipe


Steakhouse Melts - Grilled Beef filled with Melted Cheese!!! Spicy Stuffed Steaks!!!
Author: 
Recipe type: Beef
Prep time: 
Cook time: 
Total time: 
Serves: 4
 
Steakhouse melts are legendary. Oozing melted cheese encased in spicy emulsified beef makes for a feast from heaven.
Ingredients
  • 500g Ground beef
  • 20g Salt
  • 2.5ml White pepper
  • 5ml Ground coriander seed
  • 5ml Chilli flakes
  • 2.5ml Crushed garlic powder
  • 4 Thick slices Mozzarella cheese
  • 50g Butter for frying
Instructions
  1. Place the ground beef in your mixer bowl. Add the salt, white pepper, ground coriander seed, chilli flakes and garlic powder.
  2. Place the bowl on the stand mixer. Attach the dough hooks and mix the beef on medium speed for 10 minutes.
  3. By this stage the beef will be emulsified and very sticky.
  4. Divide the beef into 4 equal portions of 125g each. Working with one at a time, form a portion of the beef into a ball and place it in the center of a piece of cling-wrap. Flatten the beef into a disc, then fold the cling-wrap over to enclose the meat.
  5. Flatten the meat out into a large circle 4mm thick, or 1 sixth of an inch.
  6. Repeat this with the remaining portions.
  7. Cut 4 thick slices of Mozzarella cheese, about 10mm thick or just less than a half inch, and big enough to cover half of the beef circles with a border around the edge.
  8. Position the cheese pieces on the upper half of the beef portions and season with salt and cracked black pepper.
  9. Use the cling-wrap to fold the open half of beef over the cheese, and crimp the edges closed.
  10. Transfer the steakhouse melts to your refrigerator for 30 minutes.
  11. Heat your pan over medium high heat and add 50g of butter and fry the melts for 4 to 5 minutes per side.
  12. Serve the melts immediately with the accompaniments of your choice.


Pasta with Anchovies, Capers, Garlic & Parmesan. Brilliantly Simple Pasta!!!

Quick pasta recipe,simple pasta recipe,pasta with anchovies recipe,pasta with anchovies & capers recipe,quick pasta with anchovies,super-easy pasta recipe,best seafood pasta recipe,best anchovy pasta recipe,anchovy & caper pasta,best linguine recipe,best taglietelle recipe,best spaghetti recipe


Pasta with Anchovies, Capers, Garlic & Parmesan. Brilliantly Simple Pasta!!!
Author: 
Recipe type: Pasta / Seafood
Cuisine: Italian
Prep time: 
Cook time: 
Total time: 
Serves: 2
 
This pasta dish is pure brilliance in its absolute simplicity, and has the most amazing aromas and flavors. You can create this masterpiece with just a handful of ingredients!!!
Ingredients
  • 2 Portions Linguine, Taglietelle or spaghetti (cooked to package instructions)
  • 50g Butter
  • 15ml Olive oil
  • 4 Cloves garlic, roughly chopped
  • 6-8 Anchovy fillets, roughly chopped
  • 15 Capers, roughly chopped
  • 2.5ml Chilli flakes
  • 30ml Chopped parsley
  • Shredded Parmesan
  • Salt & cracked black pepper to taste
Instructions
  1. To start you will need Linguine, Taglietelle or even spaghetti. Cook this according to the package instructions.
  2. Measure out the chilli flakes, grate the parmesan cheese, chop the parsely, weigh out the butter, roughly chop the anchovy fillets, capers and garlic. In addition, you will need 15ml of olive oil.
  3. Heat your pan over medium high heat, add the butter and garlic. Fry this for 2 minutes until it just starts to take on some color.
  4. Add the chilli flakes, anchovies and capers and fry this for 60 seconds.
  5. Add the chopped parsley to the pan and stir this in. Remove the pan from the heat and stir in the olive oil.
  6. Pour this all over the cooked pasta and toss it thoroughly until everything is coated.
  7. Serve the pasta immediately dressed with a generous topping of shredded Parmesan cheese.


Smoked Lemon & Herb Lamb Chops. Marinated Lemon & Herb Lamb Cutlets Hot-Smoked to Perfection!!!

lemon and herb lamb chops,barbecue lemon and herb lamb chops,hot-smoked lemon and herb lamb chops,smoked lamb chops,how to smoke lamb chops,how to barbecue lamb chops,lemon and herb lamb chops recipe,lemon and herb lamb cutlets on the barbecue,how to smoke lamb chops,how to hot-smoke lamb chops,best barbecue lamb chops recipe,herby lemon lamb chops


Smoked Lemon & Herb Lamb Chops. Marinated Lemon & Herb Lamb Cutlets Hot-Smoked to Perfection!!!
Author: 
Recipe type: Lamb / Smoking / Barbecue
Prep time: 
Cook time: 
Total time: 
Serves: 2-4
 
In todays episode, part 9 of the series on smoking and curing foods, I am using the Smokedaddy cold smoke generator attached to a regular closed gas barbecue to hot smoke a batch of delectable lamb loin chops.
Ingredients
  • 8 Lamb loin chops
  • 60ml Oil
  • Juice of 1 medium lemon
  • Zest of 1 medium lemon
  • 2.5ml Garlic powder
  • 1.25ml Salt
  • 1.25ml Dry basil
  • 1.25ml Dry rosemary
  • Generous grind of cracked black pepper
Instructions
  1. To start, combine the oil, lemon juice, lemon zest, garlic powder, salt, dried basil and dried rosemary in a jug.
  2. Whisk these vigorously until the mixture is totally emulsified.
  3. Grind in a generous dose of cracked black pepper and your ready to go.
  4. Arranger your lamb loin cuts in a pan and pour the marinade over the lamb. Spread it out evenly to ensure the meat is totally covered. Place the pan in your refrigerator for 4 hours.
  5. Turn the meat over half-way through this time.
  6. After marinating, remove the chops from your the refrigerator.
  7. Lift half of the chops up onto their fatty edge and drive 2 skewers through the chops just above the fatty strip. Repeat this with the remaining chops.
  8. Heat your barbecue to medium high and get the smoke generator running. Within a few minutes the smoke will be billowing out and you can place the lamb fatty side down in the barbecue.
  9. Close the lid and allow the fatty strip to cook for 6 to 8 minutes.
  10. Open the barbecue, remove the skewers from the meat, lie the the chops on their sides and continue to barbecue for 4 to 6 minutes per side (with the barbecue lid closed), depending on your preference of doneness.
  11. Transfer the lamb to platters and serve immediately with the accompaniments of your choice.
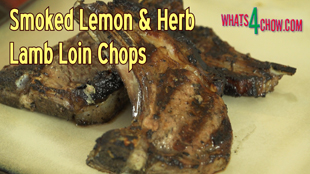
 

Spicy Pan Fried Chicken with Chimichurri Sauce – Hammered Chicken Chimichurri

chicken schnitzel,spicy chicken schnitzel,hammered chicken,spicy pan-fried chicken,pan-fried chicken breast,chicken schnitzel chimichurri,chicken schnitzel with chimichurri sauce,spicy chicken schnitzel with chimichurri,pan fried chicken breast with chimichurri sauce,beast chicken breast recipe,best chicken schnitzel recipe,chimichurri sauce with chicken


Spicy Pan Fried Chicken with Chimichurri Sauce - Hammered Chicken Chimichurri
Author: 
Recipe type: Chicken / Poultry
Cuisine: Argentinian
Prep time: 
Cook time: 
Total time: 
Serves: 2
 
This mildly spicy schnitzeled chicken breast is complimented brilliantly with the Chimichurri sauce from our previous episode!!!
Ingredients
  • 2 Medium chicken breasts
  • 5ml Cracked lemon pepper
  • 5ml Paprika
  • 5ml Salt
  • 5ml Sugar
  • 30g Butter
  • 1 Portion Chimichurri sauce
Instructions
  1. To flatten the chicken, fold it over in cling-wrap and tap it down to a thickness of 4mm or a 6th of an inch using your meat mallet. Repeat this with the second breast.
  2. Combine the paprika, salt, sugar and lemon pepper and sprinkle the mixture onto both sides of the schnitzels, pressing it into the surface as you go.
  3. Heat a large pan over medium high heat and add 30g of butter. Fry the first schnitzel for 90 seconds per side, remove it from the pan, then fry the second.
  4. Transfer the schnitzels to platters and top them with a generous portion of chimichurri sauce and the garnish of your choice before serving.


Cold Smoked Rump Steak – Cold Smoked Then Grilled to Tasty Perfection!!! Part 8 Smoking & Curing

cold-smoked rump steak,Grilling (Culinary Technique),Smoking,Rump Steak,Steak (Food),cold-smoking steak,smoke daddy cold smoke generator,how to cold smoke rump steak,cold smoking steak at home,cold-smoked rump steak recipe,using a cold smoker,how to use a cold smoker,rump steak cold smoked,how to cold smoke beef steaks,best cold smoking recipe for steak,cold smoked rump steak on barbecue


Cold Smoked Rump Steak - Cold Smoked Then Grilled to Tasty Perfection!!! Part 9 Smoking & Curing
Author: 
Recipe type: Steak / Smoking / Barbecue
Cuisine: American
Prep time: 
Cook time: 
Total time: 
Serves: 4
 
The concept of this recipe was passed on to me by Dennis Correa, the owner of Smoke Daddy. To cold smoke these steaks, I am using the Smoke Daddy cold smoke generator which has proved to be absolutely amazing throughout this series.
Ingredients
  • 4 x 250g Rump steaks
  • 60ml Demarara or treacle sugar
  • 15ml Himalayan rock salt
  • 15ml Cracked black pepper
Instructions
  1. Pat the steaks dry using kitchen paper.
  2. Transfer the steaks to a rack that has been positioned at an angle over a drip pan.
  3. Fire up your cold smoker. I am using hickory chips which produce a strong, thick smoke, but you can use any flavor of your choice.
  4. After a minute or 2, the smoke generator will be pumping out loads of smoke. Place the steaks in the barbecue and allow them to smoke for 45 minutes.
  5. Remove the steaks from the smoker and wrap them individually in cling-wrap. Allow these to stand at room temperature for a further 45 minutes.
  6. To make the rub, combine the Demerara sugar with the Himalayan rock salt and the cracked black pepper.
  7. Sprinkle the mixture onto both sides of the steaks and use the back of a spoon to polish the rub into the surface of the meat.
  8. Heat a ribbed skillet over high heat and grill the steaks to your preference of doneness. Remove the steaks from the grill and allow them to rest for 5 minutes before serving with the accompaniments of your choice.


Barbecue Bourbon Sticky Chicken Wings – BBQ Chicken Wings with Sticky Bourbon Basting!!!

sticky chicken wings,bbq sticky chicken wings,barbecue sticky chicken wings,bourbon sticky chicken wings,barbecue bourbon sticky chicken wings,marinated bourbon chicken wings recipe,sticky chicken wings video recipe,how to make sticky chicken wings,homemade sticky chicken wings,how to make bourbon chicken wings,homemade bourbon chicken wings,sticky chicken wings on the barbecue, sticky chicken wings recipe oven


Barbecue Bourbon Sticky Chicken Wings - BBQ Chicken Wings with Sticky Bourbon Basting!!!
Author: 
Recipe type: Chicken / Poultry / Barbecue
Cuisine: American
 
Bourbon chicken wings can be done on the barbecue or in the oven.... no matter which way, these bourbon sticky chicken wings are outstanding and will have your friends and family lining up for more.
Ingredients
  • 18 - 24 Full chicken wings
  • 2 Onions chopped
  • 3 Cloves garlic chopped
  • 250ml Bourbon
  • 500ml Tomato puree
  • 80ml Cider vinegar
  • 80ml Worcestershire sauce
  • 125ml Sticky brown sugar (Demarara or treacle)
  • 5ml Tabasco sauce
  • 10ml Coarse salt
  • 10ml Cracked black pepper
Instructions
  1. Starting with the marinade, saute the onions and garlic in a pan over medium heat for 5 minutes until they are tender and translucent.
  2. Pour in the bourbon and continue to fry for a further 2 minutes.
  3. Add the Tabasco, cider vinegar, Worcestershire sauce, brown sugar, salt, cracked black pepper and tomato puree.
  4. Mix this all together thoroughly and continue to simmer the sauce for a further 2 to 3 minutes. Remove the pan from the heat and set it aside to cool while you continue with the wings.
  5. Cut the the wingtips from the wings and transfer the wings to a large non-reactive pan. Pour the bourbon sauce over the wings evenly so that everything is covered.
  6. Place the wings in the refrigerator to marinate for at least 8 hours, preferably overnight.
  7. Barbecue the wings over high heat for 16 minutes, turning every 4 minutes and basting at every turn with the remaining sauce.
  8. If you prefer to use your oven, place the pan in your preheated oven at 180c or 350f for 30 to 40 minutes.
  9. Serve the wings to platters with the accompaniments of your choice and serve immediately.


Gourmet Cold-Smoked Baby Sole – How to Make Cold-Smoked Sole with Smoke Daddy Cold Smoke Generator.

how to smoke sole,cold smoked sole,cold smoking sole,cold-smoking baby sole,cold-smoke sole with smoke daddy cold smoke generator,cold-smoking fish using smoke daddy cold smoke generator,how to smoke fish,smoked sole recipe,smoked fish recipe,smoked sole using apple wood,the smoke daddy cold smoke generator how to use,making smoked fish,cold smoked fish,cold smoking fish,smoke daddy smoke generator recipes,cold-smoked sole


Gourmet Cold-Smoked Baby Sole - How to Make Cold-Smoked Sole with Smoke Daddy Cold Smoke Generator.
Author: 
Recipe type: Seafood / Fish / Smoking
Prep time: 
Cook time: 
Total time: 
Serves: 2
 
In today's episode we're going to use the Smoke Daddy cold smoke generator to flavor a batch of baby sole. The fish is first cold smoked, then pan-fried to perfection resulting in a truly gourmet fish dish subtly infused with apple wood smoke.
Ingredients
  • 4 Baby sole (approx 130g each)
  • 60g Butter
  • 5ml Herbs provence herb mix
  • 2.5ml Garlic powder
  • 30g Butter for frying
  • Apple wood chips
Instructions
  1. To start, place the butter, garlic powder and dried herbs in a heatproof bowl. Pop this in your microwave oven and melt the butter.
  2. Pat the sole dry with kitchen paper.
  3. Place a rack at an angle across the corners of a roasting pan, and transfer the sole to the rack. Brush both sides of the sole with the butter mixture.
  4. Fire up your cold smoke generator and place the fish in the barbecue. Allow this to smoke for 45 minutes.
  5. After 45 minutes remove the sole from the barbecue. Heat a pan over medium high heat and add 30g of butter. Fry the sole for 2 to 3 minutes per side.
  6. Season to taste with salt and pepper.
  7. Transfer the sole sole to serving platters and top with a little of the pan butter and lemon or lime wedges before serving with accompaniments of your choice.


Thanksgiving Smoked Turkey – Part 6 of Smoking & Curing Foods with Smoke Daddy – How to Smoke a Turkey.

smoked thanksgiving turkey,thanksgiving turkey recipe,smoke thanksgiving turkey,how to smoke a turkey,how to smoke a whole turkey,how to cure a turkey,how to cure and smoke a turkey,smoke daddy cold smoke generator,how to smoke a turkey with the smoke daddy cold smoke generator,smoking a whole turkey for thanksgiving, ultimate smoked turkey, brine recipe, barbecue turkey recipe,whole smoked turkey


Thanksgiving Smoked Turkey - Part 6 of Smoking & Curing Foods with Smoke Daddy - How to Smoke a Turkey.
Author: 
Recipe type: Smoking / Turkey / Poultry
Cuisine: American
Prep time: 
Cook time: 
Total time: 
Serves: 6-8
 
Hi and welcome to part 6 of our series on smoking and curing foods. With Canadian Thanksgiving on Monday and in just over a month in the US, today's episode covers curing a smoking a delicious Thanksgiving turkey.
Ingredients
  • 1 x 5-6lb Turkey (2.5kg - 2.8kg)
For the Curing Brine
  • 5lt Water
  • 15g Saltpetre
  • 100g Sugar
  • 200g Salt
  • 30ml Black peppercorns
  • 30ml Whole allspice
  • 10ml Ground ginger
  • 25ml Bicarbonate of soda
For the Basting / Mop
  • 100ml Honey
  • 40ml Lemon Juice
  • Zest of 1 lemon
  • 10ml Lemon pepper
  • 15ml Garlic powder
  • 5ml Cayenne pepper
  • Smoked salt
Instructions
  1. For the curing brine combine the saltpetre, sugar, salt, black peppercorns, whole allspice, ginger and bicarbonate of soda and pour these into a pot along with 5 liters of water.
  2. Bring the pot to a boil, reduce the heat and allow this to simmer for 30 minutes. Quick chill the pot by floating it in cold water in your sink.
  3. To prepare the turkey, trim away any excess skin and fat from the neck and butt. Removing the tail is a matter of personal preference.
  4. Use a sharp knife to cut through the skin and flesh along the breast bone. Cut through the breast bone with your kitchen shears.
  5. Open up the bird, flip it over and dislocate the pelvis with a sharp downward thrust. This allows the bird to lie flat. Removing the wing tips is also a matter of personal preference, however I do recommend this.
  6. Transfer the turkey skin side up to a large food-safe non-reactive container. Pour the cooled brine into the container.
  7. Place a weight on top of the turkey to keep it fully submerged in the solution.
  8. Place the container in your refrigerator and allow it to cure for 48 hours.
  9. After curing, you will need to make the basting. Combine the lemon juice and honey. Take the lemon pepper, garlic powder, cayenne pepper and lemon zest and add these to the honey and lemon juice. Mix these until totally combined.
  10. You will also need smoked salt to grind over the turkey once it has been basted.
  11. Remove the turkey from the curing brine and pat both sides dry using kitchen paper.
  12. Brush the underside liberally with the basting, flip the bird over and repeat this with skin side, before giving the skin a generous grind of smoked salt.
  13. Place a rack at an angle across a pan and transfer the turkey to the rack.
  14. Get your smoker running and heat the barbecue to 250f or 135c. I am using the Smoke Daddy cold smoke generator which allows for perfect cold or hot smoking in any closed barbecue. If you are using another brand of smoker, follow the manufacturer's instructions.
  15. Place the turkey in the barbecue and allow this to smoke for 40 minutes per pound. For my turkey weighing in at about 5 pounds this will take 3 hours 20 minutes. Baste the bird every half hour with melted butter to prevent the skin from drying out.
  16. Towards the end point, check the internal temperature with a probe thermometer. When the internal temperature reaches 170f or 77c in the thichest part of the meat, the turkey is ready to serve.
  17. And there you have it, a beautifully fragrant, tasty and succulently tender smoked turkey flavored with garlic, lemon and a hint of chilli.


Cape Malay Lamb Curry – Spicy, Fruity Lamb Curry – How to Make Lamb Curry!!!

lamb curry,lamb curry recipe,how to make lamb curry,cape malay lamb curry,how to make cape malay lamb curry,tender lamb curry cape malay style, south, cape malay, lamb, south africa, cape malay cooking, cape malay lamb curry recipe, cape malay lamb curry potjie, cape malay lamb curry ingredients, best cape malay lamb curry, how to make cape malay lamb curry, cape malay lamb knuckle curry, cape malay lamb chop curry


Cape Malay Lamb Curry - Spicy, Fruity Lamb Curry - How to Make Lamb Curry!!!
Author: 
Recipe type: Curry / Lamb
Cuisine: South African
Prep time: 
Cook time: 
Total time: 
Serves: 4-6
 
With winter just round the corner, here is the perfect solution to fight off the chills. This Cape Malay lamb curry is spicy and fragrant with massive fruity overtones. Despite the slightly longer than usual preparation, it is really easy to make and will have your guests raving for more.
Ingredients
  • 750g Boneless lamb shoulder
  • 45ml Oil
  • 2 Onions
  • 2 Cloves garlic
  • 15ml Grated ginger
  • 15ml Curry powder
  • 2.5ml Ground coriander
  • 2.5ml Cumin seeds
  • 1.25ml Turmeric
  • Pinch of salt
  • Generous grind of black pepper
  • 1.25ml Ground cinnamon
  • 2 Whole cloves
  • 1 Bay leaf, torn into bits
  • 1 Large carrot
  • 125g Dried apricots
  • 1 Banana
  • 15ml Tomato paste
  • 25ml White wine vinegar
  • 125ml Chicken stock
  • 22.5ml Apricot jam
  • 22.5ml Plain yogurt
Instructions
  1. The ingredients are split into 3 groups. For group 1, cut the lamb into bite-sized cubes. Chop the onion and garlic and grate the ginger.
  2. In another bowl, combine the ground coriander, cumin seeds, turmeric, salt, black pepper, ground cinnamon, whole cloves, and bay leaf. In another bowl, measure out the curry spice.
  3. For group 2, peel and chop the carrots and slice the bananas. Reconstitute the dried apricots by soaking them in hot water for 30 minutes, then draining. Measure out the tomato paste, white wine vinegar and chicken stock.
  4. Group 3 is quicker.... measure out the apricot jam and plain yogurt.
  5. Heat your wok or a large pan over high heat and add 45ml of oil. Add the onion, garlic and ginger and stir-fry these for 2 minutes. Add all of the spices to the pan and fry for a further 3 minutes until everything is fragrant.
  6. Move the onion mixture to the side of the pan and add the lamb. Scoop the onion over the top of the lamb and allow this to fry for a minute undisturbed.
  7. Stir the lamb and onion mixture together and continue to stir-fry for 3 to 5 minutes until the meat is browned.
  8. Add the tomato paste, apricots, vinegar, chicken stock, carrots and bananas.
  9. Stir this all together, bring it to a boil, reduce the heat and allow this to simmer gently for 90 minutes, stirring every 15 minutes.
  10. Add a little extra chicken stock to the pan if it starts getting too dry.
  11. minutes before the end, add the apricot jam and yogurt and stir these in.
  12. Portion the curry to bowls, top with a little extra yogurt, fruit chutney and fresh coriander and serve with the accompaniments of your choice.
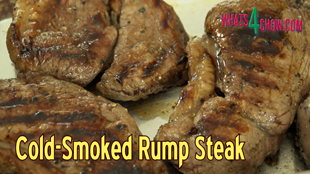
 

Apple Wood Smoked Chicken Thighs – Part 4 of Curing & Smoking Meats – Smoke Daddy Smoke Generator!!!

how to smoke chicken thighs,how to smoke chicken thighs in your smoker,making smoked chicken thighs,best smoked chicken thighs,making smoked chicken thighs using the smoke daddy smoke generator,recipe for smoked chicken thighs,best hot smoked chicken thighs recipe,hot smoking chicken, smoked chicken leg quarters, smoking leg quarters, competition-style barbecue chicken thighs, smoked chicken rub


Apple Wood Smoked Chicken Thighs - Part 4 of Curing & Smoking Meats - Smoke Daddy Smoke Generator!!!
Author: 
Recipe type: Chicken / Poultry / Barbecue / Smoked Meats
Prep time: 
Cook time: 
Total time: 
Serves: 6-12
 
These apple-wood smoked chicken thighs are absolutely amazing and will certainly have your guests talking for ages.
Ingredients
  • 8-12 Chicken thighs
  • 60ml Syrup (corn syrup, cane syrup or honey)
  • 30ml White wine vinegar
  • Peppadew Piquant Pepper & Cilantro Seasoning (if you can't find this look below for the homemade version which will closely approximate the taste)
For the Homemade Rub
  • 15ml Fine Himalayan Salt - or any non-iodated salt
  • 30ml Red Bell Pepper Falkes
  • 10ml Onion Powder
  • 10ml Garlic Powder
  • 30ml Powdered Dried Cilantro Leaves
  • 10ml Chilli Flakes
  • 5ml Ground Black Pepper
  • 10ml Lemon Pepper
  • 10ml Powdered Sugar
Instructions
  1. For the coating, pour the syrup and white wine vinegar into a jug and mix until totally combined. You can use cane syrup, corn syrup or even honey.
  2. Place the chicken thighs in a large mixing bowl and pour the syrup mixture over the chicken. Mix the chicken around in the bowl until everything is well coated.
  3. Cover the bowl and allow this to stand for 30 minutes.
  4. Transfer the chicken to a rack in a pan and sprinkle both sides of the thighs liberally with the seasoning. I am using my favorite Peppadew Cilantro seasoning. Peppedew products are sold in USA, UK and Australia, but if you can't find it, I have included a home made version in the printable recipe above.
  5. Lift the rack up and balance it diagonally across the corners of the pan. This will allow the smoke to reach the underside of the chicken effectively, while the pan becomes a drip-tray.
  6. Load up your smoker with apple wood chunks and bring it up to a temperature of 135c or 275f. Place the chicken in the smoker and allow this to smoke for 2 to 2.5hrs until the internal temperature reaches 76c or 170f. Use a reliable probe thermometer to measure the internal temperature, and measure from the thickest part of the largest thigh.
  7. Remove the amazingly aromatic and tasty thighs from the smoker and serve immediately with the accompaniments of your choice.
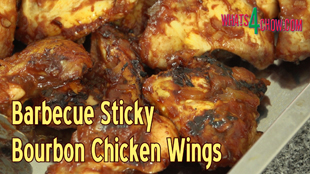
 

The Amazing Gourmet Schnitzel Hot Dog. This is for HUNGRY Hot Dog Fans!!! Gourmet Hot Dog Recipe.

gourmet hotdog,gourmet schnitzel hotdog,gourmet hotdog recipe,how to make a gourmet hotdog,best hotdog recipe,gourmet hotdog delux, hot dog (food), gourmet hot dogs, gourmet hotdog cafe, gourmet hot dog toppings, gourmet hotdog opskrift, 5 dogs gourmet hot dogs, homemade, hot dog challenge, hot dog gourmet, originals hot dog,chicken hot dog,chicken schnitzel hotdog,how to make a chicken and bacon hotdog


The Amazing Gourmet Schnitzel Hot Dog. This is for HUNGRY Hot Dog Fans!!! Gourmet Hot Dog Recipe.
Author: 
Recipe type: Fast Food
Cuisine: American
Prep time: 
Cook time: 
Total time: 
Serves: 2
 
Today we're taking yesterday's schnitzel even further from the traditional version. A footlong sausage wrapped in cheese, schnitzel and bacon, pan-fried to golden crispy perfection, then served on a length of fresh French loaf. Gourmet Hotdog Deluxe!!!
Ingredients
For 2 Gourmet Hot Dogs
  • 2 x 12 inch Smoked Vienna sausages
  • 2 x Chicken breasts
  • 6 Slices streaky bacon
  • 40g Mozzarella cheese, finely shredded
  • 1 x 24 inch French loaf
  • ⅓ Small lettuce
  • Condiments of your choice to garnish
Instructions
  1. Using sharp knife, slash angled cuts into both sides of the sausages.
  2. Unpack the smoked streaky bacon.
  3. To prepare the chicken, cut away the fillets from the breasts. Fold them in cling-wrap and using your meat mallet, tap them down to a thickness of 3mm or ⅛th of an inch.
  4. Working with one schnitzel at a time, turn the schnitzel width-ways and sprinkle half of the finely shredded cheese over the chicken.
  5. Place the sausage in the center and proceed to roll the chicken around the sausage as firmly as possible.
  6. Place a strip of bacon at a slight angle above the chicken. Roll this up with the chicken so that it spirals along the chicken. Repeat this with another 2 slices of bacon until the chicken is totally wrapped in bacon.
  7. Repeat this with second dog.
  8. Before frying the dogs, finely slice a third of a small lettuce.
  9. Cut the French loaf in half. This is a store-bought loaf, and the cheese had already been added, however, you can use any loaf of your choosing, provided it is large enough to accommodate these huge dogs.
  10. Slice through the tops of the half-loafs leaving the bottoms intact.
  11. Fill each half-loaf with half of the shredded lettuce.
  12. Heat a large pan over medium high heat and add 30g of butter. Fry the dogs for 3 minutes per side, remembering that they have 4 sides, giving you a total of 12 minutes.
  13. Transfer the crispy golden dogs to the 2 half-loaves and garnish with condiments of your choice.


Sesame Crusted Chicken Schnitzel. A New Take on Traditional Chicken Schnitzel!!!

chicken schnitzel,sesame crusted chicken schnitzel,how to make chicken schnitzel,chicken schnitel recipe,homemade chicken schnitzel,making chicken schnitzel at home,gourmet chicken schnitzel,sesame crusted chicken breast,sesame coated chicken breast,fried sesame chicken, most populat youtube cooking channels, chicken schnitzel recipe masterchef, chicken schnitzel recipe jamie oliver, chicken schnitzel recipes, recipe forchicken schnitzel


Sesame Crusted Chicken Schnitzel. A New Take on Traditional Chicken Schnitzel!!!
Author: 
Recipe type: Chicken / Poultry
Cuisine: Austrian
Prep time: 
Cook time: 
Total time: 
Serves: 2
 
Today we're cooking a variation of the inimitable chicken schnitzel, an awesome crispy, golden sesame crusted schnitzel. This quick and easy schnitzel recipe can be scaled up to any quantity required!!!
Ingredients
  • 2 Chicken Breasts
  • Seasoning of your choice
  • ½ Cup Cornflour
  • 1 Cup sesame seeds (divided into to ½ cups)
  • 2 Eggs
  • 50g Butter
  • Lemon wedges to serve
Instructions
  1. Cut the fillets away from the breasts and put these aside.
  2. Fold the first breast in cling-wrap and using your meat mallet, tap it down to a thickness of 3mm or 18th of an inch.
  3. Season both sides of the schnitzel with your favorite seasoning, whether salt and pepper, chilli powder or in this case, I am using Indian masala spice mix. Season the fillet as well, then fold the schnitzel in the cling-wrap and put it aside while you repeat this with the second breast.
  4. To coat the chicken, spread the cornflour out across a platter.
  5. Measure out half of the sesame seeds. Sprinkle a little of this across a larger third platter. This is where the coated chicken will rest.
  6. Spread the remaining sesame seeds across the smaller platter. In addition beat 2 eggs.
  7. Unwrap one of the schnitzels and dredge it in the cornflour. Also dredge the fillet. Place these back on the cling-wrap and repeat this process with the second schnitzel.
  8. Pour the egg onto a fourth platter. Drag one of the schnitzels through the egg on both sides, making sure to wet all of the cornflour.
  9. Dredge the schnitzel in the sesame to get a good solid coating, then transfer it to the large platter to set. Replenish the sesame with other half of seeds and repeat this with the remaining schnitzel and fillets.
  10. Allow the coating to set for 20 minutes before continuing.
  11. Heat a large frying pan over high heat and add 50g of butter. Fry the schnitzels for 90 seconds per side until crisp and golden.
  12. Remove the schnitzels from the pan and serve immediately with the accompaniments of your choice.


Scroll to top

Kitchen Conversions

Convert:
Masses
to:
Volumes
to:
Temperatures
to:
Lengths
to: