How to Make the Ultimate Fish Burger – The Best Crispy Deep Fried Fish Burger

burger,fish,fish burger,recipe,fish burger recipe,fish burger patty recipe,fish burger recipe jamie oliver,fish burger mcdonalds,fish burger burger king,fish fillet burger,kfc fish burger,22,30],fish burger recipe cracker meal,fish burger king,how to make the best fish burger,homemade fish burger,monk fish burger,monkfish burger,monkfish recipes,seafood burger recipe,fish burger toppings


How to Make the Ultimate Fish Burger - The Best Crispy Deep Fried Fish Burger
Author: 
Recipe type: Fish / Seafood
Serves: 2
 
In search of the ultimate fish burger, you need a very special fish. Monkfish has a texture and flavor very similar to crayfish and lobster. In fact so similar that many restaurants serve monkfish as crayfish thermador. This is the fish we need to make the ultimate fish burger.
Ingredients
  • 600g Monkfish tail
  • 80ml All-purpose flour
  • 80ml Cornflour
  • 80ml Finely crushed corn flakes
  • 15ml Salt
  • 15ml Lemon pepper
  • 2 Eggs
  • 2 Large burger buns
  • Frilly lettuce
  • Mayonnaise
  • Sliced pickled gherkin
  • Fresh lemon to squeeze
Instructions
  1. Cut the 2 fillets away from the spine of the fish. The fillets are long and fat. Cut 4 inches away from the thicker ends of the fillets for the burgers and save the thinner ends for other recipes.
  2. Use a sharp knife to butterfly the fillets from the outer edge of the meat.
  3. For the coating, combine the all-purpose flour, corn flour, finely crush corn flakes, salt and lemon pepper.
  4. Whisk 2 eggs and pour them into a bowl.
  5. Before coating the fish, sprinkle some of the seasoned flour over a platter. This is where the coated fish will set and the layer of flour prevents the coating from sticking to the platter and getting damaged.
  6. Dredge the fish in the flour mixture to coat it all over.
  7. Dunk the fish in the egg making sure to wet all of the flour.
  8. Return the fish to the flour making sure to get a good solid coating.
  9. Transfer the coated fish to the platter to set and continue with the second fillet. Allow the coating to set for 20 minutes.
  10. While the coating sets, slice and butter the burger buns. Top the buns with a healthy dose of frilly lettuce, a dollop of mayonnaise, and sliced pickled gherkin.
  11. Heat a large pan of oil to a temperature of 180c or 350f.
  12. Carefully lower the fish into the oil and fry this for 6 minutes, turning once halfway through.
  13. Remove the fish from the oil and drain any excess oil on kitchen paper.
  14. Transfer the fish to the buns, give each one a good squeeze of fresh lemon juice and serve immediately.
 

Crispy Peppered Pork Schnitzel – Quick & Easy Pork Schnitzel Recipe!!!

how-to,pork schnitzel,pork schnitzel calories,pork schnitzel gravy,pork schnitzel cut,pork schnitzel wiki,pork schnitzel recipe,how to make pork schnitzel,quick pork schnitzel,easy pork schnitzel,pork schnitzel with apple sauce,pork schnitzel recipes with pork tenderloin,pork schnitzel with dill sauce,pork schnitzel with lemon sauce,pork schnitzel with mushroom gravy,pork schnitzel with mushroom sauce,pork schnitzel with cream gravy


Crispy Peppered Pork Schnitzel - Quick & Easy Pork Schnitzel Recipe!!!
Author: 
Recipe type: Pork
Cuisine: German
 
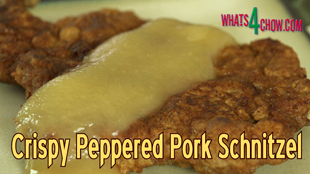
Schnitzel, meaning thinly sliced, can be made with veal, beef, chicken or pork. This spicy peppered pork schnitzel is absolutely outstanding and well worth a try.
Ingredients
  • 2 x 200g Pork neck steaks
For the Coating
  • 250ml All-purpose flour
  • 15ml Ground white pepper
  • 15ml Cayenne pepper
  • 15ml Caster sugar
  • 15ml Garlic powder
  • 10ml Fine salt
  • 2 Eggs lightly beaten
Instructions
  1. Start with 2 pork neck steaks cut about a half inch thick.
  2. Unroll a length of cling-wrap on your work surface and place one of the pork steaks in the center of the plastic. Fold the cling-wrap over to enclose the steak and use your meat mallet to tap this down to half its original thickness.
  3. Repeat this with the remaining steak.
  4. In a bowl, combine the all purpose flour, ground white pepper, cayenne pepper, caster sugar, salt and garlic powder.
  5. Whisk 2 eggs and place these in another dish.
  6. Before coating the schnitzels, sprinkle a little of the seasoned flour over a large platter. This is where the coated pork will sett and the flour prevents the coating from sticking to the platter and getting damaged.
  7. Dredge one of the schnitzels in the flour mixture to coat all over.
  8. Transfer this to the egg, making sure to wet all of the flour.
  9. Then back to the seasoned flour making sure to get a good solid coating all over.
  10. Transfer the schnitzel to the platter and continue with the second schnitzel.
  11. Allow these to set for 20 minutes before continuing.
  12. Place a large frying pan over medium high heat and add just enough oil to coat the base of the pan.
  13. When the oil is really hot it will start to shimmer. Add the pork to the pan and fry it for 3 minutes.
  14. Turn the pork over and continue to fry for a further 2 minutes.
  15. Remove the pork from the pan and drain any excess oil on kitchen paper.
  16. Serve the schnitzels immediately with apple sauce and the accompaniments of your choice.


Chicken Kiev – Deep fried Chicken Breast Stuffed with Garlic Parsley Butter

chicken kiev,how to make chicken kiev,homemade chicken kiev,crumbed chicken stuffed with garlic parsley butter,the trick to making chicken kiev,chicken kiev recipe,best chicken kiev,chicken kiev recipe easy,chicken kiev james martin,chicken kiev gordon ramsay,chicken kiev marco pierre white,chicken kiev ingredients,chicken kiev sauce,chicken kiev recipe rachael ray,chicken kiev alton brown


Chicken Kiev - Deep fried Chicken Breast Stuffed with Garlic Parsley Butter
Author: 
Recipe type: Chicken
Serves: 2
 
Chicken Kiev is a Classic dish of chicken breast filled with garlic and parsley butter, crumbed and deep-fried to golden perfection. This all sounds really easy until the butter melts and runs out of the breast. There is a trick to this, and this how it goes.
Ingredients
  • 2 Chicken breasts (deboned, skinless)
  • 1 Cup all-purpose flour
  • 5ml Paprika
  • 5ml White pepper
  • 5ml Salt
  • 3 Eggs, lightly beaten
  • 1 Cup fine dried breadcrumbs
  • Oil for frying
For the Filling
  • 80g Butter
  • 125ml Finely chopped parsley
  • 15ml Garlic, finely chopped
  • Salt and pepper to taste
Instructions
  1. To make the garlic parsley butter, mash the butter, finely chopped garlic, and parsley together until well combined. Put this aside.
  2. Place the chicken breasts on the chopping board, smooth side down and trim away the little fillets from the breasts. Put these aside.
  3. Turn the breasts over. Starting about a quarter of the way in from the long edge of the breast, slice into the breast at a slight angle until you can flap the upper part of the breast back.
  4. Turn the breast 180 degrees and repeat this starting 3 quarters of the way in from the edge. Flap this piece open, then repeat this with the remaining breast.
  5. Place the chicken fillets on a piece of cling-wrap. Fold the wrap over to enclose the fillets and use the base of a small saucepan to gently tap the fillets flat.
  6. Place half of the butter mixture into each of the breasts and flap the 2 edges over the butter to enclose the butter. Place a fillet over the join in the flaps to close it entirely.
  7. Place the chicken in the refrigerator for 30 minutes to set and firm up.
  8. While the chicken sets, combine the all-purpose flour, paprika, white pepper and salt.
  9. Measure out the dried breadcrumbs.
  10. Lightly beat 3 eggs and pour these into a dish.
  11. Sprinkle a thin layer of the seasoned flour over a large platter. This is where the coated chicken kiev will set, and the layer of flour will prevent the chicken coating from sticking to the platter and getting damaged.
  12. To coat the kiev, dredge it in the seasoned flour. Dunk the chicken in the egg to wet all of the flour. Return it to the flour mixture to get a good coating, then back to the egg making sure to wet all of the flour, especially the ends.
  13. Then it's into the bread crumbs to get a good solid coating all over.
  14. Transfer the coated chicken to the platter and continue with the remaining chicken. Allow the coating to set for 20 minutes.
  15. Fill a large pan with oil to a depth of 1 inch and heat this over medium heat to a temperature of 170c or 340f.
  16. Carefully drop the chicken kiev into the oil and fry these for 2 to 3 minutes per side until crisp and golden.
  17. Remove the breasts from the oil using a slotted spoon and drain any excess oil on kitchen paper.
  18. Serve the kiev immediately with the accompaniments of your choice.
  19. And there we have it... the perfect chicken kiev ... filled with melted butter, garlic and parsley.


Pork Tocino – Sweet & Sticky Filipino Pork – How to Make Sweet & Sticky Pork at Home!!!

pork tocino,pork tocino recipe,how to make pork tocino,sweet & sticky pork,how to make sweet & sticky pork at home,filipino pork tocino,sticky pork recipe,sweet sticky pork recipe,recipe pork tocino youtube,recipe pork tocino video,best pork tocino recipe,filipino pork tocino recipe,youtube pork tocino,sticky braised pork recipe


Pork Tocino - Sweet & Sticky Filipino Pork - How to Make Sweet & Sticky Pork at Home!!!
Author: 
Recipe type: Pork
Cuisine: Filipino
Prep time: 
Cook time: 
Total time: 
Serves: 4-6
 
This sweet and sticky braised pork is out of this world. Marinated for days, this absolutely tender treat will become legend in your household.
Ingredients
  • 1kg Pork Shoulder, deboned, cut into 8mm slices
  • 180g Brown sugar
  • 3 Drops red food coloring (optional)
  • 125ml Ginger beer (or pineapple juice)
  • 60ml Light soy sauce
  • 2.5ml Garlic powder
  • 2 x 240ml Water
Instructions
  1. Pour the ginger beer, light soy sauce, brown sugar and garlic powder into a large food-safe container.
  2. Traditionally this recipe would use pineapple juice instead of ginger beer, but I just find the ginger beer gives it that extra something that makes it really special.
  3. In addition, if you want the traditional red color, you can achieve by adding 3 drops of food coloring. As this doesn't have any bearing on the taste, I leave it out.
  4. Stir the mixture until all of the sugar has dissolved. Place the pork shoulder in the marinade, transfer to your refrigerator and allow this to cure for 2 to 3 days, turning the meat each day.
  5. After the marinating, you will need to cook the pork in 2 batches. For each batch you will need 240ml of water. Place this in a large wok or pan, add half of the pork and half of the marinade. Bring it to a boil over medium high heat.
  6. Continue to boil, turning the meat every couple of minutes.
  7. After 10 to 15 minutes the water will have mostly evaporated leaving a thick sticky syrup. Continue turning and wiping the pork in the syrup until it develops a thick glaze.
  8. Remove the pork from the wok and keep it warm while you continue with next batch.
  9. Serve the pork hot with rice or noodles and pickled Asian ginger.


Sugar Chilli Steaks with Creamy Mushroom Sauce – How to Make Sugar Chilli Steaks at Home!!!

sugar chilli steak,how to make sugar chilli steak,homemade sugar chilli steaks,best grilled steak recipe,best steak recipe,best steak recipe youtube,best steak recipe video,the best steak ever,how to make the best steak ever,how to grill a steak,the best way to cook a steak,spicy grilled steak recipe,hot chilli steak recipe,sweet chilli steak recipe,mushroom sauce recipe,how to make mushroom sauce


Sugar Chilli Steaks with Creamy Mushroom Sauce - How to Make Sugar Chilli Steaks at Home!!!
Author: 
Recipe type: Steak / Beef
Prep time: 
Cook time: 
Total time: 
Serves: 4
 
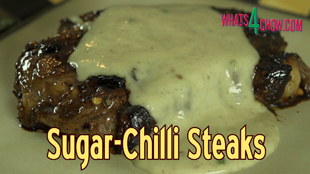
Sugar chilli steak is flavor experience you will never forget. The caramelized sweet and spicy glaze offset by the creamy mushroom sauce is quite honestly one of the best combinations around.
Ingredients
For the Steaks
  • 4 x 250g Sirloin or Rump steaks
  • 60ml Demarara sugar (or treacle sugar)
  • 15ml Coarse ground black pepper
  • 15ml Chilli flakes
  • 10ml Salt
For the Mushroom Sauce
Instructions
  1. Combine the Demarara sugar, chilli flakes, coarsely cracked black pepper and salt.
  2. Press generous amounts of the mixture into the surface of both sides of the steaks.
  3. Stand the steaks up on their fatty edge and press 3 skewers through the steaks to secure them in this position.
  4. Flip the block over and give fatty strip a liberal dose of salt. Put these aside.
  5. To make the sauce you will need 300ml of the gourmet creamy mushroom soup we made yesterday..... click the link to see this video if you missed it.
  6. Pour the soup into a small saucepan. Dissolve the tapioca flour in a little water and stir this into the soup.
  7. Bring this to a simmer over medium heat and allow it to simmer for 90 seconds until thickened.
  8. Remove this from the heat and keep it warm.
  9. Heat a large frying pan over medium high heat and add 30g of butter.
  10. Place the steaks in the pan, fatty side down and allow this to fry for 6 minutes until the fat is well rendered.
  11. Remove the skewers from the steaks and drop them flat in the pan.
  12. Continue to grill these for 3 to 4 minutes per side until we glazed and caramelized.
  13. Remove the steaks from the heat and allow them to rest for a minute before serving topped with the creamy mushroom sauce.


Deep Fried Dragon Salt Chicken – How to Make Dragon Salt Chicken at Home!!!

Deep Fried Dragon Salt Chicken - How to Make Dragon Salt Chicken at Home!!!,how to make dargon salt,dragon salt recipe,dragon salt chicken,crispy deep-fried chicken with dragon salt,crispy deep-fried chicken recipe dragon salt,how to make spicy dragon salt,home meade dragon salt chicken,crispy deep-fried chicken homemade,spicy deep-fried chicken with dragon salt,homemade spicy deep-fried chicken,make dragon salt chicken at home,spicy deep-fried chicken video,spicy deep-fried chicken youtube


Deep Fried Dragon Salt Chicken - How to Make Dragon Salt Chicken at Home!!!
Author: 
Recipe type: Deep-Fried Chicken
Cuisine: Mongolian
 
Dragon salt is an extremely versatile and tasty addition to your kitchen. It can be used to flavor roast chicken, grilled kebabs, steaks and pork. In this episode we're making the dragon salt and using it to flavor a batch of crispy deep fried chicken.
Ingredients
For the Dragon Salt
  • 10ml Himalayan rock salt
  • 30ml Ground black pepper
  • 30ml Garlic powder
  • 30ml Ground ginger
  • 30ml Chilli powder
  • 30ml Dried dill
  • 10ml Lemongrass powder
  • 15ml Smoked paprika
  • 10ml Dried basil
  • 10ml Celery salt
For the Rest
  • Chicken pieces
  • Oil for frying
  • All-purpose flour
  • 4 Eggs
Instructions
  1. Combine the Himalayan rock salt, ground black pepper, garlic powder, ground ginger, chilli powder, dried dill, lemon grass powder, smoked paprika, dried basil and celery salt.
  2. This is the dragon salt. For the purposes of our recipe, we need this to be really fine. To achieve this zap the powder in your spice blender until fine. Transfer the powder to a sprinkle bottle. Store any excess powder in an airtight container.
  3. Place the chicken pieces in a large roasting tin in a single layer and sprinkle the dragon salt liberally over the chicken. Turn the pieces over and repeat with the other side.
  4. Place this in your refrigerator for at least 4 hours to marinate.
  5. Place 2 cups of all-purpose flour in a large mixing bowl. Beat 4 eggs and place these in a large dish. (you may need more flour and eggs depending on how many chicken pieces you are coating)
  6. Take some of the flour and sprinkle this over a large platter. This is where the coated chicken will set, and the flour prevents the chicken coating from sticking to the platter.
  7. To coat the chicken, dredge the chicken in the flour. Dunk the chicken in the egg to wet all of the flour. Return the chicken to the flour to get a good solid coating. For the double dip, return the chicken to the egg to wet all of the flour, them back to the flour to get a good thick, solid coating. Transfer the chicken to the platter and continue with the remaining pieces. Allow the coating to set for 20 minutes.
  8. Half fill a large pan with oil and heat this to 160c or 320f. Fry the chicken in batches for 20 minutes per batch, turning once, halfway through.
  9. Remove the chicken from the oil and drain any excess on kitchen paper before serving.


Leipold’s Ham – Kosher Ham from Lamb – How to make Kosher Ham at Home!!!

leipold's ham,how to make ham at home,curing ham at home,how to make ham from lamb,how to make ham from mutton,how to make kosher ham,making kosher ham at home,home made kosher ham,how to cure lamb,how to cure mutton,how to make ham without pork,making and curing ham at home,curing and cooking ham at home,homemade kosher ham from lamb,how to cure ham,how to cure ham recipe,how to cure ham video,how to cure ham youtube


Leipold's Ham - Kosher Ham from Lamb - How to make Kosher Ham at Home!!!
Author: 
Recipe type: Curing Meats
Cuisine: South African
 
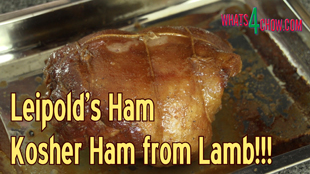
Leipold's ham, named after poet Louis Leipold, is an incredibly delicious ham made by curing lamb or young mutton. This recipe would have appeared somewhere in the early nineteenth century from a little town called Worcester in the southern Cape, South Africa.
Ingredients
  • 2kg Leg of lamb, deboned
  • 240g Salt
  • 95g Prague powder
  • 3Lt Hot Water
  • 40g Sugar
  • 20g Cracked Black Pepper
  • 10g Ground Coriander Seed
  • 1 Sachet gelatin
  • 3 Bay leaves
  • 2 Sprigs parsley
  • 15ml Whole black peppercorns
  • 1 Carrot
  • 1 Onion
  • 2 Whole cloves
  • 10ml Hot English mustard
  • 25ml Brown sugar
  • 50ml White / Red wine vinegar
Instructions
  1. Place the hot water in a non-reactive pot and add the salt, sugar, cracked black pepper and ground coriander seed.
  2. Bring this to a boil, reduce the heat and allow this to simmer for 10 minutes. Quick-chill the brine by floating the pot in a sink of cold water. Once it has cooled, stir in the Prague powder until dissolve, then put this aside.
  3. Have your butcher debone the leg of lamb. He will inevitably place this in a net. Remove the leg from the netting.
  4. There will be a tunnel through the meat where the bone was removed. Find the narrow side and slice through the meat. Open the leg and flatten it out.
  5. Sprinkle a layer of gelatin over the meat. This will absorb liquid and expand negating any possibilities of air pockets in the rolled meat.
  6. Starting with the wide edge of the meat, roll the leg up as tightly as possible.
  7. Using butcher's twine tie the roll very firmly. Three rings across the roll should do the trick, then finish this off with one tie along the length to close the ends of the roll.
  8. Place the roll in a large non-reactive container and pour in the curing brine.
  9. Using your brining syringe, suck up brine and inject this into the meat from the ends of the roll, withdrawing the needle as you depress the plunger. Continue with this until you're convinced that all of the meat has been treated.
  10. Place the lid on the container and let the meat cure in your refrigerator for a full 7 days, turning the meat each day.
  11. After 7 days, remove the lamb from the brine and wash it thoroughly under cold running water. Dry the meat with a clean dish towel, place the meat on a rack over a roasting tin or catch-tray and allow this to air-dry in your refrigerator for 5 days.
  12. After five days you'll have a magnificently colored ham with a glossy patina.
  13. Place the ham in a large pot. Add 3 bay leaves, a couple of sprigs of parsley, the whole peppercorns, a chopped carrot and onion studded with 2 whole cloves.
  14. Pour in enough water to cover the ham. Bring this to a simmer and allow this to continue for 60 minutes.
  15. For the glaze, mix the brown sugar, mustard powder and white wine vinegar.
  16. Remove the ham from the pot and pat it dry. Place it in a roasting pan and baste it all over with the glaze. Roast the ham in a preheated oven at 160c or 320f for 30 minutes.
  17. Remove the ham from the oven every 10 minutes to brush on more glaze.
  18. After the roasting time, remove the ham from the oven and allow it to rest for 5 minutes. Cut the string away from the meat and slice the ham into thin slices before serving.
  19. This ham also makes awesome cold cuts.


How to Make Classic Osso Bucco – Osso Bucco using Lamb Leg Cutlets!!!

osso bucco,recipe,osso buco,osso bucco recipe,ossobuco (dish),osso bucco jamie oliver,osso bucco beef shin,osso buco recipe mario batali,osso bucco nigella lawson,osso bucco masterchef australia,osso bucco veal,osso bucco food wishes,video,how to cook osso buco,easy osso bucco recipe,osso bucco recipes,how to cook osso bucco,ossobucco,recette d'osso bucco,osso bucco recette,osso bucco slow cooker


How to Make Classic Osso Bucco - Osso Bucco using Lamb Leg Cutlets!!!
Author: 
Recipe type: Lamb / Veal
Cuisine: Italian
Prep time: 
Cook time: 
Total time: 
Serves: 8
 
Osso Bucco is classic Italian dish of slow cooked veal cutlets with a thick glossy gravy. Although veal shank cutlets are the tradional meat used, osso bucco can be quite successfully made with lamb leg cutlets as I am about to do, or even with young goat leg cutlets.
Ingredients
  • 2kg / 4.4lb Lamb leg cutlets
  • Oil for coating
  • 120ml Oil for frying
  • 1 Onion, chopped
  • 250ml White wine
  • 250g Cherry tomatoes, halved
  • 1lt Vegetable stock
For the Seasoned Flour
  • 500ml All-purpose flour
  • 10ml Salt
  • 2.5ml Fine black pepper
  • 2.5ml Ground nutmeg
For the Gremolata, mix together
  • 60ml Parsely, finely chopped
  • 2 Cloves garlic, finely chopped
  • 30ml Grated lemon rind
Instructions
  1. Combine the flour, salt, pepper and nutmeg and place this in a large pan. Place the lamb leg cutlets in another pan, drizzle with little oil and rub this into the meat until everything is coated.
  2. Chop the onion, half the cherry tomatoes, measure out the wine and the vegetable stock.
  3. Heat 120ml of oil in a large pan. Dredge the lamb cutlets in the seasoned flour and fry the cutlets slowly for 5 minutes per side and they are nicely browned. Repeat this until all of the cutlets are fried. Transfer the cutlets to a large roasting tin.
  4. Add the onion to the pan and fry for 2 to 3 minutes until tender. Pour the onions and the roux from the pan over the lamb.
  5. Return the pan to the heat and add the wine, tomatoes and stock. Heat this until almost boiling, then pour it over the lamb.
  6. Cover the roasting tin with foil and bake in a preheated oven at 150c or 300f for 90 minutes.
  7. Remove the osso bucco form the oven and serve immediately topped with a generous dose of the gravy and a scattering of gremolata.
For Veal or Goat Osso Bucco, follow exactly the same procedure.
If your gravy is still a bit thin after the cooking time, transfer it to a saucepan and thicken it by adding a tablespoon or 2 of cornflour dissolved in a little water. Allow this to boil until thickened.


KFC Fried Chicken Secret Recipe – Original Recipe / Secret Ingredients / How to Make KFC – Part 2

kfc secret recipe,kfc secret spice recipe,kfc spice blend,how to make kfc fried chicken,kfc fried chicken secret recipe,copycat kfc chicken,homemade kfc fried chicken,the real kfc fried chicken recipe,KFC secred blend of 11 herbs and spices,how to make real kfc at home,how to real kfc fried chicken at home,real homemade kfc fried chicken,secret kfc coating,what is the secret to kfc fried chicken,kfc deep-fried chicken recipe,Making KFC using Prague powder


KFC Fried Chicken Secret Recipe - Original Recipe / Secret Ingredients / How to Make KFC - Part 2
Author: 
Recipe type: Chicken / Fast Food / Take-Out
Cuisine: American
 
Some time ago we launched the first of our KFC series and have been overwhelmed at the response. One of the main questions that arose from this was where to buy saltpetre. This updated version of the recipe uses Prague powder to replaces the saltpetre, the salt and the bicarbonate of soda.
Ingredients
  • 8-12 Chicken pieces
For the Secret Herb & Spice Blend
  • 15ml Paprika
  • 10ml Onion Salt
  • 5ml Dried Sage
  • 5ml Garlic Powder
  • 5ml Dried Oregano
  • 5ml Cayenne Pepper
  • 5ml Cracked black pepper
  • 5ml Dried basil
  • 5ml Dried marjoram
  • 5ml Ground Coriander seed
For the Curing Brine
  • 3lt Water
  • 5ml Whole black peppercorns
  • 1 Whole allspice
  • 5ml Ground ginger
  • 50g Sugar
  • 105g Prage powder / pink curing salt (NOT Instacure)
For the Coating
  • 2 Cups all-purpose flour
  • 4-6 eggs, beaten
Instructions
  1. Some time ago we launched the first of our KFC series and have been overwhelmed at the response. One of the main questions that arose from this was where to buy saltpetre. This updated version of the recipe uses Prague powder to replaces the saltpetre, the salt and the bicarbonate of soda.
  2. Prague powder, or pink curing salt is available worldwide from butchery suppliers, and you may even buy it directly from any butcher that processes cured meats and sausages.
  3. Prague powder is not to be confused with Instacure which is a totally different formulation and cannot be substituted.
  4. Before continuing, if you have not viewed the original video, please do so now as it contains all of the introductory information about the process.
  5. To make up the curing brine, place all of the brine spices, excluding the prague powder into a large pot. Add half of the secret spice blend to the pot as well, then pour in 3 liters of water.
  6. Bring this to a boil, lower the heat and allow this to simmer for 10 minutes.
  7. Quick-chill the brine by floating it in a sink of cold water. Changing the sink water every few minutes will speed this up as well.
  8. While the brine cools, use a carving fork or skewer to punch holes through the skin of the chicken pieces. This enables the curing brine to penetrate the chicken more efficiently.
  9. Place the chicken pieces in a large non-reactive food-safe container.
  10. Remove the cooled brine from the sink and add the Prague powder. Stir this thoroughly until totally dissolved.
  11. Pour the brine over the chicken pieces and pop a couple of side plates on top of the chicken pieces to keep them submerged.
  12. Put the lid on the container, transfer it to your refrigerator and allow the chicken to cure for a full 24 hours.
  13. Place the all-purpose flour in a large bowl and add the remaining half of the secret herbs and spices. Mix this until combined, then cover the bowl with cling-wrap.
  14. The following day, remove the chicken from the brine and pat it dry with a clean kitchen towel.
  15. Before coating the chicken, sprinkle a layer of the seasoned flour over a large platter. This is where the coated chicken will set, and the layer of flour prevents the coating from sticking to the platter.
  16. Working with on piece of chicken at a time, dredge the chicken in tbe seasoned flour to coat all over.
  17. Dunk the the chicken in the egg to wet all of the flour.
  18. Return the chicken to the flour, making sure to get a good solid coating all over. Transfer the coated chicken to the platter to set, then continue with the remaining pieces.
  19. Allow the coated chicken to set for 20 minutes.
  20. Half-fill a large pan with oil and heat this to 160c or 320f.
  21. Carefuly drop the chicken into the oil and fry for a full 20 minutes turning halfway through. If you have chicken wings among your pieces, half the frying time for these.
  22. Remove the chicken from the oil and drain any excess oil on kitchen paper.
  23. The chicken does benefit from standing for a while before serving. Five to ten minutes is ideal.
  24. And there it is.... golden, crispy and aromatic KFC deep-fried chicken.


Valentines Day Pancetta, Camembert and Preserved Fig Pizza – The Pizza of Love!!!

valentine's day recipe,savoury and sweet pizza recipe,pizza with pancetta recipe,pizza of love,sweet and savory pizza,pizza with pancetta and figs,pizza with pancetta and camembert,valentine's day pizza,how to make pizza,valentine's day pizza recipe,quick and easy gourmet pizza,special pizza recipe,sweet & sour pizza recipe,pancetta pizza recipe


Valentines Day Pancetta, Camembert and Preserved Fig Pizza - The Pizza of Love!!!
Author: 
Recipe type: Pizza
Cuisine: Italian
Prep time: 
Cook time: 
Total time: 
Serves: 2
 
What life or love be without a little sweet and a little savoury? This pizza gives you both in one. The strongly flavored Pancetta is offset by the sweetness of the preserved figs, and this all melted together with creamy Camembert and mozzarella.
Ingredients
For 2 Large (35cm) Pizzas
  • 1 Batch of Instant Pizza Dough
  • 400g Grated mozzarella cheese
  • 1 Round of Camembert cheese
  • 8 Slices of rolled pancetta
  • 2 Preserved figs
  • Salt & pepper to taste
Instructions
  1. For the toppings, cut a round of camembert into 8 wedges. Turn the on their side and cut them through the center giving you 16 pieces.
  2. Cut the preserved figs into slices, then cut 8 slices of pancetta.
  3. In addition, grate 400g of mozzarella cheese.
  4. Divide the pizza dough in 2. This is the instant pizza dough we featured a few weeks back and you can see this by clicking the onscreen link.
  5. Press each half into a large disc. Lightly flour the work surface and roll this out to 35cm in diameter, or 14 inches.
  6. Transfer the bases to baking sheets. Dock the bases using the tines of a fork to stop the dough from bubbling up during baking.
  7. Sprinkle a little less than half of the mozzarella onto each base. Arrange 8 wedges of the camembert on each each base, followed by 4 rounds of pancetta and the sliced preserved fig.
  8. Finish it off by sprinkling half of the remaining mozzarella over each one.
  9. Bake the pizza in a preheated oven at 250c or 480f for 15 to 20 minutes until the edges are crispy and golden.
  10. Remove the pizzas from the oven, slice into wedges and serve immediately.


KFC Zinger Burger. KFC Secret Recipe Zinger Burger – How to Make KFC at Home!!!

KFC secret recipe fried chicken,KFC secret recipe burger,KFC Secret Recipe Zinger Burger,how to make kfc fried chicken at home,homemade KFC fried chicken,how to make a kfc zinger,how to make a kfc zinger burger,secret recipe kfc zinger burger,kfc secret herbs and spices zinger burger,how to make kfc,kfc secret recipe zinger burger,zinger burger secret kfc recipe,kfc secret recipe chicken zinger burger


KFC Zinger Burger. KFC Secret Recipe Zinger Burger - How to Make KFC at Home!!!
Author: 
Recipe type: KFC Secret Recipes
Cuisine: American
 
KFC has to be the all-time great when it comes to creating an unmistakable franchise taste. The KFC Zinger burger arrived sometime down the line in their history, and has carved its own little niche in the history of awesome meals.
Ingredients
  • 8-12 Chicken breasts, deboned, skin removed
For the Curing Brine
  • 3lt Water
  • 45g Prague powder
  • 45g Salt
  • 60g Sugar
  • 5ml Ground ginger
  • 6 Whole allspice (pimento)
  • 15ml Whole black peppercorns
  • ½ of the spice mix below
For the Spice blend
  • 45ml Cayenne pepper
  • 5ml Dried sage
  • 5ml Garlic powder
  • 5ml Dried oregano
  • 5ml Cracked black pepper
  • 5ml Dried basil
  • 5ml Dried marjoram
  • 5ml Ground coriander seed
For the coating
  • 2 Cups all-purpose flour
  • 4-6 Eggs, lightly beaten
Other
  • Burger buns
  • Sliced Tomato
  • Lettuce leaves
  • Mayonnaise
Instructions
  1. For the basic brine you need 45g of Prague powder, 45g of salt, 60g sugar, 5ml ground ginger, 6 allspice berries, and 15ml whole black peppercorns.
  2. For the spice blend, combine the cayenne pepper, dried sage, garlic powder, dried oregano, cracked black pepper, dried basil, dried marjoram and dried coriander.
  3. Divide the herb and spice blend in half.
  4. Fill a pot with 3 liters of water and add the Prague powder mixture along with half of the herb and spice blend.
  5. Bring this to a simmer for 10 minutes, stirring every minute then quick chill the brine by floating the pot in a sink of cold water.
  6. Once the brine has cooled, pour enough brine into a large pan to cover the base. (you must use a stainless steel for food grade plastic pan - you can not use aluminum) Place the chicken breasts in the pan in a single layer, then pour in the remaining brine to completely cover the chicken.
  7. Cover the pan and refrigerate this for a full 24 hours.
  8. After the curing time, remove the breast from the brine and pat them dry with a clean dish cloth or kitchen paper.
  9. If the breast are large like these, about 250g each, cut them in half, otherwise use them as is. Fold each piece, or whole breast if they're small, in cling-wrap and tap them down with a meat mallet until they are 10mm or just less than a half inch thick.
  10. To mix the coating, combine the all-purpose flour with the remaining half of spices. You will also need 4 to 6 eggs lightly beaten.
  11. Before coating the chicken, sprinkle some of the seasoned flour over a large platter. This is where the coated chicken will set and the layer of flour prevents the coating from sticking to the plate and getting damaged when it is lifted.
  12. To coat the chicken, dredge each piece in the flour. Dunk the chicken in the egg to wet all of flour. Then back into the flour to get a good solid coating. Transfer the coated chicken to the platter. Repeat with all the remaining chicken then allow the coating to set for 20 minutes before continuing.
  13. While the coating sets, cut and butter the buns. Spread the lid of the bun generously with plain or chilli mayonnaise. Place a generous layer of lettuce and 2 tomato slices on the bottom of each bun.
  14. Half fill a large pan with oil and heat this to 160c or 325f. Fry the chicken for a full 20 minutes turning halfway through. It is advisable to use a deep-frying thermometer to monitor the temperature.
  15. Drain the chicken on kitchen paper and transfer to the buns. Put the lids on the buns and voila.... you have the iconic KFC Zinger.


Smashed Chicken Cheese Burger – The Chicken Version of the Shake Shack & Smashburger Epic!!!

Shake Shack burger recipe,smashburger burger recipe,shake shack cheese burger recipe,smashburger cheeseburger recipe,make shake shack cheeseburger at home,homemade shake shack cheeseburger,make smashburger cheeseburger st home,home made smashburger cheeseburger,best cheeseburger recipe,best burger patty recipe,how to make a shake shack burger,how to make a smashburger at home,shake shack and smashed burger cheeseburger recipe,smashed chicken cheese burger


Smashed Chicken Cheese Burger - The Chicken Version of the Shake Shack & Smashburger Epic!!!
Author: 
Recipe type: Burgers
Cuisine: American
Serves: 8
 
In our previous episode we made the inimitable smashed cheese burger. The video has created quite some interest, so here is the chicken version.... the smashed chicken cheese burger.
Ingredients
For 8 Burgers - The Chicken
  • 1kg / 2.2lb Deboned chicken thigh, skin on
  • 15g Fine salt
  • 2ml Ground cloves
  • 10ml Ground coriander seed
  • 2ml Ground nutmeg
  • 5ml Ground white pepper
The Rest
  • 8 Large burger buns
  • 16 Slices tomato
  • Fresh crispy lettuce
  • 16 Slices Mozzarella cheese (5mm thick)
  • Butter
  • Mayonnaise
Instructions
  1. To prepare the chicken, run the chicken thigh meat through your mincer using the 6mm or quarter inch mincer plate.
  2. Add the salt, white pepper, ground cloves, ground coriander seed, and ground nutmeg to the chicken and mix this in.
  3. Fit the 3mm plate to your mincer and run the meat through again.
  4. Transfer the ground chicken to your refrigerator for 30 minutes to chill.
  5. Once chilled, divide the chicken into portions of 125g. Work on top of a square of foil, press a portion of chicken into a cylinder funnel to form a patty that resembles a hockey puck.
  6. Repeat this with all of the remaining portions. Transfer these to a large platter in a single layer and place them in your freezer for exactly 15 minutes.
  7. While the patties chill, slice your buns, the tomatoes and the cheese. You will also need a whole load of crispy lettuce leaves.
  8. Heat your pan over medium high heat and add 50g of butter. Drop the buns face down into the pan and fry them until golden. Repeat this with the remaining buns, adding more butter when necessary.
  9. By this stage the patties have chilled for 15 minutes. Crank the heat of the pan up to smoking hot and add the patties to the pan. Crush them using an egg lifter or similar utensil, pressing it down with any other sturdy kitchen tool.
  10. Allow these to fry for 3 minutes and 30 seconds. Flip the patties and immediately arrange the cheese slices on top of the patties. Continue to fry for a further 3 and half minutes.
  11. Transfer the patties to the buns. Top them with a healthy dose of lettuce and sliced tomato. Give to top of the bun a good dose of mayonnaise and close the burger.
  12. And there you have it.... the smashed chicken cheese burger.


Scroll to top

Kitchen Conversions

Convert:
Masses
to:
Volumes
to:
Temperatures
to:
Lengths
to: