How to Make Spicy, Cheesy Turkey Sausage – Full-Flavor Homemade Turkey Sausage!!!

turkey, sausage, turkey sausage, how to make turkey sausage, homemade turkey sausage, turkey sausage recipe, turkey sausage youtune, turkey sausage recipe video, make turkey sausage at home, spicy turkey sausage recipe, turkey cheese sausage recipe, best turkey sausage reciep, how to, sausage, poultry sausages recipes, hand crafted turkey sausage,


How to Make Spicy, Cheesy Turkey Sausage - Full-Flavor Homemade Turkey Sausage!!!
Author: 
Recipe type: Sausage
Cuisine: Mexican
Serves: 3kg
 
This spicy turkey cheese sausage is out of this world. Tender juicy ground turkey, spiced with Mexican spice blend and loads of mature cheese will have you guests lining up for more.
Ingredients
  • 2.6kg Turkey meat, cubed
  • 300g Well matured cheddar or Monterey Jack
  • 250ml Chilled water
  • 22mm Collagen casings
For the Spice Blend
  • 30ml Ground cumin
  • 30ml Ground coriander seed
  • 30ml Paprika
  • 30ml Oregano
  • 10ml Chilli powder
  • 10ml Garlic powder
  • 50g Salt
Instructions
  1. Starting with the spice blend, place the ground cumin, ground coriander seed, paprika, oregano, chilli powder, garlic powder and salt on a bowl and mix this until combined.
  2. Place the cubed turkey meat in a large roasting tin. You can use any part of the turkey, however the drumstick meat will yield the best result.
  3. Sprinkle the spice mixture over the meat and mix this in thoroughly.
  4. Transfer the pan to your freezer for 45 minutes to firm up. This is absolutely necessary as it aids your grinder to get a good clean grind with no fat smearing, resulting in a much better texture of sausage.
  5. Remove the meat from your freezer and and run it through the grinder with a 4mm plate fitted.
  6. Add the coarsely grated cheese to the meat and mix this in briefly.
  7. Pour in the well chilled water and mix everything together until all of water has been absorbed by the meat.
  8. Load the meat mixture into the hopper of your sausage stuffer.
  9. Fit an 18mm funnel to the stuffer and feed the 22mm collagen casing onto the funnel.
  10. Crank the stuffer until the meat reaches the end of the funnel, then twist off the casing.
  11. Apply gentle pressure to the casing at the end of the funnel and start cranking the handle.
  12. When the end of the casing is almost reached, stop cranking, remove the casing from the funnel and twist off the end.
  13. Continue with this process until all of the filling has been used.
  14. To make up individual sausages, crimp the sausage between your thumb and forefinger.
  15. Twist the sausage a few times, then snip it off in the center of the twisted section. Continue until all of the sausages are formed.
  16. Wrap the sausages and transfer them to your refrigerator overnight for the flavors to fully develop before cooking and serving.
  17. To cook the sausage, fry them gently in butter over medium heat until golden on all sides.
  18. Serve immediately with the accompaniments of your choice.


How to Make Deep Fried Buttermilk Chicken – Crispy, Spicy Homemade Buttermilk Chicken

how to, buttermilk chicken, deep-fried buttermilk chicken, how to make deep-fried buttermilk chicken, home made deep-fried buttermilk chicken, crispy fried buttermilk chicken, best buttermilk chicken recipe, homemade buttermilk chicken recipe, fried buttermilk chicken recipe, fried buttermilk chicken recipe youtube, fried buttermilk chicken video recipe, how to make buttermilk chicken at home,


How to Make Deep Fried Buttermilk Chicken - Crispy, Spicy Homemade Buttermilk Chicken
Author: 
Recipe type: Chicken
 
Crispy, deep fried buttermilk chicken is outstanding. Succulent, juicy, spicy and super tasty, this will have your guests lining up for seconds.
Ingredients
  • 4 Large chicken thighs, deboned, skin on
For the Marinade
  • 250ml Cultured buttermilk
  • 15ml Dried onion flakes
  • 5ml Garlic granules
  • 5ml Salt (non-iodated)
  • 5ml Tabasco sauce
  • 5ml White pepper
For the Coating
  • 300g All purpose flour
  • 30ml Garlic powder
  • 30ml Dried onion flakes
  • 15ml Dried thyme
  • 10ml Dried sage
  • 10ml Hot smoked paprika
  • 20ml Salt (non-iodated)
  • 15ml White pepper
Instructions
  1. If your butcher is not kind enough to debone the chicken thighs for you, this is how to do it yourself.
  2. Using a sharp paring knife, cut away any excess skin and fat from the bind side of the thigh.
  3. Cut between the skin and the spine and dig in and free the oyster from the spine.
  4. Cut the skin back until the thigh joint is exposed.
  5. Use your shears to cut through the joint.
  6. Locate the thigh bone and cut through the flesh to expose it.
  7. Grab the knuckle of the thigh bone and cut the flesh away from the joint.
  8. Use the edge of the blade to scrape the flesh down the bone until you reach the other joint.
  9. Cut around this joint to free the bone and you're done.
  10. Continue with the remaining thighs, then cut each one into 4 pieces across the width.
  11. Lift the chicken pieces using an egg lifter and transfer them to a vacuum bag.
  12. To make the buttermilk marinade, stir the Tabasco into the buttermilk.
  13. Measure out the onion flakes, garlic granules, salt and white pepper and mix these into the buttermilk.
  14. Pour this into the bag with the chicken.
  15. To vacuum pack this, elevate the vacuum packer to avoid sucking liquid into the machine. If you don't have a vacuum packer, use a jiffy bag or simply submerge the chicken in the marinade in a bowl. If you go this way, the chicken will need to marinate for 12 hours, as opposed to 3 to 6 hours in the vacuum pack.
  16. For the coating, place the garlic powder, onion flakes, dried thyme, dried sage, hot smoked paprika, salt and white pepper in your spice grinder. Zap these to a fie powder.
  17. Combine this with the all purpose flour.
  18. Cut the vac pack chicken open and pour this into a bowl.
  19. Sprinkle a generous layer of the flour mixture over a large platter. This is where the coated chicken will set, and the flour prevents the chicken from sticking to the platter and damaging the coating.
  20. Working with one piece at a time, lift the chicken from the marinade and shake off the excess marinade.
  21. Dredge the chicken in the seasoned flour to get a good solid coating. Transfer the chicken to the platter to set.
  22. Allow the coating to set for 20 minutes.
  23. Continue until all of the chicken is coated.
  24. Half fill a wok or large frying pan with oil and heat this to 180c or 350f.
  25. Carefully drop 5 or 6 chicken pieces into the oil.
  26. Fry these for 4 to 5 minutes until crisp and golden. Use a slotted spoon to lift them from the oil and drain any excess oil on kitchen paper. Continue frying batches until all of the chicken is fried.
  27. And here it is... spicy, crisp and aromatic buttermilk fried chicken.


Barbecue Glazed Pork Bracelet Kebabs – Delicious Glazed Pork Kebabs with a Difference!!!

barbecue glazed pork bangle kebabs, glazed circular kebabs, glazed bracelet kebabs, barbecue pork kebabs, pork bracelet kebabs on your barbecue, chinese stye pork bracelet kebabs on your barbecue, special pork bangle kebabs on you barbecue, how to make circular kebabs, threaded bracelet kebabs, sweet glazed pork kebabs, round pork kebabs on the barbecue, best pork kebabs recipe, best pork kebabs video recipe, best pork kebabs recipe youtube, how to make round pork kebabs youtube,


Barbecue Glazed Pork Bracelet Kebabs - Delicious Glazed Pork Kebabs with a Difference!!!
Author: 
Recipe type: Pork
Cuisine: Chinese
Prep time: 
Cook time: 
Total time: 
Serves: 6
 
Today we're making something really interesting, and you saw it first on Whats4Chow. These circular kebabs aren't just delicious, they give you a novel and attractive way to present an otherwise run-of-the-mill dish.
Ingredients
  • 700g Pork neck steak
  • 30ml Hoisin sauce
  • 60ml Soy sauce
  • 15ml Rice wine or dry sherry
  • 5ml Salt
  • 60ml Sugar
  • Spring onion greens
  • 1 x Upholstery needle for threading
Instructions
  1. slice the pork neck steaks into 20mm or ¾ inch cubes, then transfer these to mixing bowl.
  2. In a jug, combine the hoisin sauce, light soy sauce, rice wine, salt and sugar. Stir this until all of the salt and sugar has dissolved.
  3. Pour the marinade over the cubed pork and massage this into the meat thoroughly. Put this aside.
  4. Cut the greens from 5 or 6 large spring onions.
  5. Place the greens in a large roasting pan and pour in enough boiling kettle water to cover.
  6. Allow these to stand for 15 minutes until totally wilted.
  7. After this time, lift the greens and tear them in half lengthways.
  8. To thread the kebabs, you will need a large upholstery needle like this one, with and over-sized eye. You can find these at most hardware stores or leatherwork suppliers.
  9. Thread a stip of spring onion green through the eye of the needle.
  10. Press the needle through a cube of pork. Grab the point of the needle with a dishtowel and pull the spring onion through the pork. Pull it all the way through leaving about 2 inches of green loose.
  11. Continue until the entire spring onion is threaded with pork with exception of 2 inches on each end.
  12. Pull the 2 ends together and tie them using a double knot.
  13. Transfer the pork bagles to a large platter ans spoon any remaining marinade over the bangles.
  14. Heat a skillet on your barbecue until smoking hot.
  15. Brush the skillet with oil, and place the pork bangles on the skillet.
  16. Brush the bangles with the runoff marinade and close the lid of your barbecue. Allow these to grill for 4 minutes.
  17. Open the grill and carefully flip the bangles over. Brush them with any leftover marinade and close the lid.
  18. Let these grill for a further 4 minutes.
  19. Remove the pork bangle kebabs from the grill and serve immediately with the accompaniments of your choice.
  20. And the we have it, unique, tender, juicy glazed pork bangle kebabs.


How to Make Potato Bun Burgers – Delicious Crispy Deep Fried Potato Bun Burgers – Gluten Free Friend

potatoe burger buns, how to make potato buns for burgers, how to use potatoes as buns for burgers, deep fried potato buns for burgers, how to make potato burger buns, deep fried potato buns, double cheese burger on potato buns, home made potato buns, gluten free burger buns, gluten free potato burger buns, how to make gluten free burgers, homemade gluten free burger buns,


How to Make Potato Bun Burgers - Delicious Crispy Deep Fried Potato Bun Burgers - Gluten Free Friend
Author: 
Recipe type: Burgers
Prep time: 
Cook time: 
Total time: 
Serves: 2
 
Potato bun burgers are real good fun, and a great way to combine your fries with your burger. They also make it possible for people on wheat restricted diets to enjoy an amazing burger.
Ingredients
For 2 Burgers
  • 2 Large potatoes
  • 400g Ground beef
  • 15ml Salt (non-iodated)
  • 15ml Dry chilli flakes
  • 15ml Dried garlic granules
  • 12 slices melting cheese of your choice
  • Frilly lettuce
  • 3 Cocktail tomatoes
  • Ketchup or sauce of your choice
Instructions
  1. Place the large potatoes in a pot and cover them with boiling kettle water. Heat the pot over high heat and boil the potatoes until they are tender. This timing will vary depending on the variety of potatoes you're using.
  2. In the meantime place the ground beef in a mixing bowl and add the salt, chilli flakes and dried garlic granules.
  3. Get in there with your hands and massage this all together.
  4. Slice the cheese into thin slices, slice the cherry tomatoes and take enough frilly lettuce.
  5. Use your burger press to form 4 x 100g patties and transfer these to your refrigerator.
  6. Remove the boiled potatoes from the pot and cool them under cold running water.
  7. Use a sharp knife to slice a bit off of each flat side of the potatoes, then cut the potatoes through the center length-ways.
  8. Half fill a large pan with oil and heat this to 180c or 350f.
  9. Carefully lower the potatoes into the oil and fry them until crisp and golden on both sides.
  10. Remove the potatoes and drain any excess oil on kitchen paper.
  11. Heat another pan over medium high heat and add 15g of butter.
  12. Grill the burger patties for 2 to 3 minutes on the first side.
  13. Flip the patties over and top the patties with the cheese. Continue grilling until the cheese starts melting. Stack the patties in pairs.
  14. Place one of the fried potato pieces on a serving platter and top this with lettuce.
  15. Place a burger patty stack on top of this.
  16. Top the stack with sliced tomato and a drizzle of ketchup.
  17. Finish this off with the top potato and you're ready to feast.


Bacon, Feta & Peppadew Kebabs – Absolute Kebab Perfection, Made in Heaven!

bacon, feta, peppadew, kebabs, bacon feta and peppadew kebabs, how to make bacon feta and peppadew kebabs, bacon feta and peppadew kebabs recipe, bacon feta and peppadew kebabs video recipe, bacon feta and peppadew kebabs youtube, best kebabs recipe, best kebabs recipe youtube, bacon feta and piquant peppers kebabs,


Bacon, Feta & Peppadew Kebabs - Absolute Kebab Perfection, Made in Heaven!
Author: 
Recipe type: Grill / Barbecue
Prep time: 
Cook time: 
Total time: 
Serves: 4
 
These bacon, peppadew and feta kebabs are out of this world. Slightly sweet, slightly hot and tangy, these kebabs will have your guests lining up for more.
Ingredients
For 4 Kebabs
  • 8 Rashers streaky bacon
  • 16 Peppadews (pickled piquant peppers)
  • 50g Feta cheese
  • 4 x 150mm / 6 inch skewers
  • 15ml Butter
Instructions
  1. Cut the bacon rashers through the center.
  2. Cut the feta cheese into cubes of about 1cm or just less than a half inch.
  3. Stuff a cube of feta into each peppadew until each one is filled to the brim.
  4. Place s strip of bacon across the opening of a peppadew and wrap it around the peppadew to enclose the feta cheese. Continue until all of the bundles are formed.
  5. To make up the kebabs, drill the skewers through the peppadew bundles using a twisting motion. If you try to push them through, you will end up squeezing the cheese out.
  6. Once you have four bundles on the skewer, straighten the bundles out to align the edges.
  7. Heat a large pan over medium high heat and add a tablespoon of butter.
  8. Add the kebabs to the pan with the bacon in contact with the pan.
  9. Fry this for 3 minutes, then turn the kebabs over to the other bacon side. Fry this for a further 3 minutes.
  10. Turn the kebabs onto one edge and fry this for 60 seconds.
  11. Turn them to the other edge and fry for another 60 seconds.
  12. Remove the kebabs from the oven and serve immediately with the accompaniments of your choice.
  13. These little gems can also be grilled quite successfully on your barbecue using a skillet or riffle pan.


How to Make an Amazing Pepperoni Pizza – Make Superb Pepperoni Pizza at Home!!!

pizza,pepperoni pizza,pizza recipe,pepperoni pizza recipe,how to make pepperoni pizza,homemade pepperoni pizza,best pepperoni pizza recipe,pepperoni pizza video recipe,pepperoni pizza recipe youtube,easy pepperoni pizza recipe,simple pepperoni pizza recipe,quick pepperoni pizza recipe,make,pepperoni


How to Make an Amazing Pepperoni Pizza - Make Superb Pepperoni Pizza at Home!!!
Author: 
Recipe type: Pizza
Cuisine: Italian
Serves: 2
 
Just the other day we made an amazing pizza dough that yields incredibly good results in a regular domestic oven. Today we're using the same dough for the bases while make what is arguably the most popular pizza in North America, the pepperoni pizza.
Ingredients
For the Sauce
  • 180ml Tomato puree'
  • 180ml Water
  • 5ml Onion flakes
  • 5ml Dried basil
  • 5ml Garlic granules
  • 5ml Dried oregano
  • 5ml Salt
  • 30ml Shredded Parmesan cheese
For the Topping
  • 300g Mozzarella cheese
  • 200g Pepperoni (or well aged salami)
  • ½ Batch special pizza dough each rolled to 30cm / 12 inches
Instructions
For the Sauce
  1. Measure out the onion flakes, dried basil, garlic granules, dried oregano and salt.
  2. Measure out the tomato puree and water, and finely shred the Parmesan cheese.
  3. Place everything except the Parmesan in a small saucepan.
  4. Place the pan over medium heat and bring it to a boil, stirring regularly.
  5. When the pot comes to a boil, reduce the heat to a simmer and allow this to continue for 30 minutes until thickened.
  6. Turn off the gas or remove the pot from the heat and stir in the shredded Parmesan.
For the Rest
  1. Pepperoni and salami are from the same family, with pepperoni being slightly more spicy. For this reason, if you cannot find pepperoni, you can substitute a good quality, well aged salami for excellent results.
  2. Slice the meat thinly using your slicer. This can also be done by hand, although it will take a bit longer.
  3. Cut the mozzarella cheese into thick slices. If your fortunate enough to find hand-crafted mozzarella, you can simply rip apart by hand.
  4. Scatter a little corn meal over your baking sheet and place one of the bases on the sheet.
  5. Pour half of the tomato sauce onto the base and spread it around, leaving about a half inch open around the edge.
  6. Scatter half of the mozzarella cheese over the base.
  7. Follow this with the sliced pepperoni to cover the entire surface of the pizza, then continue with second base.
  8. Bake the pizzas in a preheated oven at 250c or 480f for 15 minutes. The edges will be beautifully golden and base will nicely charred and crisp underneath.
  9. Serve immediately.
  10. Stay tuned for our next pizza episode towards the end of the month, where we will be start a multi-episode review of a remarkable domestic pizza oven.


How to Make Curry in the Oven – Delicious Full Flavored Spicy Oven Curry

how to make curry,how to make chicken curry,how to make curry in the oven,oven curry recipe,oven curry recipe youtube,oven curry recipe video recipe,making curry in your oven,how to make curry in the oven,spicy chicken curry in the oven,spicy homemade chicken curry,how to make curry without a pot,best chicken curry recipe,making homemade chicken curry,use your oven to make curry


How to Make Curry in the Oven - Delicious Full Flavored Spicy Oven Curry
Author: 
Recipe type: Curry
Cuisine: Indian
Prep time: 
Cook time: 
Total time: 
Serves: 6-8
 
Today we're making curry in the oven. So why would you do this? Sometimes the pot you normally use is in the refrigerator, or is being used for some other dish, then this trick is very useful. The added bonus is that making curry in this way is maintenance free.... there is very little stirring or hassle of any kind.
Ingredients
  • 4 Chicken drumticks
  • 4 Chicken thighs
  • 2 Potatoes
  • 2 Onions
  • ½ Green Pepper
  • ½ Red Pepper
  • ½ Yellow pepper
  • 60ml Chicken Masala curry spice blend
  • 500ml Chicken stock
  • 15ml Garlic granules
  • 15ml Ground ginger
  • 10ml Golden syrup
  • 15ml Chilli powder
  • Salt to taste
  • 30ml Tapioca flour dissolved in a little water
Instructions
  1. Use you kitchen sheers to cut the chicken legs and thighs into chunky pieces. Arrange the pieces in large roasting pan skin side up.
  2. Dice the onions and scatter this evenly over the chicken.
  3. Cube the potatoes and scatter these evenly across the pan.
  4. Roll-cut the carrots and scatter these across the pan.
  5. Cut the peppers into blocks and add these to the pan.
  6. Pour the chicken stock over the ingredients.
  7. Place the curry powder in a shaker bottle and dispense this evenly across the top of the pan.
  8. Cover the pan with foil and bake this in a preheated oven at 160c or 320f for 2 hours.
  9. After 2 hours, remove the pan from the oven and carefully remove the foil.
  10. Stir up the ingredients thoroughly.
  11. Add the garlic granules and stir this in.
  12. Return the pan to the oven for a further 60 minutes.
  13. Remove the pan from the oven and scoop all of the solid ingredients from the pan using a slotted spoon. Put this aside.
  14. Pour the sauce from the roasting pan into a frying pan.
  15. Heat the sauce over medium high heat and add the ground ginger, golden syrup and chilli powder.
  16. Dissolve the tapioca flour in a little water and pour this in.
  17. Adjust the seasoning with salt and stir this all together.
  18. Bring the pan to a boil, lower the heat and simmer for a minute until thickened.
  19. Pour the sauce over the chicken and serve immediately accompanied with sliced banana, fruit chutney, desiccated coconut and sambal.
  20. And there it is, an amazingly fragrant and spicy curry made in the oven.


Steak Schnitzel with Veloute’ Cheese Sauce – How to Make Rump Steak Schnitzel – How to Make Cheese S

steak schnitzel,steak schnitzel recipe,how to make steak schnitzel,rump steak schnitzel,how to make rump steak schnitzel,beef schnitzel,how to make beef schnitzel,beef schnitzel recipe,cheese sauce,how to make cheese sauce,cheese sauce recipe,make cheese sauce from veloute' sauce,steak schnitzel recipe youtube,steak schnitzel video recipe


Steak Schnitzel with Veloute' Cheese Sauce - How to Make Rump Steak Schnitzel - How to Make Cheese S
Author: 
Recipe type: Steak / Beef
Serves: 4
 
Just a few episodes back we made a veloute' sauce using chicken bone broth. One of our viewers requested that we expand on this to make a cheese sauce. This on its own would be too simple and short to make up a full episode, so today we're going to make a rump steak schnitzel topped with this cheese sauce.
Ingredients
  • 2 x Rump steaks cut to 1 inch thick
  • Fine breadcrumbs
  • 4 Eggs, beaten
  • 1 Batch veloute' sauce
  • 150g Edam cheese, finely grated
Instructions
  1. You will need 2 juicy rump steaks cut to an inch thick. Try to buy steaks with a decent strip of fat down the edge.
  2. Set your meat slicer to 6mm thick and run the steaks trough the blade. This will give you 8 schnitzels, or 4 servings.
  3. For the coating, beat 4 eggs and pour them into a large bowl.
  4. Half fill another bowl with fine bread crumbs. I am not going to season the crumbs as the cheese and veloute' sauce already have tons of seasoning.
  5. Before coating the schnitzels, sprinkle a layer of bread crumbs over a large platter. This is where the coated schnitzels will set, and the layer prevents the coating from sticking to the platter and getting damaged.
  6. Working with one schnitzel at a time dip the steak in the egg to wet it all over.
  7. Transfer it to the crumbs and dredge it to get a good solid coating.
  8. Transfer the the coated schnitzels to the platter to set, the continue with the remaining schnitzels. Allow the coating to set for 20 minutes before continuing.
  9. To make the cheese sauce, take a batch of the veloute' sauce we made the other day and add 150g of finely shredded Edam cheese. You can also use any other strong, well matured cheese of your choice.
  10. Whisk the cheese into the hot veloute' until it has started to melt in.
  11. Use your stick blender to smooth the sauce and completely combine the cheese.
  12. Heat a large frying pan over medium high heat and add 50g of butter.
  13. When the butter is bubbling add the first batch of schnitzels.
  14. Fry these for 3 to 4 minutes per side until crisp and golden.
  15. Remove the schnitzels from the pan and continue with the next batch.
  16. Serve the schnitzels immediately drenched with the cheese sauce and the accompaniments of your choice.


Mexican Hellfire Burgers – Headstands in the Shower – Seriously Hot Burgers!!!

mexican burgers,spicy mexican burgers,mexican hellfire burgers,hot and spicy burgers,how to make mexican burgers,super hot mexican burgers,serious burgers,insanely hot mexican burgers,jalapeno burger recipe,chilli burger recipe


Mexican Hellfire Burgers - Headstands in the Shower - Seriously Hot Burgers!!!
Author: 
Recipe type: Burgers
Cuisine: Mexican
 
Today's episode holds something really special for those who love hot and spicy food. These burgers will grow hair on a woman's chest and almost certainly have you doing headstands in the shower. The recipe for the Mexican spice blend is included in the printable recipe for the burgers.
Ingredients
  • 450g Ground beef
  • 450g Ground pork
  • 60ml Mexican spice blend (see below)
  • 6 Giant burger buns
  • 3 Large pickled jalapenos
  • Sour cream
  • Sliced tomato
  • Fresh cilantro / coriander
How to make Mexican Spice Blend
  • 15ml Cumin seeds
  • 15ml Dried coriander leaves
  • 15ml Paprika
  • 5ml Dried oregano
  • 5ml Cayenne pepper (mild) / 15ml (medium) / 25ml (hot)
  • 5ml Garlic granules
  • 10ml Salt
  • (Machine these all until fine in your spice grinder)
Instructions
  1. Place the beef mince and pork mince in a mixing bowl and add the Mexican spice mix.
  2. Massage the spice into the meat thoroughly.
  3. Use your patty press to form the patties. I am making 160g patties, but you can make them any size you prefer. If you don't have a patty press, weigh the meat into portions and form them by hand.
  4. I have giant burger buns, and to match the bun size I am going to press the patties further between cling-wrap. Once at this size, you really want to make a deep indentation in the center of each patty. This prevents the patty from deforming when it is cooked.
  5. If you're following the same weight patty as I am using, press them out to a thickness of 10mm or just short of a half inch.
  6. Put the patties aside while you slice the pickled jalapeños and tomatoes.
  7. You will also need a generous handful of fresh coriander.
  8. Slice and butter the buns.
  9. On the bottom half of each bun, spread a thick layer of sour cream.
  10. Top this with a generous scattering of sliced pickled jalapeño.
  11. Follow this with a good portion of fresh coriander.
  12. Heat your pan over medium high heat and add a little butter.
  13. Grill the patties for 2.5 minutes per side until nicely browned.
  14. Transfer the patties to the buns.
  15. Top the patties with the sliced tomato.
  16. Top the tomato with a generous dose of chilli Doritos and you're ready to serve.


Chicken Enchiladas – Spicy Chicken Wraps with Melted Cheese, Sour Cream & Hot Salsa

chicken enchiladas recipe,chicken enchiladas recipe youtube,chicken enchiladas video recipe,how to make chicken enchiladas,homemade chicken enchiladas,best chicken enchiladas recipe,authentic chicken enchiladas,mexican chicken enchiladas recipe,best spicy chicken enchiladas,best enchiladas recipe,simple chicken enchiladas recipe,how to make chicken enchiladas,hot and spicy chicken enchiladas


Chicken Enchiladas - Spicy Chicken Wraps with Melted Cheese, Sour Cream & Hot Salsa
Author: 
Recipe type: Chicken
Cuisine: Mexican
 
In today's episode we're taking a quick trip to Mexico to make some awesomely rustic, spicy chicken enchiladas. Filled with creamy, spicy chicken and jalapeños and topped with melted cheese, sour cream and hot salsa these enchiladas will have your guests lining up for more. This recipe will make 2 large enchiladas or 4 medium.
Ingredients
For the Hot Salsa
  • 2 Tomatoes
  • 1 Pickled Jalapeno
  • 10ml Garlic granules
  • Handful of fresh coriander
For the Filling
  • 3 Chicken thighs, deboned
  • ¼ each - red, yellow and green pepper
  • 1 Onion
  • 1 Pickled jalapeno
  • 30ml Mexican spice blend (see below)
  • 80ml Sour cream
For the topping
  • Shredded mature cheddar or strong Jack cheese
  • 160ml Sour cream
How to make Mexican Spice Blend
  • 15ml Cumin seeds
  • 15ml Dried coriander leaves
  • 15ml Paprika
  • 5ml Dried oregano
  • 5ml Cayenne pepper (mild) / 15ml (medium) / 25ml (hot)
  • 5ml Garlic granules
  • 10ml Salt
  • (Machine these all until fine in your spice grinder)
Instructions
  1. Starting with the salsa, chop the tomatoes and pickled jalapeños.
  2. Grab a handful of fresh coriander and measure out the dried garlic granules. You can also use fresh garlic, but I like the rounded flavor these granules give to the food.
  3. Heat a large frying pan over medium heat and add 30g of butter.
  4. Fry the fresh ingredients for about 90 seconds until wilted then add the garlic.
  5. Continue to fry this for another 60 seconds. Remove the salsa from the pan and keep it warm.
  6. Place the deboned chicken thighs on a large platter skin side up.
  7. Sprinkle half of the Mexican spice over the skin and rub it in.
  8. You can find the spice recipe included in the printable recipe.
  9. Flip the thighs over and sprinkle the remaining spice over the chicken. Put this aside while you slice the onions, dice the peppers and chop the pickled jalapeño. In addition measure out 80ml of sour cream.
  10. Return the pan to the heat and fry the onion, peppers and jalapeño for 2 to 3 minutes and onion is tender and translucent.
  11. Remove this from the pan and keep it warm.
  12. Add 30g of butter to the pan and add the chicken thighs skin side down.
  13. Fry the chicken for 6 minutes turning halfway through. The chicken should be well charred on the outside.
  14. Remove the chicken from the pan and chop it into thin strips.
  15. Return the chicken to the pan along with the onion, peppers and jalapeño and stir this briefly to warm it through.
  16. Add the sour cream and stir this in to combine.
  17. Remove the pan from the heat.
  18. Place a large tortilla on an oven proof serving platter. Spoon half of the chicken filling across the center of the wrap.
  19. Roll the wrap up to enclose the filling and use 2 toothpicks to secure.
  20. Drop a generous dose of mature cheddar or strong jack over the tortilla. Pick up any spillage and get it all on top of the enchilada.
  21. Repeat this with the second wrap.
  22. Place the enchiladas under the grill in your oven until the cheese is just melted.
  23. Remove these from the oven. Be careful, the plates will be very hot.
  24. Remove the toothpicks.
  25. Spoon the remaining sour cream over the enchiladas, followed by the hot salsa.
  26. Serve the enchiladas immediately accompanied with guacamole and fresh crispy salsa.


TNK Stingray Barracuda Kitchen Multitool Review – Used Making a Quick Creamy Chicken Curry

tnk barracuda kitchen multitool,kitchen tools from tnk,tnk barracuda kitchen multitool product review,how the tnk barracuda kitchen multitool works,creamy chicken curry,super-quick creamy chicken curry,easy chicken curry,how to make quick chicken curry,chicken curry stir-fry,5 minute chicken curry,chicken curry in 5 minutes


TNK Stingray Barracuda Kitchen Multitool Review - Used Making a Quick Creamy Chicken Curry
Author: 
Recipe type: Curry
Cuisine: Indian
Prep time: 
Cook time: 
Total time: 
Serves: 4
 
A couple of episodes back I featured 2 amazing kitchen multitools from the TNK Stingray range. In today's episode we're looking at the third kitchen multi tool in their range, the Barracuda. The unit is basically a scoop shaped nylon stirrer, making it great for stirfrying in non-stick pans and woks. The handle is good quality, well finished stainless steel with silicon grips. Pulling a loop at the end of the handle allows the handle to open revealing the Barracudas teeth. These allow you to pick food up and strain food in the pan, an absolute stroke of genius. To demonstrate the tool, I am going to make a super-quick creamy chicken curry.
Ingredients
  • 4 x Chicken breasts (deboned, skin off)
  • 30ml Curry powder (your favorite)
  • 250ml Cultured sour cream
  • 12 x Cherry tomatoes
  • Handful of fresh coriander
  • 50ml + 50ml Oil
Instructions
  1. To start, cut the chicken breasts across the grain into strips about 8mm or a third of an inch thick.
  2. Transfer the chicken to a mixing bowl and add the curry powder.
  3. Mix the curry in until well combined, then pour in the oil.
  4. Mix in the oil and put this aside while you cut the cherry tomatoes in half lengthways, and roughly chop the fresh coriander.
  5. Heat your wok until smoking hot then add the oil.
  6. Swirl the oil around the wok and add the chicken.
  7. Here you can see just how well the Barracuda works stir-frying and turning the chicken while in the closed position.
  8. Continue frying for 3 to 4 minutes until the chicken is cooked through.
  9. Here we see the Barracuda in a semi-open position being used as a strainer. I am lifting the chicken from the wok while the oil simply drains through the teeth of the Barracuda.
  10. Turn the heat down to medium low and add the cultured sour cream, tomatoes and coriander.
  11. Mix this all up until warmed through.
  12. Return the chicken to the wok and shovel this around until well combined with the sauce.
  13. Serve immediately with the accompaniments of your choice.

  14. You can find the full details of the Barracuda at this link - http://www.tnkbrand.com/?p=247&lang=en


Sugar Chilli Pork Roast – The MOST Tender Roast Ever!!! Perfect for the 4th of July!!!

roast pork recipe,roast pork video recipe,roast pork recipe youtube,roast pork neck,sugar chilli roast pork,roasted pork neck with sugar chilli crust,how to roast pork,the best roast pork recipe,4th of July roasted pork recipe,4th of July pulled pork recipe,super-tender roast pork,how to make tender roast pork,4th july recipes youtube,independence day recipes youtube


Sugar Chilli Pork Roast - The MOST Tender Roast Ever!!! Perfect for the 4th of July!!!
Author: 
Recipe type: Pork / Roast
Prep time: 
Cook time: 
Total time: 
Serves: 6-8
 
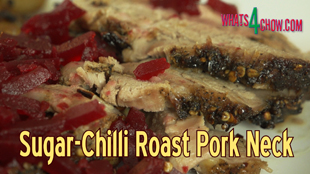
Just a few weeks ago I featured delicious sugar chilli pork neck steaks. A few viewers asked whether it is possible to make whole sugar chilli pork neck roast. So I put this my list of things to try and it turned out magnificently, except for the fact that it turned out so juicy and so tender that it was quite difficult to slice cleanly.... and I quite honestly don't see that as a problem. Alternatively, shred the pork and serve as deliciously tender and sumptuous pulled pork.
Ingredients
  • 1.5kg / 3.5lb Whole deboned pork neck
  • 80g Demerara sugar (or treacle sugar)
  • 20ml Coarse cracked black pepper
  • 20ml Dried chilli flakes
  • 20ml Himalayan rock salt (fine)
Instructions
  1. To start you need a whole deboned pork neck, around 1.5kg or 3.5 pounds.
  2. In a bowl, combine the demerara sugar, coarse cracked black pepper, dried chilli flakes and Himalayan rock salt. I prefer this salt as it contains no iodine, and imparts a slight acidity to the food resulting in a much rounder flavor.
  3. Start sprinkling this mixture over the pork and pressing it firmly into surface of the meat. Continue until the slab of meat is coated well and all of the sugar chilli rub is used.
  4. Place the pork in a roasting tin and scrape any over overrun rub over the top of the pork.
  5. I am adding boiled potato wedges to the pan as well.
  6. Roast the pork in a preheated oven at 250c or 480f for 60 minutes undisturbed.
  7. On removing the pork from the oven, the first thing you will notice is the amazing charred crust that has formed on the pork.... not to mention the insanely incredible aroma.
  8. By this stage the potatoes will also be well roasted and will have absorbed some of the amazing pan flavors.
  9. Serve this immediately with the accompaniments of your choice.
  10. I will be publishing a video shortly where I will show you the trick to these amazing roast potatoes.
  11. Stay tuned for our next episode where we're looking a very simple way to distil alcohol at home with basic kitchen equipment, and I mean basic.


Scroll to top

Kitchen Conversions

Convert:
Masses
to:
Volumes
to:
Temperatures
to:
Lengths
to: