Sticky Mocha Coffee Chicken – Amazing Sticky Coffee Chicken – Sticky Chicken with a Difference!!!

sticky mocha coffee chicken,sticky coffee chicken recipe,how to make sticky chicken,best sticky chicken recipe,how to make coffee chicken,sticky chicken video recipe,sticky chicken recipe youtube,mocha coffee chicekn recipe,easy sticky chicken recipe,homemade sticky chicken recipe,how to make sticky chicken at home,using xanthan gum


Sticky Mocha Coffee Chicken - Amazing Sticky Coffee Chicken - Sticky Chicken with a Difference!!!
Author: 
Recipe type: Chicken / Poultry
Prep time: 
Cook time: 
Total time: 
Serves: 4-8
 
Sticky chicken is awesome in any description, but this sticky mocha coffee chicken is at least a few steps ahead of the competition. A few episodes ago we introduced xanthan gum, the thickener of the future. This recipe owes its amazing stickiness and phenomenal mouth-feel to this simple ingredient
Ingredients
  • 150ml Light Soy sauce
  • 125ml Brown sugar
  • 60ml Sherry
  • 80ml Strong brewed coffee (at least double strength)
  • 60ml Olive oil
  • 8 Chicken pieces (drumsticks & thighs)
  • Salt and pepper to taste
Instructions
  1. Combine the light soy sauce, brown sugar, sherry, strong black coffee, and oil.
  2. Normally there would be no way to combine the oil with the rest of the ingredients, and this is where xanthan gum comes in. Xanthan gum is a strong hydrocolloid which with its bipolar nature will effectively bind the oil and water based ingredients.
  3. Add the xanthan gum and zap the mixture for 60 seconds using your stick blender. You can also do this in a regular blender.
  4. Place the chicken pieces into a vacuum packing bag. If you don't have a vacuum packer, use a ziplock bag and extract as much air as possible.
  5. Pour the marinade.
  6. If you're using basic front-loading vacuum packer, it is a good idea to elevate the machine. This allows you to extract the air from the bag without sucking liquid into the vacuum pump, which will almost certainly damage the machine.
  7. It it also a good idea to do second seal to ensure that the bag does not leak.
  8. Transfer the bag to your refrigerator and allow the chicken to marinate for at least four hours.
  9. After the marinating time, cut the bag open and empty everything into a tray or container of some sort.
  10. Heat a heavy non-stick pan or a well seasoned cast iron pan over medium high heat. Do not add butter or oil.
  11. Lift the chicken pieces fron the marinade and place them in the pan skin side up.... obviously with the drumsticks this could be a little confusing.
  12. Fry the chicken for 3 minutes per side. It may appear that the chicken is burning, but this is simply the marinade becoming super-caramelized.
  13. After both sides have had 3 minutes, turn the chicken pieces back to their first side and pour in the marinade.
  14. Turn the heat down to medium and allow the chicken to simmer for 15 minutes.
  15. At the 15 minute mark, turn the pieces over and continue simmering the chicken for a further 5 minutes.
  16. Make sure to shake the pan back and forward every minute to ensure that the chicken is well coated with the sticky sauce.
  17. Remove the chicken from the pan and serve with the accompaniments of your choice. As a hint these sticky chicken marvels go incredibly well with prawn crackers.

 

Grilled Sirloin Steak with Portabellini Mushrooms & Red Wine Sauce – Making Sauces using Xanthan Gum.

Grilled Sirloin Steak with Portabellini Mushrooms & Red Wine Sauce,how to grill sirloin steak,how to grill tenderloin steak,how to make a uick red wine sauce,how to make red wine sauce using xanthan gum,thick red wine sauce recipe,grilled sirloin recipes,grilled tenderloin recipes,making the perfect steak,how to grill steak in a pan


Grilled Sirloin Steak with Portabellini Mushrooms & Red Wine Sauce - Making Sauces using Xanthan Gum.
Author: 
Recipe type: Steak
Prep time: 
Cook time: 
Total time: 
Serves: 2
 
In today's episode we're making a couple juicy grilled sirloin steaks smothered in fried Portabellini mushrooms and a super quick red wine sauce using xanthan gum.
Ingredients
For the Sauce
  • 250ml Dry red wine (good quality - bad wine = bad sauce)
  • Chicken stock or beef stock
  • 3.75ml Xanthan gum
For the Rest
  • 6 Portabellini / Porcini / brown mushrooms
  • 30g Butter
  • 2 Fronds fresh rosemary
  • 2 x 250g Sirloin / Tenderloin steaks, cut 30mm thick
  • Salt and cracked black pepper
Instructions
  1. Starting with the red wine sauce, crumble the stock cube into the red wine. Follow the stock manufacturers instructions to calculate the quantity of stock required for this amount of liquid.
  2. Add 3.75ml of xanthan gum to the wine mixture.
  3. Use your stick blender to combine this thoroughly. You can use a regular stand blender. You will end up with a thick red wine sauce within 60 seconds, and all that remains to be done is to heat the sauce in your microwave when required.
  4. Strip the leaves from 2 fronds or fresh rosemary and roughly chop the leaves, then measure out 30g of butter.
  5. You will need 2 juicy sirloin steaks cut to 1 and a quarter inches thick, or just over 30mm.
  6. Stand the steaks on their fatty edge and press 2 skewers through the steaks to secure.
  7. Flip the steaks over and season the fat liberally with salt and cracked black pepper.
  8. Slice the mushrooms and put these aside.
  9. Heat a heavy pan over medium high heat, add the butter and drop the steaks into the pan fatty side down.
  10. Allow the fat to cook like this for 6 to 8 minutes until well browned, crispy and rendered.
  11. Remove the skewers and lift the steaks from the pan while you add half of the rosemary.
  12. Return the steaks to the pan, lying flat, and sprinkle the remaining rosemary over the top.
  13. Grill the steaks for 2 minutes per side for medium rare, or add 30 seconds per side for medium.
  14. Remove the steaks from the pan and transfer them to warm plate to rest.
  15. Add the sliced mushrooms to the pan and stir fry these for 2 to 3 minutes until tender and golden.
  16. In the meantime heat the red wine sauce in your microwave oven until nice and warm.
  17. Transfer the steaks to serving platters, top each with half of the mushrooms and a generous dose of the red wine sauce.
  18. Serve your masterpiece immediately with the accompaniments of your choice.


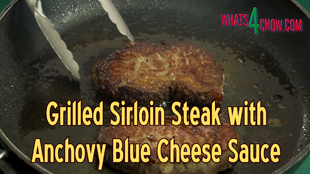
Grilled Sirloin Steak with Anchovy Blue Cheese Sauce – How to Grill a Perfect Steak with Anchovy Blue Cheese Sauce!!!

Grilled Sirloin Steak with Anchovy Blue Cheese Sauce - How to Grill a Perfect Steak with Anchovy Blue Cheese Sauce!!!,how to grill a steak,best grilled steak recipe,grilled steak video recipe,grilled steak recipe youtube,how to use xanthan gum,using xanthan gum to make sauces,anchovy and blue cheese sauce with xanthan gum,making gourmet steak at home,incredibly good steak at home,the best steak recipes,tendy tasty steak recipes


Grilled Sirloin Steak with Anchovy Blue Cheese Sauce - How to Grill a Perfect Steak with Anchovy Blue Cheese Sauce!!!
Author: 
Recipe type: Steak / Beef
Prep time: 
Cook time: 
Total time: 
Serves: 2
 
In our previous episode we looked at xanthan gum, and used it to make a simple vinaigrette and a thick anchovy and blue cheese dressing. Today we're doing a super-quick grilled steak topped with the anchovy blue cheese dressing, thinned with the vinaigrette.
Ingredients
  • 2 x 250g Prime sirloin steaks, cut 30mm thick
  • [url:1]100g Anchovy & blue cheese dressing (prepared in previous episode - click to see)
  • 25-50ml quick Vinaigrette (prepared in previous episode - click to see)[/url]
  • 15ml Butter
Instructions
  1. You need a couple of juicy sirloin steaks, cut to 1 and a quarter inch thick..... in metric that's about 30mm.
  2. Stand the steaks on their fatty edge and press 2 skewers through the steaks to secure them.
  3. Flip the steaks over and season the fatty strips liberally with salt and cracked black pepper.
  4. Heat a heavy pan over medium high heat and add a tablespoon of butter.
  5. When the butter is sizzling, place the steaks fatty side down in the pan.
  6. Allow the steaks to cook like this for 6 to 8 minutes. This renders and crisps the fatty edge. The rendered fat mixes with butter resulting in an amazing flavor when the steak is separated and grilled.
  7. Once the fatty strip is crispy and well browned, remove the skewers and drop the steaks flat in the pan.
  8. Grill the steaks for 2 minutes per side for medium rare, or an extra 30 seconds per side for medium.
  9. In the meantime, thin the anchovy blue cheese dressing using some of the vinaigrette. Pop this in your microwave and heat it gently for about 60 seconds.
  10. Remove the steaks from the pan, allow them to rest for a couple of minutes, then serve topped with the sauce and accompaniments of your choice.
  11. And there it is, a super-quick, super-tender and super-tasty grilled sirloin with an amazing sauce. Stay tuned for our next episode where we're grilling a magnificent steak with Portabellini mushrooms and a super-quick red wine sauce using xanthan gum.


Chicken with Orange and Star Anise – Spiced Citrus Chicken Roasted to Perfection!!!

chicken with orange and star anise,citrus chicken with star anise,spiced citrus chicken,chicken roasted with orange and star anise,eastern style citrus chicken,orange chicken recipe,chicken with orange and star anise recipe video youtube,chinese chicken with orange and star anise,roasted chinese chicken,spicy chinese chicken,best orange chicken,easy chicken with oranges


Chicken with Orange and Star Anise - Spiced Citrus Chicken Roasted to Perfection!!!
Author: 
Recipe type: Chicken / Poultry
Cuisine: Eastern
Serves: 3-6
 
Chicken with orange and star anise is outstanding with a magnificent spicy citrus flavor and aroma. The process is longer than most, however it is all really easy.
Ingredients
  • 6 Chicken thighs
  • Oil for frying
  • 1 Onion, diced
  • 1 Onion, cut into wedges
  • 30ml Grated ginger
  • 15ml Garlic, finely chopped
  • 4 Whole star anise
  • 5ml Dried chilli flakes
  • 1 Red pepper, sliced into strips
  • 6 Top slices butternut
  • 1 Whole head of garlic, cloves separated, skin on
  • 2 Oranges sliced
  • Asian noodles to serve
For the Sauce
  • 30ml Light soy sauce
  • 30ml Rice wine vinegar
  • 15ml Brown sugar
  • 50ml Freshly squeezed orange juice
  • 125ml Chicken stock
  • 10ml Cornflour
Instructions
  1. Heat a large pan over medium high heat and add enough oil to coat the base of the pan.
  2. Add the chicken thighs to the pan, skin side up and fry for 4 minutes until the underside is nicely colored.
  3. Turn the thighs over and fry for a further 4 minutes until the skin is golden.
  4. Remove the thighs from the pan and transfer them to a roasting pan, skin side up.
  5. Heat another pan over medium high heat and add a tablespoon of oil.
  6. Add the chopped onion and fry these until slightly translucent, about 2 minutes.
  7. Add the grated ginger and crushed garlic and stir-fry this until fragrant, about 30 seconds.
  8. Add the star anise and dried chilli flakes. Fry this for 60 seconds then remove the pan from the heat.
  9. Spoon the mixture over the chicken thighs.
  10. Add the onion wedges to the roasting pan along with the sliced red pepper, sliced butternut and garlic cloves.
  11. In a jug, combine the light soy sauce, rice wine vinegar, brown sugar, freshly squeezed orange juice and chicken stock.
  12. Stir until all of the sugar has dissolved and spoon half of the liquid over the chicken and vegetables. Put the other half aside.
  13. Cover the roasting pan with foil and bake in a preheated oven at 180c or 350f for 30 minutes.
  14. Remove the pan from the oven and scatter the sliced oranges over the top of the pan.
  15. Return the pan to the oven, uncovered, for 40 minutes.
  16. Remove the pan from the oven and transfer the chicken and vegetables to another pan and keep it warm.
  17. Pour the pan juices into a small saucepan. Dissolve the cornflour in a little water and add this to the sauce we put aside earlier.
  18. Pour this into the pan juices. Place the pot over medium high heat and bring this to a boil. Allow it to boil for 60 seconds until thickened.
  19. Serve the orange anise chicken on a bed of noodles accompanied with the vegetables, orange slices and roasted garlic.
  20. Spoon a healthy dose of sauce over the dish and serve immediately.


The Correct Way to Make Beef Kebabs – Succulent & Tender Beef Kebabs Every Time!!!

beef kebabs,how to make beef kebabs,best beef kebab recipe,the best way to make beef kebabs,the trick to making succulent tender beef kebabs,the correct way to make beef kebabs,tender and juicy beef kebabs,making beef kebabs at home,homemade beef kebabs,how to make beef kebabs video recipe,how to make beef kebabs youtube,beef kebabs recipe video,beef kebas recipe youtube


The Correct Way to Make Beef Kebabs - Succulent & Tender Beef Kebabs Every Time!!!
Author: 
Recipe type: Beef / Steak
 
Beef kebabs more often than not are tough and dry, and quite plainly unpleasant. In today's episode we're looking at a really simple trick that will give you awesomely succulent and tender beef kebabs every time. So we're going to rustle up a batch of the amazing beef wonders.
Ingredients
  • 1.8kg Rump steak, cut 1 inch thick
  • Seasoning of your choice
  • 60g Butter
  • 20 x 8 inch skewers
Instructions
  1. You need to start with a good cut of meat like rump, with a nice thick strip of fat on the edge. Here I have 2 very nice slabs each about 900g or 2 pounds, cut nd inch thick.
  2. You will notice the one side of each piece has a much thinner strip of fat. Cut this piece away, and cut it into 1 inch cubes.
  3. To bard the cubes of meat that don't border with fat we are going to borrow some of the fat from the thick layer on the other side.
  4. Use sharp knife to trim away the fat, leaving only about 5mm or a quarter inch of fat behind.
  5. Cut the meat into 1 inch cubes, then slice the strip of fat into 5mm bits.
  6. Continue with the remaining steak.
  7. To thread the skewers, start with a cube that has fat. Follow this with a slice of fat, then another cube of meat and so on until all of your skewers are assembled.
  8. Every piece of meat will be interspersed with a piece of fat. This is what keeps the meat juicy and tender, and adds tons of flavor.
  9. Transfer the kebabs to a large roasting tin and season them liberally with the seasoning of your choice. Allow them to marinate for at least an hour before continuing.
  10. You can cook the kebabs on your barbecue, in a pan or under your oven grill. You will need medium high heat, and if your barbecuing or oven grilling, remember to baste with melted butter before starting.
  11. I am doing mine in a pan. Heat the pan to medium high and add 60g of butter.
  12. When the butter is bubbling, add the kebabs. You will probably need to cook 2 batches if you're using a pan.
  13. Grill the kebabs for 2 minutes 30 seconds per side, remembering that they have 4 sides... giving you 10 minutes in total.
  14. Remove the kebabs from the pan and serve immediately with accompaniments of your choice.


Spicy Moroccan Chicken Kebabs – Moroccan Chicken Kebabs with Ras al Hanout & Lemon

moroccan chicken kebabs,moroccan chicken kebabs recipe,how to make moroccan chicken kebabs,homemade moroccan chicken kebabs,spicy moroccan chicken kebabs,morccan curry chicken kebabs recipe,moroccan chicken kebabs video recipe,moroccan chicken kebabs youtube,best chicken kebabs recipe,spicy moroccan chicken kebabs with lemon,best kebabs recipe,best kebabs video recipe,how to make kebabs,award winning kebabs


Spicy Moroccan Chicken Kebabs - Moroccan Chicken Kebabs with Ras al Hanout & Lemon
Author: 
Recipe type: Chicken
Cuisine: Moroccan
Prep time: 
Cook time: 
Total time: 
Serves: 3-6
 
This episode is the third in our short series on using the trademark Moroccan spice blend Ras al Hanout. These spicy chicken kebabs are succulent and tender and simply explode with flavor.
Ingredients
  • 9 Chicken thighs
  • Zest of a large lemon
  • 50g Butter for frying
For the Ras al Hanout Spice Blend (Grind everything until fine in your spice grinder)
  • 7.5ml Ground cumin
  • 7.5ml Ground ginger
  • 7.5ml Turmeric
  • 7.5ml Salt
  • 6.25ml Ground cinnamon
  • 10ml Whole black peppercorns
  • 5ml Ground white pepper
  • 3.75ml Ground coriander seed
  • 7.5ml Chilli powder
  • 7.5ml Whole allspice berries
  • 3.75ml Ground nutmeg
  • 2.5ml Ground cloves
Instructions
  1. To start you need to debone 9 chicken thighs. We have done this before, but here's a quick recap.
  2. Using a short sharp blade lift skin along the spine bone of the thigh.
  3. Cut underneath the oyster to free it from the bone.
  4. Continue to peel the skin back to reveal the hip joint.
  5. Using your chicken shears to cut through the hip joint.
  6. Flip the thigh over and cut away the connecting tissue to free the spine from the thigh.
  7. Slice through the flesh along the thigh bone.
  8. Grab the joint and use the edge of the blade to scrape the flesh down the bone.
  9. Cut around the lower joint to free the bone.
  10. Continue with the remaining thighs.
  11. Place the thighs in a large roasting pan skin side down.
  12. Sprinkle the ras al hanout liberally over the chicken. Don't be shy with the spice, it has to be well spiced.
  13. Turn the thighs over and give the skin a good coating of spice as well.
  14. Turn the thighs again and spice any spots you may have missed.
  15. Sprinkle the grated lemon zest over the thighs and transfer the tray to your refrigerator to marinate for at least 2 hours.
  16. After marinating, remove the chicken from the refrigerator and cut the thighs into bite-sized cubes.
  17. Pick up any lemon zest from the marinating pan and return it to the cubed chicken.
  18. Thread the chicken cubes onto 8 inch or 20cm skewers. You will need 6 skewers for this quantity of chicken.
  19. Heat a pan over medium high heat and add 50g of butter.
  20. When the butter is bubbling add the kebabs to the pan.
  21. Grill the kebabs for 4 minutes per side, remembering that they have 4 sides.
  22. The chicken will be beautifully charred and crispy with an aroma from heaven.
  23. Remove the kebabs from the pan and serve immediately with the accompaniments of your choice.


Grilled Chicken Mayonnaise Sandwich Meltdown – The Ultimate Grilled Chicken Mayonnaise Sandwich

grilled chicken mayonnaise sandwich,grilled chicken mayo sandwich recipe,grilled chicken sandwich mayo calories,grilled chicken sandwich without mayonnaise,grilled chicken sandwich with pesto mayonnaise,toasted sandwich,grill sandwich recipe,how to make the best toasted sandwich,the best toasted sandwich recipe,double size toasted sandwich,toasted sandwich fillings,toasted sandwich in pan


Grilled Chicken Mayonnaise Sandwich Meltdown - The Ultimate Grilled Chicken Mayonnaise Sandwich
Author: 
Recipe type: Sandwiches / Grills
Serves: 2
 
I don't think I have ever met anyone who doesn't enjoy a good toasted chicken mayonnaise sandwich. Here is recipe for this old favorite that gives a whole new definition to this classic. I call it the grilled chicken mayo meltdown. It just looks better and it really tastes better.
Ingredients
  • 2 Roasted chicken quarters
  • 1 Onion
  • 120g Tangy mayonnaise
  • Salt and pepper to taste (or the seasoning of your choice)
  • 8 Slices square loaf bread
  • Butter
  • 8 Slices mature cheddar / Jack
  • 4 Cocktail tomatoes
Instructions
  1. Strip and shred the meat from 2 roasted chicken quarters, including the skin.
  2. Add a diced onion and the tangy mayonnaise. Mix this all until everything is well coated.
  3. Season liberally with salt and cracked black pepper, or the seasoning of your choice. Mix this in thoroughly.
  4. Lightly butter 8 slices of bread and arrange the slices in pairs with buttered surfaces face to face.
  5. Divide the chicken mixture evenly among the 4 sandwiches.
  6. Heat a large pan over medium heat. You can test the readiness of the pan by flicking a little cold water onto the surface. If it bubbles instantly, the pan is ready.
  7. Lift the top slices of bread and place them in the pan. Top these with the bottom slices. Now the buttered faces are on the outside of the sandwiches.
  8. Grill the sandwiches turning them every couple of minutes until they are golden and crispy. Make sure to square up the slices after every turn.
  9. Once you are happy with their color, remove the sandwiches from the pan and continue with the following 2.
  10. Place the sandwiches on a chopping board. Use a sharp thin blade to cut through the sandwiches along the diagonals.
  11. Flip the sandwich triangle onto their crusts and arrange them in a line.
  12. Drive a 25cm or 10 inch skewer through the sandwich triangles to hold them together. Repeat this with the other 2 sandwiches.
  13. Transfer the sandwiches to a foil lined baking sheet.
  14. Place the cheese slices along the apex of the sandwiches. Press them down gently to make contact with the hot filling. This secures them in place.
  15. Grill the sandwiches under a preheated grill in your oven until the cheese has melted completely, but not browned.
  16. Remove the sheet from the oven and transfer the meltdowns to serving platters.
  17. Press cocktail tomatoes onto each end of the skewers and serve immediately with the accompaniments of your choice.


How to Make Jagermeister Steaks – Perfectly Grilled Jagermeister Steaks – Plus 9 Minute Marinator Review!!!

jagermeister steak,jagermeister rump steak,how to make jagermeister steak,steak with jagermeister glaze,the perfect jagermeister steak,rump steak with jagermeister,9 minute marinator review,minute marinator how to use,review of 9 minute marinator,how to use the minute marinator,making jagermeister marinated steak,rump steak recipes,rump steak video recipe,rump steak youtube recipe


How to Make Jagermeister Steaks - Perfectly Grilled Jagermeister Steaks - Plus 9 Minute Marinator Review!!!
Author: 
Recipe type: Steak / Beef
Cook time: 
Total time: 
Serves: 4
 
Jagermeister has become a household name in the realm drinks. Made with 56 herbs and spices it makes a perfect base for flavoring red meats and game. In this case we're going to rustle up a deliciously tender and succulent Jagermeister rump steak. This recipe is courtesy of a friend of mine who owns and runs a pub and grub and golf range just down our street called "At the 19th".
Ingredients
  • 4 x 300g Rump steaks
  • 90ml Jagermeister
  • 220ml Coca Cola
  • 220ml Worcestershire sauce
  • 30ml Tomato sauce
  • 30ml Demerara sugar
  • 5ml Salt
  • 30g Butter
Instructions
  1. Starting with the marinade, combine the coca cola, Worcestershire sauce, Jagermeister, Demerara sugar, salt, sugar and tomato sauce. Mix this until the solids are dissolved.
  2. On with the cooking. Here I have 2 large rump steaks, about 600g each.... cut to an inch thick.
  3. I am going to cut these in half to give 4 portions.
  4. Place the steaks in a baking tin and pour in the marinade. Drag the steaks through the marinade making sure that they are coated all over. Put these aside for 2 hours to marinate.
  5. After 2 hours, transfer the steaks to a platter and pour the marinade into a pan..
  6. Bring the liquid to boil and let this reduce to a syrup stirring continuously.
  7. Put the syrup aside.
  8. I have reduced half of the syrup as I am only going to grill 2 steaks for this demonstration. The other 2 are for my lunch tomorrow.
  9. Heat a heavy pan over medium high heat and add 30g of butter. Add the steaks to the pan.
  10. Grill the steaks for 10 minutes, turning every 2 minutes. After every turn wipe the steaks around the pan to pick up the caramelized juices.
  11. After 10 minutes, the steaks are almost done and will have a beautiful dark crust.
  12. Lift the steaks from the pan and wipe them through the marinade syrup, then return them to the pan for a further 60 seconds on each side.
  13. And there you have it..... the perfectly grilled Jagermeister rump steak.


Spiral Cut Russian Hot Dogs – Gourmet Hot Dogs with a Twist!!!

fancy hot dog recipes,gourmet hot dog recipe,spiral-cut hot dog recipe,russian sausage hot dogs,spiral-cut hot dog recipes,luxury hot dog recipes,fancy hot dogs recipe video,how to make spiral cut hot dogs,bacon and cheese hot dogs,best hot dog recipes,best party recipes,easy gourmet hot dog recipe


Spiral Cut Russian Hot Dogs - Gourmet Hot Dogs with a Twist!!!
Author: 
Recipe type: Fast Foods
Cuisine: American
Prep time: 
Cook time: 
Total time: 
 
These spiral cut Russian hot dogs are a fun and novel way to add interest to what would otherwise be just a big hot dog. Along with the bacon and melted cheese this is a dog fit for kings.
Ingredients
For Each Hotdog
  • 1 x 8 inch / 20cm Russian sausage
  • 1 x Strip streaky bacon
  • 50g Mozzarella or Cheddar, grated
  • Frilly lettuce
  • 1 x 10 inch / 25cm Hot dog roll
  • 1 x 10 inch / 25cm bamboo skewer
Instructions
  1. Press a 10 inch or 25cm skewer through the length each Russian sausage.
  2. Holding your knife at 30 degrees to the perpendicular or right angle to the sausage, start rolling and slicing simultaneously.
  3. Slice the spiral all the way up each sausage.
  4. Gently open up the spiral by working the ends of the sausage towards the ends of the skewer.
  5. Place a slice of streaky bacon on the cutting board. Cut through the bacon lengthways, leaving one end intact. This will give you a long strip of bacon.
  6. Tuck one end of the long strip into the spiral groove of a sausage and start winding it up the spiral, making sure to keep it in the groove. This will make sure the spiral remains open while cooking as well as adding the magnificent bacon flavor right through the sausage.
  7. Repeat this until all of your sausages are done.
  8. Line a baking sheet with foil and place the sausages on the sheet. Bake the sausages in a preheated oven at 250c or 480f for 15 minutes.
  9. Remove the sausages from the oven and carefully pull the skewers free.
  10. Top the sausages with a liberal dose of your favorite melting cheese, making sure to get as much of the cheese on top of the sausages as possible.
  11. Return the sausages to the oven and let these cook just until the cheese is nicely melted.
  12. Transfer the sausage to buttered hot dog rolls dressed with liberal amounts of frilly lettuce, top the sausages with the sauce of your choice and serve immediately.


Moroccan Chicken Tagine – Spicy Moroccan Style Chicken Curry – Ras el Hanout

moroccan chicken tagine,moroccan chicken curry,ras el hamout,moroccan spice recipe,how to make moroccan chicken,homemade moroccan chicken,how to make ras el hamout,how to make moroccan spice,moroccan spice blend recipe,how to cook moroccan chicken tagine,spicy moroccan chicken recipe,authentic moroccan chicken recipe,chicken tagine recipe,moroccan spice recipe video


Moroccan Chicken Tagine - Spicy Moroccan Style Chicken Curry - Ras el Hanout
Author: 
Recipe type: Chicken
Cuisine: Moroccan
Prep time: 
Cook time: 
Total time: 
Serves: 4-6
 
Although this recipe is not entirely authentic, it has all the flavors and aromas of the real thing and is certainly worth a try. The list of spices required may seem a little daunting but please don't let this put you off.
Ingredients
  • 7.5ml Ground cumin
  • 7.5ml Ground ginger
  • 7.5ml Turmeric
  • 7.5ml Salt
  • 6.25ml Ground cinnamon
  • 10ml Whole black peppercorns
  • 5ml Ground white pepper
  • 3.75ml Ground coriander seed
  • 7.5ml Chilli powder
  • 7.5ml Whole allspice berries
  • 3.75ml Ground nutmeg
  • 2.5ml Ground cloves
  • 8-12 Chicken pieces
  • 1 Green pepper
  • 1 Yellow pepper
  • 1 Red pepper
  • 4 Potatoes
  • 2 Onions
  • 3-4 Small lemons
Instructions
  1. Starting with the spice blend or Ras el Hanout. Ras el Hanout is Arabic for head of the shop, or the best spices the shop has to offer.
  2. Place the ground cumin, ground ginger, turmeric, salt, ground cinnamon, black peppercorns, white pepper, ground coriander, chilli powder, allspice berries, ground nutmeg and ground cloves in your spice grinder. Placing the ground ingredients into the grinder along with the ingredients that require grinding really helps the mill achieve a finer result.
  3. Machine the spice blend until nice and fine.
  4. Transfer the spice mixture to a spice shaker.
  5. To continue, seed and cut the peppers into chunky bits.
  6. Cut the onions into thick half-rounds.
  7. Top and tail the lemons and slice them into thin wedges.
  8. Peel and chop the potatoes into chunks.
  9. Pour the chopped peppers, onions and potatoes into a large roasting tin and mix them around.
  10. Traditionally this dish would be baked in a tagine, but a roasting tin does just fine.
  11. Sprinkle generous dose of the ras el hanout over the vegetables. Don't be stingy with the spices, this is a dish that requires a heavy hand, otherwise you will end up with a bland chicken stew.
  12. Place the chicken pieces on top of the vegetables and give this a large dose of the spice blend.
  13. Scatter the lemon wedges around the pan and your ready to roast.
  14. Roast the chicken at 160c or 320f for 60 minutes.
  15. Remove the pan from the oven. Shuffle the vegetables around the pan and flip the chicken pieces over.
  16. Reseason the chicken and the vegetables with another large dose of the spice blend.
  17. Place the chicken back into the oven and continue to roast for a further 60 minutes.
  18. Remove the pan from the oven, shuffle the vegetables around and flip the chicken over again.
  19. Once again, give the pan a generous dose of the ras el hanout.
  20. Return the pan to the oven, adjust the temperature to 250c or 480f and roast for a final 15 to 20 minutes until the chicken skin is well browned.
  21. Remove the pan from the oven and serve the chicken and vegetables on a bed of couscous and enjoy.


Mexican Deep Fried Chicken Wings – Crispy Deep Fried Wings with Mexican Spice

deep-fried chicken wings,crispy deep-fried chicken wings,mexican style deep-fried chicken wings,mexican chicken wings,chicken wings with mexican spice,mexican spice blend recipe,how to make mexican spice,how to make deep-fried mexican chicken wings,mexican deep-fried chicken wings recipe,spicy deep-fried chicken wings recipe,crispy mexican chicken wings,hot and spicy wings recipe,how to make spicy chicken wings,how to deep-fry chicken wings


Mexican Deep Fried Chicken Wings - Crispy Deep Fried Wings with Mexican Spice
Author: 
Recipe type: Chicken
Cuisine: Mexican
 
These deep-fried Mexican spiced chicken wings are out of this world. By adjusting the quantity of cayenne you can make this dish as hot or mild as you like.
Ingredients
  • 12-16 Chicken wings
  • 15ml Cumin seeds
  • 15ml Dried coriander leaves
  • 15ml Paprika
  • 5ml Dried oregano
  • 5ml Cayenne pepper (mild) / 15ml (medium) / 25ml (hot)
  • 5ml Garlic granules
  • 10ml Salt
  • 2 Cups all-purpose flour
  • 4 Eggs
Instructions
  1. Starting with the Mexican spice blend, place the cumin seeds, dried coriander leaves, paprika, dried oregano, cayenne pepper a dried garlic granules and salt in your spice grinder.
  2. Putting the powdered spices into the grinder along with the ingredients that require grinding helps the grinder achieve a finer result.
  3. Unpack the chicken wings. Cut away the wing tips and discard them, then slice through the center joint of each wing.
  4. Sprinkle some of the spice blend over the base of a container and pack in a single layer of the wings.
  5. Sprinkle more of the spice followed by another layer of wings.
  6. Continue with this until all of the wings are packed in.
  7. Sprinkle any remaining spice over the top, put the lid on and give it all a good shake-up.
  8. Put the wings aside for 30 minutes to marinate.
  9. Place the all-purpose flour into a bowl, and 4 well whisked eggs into another.
  10. Sprinkle a little of the flour over a platter. This is where the coated wings will set, and the layer of flour prevents the coating from sticking to the plate and getting damaged.
  11. Dredge the wings in the flour to coat them all over.
  12. Dunk the wings in the egg to wet all of the flour.
  13. Then it's back to the flour to get a good solid coating all over.
  14. Transfer the wings to the platter and allow the coating to set for 20 minutes.
  15. Half-fill a large pan with oil and heat this to 180c or 350f.
  16. Carefully drop the wings into the oil and fry them for 6 minutes, turning once halfway through.
  17. Use a slotted spoon to lift the wings from the oil and drain any excess oil on kitchen paper.
  18. Serve the wings immediately with the accompaniments of your choice.


The Amazing Banting, Wheat & Gluten Free Pizza

pizza,banting,gluten free pizza,healthy pizza,banting pizza base,banting pizza,banting pizza dough,banting pizza base recipes,banting pizza crust,banting pizza recipe,pizza recipe,gluten-free,wheat free pizza base,wheat free pizza recipe,gluten free recipes,clean eating pizza,healthy pizza recipes,healthy pizza recipe,healthiest pizza,how to make pizza base no wheat,best banting pizza recipe


The Amazing Banting, Wheat & Gluten Free Pizza
Author: 
Recipe type: Pizza / Banting
Serves: 2
 
Whether you just want a change from regular pizza, or you're following Banting, or you want gluten free, this chicken pizza is for you. Super simple and super quick to make, this pizza truly is a full meal in one.
Ingredients
  • 2 Large chicken breasts
  • Diced green, red and yellow peppers
  • Chopped streaky bacon
  • Onion cut into quarter rounds
  • Feta cheese
  • Grated mozzarella cheese
Instructions
  1. Flip the chicken breasts over and cut away the fillets. Save these for another time.
  2. Working with one breast at a time, fold the breast in cling-wrap and start tapping it down with your meat mallet.
  3. This part does take a little patience as you don't want to bang a hole right through the breast.
  4. Keep tapping it down, work from the center out towards the edges.
  5. Stretch the plstic out flat periodically and pat the chicken with your hand to check on progress.
  6. Your goal is to get the breast down to a thickness of 3mm or ⅛th of an inch.
  7. Repeat this with the second breast.
  8. Start preheating your oven grill to maximum, and heat a large pan over medium high heat.
  9. Add a little butter to the pan and add one of the breasts smooth side down as soon as the butter starts to bubble.
  10. Season the top of the breast with the seasoning of your choice and fry this for about 3 minutes.
  11. You will see that the breast is almost cooked all the way through.
  12. Remove the breast from the pan and transfer it to a foil lined baking sheet.
  13. Continue with the secong breast.
  14. Top the breasts with the onion.
  15. Then come the diced peppers.
  16. Pile a large dose of mozzarella cheese on top of each breast.
  17. This is followed by a generous scattering of the streaky bacon.
  18. Crumble the feta cheese over the whole lot and you're ready to rock. There is no need to season with salt as the feta and bacon will add more than enough salt to the dish.
  19. Slide the baking sheet into the oven on the second to highest shelf and allow this grill until the feta has started to brown slightly. This should take about 10 to 12 minutes.
  20. Remove the pizzas from the oven and serve immediately.


Scroll to top

Kitchen Conversions

Convert:
Masses
to:
Volumes
to:
Temperatures
to:
Lengths
to: