Chilli Chicken Jerky Snack Sticks – Chilli Chicken Biltong Strips

chicken jerky, chicken jerky recipe, how to make chicken jerky, chilli chiken jerky sticks recipe, chicken bilton, chicken biltong sticks, how to make chicken biltong, homemade chicken jerky, homemade chicken biltong, chilli chicken sticks, making jerky at home, homemade jerky recipe, jerky, chilli, chicken, beef, how to, kfc chicken recipe, how to make, turkey, chicken snack sticks, snack recipes, healthy dried chicken recipe,


Chilli Chicken Jerky Snack Sticks - Chilli Chicken Biltong Strips
Author: 
Recipe type: Cured Meat / Dried Meat
 
Chicken jerky is super easy to make, and it makes great savory snack over the festive season and for the big game. Chicken jerky, as easy as it is, takes 2 days of waiting time, so you do need to plan ahead if you're making this for an occasion.
Ingredients
  • 650g Chicken breasts
  • 13g Prague powder #1
  • 15ml Cayenne Pepper
  • 50ml White vinegar
  • 1 liter Water (hot)
Instructions
  1. Cut away the fillets from the chicken breasts. Keep these for other meals.
  2. Cut the breasts lengthways into strips 1cm or just less than a half inch thick.
  3. Measure out the Prague powder and combine this with the cayenne pepper. Mix this thoroughly, breaking down any lumps as you go.
  4. Transfer the powder to a sprinkle bottle.
  5. Sprinkle half of the powder over the base of a large stainless steel roasting tin.
  6. Lay the chicken strips out on top of the powder.
  7. Sprinkle the other half of the powder over the top of the chicken.
  8. Cover the pan with cling-wrap and transfer this to your refrigerator for 24 hours.
  9. The following day, place a rack over a clean dish towel.
  10. Combine the hot water and vinegar in a mixing bowl.
  11. Working with one strip of chicken at a time, dip it briefly in the vinegar solution and transfer it to the rack.
  12. Continue with this leaving a little space between each strip.
  13. It does help if you have a multi-level rack if you're making this quantity or more.
  14. Place the racks in a preheated oven at 80c or 175f for 4 to 7 hours depending on how dry you want your jerky.
  15. Once you've happy with the result, remove the jerky from your oven, allow to cool, and they are ready to serve.
  16. The jerky stores very well in a paper bag in a cool place, or wrapped in cling-wrap and frozen.


How to Make Peppadew Poppers – Crumbed, Deep-fried Stuffed Piquante’ Peppers

peppadew poppers, how to make peppadew poppers, peppadew poppers recipe, best recipe peppadew poppers, homemade peppadew poppers, crumbed deep-fried peppadew poppers, chillipoppers recipe, how to make chilli poppers, homemade chilli poppers, blue cheese peppadew poppers, easy peppadew poppers, quick peppadew poppers, peppadew poppers video recipe, peppadew poppers recipe youtube,


How to Make Peppadew Poppers - Crumbed, Deep-fried Stuffed Piquante' Peppers
Author: 
Recipe type: Peppers / Deep-Fried
Prep time: 
Cook time: 
Total time: 
Serves: 20-30
 
Peppadews, and registered brand Peppadew originate in South Africa and must be undoubtedly South Africa's greatest culinary contribution this century. These piquant pickled peppers have a thousand different and delicious applications and today we're going to look at one of my favorites.... peppadew poppers. These are very similar to chilli poppers, but with a unique flavor all their own, and far less fire.
Ingredients
  • 100g Blue Cheese
  • Yogurt (approx. 45-60ml)
  • 20-30 Pickled peppadews
  • ½ Cup Finely crushed cornflakes
  • ½ Cup All-purpose flour
  • 2 Eggs
Instructions
  1. Starting with the filling, add just enough yogurt to a 100g of strong blue cheese to make a paste. The paste must be just thinned enough to be pipe-able.
  2. Use a fork to mix this until smooth.
  3. Spoon the creamy mixture into a piping bag.
  4. Use the edge of a ruler to squish the cheese down the bag, then snip about 10mm or just less the a half inch from the tip of the bag.
  5. Use the ruler again to press the mass of cheese down to the tip.
  6. For the coating, whisk 2 eggs thoroughly until all of the albumen has broken down.
  7. Combine the finely crushed cornflakes and all purpose flour.
  8. You will need to count out 20 to 30 pickled peppadews and drain the syrup from them.
  9. Use the filled piping bag to pipe the cheese mixture into each peppadew.
  10. To coat the poppers, sprinkle a layer of the cornflake mixture over a large platter. This where the coated peppadews will set, and the crumbs will prevent the coating from sticking to the platter and getting damaged.
  11. Working with one popper at a time, roll the popper in the crumb mixture.
  12. Transfer this to the egg to wet all of the crumb.
  13. Then back to the crumbs to get a good solid coating all over.
  14. Transfer this to the platter to set and continue with the rest of the poppers.
  15. Allow the coating to set for 20 minutes.
  16. Half fill your wok or a large pan with oil and heat this to 180c or 350f.
  17. Carefully drop the poppers into the oil in batches. The poppers will fry very quickly... about 45 to 60 seconds.
  18. Use slotted spoon to lift the golden poppers from the oil and drain any excess oil on kitchen paper.
  19. Continue frying the remaining poppers.
  20. Serve the poppers piping hot and enjoy....


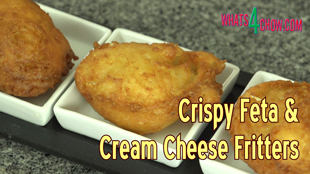
Crispy Feta and Cream Cheese Fritters – Light & Airy Cheese Fritters Deep-Fried to Golden Perfection

feta cheese fritters, cream cheese fritters, feta and cream cheese fritters, how to make feta and cream cheese fritters, how to make fritters, crispy deep fried fritters, quick fritter recipe, easy fritter recipe, cheese fritter recipe youtube, cheese fritter recipe video, homemade fritter recipe, making crispy deep-fried fritters at home, feta cheese, cream cheese, buttermilk, self-raising flour,


Crispy Feta and Cream Cheese Fritters - Light & Airy Cheese Fritters Deep-Fried to Golden Perfection
Author: 
Recipe type: Cheese / Deep-Fried
Cuisine: Mediterranean
Prep time: 
Cook time: 
Total time: 
 
These cheesy fritters are light and airy, and just full of flavor. Best of all, they are fail proof, so you could even get your children to mix the batter, however I don't suggest allowing kids to do the deep-frying.
Ingredients
  • 250ml Cultured buttermilk
  • 250g Cream cheese (plain or flavored)
  • 250g Feta cheese
  • 2 Eggs, beaten
  • 1½ Cups Self-raising flour
Instructions
  1. Measure out 250g of feta cheese, 250g of cream cheese , 250ml of cultured buttermilk, beat 2 eggs, and weigh 1½ cups of self raising flour.
  2. Place all of these in your food processor.
  3. Zap these until well blended and smooth, then allow the batter to stand for 15 minutes.
  4. Half fill your wok, or a large pan with oil and heat this to 170c or 340f.
  5. Spoon slightly heaped tablespoons of the batter into the oil.
  6. Allow these to fry for 3 minutes, turning halfway through.
  7. Use you tongs to lift the fritters from the oil and drain any excess oil on kitchen paper. Continue frying the remaining fritters.
  8. Serve these light and crispy snacks as is and enjoy.


Deep-Fried Super-Cheesy Bites – A Creamy, Crunchy, Sweet & Savory Taste of Heaven!!!

deep-fried cheese bites, crispy deep-fried mini chese pies, crispy fried cheese parcels, sweet gow gee, deep-fried cheese fold-overs, deep-fried cheesy pocket pies, super chessy pocket pies, blue cheese and preserve deep-fried dessert pies, how to make super cheesy dessert pies, crispy fried cheese fold-overs, golden fried cheese and preserve pies, how to make the best dessert, best dessert recipe, unique dessert recipe,


Deep-Fried Super-Cheesy Bites - A Creamy, Crunchy, Sweet & Savory Taste of Heaven!!!
Author: 
Recipe type: Dessert
Prep time: 
Cook time: 
Total time: 
Serves: 16
 
These deep-fried super-cheesy bites are insanely good. Strong blue cheese and fruit jam enclosed in American cheese slices then crumbed a deep-fried results in the most amazing sweet savory flavor and texture combination.
Ingredients
  • 16 Slices American processed cheese
  • 3 Heaping tablespoons fruit preserve / jam
  • 80g Creamy blue cheese
  • 250ml Fine bread crumbs
  • 250ml All-purpose flour
  • 2 Eggs, beaten
  • Oil for deep-frying
Instructions
  1. You will need 16 slices of American cheese. For those not in North America, this the processed cheese slices that come individually wrapped in plastic sheets.
  2. In addition, measure out 3 heaping tablespoon of a good quality fruit preserve and open a block of creamy blue cheese.
  3. You will also need an 8cm, or just more than 3 inch gow gee press. These are readily available on eBay and Amazon for next to nothing.
  4. To start assembling, open a cheese slice and keeping the plastic wrapper in place, use the back of the press to cut out the circle then position the circle over the press.
  5. Place ⅔ of a teaspoon of the preserve in the center of the cheese, followed by a small piece of blue cheese.
  6. Grab the handles of the press and close this just firmly enough to seal the edges of the cheese. If you press to hard, the cheese will split.
  7. Continue until all of the cheesy bites are formed.
  8. To coat the bites, measure out a cup of all-purpose flour, a cup of fine bread crumbs, and whisk 2 eggs.
  9. Sprinkle a layer of breadcrumbs over a large platter. This is where the coated cheesy bites will set, and the crumbs prevent the coating from sticking to the platter and getting damaged.
  10. Working with cheesy bite at a time, dredge the bite in the flour.
  11. Transfer this to the egg to wet all of the flour.
  12. Then it's into the bread crumbs to get a good solid coating all over.
  13. Transfer this to the platter to set, and continue with the remaining pockets.
  14. Allow the coating to set for 20 minutes.
  15. Half fill a large pan with oil and heat this to 180c or 350f.
  16. Carefully drop the cheesy bites into the oil and fry these for 3 minutes, turning over halfway through.
  17. As the first cheesy bites are ready, use a slotted spoon to remove them from oil, and drain any excess oil on kitchen paper.
  18. Serve the bites immediately accompanied with whipped cream and a good dessert wine.
  19. And there we have it, a crunchy, creamy, sweet and savory taste of heaven.


How to Make Deep Fried Buttermilk Chicken – Crispy, Spicy Homemade Buttermilk Chicken

how to, buttermilk chicken, deep-fried buttermilk chicken, how to make deep-fried buttermilk chicken, home made deep-fried buttermilk chicken, crispy fried buttermilk chicken, best buttermilk chicken recipe, homemade buttermilk chicken recipe, fried buttermilk chicken recipe, fried buttermilk chicken recipe youtube, fried buttermilk chicken video recipe, how to make buttermilk chicken at home,


How to Make Deep Fried Buttermilk Chicken - Crispy, Spicy Homemade Buttermilk Chicken
Author: 
Recipe type: Chicken
 
Crispy, deep fried buttermilk chicken is outstanding. Succulent, juicy, spicy and super tasty, this will have your guests lining up for seconds.
Ingredients
  • 4 Large chicken thighs, deboned, skin on
For the Marinade
  • 250ml Cultured buttermilk
  • 15ml Dried onion flakes
  • 5ml Garlic granules
  • 5ml Salt (non-iodated)
  • 5ml Tabasco sauce
  • 5ml White pepper
For the Coating
  • 300g All purpose flour
  • 30ml Garlic powder
  • 30ml Dried onion flakes
  • 15ml Dried thyme
  • 10ml Dried sage
  • 10ml Hot smoked paprika
  • 20ml Salt (non-iodated)
  • 15ml White pepper
Instructions
  1. If your butcher is not kind enough to debone the chicken thighs for you, this is how to do it yourself.
  2. Using a sharp paring knife, cut away any excess skin and fat from the bind side of the thigh.
  3. Cut between the skin and the spine and dig in and free the oyster from the spine.
  4. Cut the skin back until the thigh joint is exposed.
  5. Use your shears to cut through the joint.
  6. Locate the thigh bone and cut through the flesh to expose it.
  7. Grab the knuckle of the thigh bone and cut the flesh away from the joint.
  8. Use the edge of the blade to scrape the flesh down the bone until you reach the other joint.
  9. Cut around this joint to free the bone and you're done.
  10. Continue with the remaining thighs, then cut each one into 4 pieces across the width.
  11. Lift the chicken pieces using an egg lifter and transfer them to a vacuum bag.
  12. To make the buttermilk marinade, stir the Tabasco into the buttermilk.
  13. Measure out the onion flakes, garlic granules, salt and white pepper and mix these into the buttermilk.
  14. Pour this into the bag with the chicken.
  15. To vacuum pack this, elevate the vacuum packer to avoid sucking liquid into the machine. If you don't have a vacuum packer, use a jiffy bag or simply submerge the chicken in the marinade in a bowl. If you go this way, the chicken will need to marinate for 12 hours, as opposed to 3 to 6 hours in the vacuum pack.
  16. For the coating, place the garlic powder, onion flakes, dried thyme, dried sage, hot smoked paprika, salt and white pepper in your spice grinder. Zap these to a fie powder.
  17. Combine this with the all purpose flour.
  18. Cut the vac pack chicken open and pour this into a bowl.
  19. Sprinkle a generous layer of the flour mixture over a large platter. This is where the coated chicken will set, and the flour prevents the chicken from sticking to the platter and damaging the coating.
  20. Working with one piece at a time, lift the chicken from the marinade and shake off the excess marinade.
  21. Dredge the chicken in the seasoned flour to get a good solid coating. Transfer the chicken to the platter to set.
  22. Allow the coating to set for 20 minutes.
  23. Continue until all of the chicken is coated.
  24. Half fill a wok or large frying pan with oil and heat this to 180c or 350f.
  25. Carefully drop 5 or 6 chicken pieces into the oil.
  26. Fry these for 4 to 5 minutes until crisp and golden. Use a slotted spoon to lift them from the oil and drain any excess oil on kitchen paper. Continue frying batches until all of the chicken is fried.
  27. And here it is... spicy, crisp and aromatic buttermilk fried chicken.


McDonald’s Chicken McNuggets Recipe – How to Make McDonald’s McNuggets at Home!!!

chicken mcnuggets, mcdonalds chicken mcnuggets, how to make, how to make mcdonals chicken mcnuggets, homemade mcdonalds chicken mcnuggets recipe, chicken mcnuggets recipe video, chicken mcnuggets recipe youtube, make mcdonalds chicken mcnuggets at home, quick and easy chicken mcnuggets recipe, mcdonalds chicken nuggets recipe,


McDonald's Chicken McNuggets Recipe - How to Make McDonald's McNuggets at Home!!!
Author: 
Recipe type: Chicken / Fast Foods
Cuisine: American
 
A couple of weeks ago one of our viewers requested that I decode the McDonalds Chicken McNuggets recipe. I took up the challenge, and here it is.
Ingredients
For the Coating Batter (enough for 8-12 chicken breasts)
  • 90g All purpose flour
  • 15ml Salt
  • 15ml Bicarbonate of soda
  • 125g Yellow maize meal
  • 90g Corn starch
  • 20ml White pepper
  • 10ml Onion powder
  • 5ml Garlic powder
  • 5ml Ground cumin
  • 5ml Ground coriander seed
  • 5ml Cayenne pepper
  • 2.5ml Dried oregano
  • 2.5ml Dried basil
  • 2.5ml Dried rosemary
  • 2.5ml Dried Thyme
  • 450ml Water
Instructions
  1. Unlike KFC, where the spicy flavor is cured into the chicken, with McNuggets, the flavor is all in the coating, so that's where we're starting.
  2. Measure out the yellow maize meal, the cornstarch and the all purpose flour.
  3. For the seasoning, combine the white pepper, onion powder, garlic powder, ground cumin, ground coriander seed, cayenne pepper, dried oregano, dried basil, dried rosemary and dried thyme. Grind these to powder in you spice grinder.
  4. Place all of the aforementioned into a large mixing bowl and mix briefly to combine.
  5. Pour in the water and whisk until smooth.
  6. Put this aside for 30 minutes to autolyse.
  7. After 30 minutes, even the smallest particles in the liquid will be saturated, and as a result the batter will have thickened considerably, and will coat the back of a spoon.
  8. The real McNuggets uses coarsely ground chicken reconstituted with the aid of emulsifiers and high pressure extruders. Since this does not affect the taste, we're not going to run out and buy bags of phosphates and fancy industrial extruders.
  9. Trim away the fillet from the chicken breasts.
  10. Square off the ends of the breasts and slice the remaining breasts into slices 5mm or a 5th of an inch thick.
  11. Place any trimmings in your refrigerator for other recipes.
  12. Half fill a wok or pan with oil and heat this to 170c or 340f.
  13. Once again, we don't have fancy conveyer belt coating machines, so to coat the chicken bits, pick a piece up with a skewer, dip it in the batter and drop it into the oil.
  14. The chicken cooks within 60 seconds, so you will only fry about 6 or 7 pieces at a time.
  15. Use a slotted spoon to remove them from the oil, and drain any excess oil on kitchen paper.
  16. And there it is.... a mountain of McNuggets just waiting to be enjoyed.


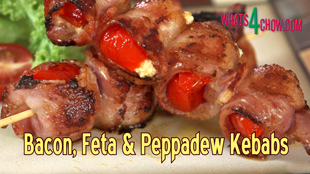
Bacon, Feta & Peppadew Kebabs – Absolute Kebab Perfection, Made in Heaven!

bacon, feta, peppadew, kebabs, bacon feta and peppadew kebabs, how to make bacon feta and peppadew kebabs, bacon feta and peppadew kebabs recipe, bacon feta and peppadew kebabs video recipe, bacon feta and peppadew kebabs youtube, best kebabs recipe, best kebabs recipe youtube, bacon feta and piquant peppers kebabs,


Bacon, Feta & Peppadew Kebabs - Absolute Kebab Perfection, Made in Heaven!
Author: 
Recipe type: Grill / Barbecue
Prep time: 
Cook time: 
Total time: 
Serves: 4
 
These bacon, peppadew and feta kebabs are out of this world. Slightly sweet, slightly hot and tangy, these kebabs will have your guests lining up for more.
Ingredients
For 4 Kebabs
  • 8 Rashers streaky bacon
  • 16 Peppadews (pickled piquant peppers)
  • 50g Feta cheese
  • 4 x 150mm / 6 inch skewers
  • 15ml Butter
Instructions
  1. Cut the bacon rashers through the center.
  2. Cut the feta cheese into cubes of about 1cm or just less than a half inch.
  3. Stuff a cube of feta into each peppadew until each one is filled to the brim.
  4. Place s strip of bacon across the opening of a peppadew and wrap it around the peppadew to enclose the feta cheese. Continue until all of the bundles are formed.
  5. To make up the kebabs, drill the skewers through the peppadew bundles using a twisting motion. If you try to push them through, you will end up squeezing the cheese out.
  6. Once you have four bundles on the skewer, straighten the bundles out to align the edges.
  7. Heat a large pan over medium high heat and add a tablespoon of butter.
  8. Add the kebabs to the pan with the bacon in contact with the pan.
  9. Fry this for 3 minutes, then turn the kebabs over to the other bacon side. Fry this for a further 3 minutes.
  10. Turn the kebabs onto one edge and fry this for 60 seconds.
  11. Turn them to the other edge and fry for another 60 seconds.
  12. Remove the kebabs from the oven and serve immediately with the accompaniments of your choice.
  13. These little gems can also be grilled quite successfully on your barbecue using a skillet or riffle pan.


How to Make Sherry Pearls – Simple Molecular Gastronomy – Sherry Caviar

simple molecular gastronomy,simple spherification,making caviar,making sherry caviar,making sherry pearls,how to do simple spherification,spherification using agar agar,making caviar using agar agar,modernist cuisine techniques,molecule-r techniues,simple spherification at home,homemade sherry caviar


How to Make Sherry Pearls - Simple Molecular Gastronomy - Sherry Caviar
Author: 
Recipe type: Modernist Cuisine - Molecular Gastronomy
 
Just a few episodes back we used agar agar to make a wonderful garnish of cilantro spaghetti. Today we're going to use sherry and agar agar to make sherry pearls, or sherry caviar. Before we start, you will need a large syringe, and you will also need to place about 500ml of cooking oil in your freezer for 30 minutes to get well chilled. This technique also falls into the category of molecular gastronomy, and is the simplest form of spherification.
Ingredients
  • 200ml Sherry
  • 2.5ml Agar Agar
  • 500ml Very cold oil for setting
Instructions
  1. Pour 200ml of your favorite sherry into a small saucepan.
  2. Add 2.5ml of agar agar to the sherry.
  3. Place the pan over medium heat and bring this to boil, stirring frequently.
  4. Lower the heat and simmer the mixture for 60 seconds.
  5. Remove the pot from the heat, and remove the chilled oil from the freezer.
  6. Use your syringe to suck up a load of the sherry mixture.
  7. Drizzle droplets of the sherry over the surface of the oil. You will see them set into tiny spheres almost immediately.
  8. Place a filter over a jug and pour the oil and sherry pearls into the filter.
  9. The oil will pass through leaving the pearls in the filter and you're done.
  10. (You can rinse the pearls briefly using cold water, but I have never found this necessary)


How to Make Mushroom Jerky – How to Make Mushroom Biltong – Vegan and Vegetarian Mushroom Jerky

how to make mushroom jerky,how to make mushroom biltong,homemade mushroom jerky,homemade mushroom biltong,vegetarian mushroom jerky,vegetarian mushroom biltong,vegan mushroom jerky,vegan mushroom biltong,making mushroom jerky at home,making mushroom biltong at home,mushroom jerky snack,mushroom biltong snack


How to Make Mushroom Jerky - How to Make Mushroom Biltong - Vegan and Vegetarian Mushroom Jerky
Author: 
Recipe type: Mushroom / Jerky / Biltong
 
Mushroom jerky makes a great tasty snack, and works brilliantly chopped and sprinkled over salads and soups. With the exception of the drying time, mushroom jerky is quick and really simple to make.
Ingredients
  • 4 Large brown mushrooms (or Porcini)
  • 45ml Worcestershire sauce
  • 45ml Light soy sauce
  • 60ml Maple syrup (can substitute regular golden syrup)
  • 60ml Cider vinegar
  • 10ml Chilli powder
  • 2.5ml Smoked paprika
Instructions
  1. Combine the Worcestershire sauce, light soy sauce, maple syrup, cider vinegar, chilli powder and smoked paprika in a jug and stir this until well combined.
  2. You will need large brown mushrooms, or porcini mushrooms as the have a well defined, robust flavor.
  3. Cut the mushrooms into slices 12mm or a half inch thick.
  4. Place the mushroom slices in a large non-reactive pan and pour the marinade mixture over the mushrooms.
  5. Use a basting brush to pick up marinade from the pan and brush this over any spots you may have missed.
  6. Cover the pan with cling-wrap and place this in your refrigerator overnight.
  7. The following day, transfer the mushroom slices to a rack in another pan.
  8. Set the temperature of your oven to 50c or 122f and place the tray in the oven.
  9. Leave the oven door slightly open.
  10. It will take around 10 hours for the mushrooms to dry. You want to be pliable and chewy, not bone dry.
  11. And there we have it, a tasty, chewy wonderful batch of mushroom jerky.


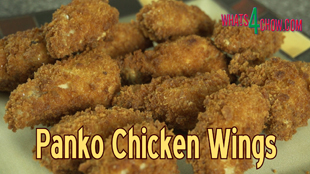
Panko Chicken Wings – How to Make Crispy Deep fried Panko Chicken Wings at Home!!!

panko chicken wings,how to make panko chicken wings,crispy fried panko chicken wings,homemade panko chicken wings,panko chicken wings recipe,panko chicken wings video,panko chicken wings youtube,deep-fried panko chicken wings,crispy deep-fried chicken wings,how to make crispy chicken wings,best crispy chicken wings recipe,making panko chicken wings


Panko Chicken Wings - How to Make Crispy Deep fried Panko Chicken Wings at Home!!!
Author: 
Recipe type: Chicken / Deep-fried
Prep time: 
Cook time: 
Total time: 
Serves: 12
 
In the previous episode we made panko crumbs. Now we're going to use these to make amazingly crispy deep-fried chicken wings.
Ingredients
  • 6 Whole chicken wings
  • 125ml All-purpose flour
  • 15ml Salt
  • 15ml Cayenne pepper
  • 1 Batch Panko crumbs
Instructions
  1. To start, combine the all-purpose flour, salt and cayenne pepper. Place this in a container with a lid.
  2. Trim away the wing tips from the chicken wings and slice through the center joint of each wing, giving you a dozen winglets.
  3. Drop the winglets into the flour, put the lid on and shake them around to coat. Allow the winglets to stand in the flour for 10 minutes.
  4. For the panko coating, place the panko crumbs in a bowl, and whisk 2 eggs in another bowl.
  5. Before starting, spread a layer of panko crumbs over a large platter. This is where the coated wings will set and the layer of crumbs prevents the coating from sticking to the platter and getting damaged.
  6. Dip the winglets in the egg to wet all of the flour coating.
  7. Transfer the winglet to the panko crumbs to get a good solid coating all over.
  8. Transfer the winglet to the platter to set. Continue with the remaining winglets.
  9. Allow the panko coating to set for 10 minutes.
  10. Half fill a large pan with oil and heat this to 180c or 350f. Carefully drop the wings into the oil and fry them for 5 to 6 minutes, turning halfway through.
  11. Remove the wings from the oil using a slotted spoon and drain any excess oil on kitchen paper.
  12. And there we have it, a batch of amazingly crisp panko chicken wings.


Escargot Melba – Escargot with Garlic, Chilli & Sour Cream on Melba Toast

escargot,escargot recipe,making escargot at home,homemade escargot,best escargot recipe,snails,best snails recipe,making snails at home,homemade snails,escargot with melba,escargot with garlic,escargot with chilli,creammy escargot recipe,how to make melba toast,homemade melba toast,perfect melba toast


Escargot Melba - Escargot with Garlic, Chilli & Sour Cream on Melba Toast
Author: 
Recipe type: Starter / Appetizer
Cuisine: French
Prep time: 
Cook time: 
Total time: 
Serves: 4
 
One of my favorite ingredients are snails, however every restaurant seems to the same boring renditions over and over. This recipe gives a new flavor, texture and presentation to what has become an otherwise boring and mundane dish.
Ingredients
  • 24 Escargot
  • 30g Butter
  • 5ml Granulated garlic
  • 2.5ml Chilli flakes
  • 60ml Sour cream
  • Salt & Pepper to taste
  • 4 Slices square loaf white bread
Instructions
  1. To start, we need to make the curly melba triangles. For this you need regular square loaf white bread.
  2. Working with 2 slices at a time, toast the slices in your toaster until they are well browned, then slice of the edges. Keep the edges on one side.
  3. Use your bread knife to cut the 2 crispy sides apart. The center is very soft and the knife will literally slide through.
  4. Turn each piece over and rub the inside surface on the work surface. The moisture in the untoasted side will cause the excess bread to ball up and rub away onto the counter, leaving you with a beautifully thin wafer of toast.
  5. Cut the wafers from corner to corner to make the triangles.
  6. Repeat this until all of the slices are processed.
  7. Place the melba triangles with the untoasted side facing upward onto a large baking sheet.
  8. Toast the melba in a preheated oven at 200c or 400f for about 90 seconds until the triangles have browned slightly and curled up.
  9. Clear the baking sheet and place any remaining triangles on the sheet along with the toast edges.
  10. Pop the sheet back in the oven for 90 seconds.
  11. Remove this from the oven and put the melba and bread batons aside.
  12. Now onto the snails.... remove the snails from the can and drain them in colander. Rinse the snails thoroughly under running water for 5 full minutes. This removes the terrible rancid brine from the snails.
  13. Measure out the dried chilli flakes, garlic granules, cultured sour cream and butter.
  14. Heat a pan over medium heat and add the butter.
  15. Once the butter is bubbling pour in the snails. Fry the snails gently for 2 minutes.
  16. Add the garlic granules and chilli flakes and continue to fry for a further 60 seconds.
  17. Turn off the gas or remove the pan from the heat and stir in the sour cream.
  18. To serve the escargot, place 3 triangles of melba on each serving plate.
  19. Top each of these with 2 snails.
  20. Dress each triangle with 2 toast batons and serve immediately.


Mexican Deep Fried Chicken Wings – Crispy Deep Fried Wings with Mexican Spice

deep-fried chicken wings,crispy deep-fried chicken wings,mexican style deep-fried chicken wings,mexican chicken wings,chicken wings with mexican spice,mexican spice blend recipe,how to make mexican spice,how to make deep-fried mexican chicken wings,mexican deep-fried chicken wings recipe,spicy deep-fried chicken wings recipe,crispy mexican chicken wings,hot and spicy wings recipe,how to make spicy chicken wings,how to deep-fry chicken wings


Mexican Deep Fried Chicken Wings - Crispy Deep Fried Wings with Mexican Spice
Author: 
Recipe type: Chicken
Cuisine: Mexican
 
These deep-fried Mexican spiced chicken wings are out of this world. By adjusting the quantity of cayenne you can make this dish as hot or mild as you like.
Ingredients
  • 12-16 Chicken wings
  • 15ml Cumin seeds
  • 15ml Dried coriander leaves
  • 15ml Paprika
  • 5ml Dried oregano
  • 5ml Cayenne pepper (mild) / 15ml (medium) / 25ml (hot)
  • 5ml Garlic granules
  • 10ml Salt
  • 2 Cups all-purpose flour
  • 4 Eggs
Instructions
  1. Starting with the Mexican spice blend, place the cumin seeds, dried coriander leaves, paprika, dried oregano, cayenne pepper a dried garlic granules and salt in your spice grinder.
  2. Putting the powdered spices into the grinder along with the ingredients that require grinding helps the grinder achieve a finer result.
  3. Unpack the chicken wings. Cut away the wing tips and discard them, then slice through the center joint of each wing.
  4. Sprinkle some of the spice blend over the base of a container and pack in a single layer of the wings.
  5. Sprinkle more of the spice followed by another layer of wings.
  6. Continue with this until all of the wings are packed in.
  7. Sprinkle any remaining spice over the top, put the lid on and give it all a good shake-up.
  8. Put the wings aside for 30 minutes to marinate.
  9. Place the all-purpose flour into a bowl, and 4 well whisked eggs into another.
  10. Sprinkle a little of the flour over a platter. This is where the coated wings will set, and the layer of flour prevents the coating from sticking to the plate and getting damaged.
  11. Dredge the wings in the flour to coat them all over.
  12. Dunk the wings in the egg to wet all of the flour.
  13. Then it's back to the flour to get a good solid coating all over.
  14. Transfer the wings to the platter and allow the coating to set for 20 minutes.
  15. Half-fill a large pan with oil and heat this to 180c or 350f.
  16. Carefully drop the wings into the oil and fry them for 6 minutes, turning once halfway through.
  17. Use a slotted spoon to lift the wings from the oil and drain any excess oil on kitchen paper.
  18. Serve the wings immediately with the accompaniments of your choice.


Scroll to top

Kitchen Conversions

Convert:
Masses
to:
Volumes
to:
Temperatures
to:
Lengths
to: