The Famous Bicken Churger – Laminated Chicken, Beef & Bacon Burger Patty

how to laminate meat,chicken beef bacon patty,best chicken burger patty,best burger patty recipe,best beef burger patty recipe,best bacon burger recipe,bicken churger,laminated burger patty recipe,how to make gourmet burger patties,homemade laminated burger patties,the famous bicken churger burger patty,best burger ever,chicken and bacon burger,burger patty recipes,beef burger patty recipes,bacon burger patty recipes


The Famous Bicken Churger - Laminated Chicken, Beef & Bacon Burger Patty
Author: 
Recipe type: Burgers and Burger Patties
Prep time: 
Cook time: 
Total time: 
Serves: 4
 
The Burger Patty EVER!!! This demonstration shows you how to laminate chicken fillet, tenderloin steak and bacon into a single layered patty that tastes like heaven!!!!
Ingredients
  • 2 Chicken breast fillets
  • 2 Sirloin steaks, cut 6mm thick
  • 4 Slices oak or hickory smoked bacon, lean
  • Kosher salt
  • Flour to dust
Instructions
  1. Fold the chicken breasts in cling wrap and tap them down with your meat mallet to a thickness of 3mm or 1 eight of an inch.
  2. Have your butcher cut the tenderloin into thin steaks of 6mm in thickness. Trim away the fat along the edges, fold the in cling wrap and tap them down to a thickness of 3mm using you meat mallet.
  3. So far so good. 2 Chicken breasts flattened along with 2 steaks and 4 large slices of good quality oak or hickory smoked bacon will make 4 large bicken churger patties.
  4. To assemble, salt the chicken and press a steak into the surface. Place 2 strips of bacon on top of the steak snd press these down. You don't need salt between the steak and bacon as the bacon has a high enough salt content.
  5. Repeat this with the second set of ingredients.
  6. Lightly flour 2 large platters and place one of the bicken churger sets on each. Lighly flour the tops of the bicken churgers and place them in your refrigerator for 30 minutes.
  7. Within 30 minutes, most of the magic has happened. Remove the platters from the refrigerator and cut each set in half down the center. This gives you 4 bicken churgers.
  8. Heat a large pan over high heat and add about 30g of butter. Carefully drop the bicken churgers into the pan with the bacon side down. Allow these to fry for 3 minutes.
  9. Turn the patties over and continue to fry for a further 2 minutes.
  10. Remove the bicken churgers from the pan, construct your burgers and serve immediately.

 

Snack Platter Catering – Part 9 – Creamy Tarragon Chicken Mini Top Hat Pies

mini tarragon chicen top hat pies,chicken pies,tarragon chicken pies,creamy chicken pies,snack chicken pies,finger snack chicken pies,cocktail chicken pies,creamy chicken pastries,fingerfood chicken pies,miniature chicken pies,tarragon chicken pastries,finger foods,snack foods recipes,cocktail party recipes,snack platter recipes,snack basket recipes


Snack Platter Catering - Part 9 - Creamy Tarragon Chicken Mini Top Hat Pies
Author: 
Recipe type: Finger foods / Snack Foods / Poultry
Cuisine: French
Serves: 40
 
Tarragon chicken mini top hat pies are really quick and easy to make, and the components can be made well ahead of time and assembled just before serving.
Ingredients
For 40 Mini Top Hat Pies
  • 500g Chicken breast
  • 7.5ml Dried tarragon
  • 2.5ml Garlic powder
  • 100ml Double cream
  • Salt and pepper to season
  • One batch of flaky pastry
  • 30g Butter
  • 1 Egg
Instructions
  1. Roll your pastry out to a thickness of 3mm. Cut the pastry into 80 squares of 40mm, or 1.5 inches.
  2. Place the squares on a lightly greased baking sheet and brush them with an egg wash consisting of an egg yolk whisked together with a tablespoon of water.
  3. Bake the pastries in a preheated oven at 200c or 400f for 12-15 minutes until golden.
  4. While the pastry bakes, cut the chicken breast into strips a quarter inch thick across the grain. Measure out the dried tarragon, garlic powder and the double cream.
  5. Heat a pan over medium high heat and add 30g of butter. Fry the chicken for 3 to 4 minutes until just cooked through.
  6. Remove the pan from the heat and allow the chicken to cool for 5 minutes. Transfer the chicken to a chopping board and cut it into small cubes.
  7. Transfer the cubed chicken to a bowl and mix in the tarragon and garlic powder.
  8. Return the chicken to the pan and fry briefly before pouring in the cream. Stir this briefly to heat the cream through and remove the pan from the heat.
  9. Spoon a teaspoon of the chicken onto 40 of the pastry squares. Top these with the remaining 40 squares and serve immediately. They also taste great served cold.


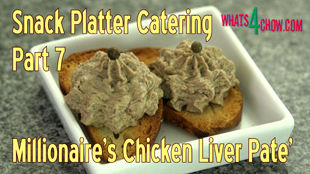
Snack Platter Catering – Part 7 – Millionaire’s Chicken Liver Pate’ – Ideal Snack Platter Food!!!

millionaires chicken liver pate',chicken liver pate',chicken liver pate' recipe,how to make chicken liver pate',homemade chicken liver pate',homemade chicken pate',chicken liver pate with brandy, chicken liver pate with cream, chicken liver pate paleo, making chicken liver pate, quick chicken liver pate', easy chicken liver pate, make chicken liver pate' at home, make creamy chicken liver pate'


Snack Platter Catering - Part 7 - Millionaire's Chicken Liver Pate' - Ideal Snack Platter Food!!!
Author: 
Recipe type: Snack Food / Finger Food / Pate'
Cuisine: French
 
Millionaire's Chicken Liver Pate' puts a new spin on a classic recipe. Once you've tasted this amazing flavor, you won't go back!!!
Ingredients
  • 500g Chicken livers
  • 50g Seedless raisins
  • 150ml Brandy
  • 1 Onion, finely chopped
  • 2 Cloves garlic, finely chopped
  • 10ml Fresh thyme, finely chopped
  • 50g Butter
  • 60ml Cream
  • Salt & cracked black pepper to taste
Instructions
  1. Cut away any sinew and discolored parts from the chicken livers. Place the livers in a large jug along with the seedless raisins and pour in the brandy. Set this aside for 1 to 2 hours.
  2. Dice the onion and finely chop the garlic and fresh thyme.
  3. Strain the livers through a colander and reserve the liquid.
  4. Heat a large pan over medium high heat, add 50g of butter and fry the onion and garlic for 5 minutes until tender and translucent.
  5. Add the liver and raisins to the pan along with the fresh chopped thyme. Fry this for 5 minutes until the livers are cooked through.
  6. Pour in the reserved liquid and continues to cook this for a further 2 to 3 minutes until the liquid has reduced by half.
  7. Remove the pan from the heat and allow it to cool for a few minutes.
  8. Transfer the mixture to a large jug and process this with your stick blender until smooth. You can also do this in a food processor or blender.
  9. Pour in the cream and mix this in thoroughly. Season to taste with salt and pepper.
  10. Cover the pate' and allow this to set in your refrigerator for at least an hour.
  11. As a serving suggestion, slice thin slices of dinner or cocktail buns and toast them under your grill for a few minutes on either side until golden.
  12. Transfer these to platters around a communal bowl of pate, or serve them in single portion bowls piped with a little pate and garnished with pickled green peppercorns.


Snack Platter Catering Part 5 – Mini Curry Chicken Samosas – Perfect Snack Platter Food

curry chicken samosas,mini curry chicken samosas,cocktail curry chicken samosas,homemade curry chicken samosas,how to make curry chicken samosas,cocktail snack curry chicken samosas,finger foods curry chicken samosas,small curry chicken samosas,how to make chicken samosas,easy curry chicken samosas,curry chicken samosas recipe,best chicken samosa recipe,how to make curry chicken samosas at home,quick chicken samosas,indian curry chicken samosas


Snack Platter Catering Part 5 - Mini Curry Chicken Samosas - Perfect Snack Platter Food
Author: 
Recipe type: Snack Platter Recipes, Curry Samosa, Finger Foods
Cuisine: Indian
 
Mini Curry Chicken Samosas are perfect for snack platter catering. Not only do they taste great, but they can be made way ahead of time and baked from frozen. These curry chicken samosas are sure winners!!!
Ingredients
For 40 Mini Samosas
  • 400g Cooked chicken thigh meat, finely chopped
  • 250g Onion, finely chopped
  • 30ml Garam Masala
  • 5ml Sugar
  • 125ml Chicken stock
  • 7.5ml Cornflour dissolved in a little water
  • Fillo pastry
Instructions
  1. Strip the meat and skin from your cooked chicken thighs. Zap this in your food processor until fine. Weigh out 400g of the processed chicken.
  2. Chop the onion and weigh out 250g of this.
  3. Heat a pan over medium high heat and add 50g of butter. Fry the onion for 5 minutes until tender and translucent.
  4. Add the garam masala and sugar and fry for a further 30 seconds until fragrant.
  5. Pour in the chicken stock and continue to fry for a further 60 seconds.
  6. Dissolve the cornflour in a little water and add this to the pan. Allow this to boil for 60 seconds until thickened.
  7. Remove the pan from the heat and stir in the finely chopped chicken. Set this aside to cool.
  8. When the filling has cooled, cut your pastry into strips 4cm or 1.5 inches in width. The length must be 5 times that of the width, in this case 20cm or 8 inches.
  9. You can make the samosas bigger or smaller according yo your preference, provided you keep the ratio of length to width.
  10. Working with a few strips at a time, spoon a tablespoon of filling onto the end of each strip.
  11. Fold the pastry at 45 degrees to cover the filling. Fold this straight up, then at 45 degrees and so on until the samosa is completely formed.
  12. Wet the last piece of pastry to seal.
  13. Transfer the samosas to a lightly greased baking sheet and brush them with melted butter.
  14. Bake the samosas in a preheated oven at 200c or 400f until golden. Turn the samosas over and continue to bake until the second side is golden and crispy.
  15. Transfer the samosas to serving platters and serve immediately.


Snack Platter Catering Part 4 – Petit Chicken & Salami Kebabs au Gratin – Cocktail Chicken Kebabs

cocktail chicken kebabs,cocktail chicken and salami kebabs,mini chicken kebabs,mini chicken and salami kebabs,finger snack chicken kebabs,party food chicken kebabs,how to make mini chickken kebabs,homemade chicken kebabs,chicken kebabs on toothpicks,superbowl chicken kebabs,snack platter chicken kebabs, cocktail chicken kebabs recipe, cocktail chicken skewers, chicken seekh kaba, chicken tikka kabab


Snack Platter Catering Part 4 - Petit Chicken & Salami Kebabs au Gratin - Cocktail Chicken Kebabs
Author: 
Recipe type: Finger Foods, Cocktail Party Foods , Poultry
Prep time: 
Cook time: 
Total time: 
Serves: 20-40
 
These cocktail chicken kebabs are outstanding. Tender chicken thigh meat enhanced with the flavor of strong salami and melted over with strong mature cheddar is legendary!!!
Ingredients
To Make 40 Cocktail Kebabs
  • 14 Chicken thighs
  • 10 Slices strong salami, 5mm thick, cut into quarters
  • 100g Mature cheddar cheese, grated
  • Salt & Pepper to taste
  • 40 Toothpicks
Instructions
  1. To debone the thighs, locate the spine along the one side. Use a sharp paring knife to lift the skin along the spine. Pull the skin back to expose the hip joint, then cut the oyster free.
  2. Using your shears, cut through the hip joint.
  3. Flip the thigh over and cut through the connecting tissue to free the spine from the thigh.
  4. Grab one side of the thigh bone and use the edge of your blade to scrape the flesh down the bone towards the other joint. Cut around the joint to free the bone from the thigh.
  5. Continue until all of the thighs are deboned, then cut each thigh into 6 blocks.
  6. Peel away the skin of the salami and cut 10 slices from the roll, each slice about 5mm thick.
  7. Stack the slices up and cut them into quarters.
  8. To make up each kebab, thread a piece of chicken onto a toothpick. Follow this with a piece of salami, then another piece of chicken. Repeat this until all of the skewers are done.
  9. Heat your pan over medium high heat and fry the kebabs for 12 to 16 minutes until well browned, turning every few minutes.
  10. Remove the pan from the heat and transfer the kebabs to a roasting tin.
  11. Sprinkle a generous layer of grated mature cheddar over the kebabs.
  12. Grill the kebabs on the second highest rack in your oven until the cheese is completely melted and starting to take on color.
  13. Transfer the kebabs to platters and serve immediately.


Perfect Pan-Fried Chicken. How to Pan-Fry the Absolutely Best Chicken Ever!!!

perfect pan-fried chicken,perfect pan fried chicken,how to pan-fry chicken,best pan fried chicken recipe,the best way to pan fry chicken,tender pan fried chicken, perfect pan-fried chicken thighs, perfect pan fried chicken recipe,how to cook chicken how to fry chicken,crispy skin pan fried chicken,how to pan fry chicken crispy skin,best pan fried chicken recipes,homemade pan fried chicken with crispy skin


Perfect Pan-Fried Chicken. How to Pan-Fry the Absolutely Best Chicken Ever!!!
Author: 
Recipe type: Chicken / Poultry
Cook time: 
Total time: 
 
These simple tips will have you on your way to making the best perfect pan-fried chicken possible. Your chicken will have beautifully crispy and golden skin, with the most tender meat!!!
Ingredients
  • Chicken Thighs
  • Butter
  • Salt, pepper & spices of your choice
Instructions
  1. Locate the spine bone to which the thigh bone is attached.
  2. Using a sharp knife cut under the skin along the spine to lift the skin. Lift the skin up and cut the oyster free.
  3. Using your shears, cut through the hip joint. Turn the thigh over and cut the connecting tissue to free the spine bone from the thigh.
  4. Cut through the flesh along the thigh bone. Grab the hip joint and use the edge of your blade to scrape the flesh away from the thigh bone.
  5. Cut around the knee joint and pull the bone free. Repeat this until all of the thighs are deboned.
  6. Season both sides of the thighs liberally with salt, pepper and the spices of your choice.
  7. Heat you pan over medium high heat and add a tablespoon of butter. Add the thighs to the pan skin-side down and fry them for five minutes.
  8. Turn the thighs over and fry for a further 5 minutes. Wipe the chicken around in the pan to pick up all the caramelized yummy stuff from the surface of the pan.
  9. Turn the thighs again and fry for a further 2 minutes to re-crisp the skin.
  10. Remove the chicken from the pan and serve immediately with the accompaniments of your choice.


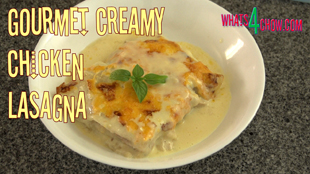
Gourmet Chicken Lasagna. Amazing Creamy Cheese Chicken Lasagna – The Best!!!

chicken lasagna,how to make lasagna,how to make chicken lasagna,creamy chicken lasagna,cheesy chicken lasagna,chicken lasagna recipe,chicken lasagna recipe video,Lasagne (Dish),Chicken and Cheese Lasagna, Creamy chicken and mushroom lasagna,chicken lasagna with white sauce,chicken lasagna recipe jamie oliver, chicken lasagna recipe sanjeev kapoor,chicken lasagna recipe italian,White Cheese Chicken Lasagna


Gourmet Chicken Lasagna. Amazing Creamy Cheese Chicken Lasagna - The Best!!!
Author: 
Recipe type: Pasta
Cuisine: Italian
Prep time: 
Cook time: 
Total time: 
Serves: 6
 
Lasagna is a cornerstone meal in many households, however the cliche'd savory mince or chicken with tomato and white sauce can be extremely tedious on the tastebuds. This creamy cheese chicken lasagna will change the way you see lasagna forever!!!
Ingredients
For the Cheese Sauce
  • 120g Mature cheddar, shredded
  • 120g Parmesan, shredded
  • 800ml Chicken stock
  • 240ml Cultured sour cream
  • 60ml Tapioca or cornflour
For the Chicken Gravy
  • 400ml Chicken stock
  • 30ml Tapioca or cornflour
The Rest...
  • 600g Roasted chicken, skin on, roughly chopped
  • 500g Fresh lasagna sheet (or quick-cook dried)
Instructions
  1. To start, we are going to make a thin gravy for the chicken. In a saucepan over medium heat, mix the tapioca or cornflour with a little water and add it to the cold chicken stock.
  2. Bring this to a boil, reduce the heat and simmer for 60 seconds until thickened. Remove the gravy from the heat and put this aside.
  3. For the creamy cheese sauce, heat the second batch of chicken stock over over medium heat. Mix the tapioca or cornflour with a little water and add this to the pot.
  4. Bring this to a boil, lower the heat and simmer for 60 seconds until thickened. Remove the pot from the heat.
  5. Stir in the shredded mature cheddar and parmesan cheeses until melted and totally combined.
  6. Pour in the sour cream and stir this in until totally combined.
  7. Place the roughly chopped chicken in a mixing bowl and pour in the gravy. Stir this until combined.
  8. Lightly grease a medium size roasting pan and line the bottom with 2 slices of lasagna sheet. I am using freshly made lasagna sheet, but you can use quick cook dried pasta as well.
  9. Top the pasta with a layer of the chicken and gravy. This is the reason we made the gravy thin. The pasta will absorb 30 percent of the liquid from the gravy as it cooks and it will thicken as a result.
  10. Add another layer of pasta to the pan.
  11. Top this with a generous layer of the creamy cheese sauce.
  12. Top this with another layer of pasta.
  13. Then another layer of chicken and gravy.
  14. A final layer of pasta topped with another generous spread of creamy cheese sauce and you're almost done.
  15. Sprinkle a generous helping of mature cheddar over the surface.
  16. Bake the lasagna in a preheated oven for 35 to 40 minutes until the cheese is crispy and well browned.
  17. Remove the lasagna from the oven and allow it to stand for 10 minutes before slicing and serving.


Plaited Chicken Pie. How to Make Rustic Chicken Pie from Start to Finish. Homemade Chicken Pie.

chicken pie,chicken pie recipe,how to make chicken pie,homemade chicken pie recipe,country chiken pie recipe,plaited chicken pie recipe,braided chicken pie recipe,how to make a chicken pie at home,chicken pie in puff pastry,best chicken pie filling,best chicken pie filling recipe,how to make chicken pie filling,chicken pie filling recipe,family sized chicken pie recipe,fancy chicken pie recipe,chicken pie


Plaited Chicken Pie. How to Make Rustic Chicken Pie from Start to Finish. Homemade Chicken Pie.
Author: 
Recipe type: Chicken / Baked / Pie
Prep time: 
Cook time: 
Total time: 
Serves: 4-6
 
This amazing plaited chicken pie that really does look incredible and tastes even better. For the best result, use the best quality parmesan and salami you can find.
Ingredients
  • 500g Chicken breast
  • 8 White mushrooms
  • 1 Medium onion
  • 50g Parmesan cheese
  • 250ml Sour cream
  • 50g Salami
  • 1 Roll puff pastry
Instructions
  1. Slice the chicken breasts across the grain into thin slices.
  2. Slice the mushrooms thinly, and dice the onion.
  3. Shred the parmesan using a fine grater and mince the salami finely.
  4. Heat your pan over medium high heat and fry the onion and mushroom for 3 minutes.
  5. Add the chicken and continue to fry for a further 5 minutes until the chicken is cooked through.
  6. Remove the pan from the heat and add the shredded parmesan and salami. Stir in the sour cream and put this aside to cool completely.
  7. Lay the puff pastry out on a lightly greased baking tray and heap the filling up down the center of the pastry.
  8. Using a sharp knife, cut the pastry at an angle in 1 inch intervals from the edge of the filling to the edge of the pastry. Repeat this on the other side as well.
  9. Lift the end of the pastry closest to you to enclose the filling.
  10. Alternating with strips on the right and left, lift these to cover the filling up until the second last pair of strips. Trim the odd ends from the end strip and lift the center piece to enclose the filling.
  11. Wrap the second last strips over this to secure it.
  12. Whisk 1 egg yolk with a tablespoon of water and paint on to the entire pie.
  13. Bake the pie in a preheated oven at 200c or 400f for 30 to 35 minutes. The pie will be well puffed up, crispy and golden.
  14. Remove the pie from the oven and allow it to rest for 5 minutes before slicing and serving with the accompaniments of your choice.


Cocktail Chicken Sausage Rolls. Crispy, Golden and Delicious Cocktail Chicken Sausage Rolls.

chicken sausage rolls,chicken sausage rolls recipe,how to make chicken sausage rolls,easy chicken sausage rolls, sausage roll recipe, chicken sausage rolls healthy, chicken sausage rolls puff pastry,best chicken sausage rolls recipe,chicken sausage rolls ingredients,how to make sausage rolls at home,how to make sausage rolls from scratch,how it's made sausage rolls,how to cook sausage rolls,homemade sausage rolls


Cocktail Chicken Sausage Rolls. Crispy, Golden and Delicious Cocktail Chicken Sausage Rolls.
Author: 
Recipe type: Cocktail Snacks / Snack Platter Food
Prep time: 
Cook time: 
Total time: 
Serves: 48
 
Making amazing chicken sausage rolls is easy and quick. This in this vide you will see how to season the chicken, fill and roll the pastry, and bake the sausage rolls to golden perfection.
Ingredients
  • 700g Chicken breast
  • 7.5ml Salt
  • 2.5ml White pepper
  • ¼Tsp Ground cloves
  • 5ml Ground coriander
  • ¼ Tsp Ground nutmeg
  • 2 Rolls puff pastry
Instructions
  1. Cut the chicken into blocks and place it in your food processor along with the salt, white pepper, ground cloves, ground coriander and ground nutmeg.
  2. Run the processor until the chicken is completely minced.
  3. Unpack the puff pastry and roll it. Keep the separating plastic in place.
  4. Using wet hands, form a sausage of the chicken mixture across the width of the dough.
  5. Using the separating plastic, lift the end of the dough up and over the chicken. Roll the dough over until you have an overlap in the pastry.
  6. Flatten the roll slightly and trim the roll from the remaining pastry. Transfer the roll to a lightly greased baking sheet.
  7. Continue rolling the sausage rolls until all of the filling and pastry is used. Any off-cuts at the ends can be used sideways to make shorter rolls.
  8. Whisk a single egg yolk with a tablespoon of water and brush the tops of the sausage rolls with the solution.
  9. Using a sharp thin blade knife, cut through the tops of the rolls. This helps moisture escape during baking ensuring that the inside of the dough is not wet and mushy. It also helps with portioning once baked. You should do this even you don't intend cutting the rolls into portions.
  10. Bake the sausage rolls in a preheated oven at 200c or 400f for 30 to 40 minutes until crisp and golden.
  11. Remove the rolls from the oven, cut them apart and serve immediately. The quantities in the recipe will yield 48 1 inch cocktail sausage rolls.


Indian Butter Chicken. How to Make Delicious, Fragrant Butter Chicken at Home.

Butter Chicken (Dish), butter chicken recipe, authentic butter chicken recipe, how to make butter chicken, indian recipes, Indian Cuisine (Cuisine), butter chicken curry recipe, tandoori, butter chicken curry, butter chicken recipe indian, butter chicken recipe with fresh cream, butter chicken recipe sanjeev kapoor, butter chicken vahchef, butter chicken restaurant style, tandoori masala chicken tikka masala,chicken tikka butter masala, Butter Chicken Masala Recipe, Punjabi butter chicken recipe


Indian Butter Chicken. How to Make Delicious, Fragrant Butter Chicken at Home.
Author: 
Recipe type: Indian Curry
Cuisine: Indian
Prep time: 
Cook time: 
Total time: 
Serves: 4-8
 
In Today's episode we make delicious, fragrant Indian Butter Chicken, using the Tandoori Chicken we baked yesterday.
Ingredients
  • 1.2kg Cooked Tandoori chicken
  • 100g Butter
  • 160ml Cream
  • 45g Garlic, finely chopped
  • 55g Ginger, finely chopped
  • 5 Green chillies, chopped
  • 1Tsp Paprika
  • 900g Tomatoes
  • 480ml Chicken Stock
  • Salt to taste
  • Fresh coriander to garnish
Instructions
  1. Finely chop the garlic, ginger and green chillies. Measure out the paprika, butter, chicken stock and cream. Chop the tomatoes, and cut the entire chicken into bite sized pieces.
  2. Heat the butter in a pan over medium high heat and fry the garlic, ginger and chilli for 2 minutes until fragrant.
  3. Add the paprika and stir this until totally combined.
  4. Add the chopped tomato and the chicken stock. Bring this to a boil, reduce the heat and simmer the tomato for 10 to 15 minutes. The tomatoes must be soft and tender.
  5. Remove the pan from the heat and allow it to cool for 5 minutes. Using your stick blender, puree the tomatoes until smooth.
  6. Return the pan to the heat, add the chicken and bring this to a boil. Reduce the heat and simmer the chicken for 10 minutes until it is absolutely tender.
  7. Add the cream, stir this in until totally combined. Season with salt to taste and serve immediately garnished with fresh coriander. As an accompaniment, any Indian bread will serve well.


Authentic Tandoori Chicken. Tradition Indian Tandoori Chicken, Spiced and Grilled to Perfection.

tandoori chicken, Tandoori Chicken (Dish), how to make tandoori chicken, tandoori chicken masala, baked tandoori chicken, Indian style tandoori chicken, indian cooking, spicy chicken recipe, chicken tandoori, indian chicken recipe, Tandoori Chicken Recipe, tandoori chicken curry recipe, tandoori chicken tikka recipe, tandoori chicken indian recipe, tandoori chicken marinade, tandoori chicken recipe sanjeev kapoor


Authentic Tandoori Chicken. Tradition Indian Tandoori Chicken, Spiced and Grilled to Perfection.
Author: 
Recipe type: Indian Curry
Cuisine: Indian
Prep time: 
Cook time: 
Total time: 
Serves: 4
 
In this first episode of 2015 we make authentic Tandoori Chicken. This is the first in a 2-part series covering Tandoori Chicken and Butter Chicken.
Ingredients
  • 1.4kg Chicken
For the Paste
  • 50g Garlic paste
  • 10g Ginger paste
  • 30ml Lemon juice
  • 25g Chilli paste
  • 5ml Salt
For the Marinade
  • 5g Cumin Powder
  • 10g Garam Masala
  • 25g Ginger paste
  • 30ml Lemon Juice
  • 50ml Oil
  • 25g Chilli paste
  • A few strands of saffron
  • 20ml Yoghurt
To Serve
  • Sliced onion
  • Chaat Masala to sprinkle
  • Cream
  • Lemon wedges
Instructions
  1. Cut away any excess skin from the neck and butt of the chicken and remove the wing tips. Slice through the breast bone and open the chicken up.
  2. Turn the chicken oven, and with a downward thrust, dislocate the pelvis of the bird.
  3. Using a sharp knife, cut deep incisions into the thighs, drumsticks and breast of the chicken.
  4. In a bowl, combine the garlic paste, ginger paste, lemon juice, chilli paste and salt.
  5. Brush all of the paste onto the chicken making sure to get it into the incisions as well. Let this stand for 30 minutes.
  6. While the chicken stands, combine the cumin powder, garam masala, ginger paste, lemon juice, chilli paste, saffron, oil, salt and yoghurt. Mix this until the oil is totally combined.
  7. Spoon this mixture over the chicken, then allow this to marinate in your refrigerator for 6 hours.
  8. Remove the chicken from the refrigerator, scoop up any over-run marinade and pour it back onto the chicken.
  9. Lift the chicken up, slide a rack underneath, then bake the chicken in a pre-heated oven at 180c or 350f for 80 minutes.
  10. Remove the chicken from the oven, cut it into portions and serve garnished with fresh onion slices, chaat masala, a drizzle of cream and a few lemon wedges.


KFC Chicken Tenders. KFC Chicken Strips the Real Way!!! Homemade KFC Recipes!!!

kfc chicken tenders,kfc chicken strips,deep-fried chicken strips,crispy fried chicken strips,how to make kfc at home,homemeade kfc recipes,original recipe kfc chicken,secret recipe kfc chicken,11 herbs and spices kfc secret recipe,the real kfc recipe, homemade chicken fingers, how to make chicken fingers, chicken finger recipe, chicken strips, how to make chicken strips, homemade chicken strips, kfc chicken tenders recipe


KFC Chicken Tenders. KFC Chicken Strips the Real Way!!! Homemade KFC Recipes!!!
Author: 
Recipe type: Chicken / Poultry / KFC
Cuisine: American
Prep time: 
Cook time: 
Total time: 
Serves: 8-12
 
A few weeks back we did a 3-Part series on KFC. Numerous requests have come in regarding KFC Chicken Tenders, so here it is. If you have not viewed the previous episodes in our KFC series, please click the onscreen link in the video, or the links below and view these first in order to understand the curing process.
Ingredients
  • 8 Fresh chicken breasts
For the Spice Blend
  • 3 Tsp Paprika
  • 2 Tsp Onion salt
  • 1 Tsp Dried sage
  • 1 Tsp Garlic powder
  • 1 Tsp Oregano
  • 1 Tsp Cayenne pepper
  • 1 Tsp Cracked black pepper
  • 1 Tsp Dried basil
  • 1 Tsp Dried marjoram
  • 1 Tsp Dried coriander
For the Curing Brine
  • 100g Dairy or Kosher salt (any non-iodated salt is fine)
  • 1 Tsp Whole black peppercorns
  • 1 Corn of whole allspice
  • 12.5g Saltpetre
  • 1 Tsp Ginger
  • 50g Sugar
  • 15g Bicarbonate of soda
For Coating
  • 3 Cups all-purpose flour
  • 4-6 Eggs
Instructions
  1. Combine the spices for the spice mixture, stir to combine and divide these in half.
  2. Place all of the curing ingredients in a pot along with one half of the spice mixture and pour in 2.5 lt of hot water. Stir until everything has dissolved, then bring it to a boil. Remove the pot from the heat and quick chill it by placing the pot in a sink of cold water.
  3. Place the chicken breasts in a large container and pour in the cooled curing brine. Place the lid on the container and allow this this cure for a full 24 hours in your refrigerator.
  4. After 24 hours, remove the breasts from the brine and slice it at an angle across the grain into slices of 10mm or just less than a half inch thick.
  5. To coat the chicken, combine the spice blend with the flour, and lightly whisk the eggs.
  6. Before you start coating the chicken, sprinkle a layer of the seasoned flour over a large platter. For this quantity of chicken you will need more than one platter.
  7. To continue with the coating, dredge the chicken in the flour mix, then dunk it in the egg, making sure to wet all of the flour.
  8. Dredge the chicken the flour again making sure to get a good solid coating...... then back to the egg making sure to wet all of the flour.
  9. Finally a last coating of flour finishes it off. Transfer the chicken to the platter and continue with the rest of the chicken.
  10. Allow all of the coated chicken to set for 20 minutes before frying.
  11. Fill your pan with oil to a depth of 1 inch and heat this to 160c or 310f and fry the chicken for 4 minutes per side until crispy and golden.
  12. Remove the chicken from the oil and drain any excess oil on kitchen paper. Repeat this until all of the chicken is cooked.


Scroll to top

Kitchen Conversions

Convert:
Masses
to:
Volumes
to:
Temperatures
to:
Lengths
to: