McDonald’s Chicken McNuggets Recipe – How to Make McDonald’s McNuggets at Home!!!

chicken mcnuggets, mcdonalds chicken mcnuggets, how to make, how to make mcdonals chicken mcnuggets, homemade mcdonalds chicken mcnuggets recipe, chicken mcnuggets recipe video, chicken mcnuggets recipe youtube, make mcdonalds chicken mcnuggets at home, quick and easy chicken mcnuggets recipe, mcdonalds chicken nuggets recipe,


McDonald's Chicken McNuggets Recipe - How to Make McDonald's McNuggets at Home!!!
Author: 
Recipe type: Chicken / Fast Foods
Cuisine: American
 
A couple of weeks ago one of our viewers requested that I decode the McDonalds Chicken McNuggets recipe. I took up the challenge, and here it is.
Ingredients
For the Coating Batter (enough for 8-12 chicken breasts)
  • 90g All purpose flour
  • 15ml Salt
  • 15ml Bicarbonate of soda
  • 125g Yellow maize meal
  • 90g Corn starch
  • 20ml White pepper
  • 10ml Onion powder
  • 5ml Garlic powder
  • 5ml Ground cumin
  • 5ml Ground coriander seed
  • 5ml Cayenne pepper
  • 2.5ml Dried oregano
  • 2.5ml Dried basil
  • 2.5ml Dried rosemary
  • 2.5ml Dried Thyme
  • 450ml Water
Instructions
  1. Unlike KFC, where the spicy flavor is cured into the chicken, with McNuggets, the flavor is all in the coating, so that's where we're starting.
  2. Measure out the yellow maize meal, the cornstarch and the all purpose flour.
  3. For the seasoning, combine the white pepper, onion powder, garlic powder, ground cumin, ground coriander seed, cayenne pepper, dried oregano, dried basil, dried rosemary and dried thyme. Grind these to powder in you spice grinder.
  4. Place all of the aforementioned into a large mixing bowl and mix briefly to combine.
  5. Pour in the water and whisk until smooth.
  6. Put this aside for 30 minutes to autolyse.
  7. After 30 minutes, even the smallest particles in the liquid will be saturated, and as a result the batter will have thickened considerably, and will coat the back of a spoon.
  8. The real McNuggets uses coarsely ground chicken reconstituted with the aid of emulsifiers and high pressure extruders. Since this does not affect the taste, we're not going to run out and buy bags of phosphates and fancy industrial extruders.
  9. Trim away the fillet from the chicken breasts.
  10. Square off the ends of the breasts and slice the remaining breasts into slices 5mm or a 5th of an inch thick.
  11. Place any trimmings in your refrigerator for other recipes.
  12. Half fill a wok or pan with oil and heat this to 170c or 340f.
  13. Once again, we don't have fancy conveyer belt coating machines, so to coat the chicken bits, pick a piece up with a skewer, dip it in the batter and drop it into the oil.
  14. The chicken cooks within 60 seconds, so you will only fry about 6 or 7 pieces at a time.
  15. Use a slotted spoon to remove them from the oil, and drain any excess oil on kitchen paper.
  16. And there it is.... a mountain of McNuggets just waiting to be enjoyed.


How to Make Curry in the Oven – Delicious Full Flavored Spicy Oven Curry

how to make curry,how to make chicken curry,how to make curry in the oven,oven curry recipe,oven curry recipe youtube,oven curry recipe video recipe,making curry in your oven,how to make curry in the oven,spicy chicken curry in the oven,spicy homemade chicken curry,how to make curry without a pot,best chicken curry recipe,making homemade chicken curry,use your oven to make curry


How to Make Curry in the Oven - Delicious Full Flavored Spicy Oven Curry
Author: 
Recipe type: Curry
Cuisine: Indian
Prep time: 
Cook time: 
Total time: 
Serves: 6-8
 
Today we're making curry in the oven. So why would you do this? Sometimes the pot you normally use is in the refrigerator, or is being used for some other dish, then this trick is very useful. The added bonus is that making curry in this way is maintenance free.... there is very little stirring or hassle of any kind.
Ingredients
  • 4 Chicken drumticks
  • 4 Chicken thighs
  • 2 Potatoes
  • 2 Onions
  • ½ Green Pepper
  • ½ Red Pepper
  • ½ Yellow pepper
  • 60ml Chicken Masala curry spice blend
  • 500ml Chicken stock
  • 15ml Garlic granules
  • 15ml Ground ginger
  • 10ml Golden syrup
  • 15ml Chilli powder
  • Salt to taste
  • 30ml Tapioca flour dissolved in a little water
Instructions
  1. Use you kitchen sheers to cut the chicken legs and thighs into chunky pieces. Arrange the pieces in large roasting pan skin side up.
  2. Dice the onions and scatter this evenly over the chicken.
  3. Cube the potatoes and scatter these evenly across the pan.
  4. Roll-cut the carrots and scatter these across the pan.
  5. Cut the peppers into blocks and add these to the pan.
  6. Pour the chicken stock over the ingredients.
  7. Place the curry powder in a shaker bottle and dispense this evenly across the top of the pan.
  8. Cover the pan with foil and bake this in a preheated oven at 160c or 320f for 2 hours.
  9. After 2 hours, remove the pan from the oven and carefully remove the foil.
  10. Stir up the ingredients thoroughly.
  11. Add the garlic granules and stir this in.
  12. Return the pan to the oven for a further 60 minutes.
  13. Remove the pan from the oven and scoop all of the solid ingredients from the pan using a slotted spoon. Put this aside.
  14. Pour the sauce from the roasting pan into a frying pan.
  15. Heat the sauce over medium high heat and add the ground ginger, golden syrup and chilli powder.
  16. Dissolve the tapioca flour in a little water and pour this in.
  17. Adjust the seasoning with salt and stir this all together.
  18. Bring the pan to a boil, lower the heat and simmer for a minute until thickened.
  19. Pour the sauce over the chicken and serve immediately accompanied with sliced banana, fruit chutney, desiccated coconut and sambal.
  20. And there it is, an amazingly fragrant and spicy curry made in the oven.


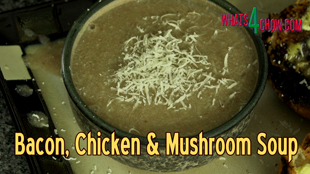
Bacon, Chicken & Mushroom Soup – Rich, Thick & Hearty Soup using Chicken Bone Broth

bacon chicken and mushroom soup,how to make bacon chicken and mushroom soup,bacon chicken and mushroom soup recipe,bacon chicken and mushroom soup youtube,bacon chicken and mushroom soup video recipe,how to make soup using bone broth,soup from bone broth recipe,using bone broth as a soup base,thick bacon chicken and mushroom soup recipe,bacon chicken and mushroom soup whats4chow


Bacon, Chicken & Mushroom Soup - Rich, Thick & Hearty Soup using Chicken Bone Broth
Author: 
Recipe type: Soup
 
In today's episode we're making a thick, rich and tasty bacon, chicken and mushroom soup using the chicken bone broth we made a couple of days ago as the base.
Ingredients
  • 200g Streaky bacon
  • 2 Chicken thighs, deboned
  • 250g White mushrooms
  • 30g Chicken fat
  • 500ml Chicken bone broth
  • 500ml Chicken stock
  • 30ml Tapioca flour dissolved in a little water
Instructions
  1. Cut the chicken into strips, cut the streaky bacon across the grain into strips and slice the mushrooms.
  2. Heat your wok over high heat and add 30ml of the chicken fat we reserved when making the broth. When the wok is smoking hot add the chicken, bacon and mushroom.
  3. Stirfry these for 4 to 5 minutes until well browned and starting to caramelize.
  4. Pour in the mixed broth and chicken stock and stir this in for minute or 2 until the mixture comes to a boil, then turn off the gas.
  5. Use your stick blender to machine the soup until smooth.
  6. Return the wok to the heat.
  7. Dissolve the tapioca flour in a little water and pour this into the soup while stirring continuously.
  8. Simmer the soup for 60 seconds to thicken, then remove from the heat.
  9. Serve this rich hearty creation immediately with the accompaniments of your choice.


Supreme Chicken Gravy – How to Make Rich, Silky Smooth Chicken Gravy

how to make chicken gravy,making chicken gravy using broth,how to make silky smooth chiken gravy,best chicken gravy recipe,homemade chicken gravy,chicken gravy recipe youtube,chicken gravy recipe video,making the best chicken gravy,making glossy chicken gravy,how to make the tastiest chicken gravy,flavorful chicken gravy,recipe for the best chicken gravy,making chicken gravy at home


Supreme Chicken Gravy - How to Make Rich, Silky Smooth Chicken Gravy
Author: 
Recipe type: Gravies and Sauces
 
This episode is the third in our short series on bone broth. Today we're going to use the broth to make a rich, silky smooth and flavorful chicken gravy.
Ingredients
  • 200ml Chicken bone broth
  • 150ml Chicken stock
  • 6 Pickling onions
  • 30g Reserved chicken fat (from making the broth) - plus extra if necessary
  • 30ml / 45ml/ 60ml Tapioca flour dissolved in a little water) - 30ml=Thin / 45ml=Medium / 60ml=Thick
Instructions
  1. Combine the broth with the chicken stock.
  2. Cut 6 pickling onions into rounds.
  3. Heat a small saucepan over medium heat and add a heaped tablespoon of the chicken fat we reserved from making the broth in the first episode.
  4. Add the onions and fry these until golden and caramelized. This will take about 8 minutes.
  5. Add a little extra chicken fat if necessary.
  6. Add the broth a stock mixture to the pot and stir this in.
  7. Bring the mixture to a boil.
  8. Dissolve the tapioca flour in a little cold water and add this to the pot while stirring continuously. 30ml of tapioca will give you a thinner gravy while 45ml results in a medium, and 60ml in a thick gravy.
  9. Continue to cook the gravy until it has thickened, about 2 minutes, then remove the pot from the heat.
  10. Use your stick blender to machine the gravy until smooth and all of the caramelized onion has been absolutely liquidized.
  11. Serve the gravy piping hot over roasted meat and potatoes.


How to Make Veloute’ Sauce – the Perfect White Sauce!!!

veloute' sauce recipe,sauce veloute',how to make veloute' sauce,homemade veloute' sauce,how to make white sauce,white gravy recipe,best veloute'sauce recipe,making veloute' sauce using bone broth,white sauce recipe,basic white sauce recipe,easy white sauce recipe,best white sauce recipe,homemade white sauce recipe,homemade white sauce youtube


How to Make Veloute' Sauce - the Perfect White Sauce!!!
Author: 
Recipe type: Sauces and Gravies
Cuisine: French
 
In yesterday's episode we made a rich, silky smooth chicken bone broth. In today's episode we're going to use this broth to make an incredible veloute' sauce. This sauce is silky smooth with full rounded flavor. Veloute' sauce is also a master sauce or main component of other more complex sauces like cheese sauce, pepper sauce or mushroom sauce.
Ingredients
  • 45g Butter
  • 45ml All-purpose flour
  • 250ml Chicken bone broth
  • 250ml Chicken stock
  • Salt and ground white pepper
Instructions
  1. Measure out the butter and all purpose flour.
  2. Measure out the broth and chicken stock and combine these in a single jug.
  3. Heat a large pan over medium heat and melt the butter.
  4. Add the flour and stir this into the melted butter to make smooth paste or roux.
  5. Allow this to cook for 2 minutes stirring continuously.
  6. Pour in the stock and broth mixture and stir this in until smooth.
  7. Use a small whisk to help break down any lumps.
  8. Bring the sauce to a boil, lower the heat and allow this to simmer for 15 minutes over medium low heat stirring every minute.
  9. Taste the sauce and adjust the seasoning by adding salt and ground white pepper.
  10. And there it is.... an amazingly smooth and flavorful veloute' sauce.


How to Make Chicken Bone Broth – the Perfect Base for Gravy, Soups and Sauces!!!


How to Make Chicken Bone Broth - the Perfect Base for Gravy, Soups and Sauces!!!
Author: 
Recipe type: Gravies and Sauces
Prep time: 
Cook time: 
Total time: 
Serves: 3 liters
 
After a couple of weeks away, and almost 4000 km later, I am back. In today's episode, we're going to make chicken bone broth. In addition to the amazing health benefits this wonder food holds, it also makes the most amazing base for gravies, soups and sauces. Some of these will be covered in the next few episodes.
Ingredients
  • Bones from 9-12 uncooked chicken thighs
  • 60ml White wine vinegar
  • 5ml Whole allspice
  • 5ml Whole black pepper
  • 15ml Salt (preferably Himalayan)
  • 3-4 Bay leaves
  • Water
Instructions
  1. Strip the flesh from 9-12 chicken thighs.
  2. Use your shears to cut through the thigh bones. This makes the gelatin and collagen more accessible and shortens the process dramatically.
  3. The collagen and gelatin are what make this so healthy. Both of these, especially the collagen are used in the treatment of arthritic and degenerative joint disorders. They also add a silky smooth mouth feel to the broth.
  4. Place the bones in your pressure cooker along with the white wine vinegar, whole allspice, whole black peppercorns, salt and bay leaves.
  5. Pour in enough boiling water to bring the total quantity to 4 liters.
  6. Place the lid on the pot and cook this under high pressure for 2 hours.
  7. After 2 hours, turn off the heat and allow the mixture to cool substantially in the sealed pot for an hour or 2.
  8. After this time, remove the lid and strain the broth through a sieve into a large bowl. Notice how glossy the liquid is as a result of the gelatin and collagen.
  9. Place the bowl in the refrigerator overnight to allow the fat to rise to the surface and solidify.
  10. The following day, use a slotted spoon to remove the fat from the surface. Reserve the fat in a bowl in your refrigerator.
  11. In the following 3 episodes we will be using the broth to make amazing gravy, soup and sauce.


Chicken Enchiladas – Spicy Chicken Wraps with Melted Cheese, Sour Cream & Hot Salsa

chicken enchiladas recipe,chicken enchiladas recipe youtube,chicken enchiladas video recipe,how to make chicken enchiladas,homemade chicken enchiladas,best chicken enchiladas recipe,authentic chicken enchiladas,mexican chicken enchiladas recipe,best spicy chicken enchiladas,best enchiladas recipe,simple chicken enchiladas recipe,how to make chicken enchiladas,hot and spicy chicken enchiladas


Chicken Enchiladas - Spicy Chicken Wraps with Melted Cheese, Sour Cream & Hot Salsa
Author: 
Recipe type: Chicken
Cuisine: Mexican
 
In today's episode we're taking a quick trip to Mexico to make some awesomely rustic, spicy chicken enchiladas. Filled with creamy, spicy chicken and jalapeños and topped with melted cheese, sour cream and hot salsa these enchiladas will have your guests lining up for more. This recipe will make 2 large enchiladas or 4 medium.
Ingredients
For the Hot Salsa
  • 2 Tomatoes
  • 1 Pickled Jalapeno
  • 10ml Garlic granules
  • Handful of fresh coriander
For the Filling
  • 3 Chicken thighs, deboned
  • ¼ each - red, yellow and green pepper
  • 1 Onion
  • 1 Pickled jalapeno
  • 30ml Mexican spice blend (see below)
  • 80ml Sour cream
For the topping
  • Shredded mature cheddar or strong Jack cheese
  • 160ml Sour cream
How to make Mexican Spice Blend
  • 15ml Cumin seeds
  • 15ml Dried coriander leaves
  • 15ml Paprika
  • 5ml Dried oregano
  • 5ml Cayenne pepper (mild) / 15ml (medium) / 25ml (hot)
  • 5ml Garlic granules
  • 10ml Salt
  • (Machine these all until fine in your spice grinder)
Instructions
  1. Starting with the salsa, chop the tomatoes and pickled jalapeños.
  2. Grab a handful of fresh coriander and measure out the dried garlic granules. You can also use fresh garlic, but I like the rounded flavor these granules give to the food.
  3. Heat a large frying pan over medium heat and add 30g of butter.
  4. Fry the fresh ingredients for about 90 seconds until wilted then add the garlic.
  5. Continue to fry this for another 60 seconds. Remove the salsa from the pan and keep it warm.
  6. Place the deboned chicken thighs on a large platter skin side up.
  7. Sprinkle half of the Mexican spice over the skin and rub it in.
  8. You can find the spice recipe included in the printable recipe.
  9. Flip the thighs over and sprinkle the remaining spice over the chicken. Put this aside while you slice the onions, dice the peppers and chop the pickled jalapeño. In addition measure out 80ml of sour cream.
  10. Return the pan to the heat and fry the onion, peppers and jalapeño for 2 to 3 minutes and onion is tender and translucent.
  11. Remove this from the pan and keep it warm.
  12. Add 30g of butter to the pan and add the chicken thighs skin side down.
  13. Fry the chicken for 6 minutes turning halfway through. The chicken should be well charred on the outside.
  14. Remove the chicken from the pan and chop it into thin strips.
  15. Return the chicken to the pan along with the onion, peppers and jalapeño and stir this briefly to warm it through.
  16. Add the sour cream and stir this in to combine.
  17. Remove the pan from the heat.
  18. Place a large tortilla on an oven proof serving platter. Spoon half of the chicken filling across the center of the wrap.
  19. Roll the wrap up to enclose the filling and use 2 toothpicks to secure.
  20. Drop a generous dose of mature cheddar or strong jack over the tortilla. Pick up any spillage and get it all on top of the enchilada.
  21. Repeat this with the second wrap.
  22. Place the enchiladas under the grill in your oven until the cheese is just melted.
  23. Remove these from the oven. Be careful, the plates will be very hot.
  24. Remove the toothpicks.
  25. Spoon the remaining sour cream over the enchiladas, followed by the hot salsa.
  26. Serve the enchiladas immediately accompanied with guacamole and fresh crispy salsa.


Panko Chicken Wings – How to Make Crispy Deep fried Panko Chicken Wings at Home!!!

panko chicken wings,how to make panko chicken wings,crispy fried panko chicken wings,homemade panko chicken wings,panko chicken wings recipe,panko chicken wings video,panko chicken wings youtube,deep-fried panko chicken wings,crispy deep-fried chicken wings,how to make crispy chicken wings,best crispy chicken wings recipe,making panko chicken wings


Panko Chicken Wings - How to Make Crispy Deep fried Panko Chicken Wings at Home!!!
Author: 
Recipe type: Chicken / Deep-fried
Prep time: 
Cook time: 
Total time: 
Serves: 12
 
In the previous episode we made panko crumbs. Now we're going to use these to make amazingly crispy deep-fried chicken wings.
Ingredients
  • 6 Whole chicken wings
  • 125ml All-purpose flour
  • 15ml Salt
  • 15ml Cayenne pepper
  • 1 Batch Panko crumbs
Instructions
  1. To start, combine the all-purpose flour, salt and cayenne pepper. Place this in a container with a lid.
  2. Trim away the wing tips from the chicken wings and slice through the center joint of each wing, giving you a dozen winglets.
  3. Drop the winglets into the flour, put the lid on and shake them around to coat. Allow the winglets to stand in the flour for 10 minutes.
  4. For the panko coating, place the panko crumbs in a bowl, and whisk 2 eggs in another bowl.
  5. Before starting, spread a layer of panko crumbs over a large platter. This is where the coated wings will set and the layer of crumbs prevents the coating from sticking to the platter and getting damaged.
  6. Dip the winglets in the egg to wet all of the flour coating.
  7. Transfer the winglet to the panko crumbs to get a good solid coating all over.
  8. Transfer the winglet to the platter to set. Continue with the remaining winglets.
  9. Allow the panko coating to set for 10 minutes.
  10. Half fill a large pan with oil and heat this to 180c or 350f. Carefully drop the wings into the oil and fry them for 5 to 6 minutes, turning halfway through.
  11. Remove the wings from the oil using a slotted spoon and drain any excess oil on kitchen paper.
  12. And there we have it, a batch of amazingly crisp panko chicken wings.


TNK Stingray Barracuda Kitchen Multitool Review – Used Making a Quick Creamy Chicken Curry

tnk barracuda kitchen multitool,kitchen tools from tnk,tnk barracuda kitchen multitool product review,how the tnk barracuda kitchen multitool works,creamy chicken curry,super-quick creamy chicken curry,easy chicken curry,how to make quick chicken curry,chicken curry stir-fry,5 minute chicken curry,chicken curry in 5 minutes


TNK Stingray Barracuda Kitchen Multitool Review - Used Making a Quick Creamy Chicken Curry
Author: 
Recipe type: Curry
Cuisine: Indian
Prep time: 
Cook time: 
Total time: 
Serves: 4
 
A couple of episodes back I featured 2 amazing kitchen multitools from the TNK Stingray range. In today's episode we're looking at the third kitchen multi tool in their range, the Barracuda. The unit is basically a scoop shaped nylon stirrer, making it great for stirfrying in non-stick pans and woks. The handle is good quality, well finished stainless steel with silicon grips. Pulling a loop at the end of the handle allows the handle to open revealing the Barracudas teeth. These allow you to pick food up and strain food in the pan, an absolute stroke of genius. To demonstrate the tool, I am going to make a super-quick creamy chicken curry.
Ingredients
  • 4 x Chicken breasts (deboned, skin off)
  • 30ml Curry powder (your favorite)
  • 250ml Cultured sour cream
  • 12 x Cherry tomatoes
  • Handful of fresh coriander
  • 50ml + 50ml Oil
Instructions
  1. To start, cut the chicken breasts across the grain into strips about 8mm or a third of an inch thick.
  2. Transfer the chicken to a mixing bowl and add the curry powder.
  3. Mix the curry in until well combined, then pour in the oil.
  4. Mix in the oil and put this aside while you cut the cherry tomatoes in half lengthways, and roughly chop the fresh coriander.
  5. Heat your wok until smoking hot then add the oil.
  6. Swirl the oil around the wok and add the chicken.
  7. Here you can see just how well the Barracuda works stir-frying and turning the chicken while in the closed position.
  8. Continue frying for 3 to 4 minutes until the chicken is cooked through.
  9. Here we see the Barracuda in a semi-open position being used as a strainer. I am lifting the chicken from the wok while the oil simply drains through the teeth of the Barracuda.
  10. Turn the heat down to medium low and add the cultured sour cream, tomatoes and coriander.
  11. Mix this all up until warmed through.
  12. Return the chicken to the wok and shovel this around until well combined with the sauce.
  13. Serve immediately with the accompaniments of your choice.
  14. You can find the full details of the Barracuda at this link - http://www.tnkbrand.com/?p=247&lang=en


Jamaican Jerk Chicken Kebabs – Jamaican Jerk Chicken Burgers – Jamaican Jerk Chicken Spice

jamaican jerk chicken,jamaican jerk chicken recipe,how to make jamaican jerk chicken,how to make jamaican jerk spice,jamaican jerk spice recipe,jamaican jerk chicken kebabs,jamaican jerk chicken burgers,jamaican jerk chicken youtube,jamaican jerk chicken video recipe,homemade jamaican jerk chicken,foolproof jamaican jerk chicken,best jamaican jerk chicken


Jamaican Jerk Chicken Kebabs - Jamaican Jerk Chicken Burgers - Jamaican Jerk Chicken Spice
Author: 
Recipe type: Chicken / Poultry
Cuisine: Jamaican
Prep time: 
Cook time: 
Total time: 
Serves: 6-8
 
Jamaican jerk chicken can be as mild or as hot as you like. You can adjust the heat by simply adding more or less cayenne and chilli flakes. The measurements in this recipe will give you a result on the milder side, but with tons of flavor. I am going to make jerk chicken kebabs and a couple of jerk chicken burgers using the TNK Stingray multitools feature in the previous episode.
Ingredients
  • 9-12 Chicken thighs, deboned
For the Jerk Spice
  • 15ml Onion flakes
  • 10ml Dried Thyme
  • 5ml Dried parsley
  • 7.5ml Whole allspice
  • 2.5ml Ground cinnamon
  • 5ml Whole black peppercorns
  • 2.5ml Cayenne pepper
  • 5ml Paprika
  • 2.5ml Chilli flakes
  • 1.25ml Ground cumin
  • 5ml Dried garlic granules
  • 10ml Salt
  • 1.25ml Ground nutmeg
  • 10ml Sugar
  • 10ml Dried chives
Instructions
  1. To make the spice blend, combine the onion flakes, thyme, parsley, allspice, cinnamon, black peppercorns, cayenne pepper, paprika, chilli flakes, ground cumin, garlic granules, salt, nutmeg, sugar and dried chives.
  2. Put this all into your spice grinder and zap it until fine. Transfer the jerk spice to a sprinkle bottle.
  3. Place your deboned chicken thighs in a large non-reactive pan, skin side down.
  4. Sprinkle a generous dose of the spice over the chicken. Generous can not be overstated... you want to use a third of the spice on this side.
  5. Turn the chicken thighs over and dose the skin side with another third of the spice.
  6. Cover the pan with cling wrap and place this in your refrigerator overnight.
  7. The following day, cut the chicken into cubes. I have held 2 thighs back to cook as jerk chicken burger patties.
  8. Thread the chicken cubes onto skewers and you're ready to rock.
  9. To demonstrate the larger of the 2 Stingray multitools, I am going to barbecue most of the chicken, saving some for the pan to demonstrate the smaller model.
  10. Heat a barbecue skillet over medium high heat and brush this with oil and add the kebabs and jerk chicken burger.
  11. Turn the kebabs every 3 minutes, remembering that they have 4 sides, giving you a total time of 12 minutes.
  12. Watch how well the multitools toothed edge lifts end turns the kebabs with absolutely no problem.
  13. Grill the jerk burger for 4 minutes per side. Here's a shot of the lifter mechanism at work turning the burger.
  14. Using the prong to lift the burger from the skillet is effortless, and you can see the true genius behind the launch mechanism that gently squeezes the chicken of of the prongs onto the plate.
  15. Remove the kebabs from the barbecue and serve immediately.
  16. Now across to the non stick pan. Heat the pan over medium high heat and add a little butter.
  17. Add the kebabs and jerk burger to the pan. Grill them for 12 minutes, or 3 minutes per side. Grill the jerk burger for 8 minutes, turning halfway through.
  18. Here we can see just how simply the multitool turns the kebabs. The toothed edge really does make a difference.
  19. And again, here is the lifter turning the burger.
  20. Remove the chicken from the pan and serve with the accompaniments of your choice.
  21. And there we have it.... beautifully spiced and flavor Jamaican jerk chicken kebabs and burger patties.


Sticky Mocha Coffee Chicken – Amazing Sticky Coffee Chicken – Sticky Chicken with a Difference!!!

sticky mocha coffee chicken,sticky coffee chicken recipe,how to make sticky chicken,best sticky chicken recipe,how to make coffee chicken,sticky chicken video recipe,sticky chicken recipe youtube,mocha coffee chicekn recipe,easy sticky chicken recipe,homemade sticky chicken recipe,how to make sticky chicken at home,using xanthan gum


Sticky Mocha Coffee Chicken - Amazing Sticky Coffee Chicken - Sticky Chicken with a Difference!!!
Author: 
Recipe type: Chicken / Poultry
Prep time: 
Cook time: 
Total time: 
Serves: 4-8
 
Sticky chicken is awesome in any description, but this sticky mocha coffee chicken is at least a few steps ahead of the competition. A few episodes ago we introduced xanthan gum, the thickener of the future. This recipe owes its amazing stickiness and phenomenal mouth-feel to this simple ingredient
Ingredients
  • 150ml Light Soy sauce
  • 125ml Brown sugar
  • 60ml Sherry
  • 80ml Strong brewed coffee (at least double strength)
  • 60ml Olive oil
  • 8 Chicken pieces (drumsticks & thighs)
  • Salt and pepper to taste
Instructions
  1. Combine the light soy sauce, brown sugar, sherry, strong black coffee, and oil.
  2. Normally there would be no way to combine the oil with the rest of the ingredients, and this is where xanthan gum comes in. Xanthan gum is a strong hydrocolloid which with its bipolar nature will effectively bind the oil and water based ingredients.
  3. Add the xanthan gum and zap the mixture for 60 seconds using your stick blender. You can also do this in a regular blender.
  4. Place the chicken pieces into a vacuum packing bag. If you don't have a vacuum packer, use a ziplock bag and extract as much air as possible.
  5. Pour the marinade.
  6. If you're using basic front-loading vacuum packer, it is a good idea to elevate the machine. This allows you to extract the air from the bag without sucking liquid into the vacuum pump, which will almost certainly damage the machine.
  7. It it also a good idea to do second seal to ensure that the bag does not leak.
  8. Transfer the bag to your refrigerator and allow the chicken to marinate for at least four hours.
  9. After the marinating time, cut the bag open and empty everything into a tray or container of some sort.
  10. Heat a heavy non-stick pan or a well seasoned cast iron pan over medium high heat. Do not add butter or oil.
  11. Lift the chicken pieces fron the marinade and place them in the pan skin side up.... obviously with the drumsticks this could be a little confusing.
  12. Fry the chicken for 3 minutes per side. It may appear that the chicken is burning, but this is simply the marinade becoming super-caramelized.
  13. After both sides have had 3 minutes, turn the chicken pieces back to their first side and pour in the marinade.
  14. Turn the heat down to medium and allow the chicken to simmer for 15 minutes.
  15. At the 15 minute mark, turn the pieces over and continue simmering the chicken for a further 5 minutes.
  16. Make sure to shake the pan back and forward every minute to ensure that the chicken is well coated with the sticky sauce.
  17. Remove the chicken from the pan and serve with the accompaniments of your choice. As a hint these sticky chicken marvels go incredibly well with prawn crackers.


Chicken with Orange and Star Anise – Spiced Citrus Chicken Roasted to Perfection!!!

chicken with orange and star anise,citrus chicken with star anise,spiced citrus chicken,chicken roasted with orange and star anise,eastern style citrus chicken,orange chicken recipe,chicken with orange and star anise recipe video youtube,chinese chicken with orange and star anise,roasted chinese chicken,spicy chinese chicken,best orange chicken,easy chicken with oranges


Chicken with Orange and Star Anise - Spiced Citrus Chicken Roasted to Perfection!!!
Author: 
Recipe type: Chicken / Poultry
Cuisine: Eastern
Serves: 3-6
 
Chicken with orange and star anise is outstanding with a magnificent spicy citrus flavor and aroma. The process is longer than most, however it is all really easy.
Ingredients
  • 6 Chicken thighs
  • Oil for frying
  • 1 Onion, diced
  • 1 Onion, cut into wedges
  • 30ml Grated ginger
  • 15ml Garlic, finely chopped
  • 4 Whole star anise
  • 5ml Dried chilli flakes
  • 1 Red pepper, sliced into strips
  • 6 Top slices butternut
  • 1 Whole head of garlic, cloves separated, skin on
  • 2 Oranges sliced
  • Asian noodles to serve
For the Sauce
  • 30ml Light soy sauce
  • 30ml Rice wine vinegar
  • 15ml Brown sugar
  • 50ml Freshly squeezed orange juice
  • 125ml Chicken stock
  • 10ml Cornflour
Instructions
  1. Heat a large pan over medium high heat and add enough oil to coat the base of the pan.
  2. Add the chicken thighs to the pan, skin side up and fry for 4 minutes until the underside is nicely colored.
  3. Turn the thighs over and fry for a further 4 minutes until the skin is golden.
  4. Remove the thighs from the pan and transfer them to a roasting pan, skin side up.
  5. Heat another pan over medium high heat and add a tablespoon of oil.
  6. Add the chopped onion and fry these until slightly translucent, about 2 minutes.
  7. Add the grated ginger and crushed garlic and stir-fry this until fragrant, about 30 seconds.
  8. Add the star anise and dried chilli flakes. Fry this for 60 seconds then remove the pan from the heat.
  9. Spoon the mixture over the chicken thighs.
  10. Add the onion wedges to the roasting pan along with the sliced red pepper, sliced butternut and garlic cloves.
  11. In a jug, combine the light soy sauce, rice wine vinegar, brown sugar, freshly squeezed orange juice and chicken stock.
  12. Stir until all of the sugar has dissolved and spoon half of the liquid over the chicken and vegetables. Put the other half aside.
  13. Cover the roasting pan with foil and bake in a preheated oven at 180c or 350f for 30 minutes.
  14. Remove the pan from the oven and scatter the sliced oranges over the top of the pan.
  15. Return the pan to the oven, uncovered, for 40 minutes.
  16. Remove the pan from the oven and transfer the chicken and vegetables to another pan and keep it warm.
  17. Pour the pan juices into a small saucepan. Dissolve the cornflour in a little water and add this to the sauce we put aside earlier.
  18. Pour this into the pan juices. Place the pot over medium high heat and bring this to a boil. Allow it to boil for 60 seconds until thickened.
  19. Serve the orange anise chicken on a bed of noodles accompanied with the vegetables, orange slices and roasted garlic.
  20. Spoon a healthy dose of sauce over the dish and serve immediately.


Scroll to top

Kitchen Conversions

Convert:
Masses
to:
Volumes
to:
Temperatures
to:
Lengths
to: