How to Make Little Smokey Frankfurters from Start to Finish – How to Make & Smoke Mini-Frankfurter Sausages!!!

how to make cocktail frankfurters,how to make cocktail sausages,lil smokey sausage,how to make lil smokey sausages,smoked mini frankfurters,how to make sausage,smoked cocktail frankfurter sausages from scratch,homemade frankfurter sausages,homemade sausage,how to make sausage at home,mini frankfurter sausage recipe,how to make cocktail sausages at home,homemade sausage recipe,how to smoke sausage,homemade lil smokey sausage recipe,making frankfurters at home


How to Make Little Smokey Frankfurters from Start to Finish - How to Make & Smoke Mini-Frankfurter Sausages!!!
Author: 
Recipe type: Sausage
 
These little smoked cocktail frankfurters are amazing, and really easy to make. I am using trimmings from a whole ribeye roast, but you can use rump or sirloin as well, provided the the fat content is 25%. If you use a leaner cut, add the balance in pork back fat. You can find the printable recipe on our website http://Whats4Chow.com This is episode #375 with Whats4Chow.com - please subscribe for notifications and updates.
Ingredients
  • 1.8kg Beef, 25% Fat
  • 200ml Milk powder
  • 1 medium onion
  • 3 Cloves garlic
  • 120ml Paprika
  • 36g Prague powder
  • 20g Kosher salt
  • 360ml Water, well chilled
Instructions
  1. Cut the meat into pieces that will fit through the feeder tube of your mincer. Cut a medium onion, peel 3 cloves of garlic, measure out the Prague powder and salt, as well as the milk powder and paprika. Use a good quality paprika as the success of this endeavor hinges on this.
  2. Place the meat in your freezer for 15 minutes, then run this through your mincer using the coarse mincer plate. Return the meat to the freezer for 15 minutes.
  3. Run the onion and garlic through the mincer and place this in your refrigerator.
  4. Combine the paprika, milk powder, Prague powder and salt. Mix this together thoroughly.
  5. Remove the meat from the freezer and place it in a large tub. Add the minced garlic and onion, and the paprika mixture. Mix this all together thoroughly.
  6. Run the beef through the mincer again, this time using the medium plate. Return the meat to the freezer for 25 minutes.
  7. After the chilling time place the meat back into the tub. At this stage the meat, despite being chilled is quite sticky and needs to be tempered by adding water. You need to add 20% of the meat weight in water in order to make it workable, and to make sure it will run through the sausage stuffer smoothly.
  8. Run the meat through the mincer again, this time using the fine plate.
  9. Load the finely minced meat into the hopper of the sausage stuffer.
  10. I am pumping this into 18mm collagen casings and to do this I have the 12mm funnel attached to the stuffer.
  11. Place the hopper on the stuffer and turn the crank until the filling reaches the end of the funnel. Load the casing onto the funnel, twist the end and start cranking.
  12. When making the mini franks, it is much easy to twist off the links progressively. If you extrude the entire length, you stand a good chance of ending up with over-filled casings that are difficult, or impossible to crimp and form links.
  13. Once all of the links are filled and formed, it's time for the smoker. I am using the Smoke Daddy Cold Smoke Generator attached to my regular gas barbecue.
  14. Fire up the smoker and arrange the sausages on racks, or hang them from the warming rack. The sausages must not be touching. Ignite a single burner furthest from the sausage, close the lid and allow the sausages to smoke for 2.5 to 3 hours. The barbecue thermometer should read 80c or 176f, and the target internal temperature of the sausages is 65c or 149f.
  15. Once smoking is complete, remove the sausages from the barbecue. These are only partially cooked and require cooking to completion, either by boiling, broiling or gently frying them to perfection.


Smashed Chicken Cheese Burger – The Chicken Version of the Shake Shack & Smashburger Epic!!!

Shake Shack burger recipe,smashburger burger recipe,shake shack cheese burger recipe,smashburger cheeseburger recipe,make shake shack cheeseburger at home,homemade shake shack cheeseburger,make smashburger cheeseburger st home,home made smashburger cheeseburger,best cheeseburger recipe,best burger patty recipe,how to make a shake shack burger,how to make a smashburger at home,shake shack and smashed burger cheeseburger recipe,smashed chicken cheese burger


Smashed Chicken Cheese Burger - The Chicken Version of the Shake Shack & Smashburger Epic!!!
Author: 
Recipe type: Burgers
Cuisine: American
Serves: 8
 
In our previous episode we made the inimitable smashed cheese burger. The video has created quite some interest, so here is the chicken version.... the smashed chicken cheese burger.
Ingredients
For 8 Burgers - The Chicken
  • 1kg / 2.2lb Deboned chicken thigh, skin on
  • 15g Fine salt
  • 2ml Ground cloves
  • 10ml Ground coriander seed
  • 2ml Ground nutmeg
  • 5ml Ground white pepper
The Rest
  • 8 Large burger buns
  • 16 Slices tomato
  • Fresh crispy lettuce
  • 16 Slices Mozzarella cheese (5mm thick)
  • Butter
  • Mayonnaise
Instructions
  1. To prepare the chicken, run the chicken thigh meat through your mincer using the 6mm or quarter inch mincer plate.
  2. Add the salt, white pepper, ground cloves, ground coriander seed, and ground nutmeg to the chicken and mix this in.
  3. Fit the 3mm plate to your mincer and run the meat through again.
  4. Transfer the ground chicken to your refrigerator for 30 minutes to chill.
  5. Once chilled, divide the chicken into portions of 125g. Work on top of a square of foil, press a portion of chicken into a cylinder funnel to form a patty that resembles a hockey puck.
  6. Repeat this with all of the remaining portions. Transfer these to a large platter in a single layer and place them in your freezer for exactly 15 minutes.
  7. While the patties chill, slice your buns, the tomatoes and the cheese. You will also need a whole load of crispy lettuce leaves.
  8. Heat your pan over medium high heat and add 50g of butter. Drop the buns face down into the pan and fry them until golden. Repeat this with the remaining buns, adding more butter when necessary.
  9. By this stage the patties have chilled for 15 minutes. Crank the heat of the pan up to smoking hot and add the patties to the pan. Crush them using an egg lifter or similar utensil, pressing it down with any other sturdy kitchen tool.
  10. Allow these to fry for 3 minutes and 30 seconds. Flip the patties and immediately arrange the cheese slices on top of the patties. Continue to fry for a further 3 and half minutes.
  11. Transfer the patties to the buns. Top them with a healthy dose of lettuce and sliced tomato. Give to top of the bun a good dose of mayonnaise and close the burger.
  12. And there you have it.... the smashed chicken cheese burger.


Smashed Cheese Burger. Shake Shack and Smashburger in Your Own Kitchen!!!

Shake Shack burger recipe,smashburger burger recipe,shake shack cheese burger recipe,smashburger cheeseburger recipe,make shake shack cheeseburger at home,homemade shake shack cheeseburger,make smashburger cheeseburger st home,home made smashburger cheeseburger,best cheeseburger recipe,best burger patty recipe,how to make a shake shack burger,how to make a smashburger at home,shake shack and smashed burger cheeseburger recipe


Smashed Cheese Burger. Shake Shack and Smashburger in Your Own Kitchen!!!
Author: 
Recipe type: Burgers / Franchise
Cuisine: American
Serves: 4
 
Shake Shack and Smashburger are taking the market by storm. The unique texture and taste of the smashed patty is what has everyone raving. The process has a good few steps, but just follow the steps and your burger will be smashing too.
Ingredients
For 4 Patties
  • 500g Ground beef - 25% fat content
  • 2.5ml White pepper
  • 5ml Ground coriander seed
  • 5ml Chilli flakes
  • 2.5ml Garlic powder
For the Burgers
  • 4 Large burger buns
  • Sliced tomato
  • 8 Thick slices cheese (I used Mozzarella)
  • Lettuce
  • Mayonnaise
Instructions
  1. To achieve the texture that is more akin to steak, rather than compressed mince, the ground beef needs to be emulsified.
  2. Place the beef in your mixer bowl. Add the salt, ground white pepper, ground coriander seed, chilli flakes and garlic powder.
  3. Place the bowl on your stand mixer and attach the dough hooks to the mixer. Mix the meat on medium speed for a full ten minutes.
  4. By this stage proteins in the beef are liberated and the mixture will be very sticky. Transfer the bowl to the refrigerator while you continue with the other preparations.
  5. Cut the burger buns, slice the tomatoes and cut 2 thick slices of cheese for each burger. You will also need nice crispy fresh lettuce leaves.
  6. To continue with patties.... divide the beef into portions of 125g. Working with one portion, press it into a cylinder mold to form a thick narrow patty that resembles a hockey puck. Do this on top of a piece of foil or clingwrap. Continue until all the patties are formed.
  7. Transfer the patties to a large platter in a single layer and transfer these to your freezer for exactly 15 minutes. This chills the burger to the core and prevents the center of the burger from over-cooking under the extreme cooking heat to follow.
  8. While the burgers chill, heat your pan over medium high heat and add 50ml of butter. Drop the buns into the pan to toast the insides until golden.
  9. Increase the heat of the pan to smoking hot. Place the patties in the pan. Use an egg lifter or similar utensil along with any other sturdy tool to crush the burger patties. You want them to end up just slightly bigger than the buns. Allow these to grill for 3 and a half minutes and the underside is crispy and caramelized.
  10. Flip the patties and immediately add the cheese to each one. Continue grilling these for a further 3 and a half minutes.
  11. Transfer the patties to the buns. Top each one with 2 slices of tomato and loads of lettuce.
  12. Give the lid of the bun a good dose of mayonnaise and close the burger.
  13. Serve immediately.


Chicken Breakfast Sausage. A Delicious Alternative to Pork Bangers – Quick & Easy!!!

chicken breakfast sausage,how to make chicken breakfast sausage,chicken bangers,chicken sausage recipe,how to make chicken sausage,breakfast sausage recipe,homemade chicken sausage,homemade chicken breakfast sausage,homemade chicken bangers,making chicken sausage at home,best chicken sausage recipe,quick and easy chicken breakfast sausage recipe


Chicken Breakfast Sausage. A Delicious Alternative to Pork Bangers - Quick & Easy!!!
Author: 
Recipe type: Sausages
 
Following the introduction of the sausage stuffer, we're going to make a batch of chicken breakfast sausages.
Ingredients
  • 1kg (2.2lb) Deboned chicken thigh with skin on
  • 15g Fine non-iodated salt
  • 5ml White pepper
  • 2ml Ground cloves
  • 10ml Ground coriander seed
  • 2ml Nutmeg
  • 10ml Cayenne pepper (optional)
Instructions
  1. You will need a kilogram or 2.2lb of deboned chicken thigh, with the skin on. Fit the 6mm mincer plate to your mincer and run the chicken through the machine.
  2. Add the salt, white pepper, ground cloves, ground coriander seed and ground nutmeg, and mix these into the chicken.
  3. Fit the 3mm plate to your mincer and run the chicken through the machine again. This minces the chicken finely and mixes the spices into the meat thoroughly.
  4. To stuff the sausages, I am using 26mm collagen casings on the 20mm funnel. Load the sausage stuffer's hopper with meat and press it down firmly to expel any air.
  5. Feed the collagen casing onto the funnel and twist the end. I have found that using a bull-clip to secure the end works quite well.
  6. Start cranking the handle of the stuffer while feeding the casing off of the funnel with your other hand. Don't apply too much pressure to the casing as this will lead to over-stuffing and cause the casings to burst while being cooked.
  7. Twist the sausage into links and snip these apart. Refrigerate the sausage overnight to allow the flavors to develop, then cook them in the same way that you would cook pork bangers.


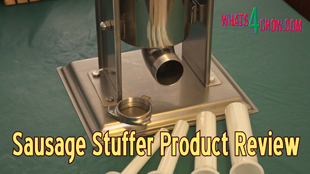
Upright 7lb Sausage Stuffer Review – Stainless Steel Sausage Stuffer Product Test.

upright susage stuffer,stainless steel sausage stuffer,7lb sausage stuffer,3kg sausage stuffer,upright sausage filler,stainless steel sausage filler,7lb sausage filler,3kg sausage filler,hand crank sausage filler,sausage filler product review,suasage stuffer product review,how to use a sausage stuffer,sausage stuffer with funnels,product review sausage filler stuffer


Over the next couple of weeks we’re going to do a few homemade sausage recipes. To take the mission out of stuffing the sausage casings, I ordered an upright sausage stuffer, and after putting about 200 pounds of sausage through this, here are my thoughts on the machine.

Constructed entirely from stainless steel, the machine a basically a massive syringe. The ground meat goes into a hopper and is injected into the sausage casings through various sized funnels. The machine is available in 3kg, 5 kg, 7kg and 10kg capacities, and although it comes with a selection of funnels, additional funnels can be purchased separately.

The funnels attach to the outlet of the hopper by means of a large and well threaded retaining collar.

The hopper simply clips into the frame making cleanup really easy. This also allows the machine to used left handed or right handed.

Built into the plunger is a one-way air valve which allows air in the hopper to escape. This ensures that you don’t end up pumping air into your sausages.

The plunger is driven by very strong, heavy gears with 2 different ratios. The fast gear is for dropping and retrieving the plunger, while the slower gear is used for stuffing.

All-in-all, this machine is excellent value for money, and if looked after, will probably outlive your great great grand children. Click HERE to see pricing for the various models.

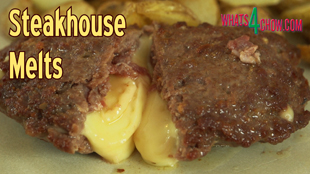
Steakhouse Melts – Grilled Beef filled with Melted Cheese!!! Spicy Stuffed Steaks!!!

steakhouse melts,cheesy stuffed beef pockets,beef stuffed with cheese,emulsified beef pockets with cheese,how to stuff beef with cheese,how to emulsify beef,how to emilsify beef mince,how to emulsify ground beef,steakhouse melts filled with cheese,make stuffed beef pockets,emulsified beef fold-overs,stuffed beef fold-overs,steakhouse melts recipe,stuffed beef fold-overs recipe


Steakhouse Melts - Grilled Beef filled with Melted Cheese!!! Spicy Stuffed Steaks!!!
Author: 
Recipe type: Beef
Prep time: 
Cook time: 
Total time: 
Serves: 4
 
Steakhouse melts are legendary. Oozing melted cheese encased in spicy emulsified beef makes for a feast from heaven.
Ingredients
  • 500g Ground beef
  • 20g Salt
  • 2.5ml White pepper
  • 5ml Ground coriander seed
  • 5ml Chilli flakes
  • 2.5ml Crushed garlic powder
  • 4 Thick slices Mozzarella cheese
  • 50g Butter for frying
Instructions
  1. Place the ground beef in your mixer bowl. Add the salt, white pepper, ground coriander seed, chilli flakes and garlic powder.
  2. Place the bowl on the stand mixer. Attach the dough hooks and mix the beef on medium speed for 10 minutes.
  3. By this stage the beef will be emulsified and very sticky.
  4. Divide the beef into 4 equal portions of 125g each. Working with one at a time, form a portion of the beef into a ball and place it in the center of a piece of cling-wrap. Flatten the beef into a disc, then fold the cling-wrap over to enclose the meat.
  5. Flatten the meat out into a large circle 4mm thick, or 1 sixth of an inch.
  6. Repeat this with the remaining portions.
  7. Cut 4 thick slices of Mozzarella cheese, about 10mm thick or just less than a half inch, and big enough to cover half of the beef circles with a border around the edge.
  8. Position the cheese pieces on the upper half of the beef portions and season with salt and cracked black pepper.
  9. Use the cling-wrap to fold the open half of beef over the cheese, and crimp the edges closed.
  10. Transfer the steakhouse melts to your refrigerator for 30 minutes.
  11. Heat your pan over medium high heat and add 50g of butter and fry the melts for 4 to 5 minutes per side.
  12. Serve the melts immediately with the accompaniments of your choice.


Smoked Chicken Breasts – Cured and Smoked Chicken Breast Cold Cuts – How to Smoke Chicken Breast

how to smoke chicken breast,smoked chicken breast cold cuts,smoking chicken breast with smoke daddy smoke generator,how to cure chicken breast,how to make curing brine,curing and smoking chicken,cold smoked chicken,hot smoked chicken,cold smoked chicken breast,hot smoked chicken breast,barbecue smoked chicken breast,how to cure and smoke chicken breast,smoke daddy cold smoke generator,using the smoke daddy cold smoke generator


Smoked Chicken Breasts - Cured and Smoked Chicken Breast Cold Cuts - How to Smoke Chicken Breast
Author: 
Recipe type: Chicken / Smoked
 
This is part 10 of our short course on smoking and curing meats. Today we're curing and smoking chicken breast for use as cold cuts.
Ingredients
  • 8-16 Skinless, boneless chicken breasts
For the Brine
  • 5lt Water
  • 12.5g Saltpetre
  • 60g Sugar
  • 300g Salt (Kosher or dairy or rock salt)
  • 30g Black pepper corns
  • 10g Whole allspice
  • 45g Whole or ground coriander seed
  • 50ml Bicarbonate of soda
Instructions
  1. To cure the chicken, pour 5 liters of water into a large non-reactive pot. Add the saltpetre, sugar, salt, black pepper corns, whole allspice, coriander and bicarbonate of soda.
  2. Bring this to a boil, lower the heat and allow this to simmer for 10 minutes. Quick-chill the brine by floating it in a sink of cold water.
  3. Pour the solution into a large non-reactive container. Use a ladle to remove about 250ml of the liquid and pour this through a fine filter.
  4. Use your brining syringe to inject the filtered brine into the chicken breasts. Insert the needle all the way into the breasts from the thick end. Slowly remove the needle as you expel the liquid. Inject each breast 3 times.
  5. Place the breasts in the remaining brine, put the lid on the container and let this cure for 12 hours in your refrigerator. If you have not injected the breasts, allow the chicken to cure for a full 24 hours in your refrigerator.
  6. The following day, remove the breasts from the curing brine and pat them dry using clean dish cloths.
  7. Transfer the breasts to stainless wire racks.
  8. Fire up your cold smoker with apple wood chips. For the first 30 minutes we are cold smoking the chicken, so none of the barbecue burners will be lit.
  9. Place the chicken in the barbecue and allow these to smoke for 30 minutes.
  10. After 30 minutes, ignite the burner furthest from the chicken and raise the temperature in the barbecue to 110c or 230f.
  11. Insert your probe thermometer into the center of the thickest breast, close the lid and allow the chicken to smoke for 2 to 2.5 hours until the internal temperature reaches 79c or 174f.
  12. Remove the chicken from the barbecue and allow it to cool completely before vacuum packing for storage in your refrigerator or freezer.


Stuffed Barbecue Grilled Buns – Stuffed Roostekoek – Roostekoek Stuffed with Garlic Butter & Herbs.

stuffed barbecue grilled buns,stuffed roostekoek,traditional south african roostekoek,how to make roostekoek,roostekoek recipe,best roostekoek recipe,make bread buns on the barbecue,make bread rolls on the barbecue,how to make bread rolls on the barbecue,barbecue bread rolls,make bread rolls on the barbecue grill,homemade roostekoek,easy roostekoek recipe,quick barbecue bread rolls,easy brabecue buns,making bread rolls on the barbecue


Stuffed Barbecue Grilled Buns - Stuffed Roostekoek - Roostekoek Stuffed with Garlic Butter & Herbs.
Author: 
Recipe type: Barbecue Grilled Bread
Cuisine: South African
 
Just a few episodes back we made traditional South African roostekoek, or in English, barbecue grilled buns. Following that, I had a number of requests to do the same buns stuffed with fillings.
Ingredients
  • 2 Batches of Roostekoek dough
  • 160g Butter
  • 3 Large cloves garlic, finely chopped
  • 2.5ml Salt
  • 2.5ml Dried Italian herb mix
  • Fresh cracked black pepper
Instructions
  1. To make the filling, mush the butter, garlic, salt, herbs and cracked black pepper until totally combined.
  2. Lay out a sheet of cling wrap and drop the butter mixture into the center of the plastic.
  3. Fold the plastic over the butter and roll it out to a thickness of 3mm.
  4. Transfer this to your freezer for at least an hour to solidify.
  5. Turn the roostekoek dough out onto a lightly floured work surface and gently flatten it out to a roughly rectangular shape.
  6. Use your rolling pin to roll this down to a thickness of 10mm or just less then half an inch.
  7. Remove the solid sheet of garlic butter from the freezer and cut it into squares.
  8. Mark out the center point on the dough. Space squares of frozen butter over on half of the dough at even intervals.
  9. Fold the blank dough over this and press it down lightly, then run over the sheet lightly with your rolling pin.
  10. This will allow you to see where the squares of butter are located. Cut the dough between each row of butter squares to give you 9 buns.
  11. Lightly flour a roasting pan and transfer the buns to the pan. Cover the pan with cling wrap and allow the buns to rise in a warm place for 30 minutes.
  12. Heat your barbecue to the lower side of medium heat and oil the grid. When you can hold your hand an inch from the grid for 10 seconds before burning, the temperature is right.
  13. Grill the buns for 6 minutes per side until well colored and slightly crisped on the outside.
  14. Remember that the grill is not the same temperature all over, and some of the buns may have to bake slightly longer.
  15. Remove the buns from the grill once done and serve immediately.


Traditional South African Roostekoek – Best Barbecue Buns Recipe – Bread Rolls on the Barbecue!!!

traditional south african roostekoek,how to make roostekoek,roostekoek recipe,best roostekoek recipe,make bread buns on the barbecue,make bread rolls on the barbecue,how to make bread rolls on the barbecue,barbecue bread rolls,make bread rolls on the barbecue grill,homemade roostekoek,easy roostekoek recipe,quick barbecue bread rolls,easy brabecue buns,making bread rolls on the barbecue


Traditional South African Roostekoek - Best Barbecue Buns Recipe - Bread Rolls on the Barbecue!!!
Author: 
Recipe type: Bread / Dough / Barbecue
Cuisine: South African
Serves: 6-8
 
Roostekoek are the traditional barbecue buns served at South African barbecues, or braais. There is a trick to achieving light, well textured roostekoek, with a beautifully soft inside and slightly crispy outside.
Ingredients
  • 300g Strong white bread flour
  • 5ml Salt
  • 15ml Sugar
  • 10ml Yeast
  • 30ml Oil
  • 180ml Warm water
Instructions
  1. To start, pour the warm water into a jug. Add the yeast, sugar and oil and stir this all together. Put this aside in a warm place for 20 to 30 minutes until it is very frothy.
  2. In a large mixing bowl, combine the strong white bread flour and salt. Make a well in the center and pour in the frothy yeast mixture.
  3. Using a wooden paddle mix this until a dough comes together and comes away from the sides of the bowl.
  4. Turn the dough out onto a lightly floured work surface, sprinkle a little flour over the top, and proceed to knead the flour for 5 minutes until it is smooth and elastic.
  5. Place the dough back into the bowl, cover with cling-wrap and allow this to rise to double for 60 minutes in a warm place.
  6. Once again, turn the dough out onto a lightly floured work surface. Don't punch the dough down. You want keep as much air in the dough as possible.
  7. Lightly flour the top of the dough and gently flatten it out into a roughly rectangular shape. Use your roller to roll it to a thickness of 10mm or just less than a half inch.
  8. Use your dough scraper to cut this into 6 or 8 pieces. Place the pieces in a lightly floured pan. Cover the pan and allow these to rise again for 20 minutes in a warm place.
  9. Heat your barbecue to medium heat and oil the grid. You will know you have the correct temperature when you can hold you hand over the heat for 10 seconds before it becomes unbearable. If it hotter the buns will burn before the inside cooks, any cooler and they will dry out and become dense and heavy.
  10. Grill the buns for 5 to 6 minutes per side. Bare in mind that not all parts of the grill are the same temperature, and as a result some of the buns will grill quicker than others.
  11. Remove the buns from the grill and serve hot with a large dose of butter and the fillings of your choice.


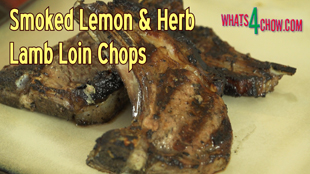
Smoked Lemon & Herb Lamb Chops. Marinated Lemon & Herb Lamb Cutlets Hot-Smoked to Perfection!!!

lemon and herb lamb chops,barbecue lemon and herb lamb chops,hot-smoked lemon and herb lamb chops,smoked lamb chops,how to smoke lamb chops,how to barbecue lamb chops,lemon and herb lamb chops recipe,lemon and herb lamb cutlets on the barbecue,how to smoke lamb chops,how to hot-smoke lamb chops,best barbecue lamb chops recipe,herby lemon lamb chops


Smoked Lemon & Herb Lamb Chops. Marinated Lemon & Herb Lamb Cutlets Hot-Smoked to Perfection!!!
Author: 
Recipe type: Lamb / Smoking / Barbecue
Prep time: 
Cook time: 
Total time: 
Serves: 2-4
 
In todays episode, part 9 of the series on smoking and curing foods, I am using the Smokedaddy cold smoke generator attached to a regular closed gas barbecue to hot smoke a batch of delectable lamb loin chops.
Ingredients
  • 8 Lamb loin chops
  • 60ml Oil
  • Juice of 1 medium lemon
  • Zest of 1 medium lemon
  • 2.5ml Garlic powder
  • 1.25ml Salt
  • 1.25ml Dry basil
  • 1.25ml Dry rosemary
  • Generous grind of cracked black pepper
Instructions
  1. To start, combine the oil, lemon juice, lemon zest, garlic powder, salt, dried basil and dried rosemary in a jug.
  2. Whisk these vigorously until the mixture is totally emulsified.
  3. Grind in a generous dose of cracked black pepper and your ready to go.
  4. Arranger your lamb loin cuts in a pan and pour the marinade over the lamb. Spread it out evenly to ensure the meat is totally covered. Place the pan in your refrigerator for 4 hours.
  5. Turn the meat over half-way through this time.
  6. After marinating, remove the chops from your the refrigerator.
  7. Lift half of the chops up onto their fatty edge and drive 2 skewers through the chops just above the fatty strip. Repeat this with the remaining chops.
  8. Heat your barbecue to medium high and get the smoke generator running. Within a few minutes the smoke will be billowing out and you can place the lamb fatty side down in the barbecue.
  9. Close the lid and allow the fatty strip to cook for 6 to 8 minutes.
  10. Open the barbecue, remove the skewers from the meat, lie the the chops on their sides and continue to barbecue for 4 to 6 minutes per side (with the barbecue lid closed), depending on your preference of doneness.
  11. Transfer the lamb to platters and serve immediately with the accompaniments of your choice.


Argentinian Chimichurri Sauce – Classic Piquant Herb Sauce for Steak, Chicken, Pork, Lamb & even Eggs!!!!!

Chimichurri (Food),chimichurri sauce recipe,how to make chimichurri sauce,homemade chimichurri sauce,best chimichurri sauce recipe,argentinian chimichurri sauce recipe,classic chimichurri sauce,best sauce for steak,best sauce for barbecue meat,sauce for smoked meat,sauce for barbecued meat,sauce for lamb,sauce for pork,sauce for eggs,chimichurri sauce for all meats


Argentinian Chimichurri Sauce - Classic Piquant Herb Sauce for Steak, Chicken, Pork, Lamb & even Eggs!!!!!
Author: 
Recipe type: Sauce
Cuisine: Argentinian
Prep time: 
Total time: 
 
Chimichurri sauce originates in Argentina, a country that eats more beef per capita than any othe country in the world. Most of there beef is barbecued and this sauce is the perfect accompaniment to smokey barbecued beef, however it goes equally well with chicken, pork and lamb.
Ingredients
  • 250ml Fresh parsley
  • 2 Cloves garlic
  • 30ml Fresh Oregano
  • 30ml Red wine vinegar
  • 1.25ml Red chilli flakes
  • 1.25ml Salt
  • Cracked black pepper to taste
  • 125ml Oil
Instructions
  1. Measure out the parsley, oregano, red wine vinegar, olive oil, cracked black pepper, red chilli flakes, salt and 2 cloves of garlic.
  2. Transfer all of these to a tall jug and proceed to puree them with your stick blender. Place the pureed sauce in your refrigerator to chill for at least 2 hours, preferably overnight.
  3. The sauce will keep for up to a week in your refrigerator.
  4. To serve, simply spoon the chimichurri liberally over the meats you are serving and enjoy.


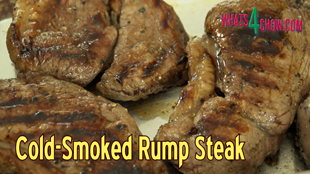
Cold Smoked Rump Steak – Cold Smoked Then Grilled to Tasty Perfection!!! Part 8 Smoking & Curing

cold-smoked rump steak,Grilling (Culinary Technique),Smoking,Rump Steak,Steak (Food),cold-smoking steak,smoke daddy cold smoke generator,how to cold smoke rump steak,cold smoking steak at home,cold-smoked rump steak recipe,using a cold smoker,how to use a cold smoker,rump steak cold smoked,how to cold smoke beef steaks,best cold smoking recipe for steak,cold smoked rump steak on barbecue


Cold Smoked Rump Steak - Cold Smoked Then Grilled to Tasty Perfection!!! Part 9 Smoking & Curing
Author: 
Recipe type: Steak / Smoking / Barbecue
Cuisine: American
Prep time: 
Cook time: 
Total time: 
Serves: 4
 
The concept of this recipe was passed on to me by Dennis Correa, the owner of Smoke Daddy. To cold smoke these steaks, I am using the Smoke Daddy cold smoke generator which has proved to be absolutely amazing throughout this series.
Ingredients
  • 4 x 250g Rump steaks
  • 60ml Demarara or treacle sugar
  • 15ml Himalayan rock salt
  • 15ml Cracked black pepper
Instructions
  1. Pat the steaks dry using kitchen paper.
  2. Transfer the steaks to a rack that has been positioned at an angle over a drip pan.
  3. Fire up your cold smoker. I am using hickory chips which produce a strong, thick smoke, but you can use any flavor of your choice.
  4. After a minute or 2, the smoke generator will be pumping out loads of smoke. Place the steaks in the barbecue and allow them to smoke for 45 minutes.
  5. Remove the steaks from the smoker and wrap them individually in cling-wrap. Allow these to stand at room temperature for a further 45 minutes.
  6. To make the rub, combine the Demerara sugar with the Himalayan rock salt and the cracked black pepper.
  7. Sprinkle the mixture onto both sides of the steaks and use the back of a spoon to polish the rub into the surface of the meat.
  8. Heat a ribbed skillet over high heat and grill the steaks to your preference of doneness. Remove the steaks from the grill and allow them to rest for 5 minutes before serving with the accompaniments of your choice.


Scroll to top

Kitchen Conversions

Convert:
Masses
to:
Volumes
to:
Temperatures
to:
Lengths
to: