How to Make Authentic Hummus – Middle Eastern Chickpea Dip – Homemade Hummus Recipe!!!

hummus,recipe,how to make hummus,homemade hummus,how to make hummus dip,how to make hummus from scratch,how to make hummus with chickpeas,best hummus recipe,how to make hummus at home,how to make hummus south africa,how to make hummus easy,how to make hummus sauce,how to make hummus vegan,how to make hummus with tahini,how to make hummus from canned garbanzo beans,video recipe,simple hummus recipe,easy hummus recipe


How to Make Authentic Hummus - Middle Eastern Chickpea Dip - Homemade Hummus Recipe!!!
Author: 
Recipe type: Dipping Sauce
Cuisine: Middle Eastern
 
In our previous episode we made authentic tahini paste. Today we're going to use this to make authentic hummus.
Ingredients
  • 400g Can of chickpeas, drained and rinsed
  • 30ml Tahini paste
  • 1 Clove garlic
  • 2.5ml Salt
  • 45ml Olive oil
  • 25ml Lemon juice
  • Chopped coriander leaf and lemon zest to garnish
Instructions
  1. Thoroughly rinse the canned chickpeas and measure out the tahini paste, salt, extra virgin olive oil and lemon juice. Peal and roughly chop 1 clove of garlic.
  2. Place all of these ingredients into a tall jug and process until smooth using your stick blender. You can also do this in your food processor. If you're using stick blender lift the head of the blender to clear the blades after each pulse to avoid damaging the unit.
  3. Once you're happy with the texture, transfer the thick paste to a bowl. Drizzle this with a little extra olive oil and mix this in. Continue adding oil until you achieve your desired consistency.
  4. Serve dressed with a little chopped coriander, fresh lemon zest and a drizzle of olive oil.
  5. Stay tuned for our next episode where we're making authentic falafel, accompanied with sesame sauce and hummus.


How to Make Authentic Tahini Paste – Homemade Tahini, Quick & Easy!!!

vegetarian,tahini,mediterranean,how to make,middle east,tahini sauce,sesame,tahini paste,homemade tahini,how to make tahini paste,how to make tahini paste at home,how to make tahini paste video,how to make tahini paste from sesame seeds,how to make tahini paste youtube,how to make tahini paste from scratch,how to make tahini paste for hummus,olive oil,tahini (food),tahini (ingredient)


How to Make Authentic Tahini Paste - Homemade Tahini, Quick & Easy!!!
Author: 
Recipe type: Sauce
Cuisine: Middle Eastern / Mediterranean
 
Tahini paste originates in the Middle East and has gained wide popularity in almost every country of the world. It is one of the main ingredients in hummus, and can be thinned further to make a pourable sauce.
Ingredients
  • 125ml Hulled sesame seeds
  • 30ml Extra virgin olive oil
Instructions
  1. Measure the hulled sesame seeds and the extra virgin olive oil. I am going to process this with a stick blender which is ideal for small quantities, however you can do this in a small food processor, or of you have a large processor, double or triple the recipe to do this.
  2. Place the sesame in a pan over medium heat. Stir the seeds continuously to avoid burning. The toasting process will take 5 to 6 minutes. About halfway through, you will notice the seeds starting to clump together as a result of the oil being released.
  3. Towards the end, the seeds will be very fragrant and will have darkened to a golden color.
  4. Place the sesame in a tall jug and pour in 2 thirds of the oil. Process this with your blender until smooth.
  5. You will notice here that the paste is still a little thick, so Add the remaining oil. Process again to combine this.
  6. Pour the paste into a bowl for immediate use, or store it in an air-tight container in your refrigerator for a few months.
  7. Stay tuned for our next episode where we're using this sesame paste to make hummus.


Gourmet Garlic Bread – Crispy, Crusty Garlic Bread with Pancetta & Blue Cheese!!!

garlic bread recipe,homemade garlic bread,how to make garlic bread,garlic bread ideas,garlic bread in oven,garlic bread rolls recipe,garlic bread from scratch,garlic bread with cheese,garlic bread recipe from scratch,how to make homemade garlic bread,baked garlic bread,easy garlic bread,restaurant garlic bread,gourmet garlic bread,garlic bread recipe youtube,garlic bread recipe video


Gourmet Garlic Bread - Crispy, Crusty Garlic Bread with Pancetta & Blue Cheese!!!
Author: 
Recipe type: Bread / Baked / Barbecue
Cuisine: French
 
Yesterday we made amazing crusty white farm bread. Today we're going to use one of these loaves to make awesome gourmet garlic bread turbo-charged with creamy melted blue cheese and pancetta.
Ingredients
  • 1 x 36cm / 15 inch Baguette-style farm loaf
  • 60g Butter
  • 5 Cloves garlic, finely chopped
  • 60g Blue cheese
  • 50g Pancetta (Italian bacon) finely chopped
Instructions
  1. Measure out the softened butter and blue cheese, and finely chop the fresh garlic and pancetta.
  2. Add the pancetta and garlic to the butter and blue cheese and mash this in thoroughly until everything is totally combined.
  3. Slice through the loaf of bread at an angle leaving the bottom crust of the loaf intact until the entire loaf is sliced with a space of 15mm or just more than a half inch between slices.
  4. Start filling the slices with the garlic butter mixture. This quantity of mixture is sufficient for one loaf.
  5. Place the loaf on a rectangle of foil and roll the log edge of the foil to enclose the loaf. Twist the ends to secure the foil. Don't twist the ends too tightly as you need to unwrap the loaf while it is hot, and if it is too tightly bound this will be very difficult and possibly dangerous.
  6. Bake the loaf in a preheated oven at 180c or 350f for 20 minutes.
  7. Immediately after baking, unwrap the loaf and serve hot and steaming.
  8. You can also bake the garlic bread in your closed barbecue following the same time and temperature. (indirect heat)


How to Pickle Jalapeño Peppers – Homemade Pickled Jalapeño Peppers Quick & Easy

How to Pickle Jalapeño Peppers,Homemade Pickled Jalapeño Peppers,quick pickled jalapeno peppers,easy pickled jalapeno peppers,make pickled peppers at home,bottled jalapeno peppers,pickling jalapeno peppers at home,how to bottle peppers,how to pickle peppers,making pickled jalapenos at home,pickled jalapenos easy recipe,pickled jalapenos video recipe,pickled jalapenos youtube


How to Pickle Jalapeño Peppers - Homemade Pickled Jalapeño Peppers Quick & Easy
Author: 
Recipe type: Pickles / Preserves
Cuisine: Mexican
 
Pickled jalapeños are a great way to preserve your crop. Apart from the preserving aspect, pickled jalapeños have an amazing flavor that only pickling reveals.
Ingredients
  • 200g Jalapeño Peppers
  • 200ml White wine vinegar
  • 30g White sugar
Instructions
  1. Snip off the stems from the jalapeños. Use a sharp paring knife to slice lengthways down the side of the chilies.
  2. Pack the chillies tightly into a suitable clean glass jar.pack the as tightly as possible.
  3. Add the sugar and wine vinegar to a small saucepan and bring this to a boil. Remove this from the heat and put it aside.
  4. Place the jar of chillies in a saucepan of hot water. This will acclimatize the glass to receiving the boiling hot vinegar syrup. If you skip this step, the jar may crack.
  5. Pour the syrup into the jar until the chillies are covered. Carefully put the lid on the jar, then allow this to cool in the hot water.
  6. Once cooled, place the pickled jalapeños in your refrigerator for at least a month before opening.


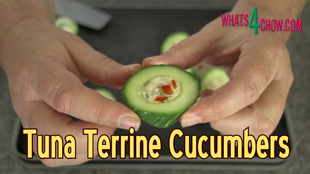
Tuna Terrine Cucumbers – Cucumber Wedges Filled with Gelatin Tuna Terrine!!!

tuna terrine cucumbers,tuna terrine stuffed cucumbers,tuna terrine filled cucumbers,stuffed cucumbers,filled cucumbers,set tuna terrine in cucumbers,how to make tuna terrine,how to mix gelatin,how to set tuna in gelatin,fish in gelatin recipe,how to mold gelatin,how to mold gelatin in cucumbers,how to make gelatin terrine,how to set gelatin terrine


Tuna Terrine Cucumbers - Cucumber Wedges Filled with Gelatin Tuna Terrine!!!
Author: 
Recipe type: Fish / Seafood
Cuisine: French
Prep time: 
Total time: 
Serves: 36-40
 
Hollowed cucumbers filled with tuna terrine make amazing finger snacks, starters or accompaniments to your main meal.
Ingredients
  • ¼ Red pepper, finely chopped
  • 4 Tbs Chopped garlic chives
  • Zest of 1 lemon
  • 100g Mayonnaise
  • 200g Canned shredded tuna, drained (can also use salmon)
  • 18-20 x 5cm (2 inch) pieces of English cucumber
  • Salt and cracked black pepper to taste
For the Gelatin
  • 25ml Powdered gelatin
  • 225ml Hot water
  • 275ml Cold water
Instructions
  1. Finely chop the red pepper and garlic chives. Grate the rind of one lemon and measure out the mayonnaise. Cut 18 to 20 x 5cm or 2 inch lengths of cucumber and use a apple corer to remove the centers from these.
  2. Place the tuna in a jug and add the lemon zest, peppers, chives and mayonnaise.
  3. To mix the gelatin, pour 225ml of hot water into a small jug and add the powdered gelatin. Stir this for a minute or 2 until it is totally dissolved. Pour this into a larger jug and top it up with cold water to a total of 500ml.
  4. Stir to combine, then pour this into the jug containing the main ingredients. Stir this until everything is combined and the mayonnaise has totally dissolved then put this aside.
  5. Use the back of a spoon to put a coating of butter onto a baking sheet or pan. Press the cucumbers into the butter.
  6. Place the baking sheet or pan on top of an ice block or over another large pan filled with ice. This sets the butter hard and totally seals the bases of the cucumbers. Allow this to set for 5 minutes.
  7. Fill the cucumbers with the terrine mixture. Don't be too concerned with spillage as this will simply wipe away once the gelatin has set. Place these in your refrigerator.
  8. Any leftover filling can be molded in ramekins.
  9. After an hour or so the terrine will have set. This timing depends largely on the temperature of your refrigerator. Remove them from the fridge and pull the cucumbers free from the butter. Wipe off any spillage from the edges.
  10. Use a razor sharp knife to slice wafer thin slices from each end of the cucumber pieces to neaten up the ends. Slice the cucumber pieces at an angle and you're done.
  11. To unmold the ramekins simply run a thin blade round the edge of the ramekins and pop them out onto the plate.


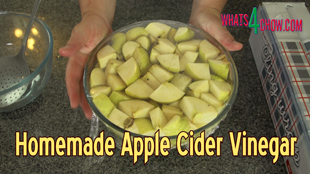
Homemade Apple Cider Vinegar – Make Real, Healthy Apple Cider Vinegar at Home!!!

Homemade Apple Cider Vinegar,how to make apple cider vinegar,simple homemade apple cider vinegar,how to make apple core vinegar,real homemade apple cider vinegar,proper apple cider vinegar recipe,recipe for making apple cider vinegar,video recipe apple cider vinegar,how to make apple cider vinegar youtube,youtube apple cider vinegar,making apple cider vinegar at home,easy apple cider vinegar recipe


Homemade Apple Cider Vinegar - Make Real, Healthy Apple Cider Vinegar at Home!!!
Author: 
Recipe type: Vinegar / Condiments
 
Apple cider vinegar is used in tons of different cuisines and despite the fact that there is a permanent glut of apples in the marketplace, cider vinegar is stupidly expensive. This is how to make it at home.
Ingredients
  • 1.5kg Apples (your favorite variety)
  • 1.5lt Pure water / mineral water (non-chlorinated)
  • 120g Sugar
Instructions
  1. Cut your apples into blocks, including the cores, and place this in a large non-reactive bowl. In another bowl, combine the sugar and mineral water. Don't use tap water as the chlorine in the water will inhibit the fermentation process. Stir the mixture until all of the sugar has dissolved.
  2. Pour the sugar solution over the apple and add a little more mineral water to top up if necessary. Cover the bowl with cling-wrap and prick a few tiny holes in the plastic to allow the CO2 to escape.
  3. Place this out of the way on your counter at room temperature. Let this stand for 7 to 10 days, stirring each day.
  4. Every day you will notice a froth on top of the bowl. This is the fermentation in progress. After 7-10 days, the mixture will have the aroma of an apple cider.
  5. Strain the fermented mixture to remove all of the solids. Pour the liquid into suitable sterilized containers.
  6. Cover the containers using multiple layers of cloth, secured with elastic bands. Place the jars in a dark cupboard for 6 weeks to mature.
  7. And there you have it, home made apple cider vinegar.


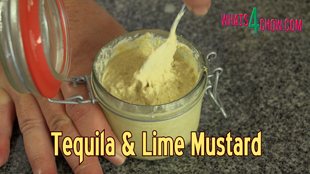
Homemade Tequila & Lime Mustard – Mexican Mustard!!!???

tequila and lime mustard,how to make mustard at home,homemade mustard,mexican mustard,how to make hot mustard,hot mustard recipe,mustard recipe,making mustard at home,gourmet mustard recipe,unusual mustard recipe,how to make mustard for pork,mexican mustard recipe,how to make mustard video recipe,homemade mustard video recipe


Homemade Tequila & Lime Mustard - Mexican Mustard!!!???
Author: 
Recipe type: Condiments & Sauces
Cuisine: Mexican
Prep time: 
Total time: 
 
Tequila and lime mustard gives a whole new twist to one of life's most popular condiments.
Ingredients
  • 60g Hot English mustard powder
  • 20g Whole yellow mustard seeds
  • 30ml Tequila
  • 50ml Lime Juice
  • 1.25ml Salt
  • 1.25ml Sugar
  • White wine vinegar to thin (quantity will vary from batch to batch)
Instructions
  1. Combine the yellow mustard powder and seeds, and measure out the salt, fresh lime juice and tequila.
  2. Place all of these in a tall jug and use your stick blender to grind the ingredients to a paste. As you do this the mustard will absorb more and more of the liquid.
  3. Add a little white wine vinegar every time it gets too thick. Continue blending until the paste is quite smooth.
  4. Transfer the mustard to a clean jar and refrigerate overnight.
  5. The following day the mustard will be far thicker after autolysing overnight. To thin the mustard, add more white wine vinegar bit by bit, stirring it in thoroughly as you go. When you reach your desired consistency, return the mustard to the refrigerator.
  6. The mustard will keep indefinitely in your refrigerator. For an interesting twist, try adding a little finely chopped pickled jalapeno.


Super Bowl Snacks – Crispy Deep Fried Baby Potato Skins – Best Potato Skins Ever!!!

super bowl recipes,deep-fried potato skins,deep-fried baby potato skins,how to make potato skins,baby potato skins recipe,Super Bowl Snacks - Crispy Deep Fried Baby Potato Skins - Best Potato Skins Ever!!!,crispy deep-fried potato skins,crispy deep-fried baby potato skins,stuffed potato skins,filled potato skins,crispy filled potato skins,crispy deep-fried stuffed potato skins,homemade potato skins recipe,best potato skins recipe


Super Bowl Snacks - Crispy Deep Fried Baby Potato Skins - Best Potato Skins Ever!!!
Author: 
Recipe type: Potatoes
Prep time: 
Cook time: 
Total time: 
 
Crispy deep-fried baby potato skins are amazing. You can fill them with anything from chilli beef to seafood, or you can use them to scoop up creamy dips.
Ingredients
  • Baby potatoes
  • Oil for frying
  • The fillings and dips of your choice
Instructions
  1. Place the baby potatoes in a pot and cover them with boiling kettle water. Bring them to a boil over high heat and continue to boil for 10 minutes.
  2. Drain the potatoes and cool them under cold running water.
  3. Cut the potatoes in half length-ways. Use a paring knife to remove the bulk of the flesh from the centers of the potatoes. Keep the centers to fry as baby potato crisps.
  4. Half-fill a large pan with oil and heat this to 180c or 350f. Carefully drop the potato skins into the oil, followed by the potato chips.
  5. Fry the potatoes until crisp and golden then remove them from the oil using a pair of tongs. Drain the excess oil on kitchen paper.
  6. Use a slotted spoon to remove the baby potato crisps.
  7. Transfer the baby potato skins to platters and serve with a dipping sauce, or fill the potatoes with fillings of your choice.


Superbowl Snacks – Little Smokey Frankfurters in Tomato, Onion & Beer Gravy

superbowl snacks,super bowl snacks,cocktail sauasages in thick gravy,cocktail sausages in tomato,onion & beer,simmered cocktail frankfurters,smoked cocktail frankfurters in tomato gravy,super bowl recipes,how to cook cocktail sausages,recipes for the big game,tomato,onion,beer,tomato onion & beer gravy,tomato onion beer salsa,food for the super bowl


Superbowl Snacks - Little Smokey Frankfurters in Tomato, Onion & Beer Gravy
Author: 
Recipe type: Sausages / Super Bowl
 
The Superbowl is here! This is an awesome dish of cocktail frankfurters lovingly simmered in tomato, onion and beer gravy. The gravy is thick and rich and delicious.
Ingredients
  • 600g Cocktail frankfurter sausages
  • 500ml Cocktail tomatoes
  • 250ml Beer
  • 60ml Soft brown sugar
  • 45ml Worcestershire sauce
  • 15ml Balsamic vinegar
  • 15ml Paprika
  • 15ml Cornstarch
  • 5ml Ground black pepper
  • 5ml Salt
  • Half an onion
  • 3 Cloves garlic
Instructions
  1. Place the cocktail tomatoes, onion and garlic in your processor bowl. I am using a combination of fresh tomatoes and canned, however you can use all fresh or all canned.
  2. Place the lid on the bowl and process this until reasonably fine.
  3. Add the sugar, paprika, ground black pepper and salt. Add the balsamic vinegar, Worcestershire sauce and beer. Dissolve the cornflour in a little water and pour this in.
  4. Put the lid back in place and process for a further 30 seconds to dissolve the sugar and salt.
  5. Pour the mixture into your slow cooker or a digital pot and bring this to a very slow simmer. Allow this to continue for 60 minutes, stirring every 20 minutes.
  6. By this stage the gravy will have started to thicken nicely and it's time to add the cocktail frankfurters. Give it a brief stir yo make sure everything is submerged, then continue to slow simmer the pot for a further 60 minutes, stirring gently every 20 minutes.
  7. Transfer the franks to serving bowls, drizzle generously with the gravy and serve immediately. You can also make these ahead of time as they reheat perfectly. If your guests don't like getting down and dirty, serve accompanied with skewers.


Baked Marrow Bones. Marrow Bones Baked with Thick Gravy in Osso Bucco Style!!!

baked marrow bone recipe,how to bake marrow bone,baked lamb marrow bone recipe,osso bucco style baked marrow bone,homemade marrow bone recipe,make marrow bone at home,how to bake marrow bone,marrow bone delicacy,how to cook marrow bones,how to prepare marrow bones,easy marrow bone recipe,simple marrow bone recipe,how to make marrow bones,marrow bones with thick gravy


Baked Marrow Bones. Marrow Bones Baked with Thick Gravy in Osso Bucco Style!!!
Author: 
Recipe type: Lamb / Mutton
Cuisine: Greek / Mediterranean
Prep time: 
Cook time: 
Total time: 
Serves: 2-4
 
Baked marrow bone is so addictive it should be scheduled as a controlled substance. This dish is suitable as a starter or accompaniment to your main course, and can be prepared ahead of time and reheated.
Ingredients
  • 1kg / 2.2lb Lamb leg bones, cut into 50mm / 2 inch pieces
  • Oil for coating
  • 60ml Oil for frying
  • 80ml Chopped onion
  • 125ml White wine
  • 125ml Chopped cherry tomatoes
  • 500ml Vegetable stock
For the Seasoned Flour
  • 1 Cup All-purpose flour
  • 5ml Salt
  • 1.25ml Fine black pepper
  • 1.25ml Ground nutmeg
For the Gremolata
  • 30ml Finely chopped parsley
  • 1 Clove garlic, finely chopped
  • 15ml Grated lemon rind
Instructions
  1. Combine the salt, ground black pepper and nutmeg with all-purpose flour.
  2. I am using lamb leg bones that have been cut into 50mm or 2 inch lengths, but you can use any marrow bones of your choice.
  3. Place the bones in a mixing bowl, pour in a little oil and toss the bones until they are all coated.
  4. Dredge the bones in the seasoned flour to coat them all over.
  5. In addition you need to chop the cocktail tomatoes and onion, and measure out the white wine and vegetable stock.
  6. Heat a large wok or pan over medium heat and add 60ml of oil. Add the marrow bones to the pan and fry the bones slowly for 15 minutes until browned, stirring intermittently to ensure even coloring.
  7. Remove the bones from the pan and place them in a small roasting tin.
  8. Add the onions to the pan and fry them for 8 minutes until they start to brown on the edges. Pour the onions and the roux from the pan over the marrow bones.
  9. Add the stock, wine and tomatoes to the pan and heat the mixture until almost boiling. Pour this over the marrow bones.
  10. Cover the roasting pan with foil and bake in a preheated oven at 150c or 300f for 60 minutes.
  11. While the bones bake, make up the gremolata by combining the finely chopped parsley, garlic and lemon rind.
  12. Remove the bones from the oven and serve them to platters. Pour some of the gravy from the pan over the marrow bones, sprinkle with the gremolata and serve immediately.


Deep-Fried Stuffed Mushrooms. Crispy Deep-Fried Mushrooms Stuffed with Pork!!!

deep-fried mushrooms,deep-fried stuffed mushrooms,deep-fried pork stuffed mushrooms,how to stuff and deep-fry mushrooms,homemade deep-fried mushrooms,best deep-fried mushrooms recipe,easy deep-fried mushrooms,deep-fried mushrooms stuffed with pork,spicy deep-fried mushrooms,how to coat mushrooms for deep frying,quick deep fried mushrooms recipe,crispy deep-fried mushrooms,deep-fried mushroom starter,mushroom recipes


Deep-Fried Stuffed Mushrooms. Crispy Deep-Fried Mushrooms Stuffed with Pork!!!
Author: 
Recipe type: Deep-fried / Starter
Prep time: 
Cook time: 
Total time: 
Serves: 2-4
 
These deep-fried mushrooms stuffed with pork banger meat are absolutely amazing!
Ingredients
  • 8-12 Medium size white mushrooms
  • 1 Large pork banger
  • 250ml All-purpose flour
  • 2 Eggs
For the flour seasoning
  • 5ml Cayenne pepper
  • 1.25ml Dried sage
  • 1.25ml Garlic powder
  • 1.25ml Dried oregano
  • 1.25ml Cracked black pepper
  • 1.25ml Dried basil
  • 1.25ml Dried marjoram
  • 1.25ml Gorund coriander seed
Instructions
  1. Snap the stems from the mushrooms. You can keep the stems to add to soups, salads or stir-fries.
  2. Take the pork banger and cut through the skin length-ways. Squeeze the pork filling from the sausage. This filling has more than enough seasoning and flavor, so you don't have to do anything more to it.
  3. Pick up a bit of the sausage meat and press it into one of the mushroom caps. You need enough meat to turn the mushroom into a totally rounded object. Smooth off the meat and continue with the remaining mushrooms.
  4. Combine the seasoning and the all-purpose flour and scatter some of this across a platter. This is where the coated mushrooms will set, and this layer of flour will prevent the coated mushrooms from sticking to the platter.
  5. In another bowl, crack 2 eggs and whisk them briefly. The mushrooms need to be double coated. To do this dunk a mushroom in the egg, then roll it in the flour to coat all over.
  6. Return it to the egg to wet all of the flour. Finally back into the flour once more, making sure to get a good solid coating. Transfer this to the platter and continue with the remaining mushrooms.
  7. Allow the coating on the mushrooms to set for 20 minutes before proceeding.
  8. Fill a large pan with oil to a depth of 25mm or 1 inch and heat this to 180c or 350f. Carefully drop the mushrooms into the oil and fry them for 3 to 4 minutes. Gently roll the mushrooms around the pan while they fry in order to get even coloring and crisping.
  9. Remove the mushrooms from the pan using a slotted spoon and drain the excess oil on kitchen paper.
  10. Transfer the mushrooms to platters and serve immediately with any mayonnaise based dipping sauce of your choice.


Honey Roasted Sweet Potato – Sticky Roasted Sweet Potato – Best Sweet Potato Recipe

sweet potatoes recipe,roasted sweet potatoes recipe,how to roast sweet potatoes,sticky sweet potatoes,sticky roast sweet potatoes,honey roast sweet potatoes,crispy sugar sweet potatoes,honey and cinnamon sweet potatoes,how to make sticky sweet potatoes,how to roast honey sweet potatoes,honey glazed sweet potatoes,best sweet potato recipe


Honey Roasted Sweet Potato - Sticky Roasted Sweet Potato - Best Sweet Potato Recipe
Author: 
Recipe type: Vegetable / Potatoes
Prep time: 
Cook time: 
Total time: 
Serves: 4
 
These golden sticky sweet potatoes will make a perfect accompaniment to any roast. Flavored with honey and cinnamon, all I can say is yum, yum....
Ingredients
  • 2 Large sweet potatoes
  • 60ml Olive oil
  • 60ml Honey
  • 10ml Cinnamon
  • Salt & Cracked Black Pepper to taste
Instructions
  1. To start, peel and cut the sweet potato into 1 inch cubes. Place the cubes in a large roasting pan.
  2. Combine the honey and olive oil in a jug.
  3. Heat this briefly in your microwave to thin it out and pour it over the potatoes. Stir the the pan until everything is well coated.
  4. Sprinkle the ground cinnamon over the potatoes and mix the pan again.
  5. Give this a generous grind of salt and cracked black pepper before popping it into a preheated oven at 190c or 375f.
  6. Roast the potatoes for 25 to 30 30 minutes, giving them a good stir every 10 minutes.
  7. Remove the potatoes from the oven and serve immediately.


Scroll to top

Kitchen Conversions

Convert:
Masses
to:
Volumes
to:
Temperatures
to:
Lengths
to: