Barbecue Bourbon Sticky Chicken Wings – BBQ Chicken Wings with Sticky Bourbon Basting!!!

sticky chicken wings,bbq sticky chicken wings,barbecue sticky chicken wings,bourbon sticky chicken wings,barbecue bourbon sticky chicken wings,marinated bourbon chicken wings recipe,sticky chicken wings video recipe,how to make sticky chicken wings,homemade sticky chicken wings,how to make bourbon chicken wings,homemade bourbon chicken wings,sticky chicken wings on the barbecue, sticky chicken wings recipe oven


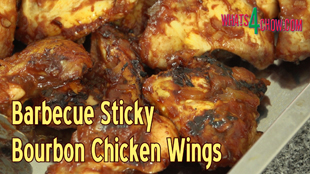
Barbecue Bourbon Sticky Chicken Wings - BBQ Chicken Wings with Sticky Bourbon Basting!!!
Author: 
Recipe type: Chicken / Poultry / Barbecue
Cuisine: American
 
Bourbon chicken wings can be done on the barbecue or in the oven.... no matter which way, these bourbon sticky chicken wings are outstanding and will have your friends and family lining up for more.
Ingredients
  • 18 - 24 Full chicken wings
  • 2 Onions chopped
  • 3 Cloves garlic chopped
  • 250ml Bourbon
  • 500ml Tomato puree
  • 80ml Cider vinegar
  • 80ml Worcestershire sauce
  • 125ml Sticky brown sugar (Demarara or treacle)
  • 5ml Tabasco sauce
  • 10ml Coarse salt
  • 10ml Cracked black pepper
Instructions
  1. Starting with the marinade, saute the onions and garlic in a pan over medium heat for 5 minutes until they are tender and translucent.
  2. Pour in the bourbon and continue to fry for a further 2 minutes.
  3. Add the Tabasco, cider vinegar, Worcestershire sauce, brown sugar, salt, cracked black pepper and tomato puree.
  4. Mix this all together thoroughly and continue to simmer the sauce for a further 2 to 3 minutes. Remove the pan from the heat and set it aside to cool while you continue with the wings.
  5. Cut the the wingtips from the wings and transfer the wings to a large non-reactive pan. Pour the bourbon sauce over the wings evenly so that everything is covered.
  6. Place the wings in the refrigerator to marinate for at least 8 hours, preferably overnight.
  7. Barbecue the wings over high heat for 16 minutes, turning every 4 minutes and basting at every turn with the remaining sauce.
  8. If you prefer to use your oven, place the pan in your preheated oven at 180c or 350f for 30 to 40 minutes.
  9. Serve the wings to platters with the accompaniments of your choice and serve immediately.


Gourmet Cold-Smoked Baby Sole – How to Make Cold-Smoked Sole with Smoke Daddy Cold Smoke Generator.

how to smoke sole,cold smoked sole,cold smoking sole,cold-smoking baby sole,cold-smoke sole with smoke daddy cold smoke generator,cold-smoking fish using smoke daddy cold smoke generator,how to smoke fish,smoked sole recipe,smoked fish recipe,smoked sole using apple wood,the smoke daddy cold smoke generator how to use,making smoked fish,cold smoked fish,cold smoking fish,smoke daddy smoke generator recipes,cold-smoked sole


Gourmet Cold-Smoked Baby Sole - How to Make Cold-Smoked Sole with Smoke Daddy Cold Smoke Generator.
Author: 
Recipe type: Seafood / Fish / Smoking
Prep time: 
Cook time: 
Total time: 
Serves: 2
 
In today's episode we're going to use the Smoke Daddy cold smoke generator to flavor a batch of baby sole. The fish is first cold smoked, then pan-fried to perfection resulting in a truly gourmet fish dish subtly infused with apple wood smoke.
Ingredients
  • 4 Baby sole (approx 130g each)
  • 60g Butter
  • 5ml Herbs provence herb mix
  • 2.5ml Garlic powder
  • 30g Butter for frying
  • Apple wood chips
Instructions
  1. To start, place the butter, garlic powder and dried herbs in a heatproof bowl. Pop this in your microwave oven and melt the butter.
  2. Pat the sole dry with kitchen paper.
  3. Place a rack at an angle across the corners of a roasting pan, and transfer the sole to the rack. Brush both sides of the sole with the butter mixture.
  4. Fire up your cold smoke generator and place the fish in the barbecue. Allow this to smoke for 45 minutes.
  5. After 45 minutes remove the sole from the barbecue. Heat a pan over medium high heat and add 30g of butter. Fry the sole for 2 to 3 minutes per side.
  6. Season to taste with salt and pepper.
  7. Transfer the sole sole to serving platters and top with a little of the pan butter and lemon or lime wedges before serving with accompaniments of your choice.


Thanksgiving Smoked Turkey – Part 6 of Smoking & Curing Foods with Smoke Daddy – How to Smoke a Turkey.

smoked thanksgiving turkey,thanksgiving turkey recipe,smoke thanksgiving turkey,how to smoke a turkey,how to smoke a whole turkey,how to cure a turkey,how to cure and smoke a turkey,smoke daddy cold smoke generator,how to smoke a turkey with the smoke daddy cold smoke generator,smoking a whole turkey for thanksgiving, ultimate smoked turkey, brine recipe, barbecue turkey recipe,whole smoked turkey


Thanksgiving Smoked Turkey - Part 6 of Smoking & Curing Foods with Smoke Daddy - How to Smoke a Turkey.
Author: 
Recipe type: Smoking / Turkey / Poultry
Cuisine: American
Prep time: 
Cook time: 
Total time: 
Serves: 6-8
 
Hi and welcome to part 6 of our series on smoking and curing foods. With Canadian Thanksgiving on Monday and in just over a month in the US, today's episode covers curing a smoking a delicious Thanksgiving turkey.
Ingredients
  • 1 x 5-6lb Turkey (2.5kg - 2.8kg)
For the Curing Brine
  • 5lt Water
  • 15g Saltpetre
  • 100g Sugar
  • 200g Salt
  • 30ml Black peppercorns
  • 30ml Whole allspice
  • 10ml Ground ginger
  • 25ml Bicarbonate of soda
For the Basting / Mop
  • 100ml Honey
  • 40ml Lemon Juice
  • Zest of 1 lemon
  • 10ml Lemon pepper
  • 15ml Garlic powder
  • 5ml Cayenne pepper
  • Smoked salt
Instructions
  1. For the curing brine combine the saltpetre, sugar, salt, black peppercorns, whole allspice, ginger and bicarbonate of soda and pour these into a pot along with 5 liters of water.
  2. Bring the pot to a boil, reduce the heat and allow this to simmer for 30 minutes. Quick chill the pot by floating it in cold water in your sink.
  3. To prepare the turkey, trim away any excess skin and fat from the neck and butt. Removing the tail is a matter of personal preference.
  4. Use a sharp knife to cut through the skin and flesh along the breast bone. Cut through the breast bone with your kitchen shears.
  5. Open up the bird, flip it over and dislocate the pelvis with a sharp downward thrust. This allows the bird to lie flat. Removing the wing tips is also a matter of personal preference, however I do recommend this.
  6. Transfer the turkey skin side up to a large food-safe non-reactive container. Pour the cooled brine into the container.
  7. Place a weight on top of the turkey to keep it fully submerged in the solution.
  8. Place the container in your refrigerator and allow it to cure for 48 hours.
  9. After curing, you will need to make the basting. Combine the lemon juice and honey. Take the lemon pepper, garlic powder, cayenne pepper and lemon zest and add these to the honey and lemon juice. Mix these until totally combined.
  10. You will also need smoked salt to grind over the turkey once it has been basted.
  11. Remove the turkey from the curing brine and pat both sides dry using kitchen paper.
  12. Brush the underside liberally with the basting, flip the bird over and repeat this with skin side, before giving the skin a generous grind of smoked salt.
  13. Place a rack at an angle across a pan and transfer the turkey to the rack.
  14. Get your smoker running and heat the barbecue to 250f or 135c. I am using the Smoke Daddy cold smoke generator which allows for perfect cold or hot smoking in any closed barbecue. If you are using another brand of smoker, follow the manufacturer's instructions.
  15. Place the turkey in the barbecue and allow this to smoke for 40 minutes per pound. For my turkey weighing in at about 5 pounds this will take 3 hours 20 minutes. Baste the bird every half hour with melted butter to prevent the skin from drying out.
  16. Towards the end point, check the internal temperature with a probe thermometer. When the internal temperature reaches 170f or 77c in the thichest part of the meat, the turkey is ready to serve.
  17. And there you have it, a beautifully fragrant, tasty and succulently tender smoked turkey flavored with garlic, lemon and a hint of chilli.


Apple Wood Smoked Chicken Thighs – Part 4 of Curing & Smoking Meats – Smoke Daddy Smoke Generator!!!

how to smoke chicken thighs,how to smoke chicken thighs in your smoker,making smoked chicken thighs,best smoked chicken thighs,making smoked chicken thighs using the smoke daddy smoke generator,recipe for smoked chicken thighs,best hot smoked chicken thighs recipe,hot smoking chicken, smoked chicken leg quarters, smoking leg quarters, competition-style barbecue chicken thighs, smoked chicken rub


Apple Wood Smoked Chicken Thighs - Part 4 of Curing & Smoking Meats - Smoke Daddy Smoke Generator!!!
Author: 
Recipe type: Chicken / Poultry / Barbecue / Smoked Meats
Prep time: 
Cook time: 
Total time: 
Serves: 6-12
 
These apple-wood smoked chicken thighs are absolutely amazing and will certainly have your guests talking for ages.
Ingredients
  • 8-12 Chicken thighs
  • 60ml Syrup (corn syrup, cane syrup or honey)
  • 30ml White wine vinegar
  • Peppadew Piquant Pepper & Cilantro Seasoning (if you can't find this look below for the homemade version which will closely approximate the taste)
For the Homemade Rub
  • 15ml Fine Himalayan Salt - or any non-iodated salt
  • 30ml Red Bell Pepper Falkes
  • 10ml Onion Powder
  • 10ml Garlic Powder
  • 30ml Powdered Dried Cilantro Leaves
  • 10ml Chilli Flakes
  • 5ml Ground Black Pepper
  • 10ml Lemon Pepper
  • 10ml Powdered Sugar
Instructions
  1. For the coating, pour the syrup and white wine vinegar into a jug and mix until totally combined. You can use cane syrup, corn syrup or even honey.
  2. Place the chicken thighs in a large mixing bowl and pour the syrup mixture over the chicken. Mix the chicken around in the bowl until everything is well coated.
  3. Cover the bowl and allow this to stand for 30 minutes.
  4. Transfer the chicken to a rack in a pan and sprinkle both sides of the thighs liberally with the seasoning. I am using my favorite Peppadew Cilantro seasoning. Peppedew products are sold in USA, UK and Australia, but if you can't find it, I have included a home made version in the printable recipe above.
  5. Lift the rack up and balance it diagonally across the corners of the pan. This will allow the smoke to reach the underside of the chicken effectively, while the pan becomes a drip-tray.
  6. Load up your smoker with apple wood chunks and bring it up to a temperature of 135c or 275f. Place the chicken in the smoker and allow this to smoke for 2 to 2.5hrs until the internal temperature reaches 76c or 170f. Use a reliable probe thermometer to measure the internal temperature, and measure from the thickest part of the largest thigh.
  7. Remove the amazingly aromatic and tasty thighs from the smoker and serve immediately with the accompaniments of your choice.


Smoke Daddy Cold Smoke Generator – Installation – Quick & Easy to Install Smoke Daddy!

cold smoking food,hot smoking food,how to use a smoker,smoking food at home,how to smoke food at home,cold smoked meat,smoked pork,smoke daddy inc.,cold smoke generator,bbq smoker,cold smoking,recipe,food,smoke daddy cold smoke generator review,smoke daddy 8 inch cold smoke generator,meat smoker,you can build a cold smoker,smoked salmon,cold smoked salmon,smoke daddy cold smoke generator,bbq smoking pellets

In yesterday’s episode we unpacked the Smoke Daddy cold smoker unit. Today we’re going to install it on our barbecue.

To start, I have used a metal hole cutter to cut holes through the side carcass of the barbecue. This particular barbecue has a double wall, but the extra length of the outlet pipe accommodates this extra thickness with no problem.

Simply slide the outlet pipe through the hole. Use the locking nut and washer to secure the pipe on the inside of the barbecue. There is no need to over-tighten the nuts… finger-tight is just fine.

To operate the unit, I am using a small lump of charcoal. Drop this into the unit and set it alight using your blow-torch. At this stage, I have both lids off and the air pump is running on full output.

This particular model, the Magnum, will take up to 6 cups of wood chips. For this demo, I am adding just 2 cups which should give me an hour or 2 of good smoke. I have found that soaking the chips in water for 30 minutes will slow the burn, but also reduces the smoke rate.

Within a minute or 2 of adding the wood, the charcoal will set this smoldering and the smoke will start pumping through the outlet pipe.

All that remains is to adjust the air flow rate on the pump and you’re ready to go.

You can click the onscreen link to see the full range of Smoke Daddy products.

Smoke Daddy Cold Smoke Generator – Unboxing. Part 1 of Whats4Chow’s Smoking & Curing Foods.

cold smoking food,hot smoking food,how to use a smoker,smoking food at home,how to smoke food at home, cold smoked meat, smoked pork, smoke daddy inc., cold smoke generator, bbq smoker, cold smoking, recipe, food, smoke daddy cold smoke generator review, smoke daddy 8 inch cold smoke generator, meat smoker, you can build a cold smoker, smoked salmon, cold smoked salmon, smoke daddy cold smoke generator, bbq smoking pellets

Smoke Daddy Cold Smoke Generator.

As promised last episode, our cold smoke generator has arrived, and our series on cold smoking, hot smoking and curing meats is starting today. This first episode is the introduction and un-boxing of this amazing product that we will be using throughout the course. So here we go…

Before we continue, you can see the full range of Smoke Daddy products on our website by clicking the onscreen link.

Smoke Daddy manufactures this product in the USA and it is shipped worldwide. In addition, the airpump that runs the venturi airflow system is available in 110v, 220v and 240v versions.

First to come out is the cast aluminium bottom cap with vents and bakelite handle.

Then the cast aluminium top cap, also with a heat proof bakelite handle.

Next up is the main body of the unit, consisting of a very solid aluminium cylinder with the air inlet pipe already threaded and attached. The stainless steel burning grate also slots into the cylinder, which we’ll look at just now.

This is followed by the stainless outflow pipe with all the fittings necessary to attach it to the barbecue or smoking chamber. In addition, the bakelite threaded nut which secures the bottom cap in place.

The unit also comes with a sturdy wire brush for cleaning the unit.

The operation manual is in full color, printed on good quality stock and includes information on all of Smoke Daddy’s products, as well as a selection of recipes for cold and hot smoking.

And last, but not least is the air pump. This pumps air through the top of the unit creating a venturi flow in the smoking chamber. This increases the efficiency of the burn and delivers the smoke to the barbecue. The pump output is variable via the rotating dial, giving you ultimate control over the burn rate and amount of smoke produced.

Back to the main unit. The stainless grating simply drops into the main cylinder and is supported by a c-clip towards the bottom of the cylinder.

The outlet pipe simply screws into the threaded outlet hole situated directly opposite the air pump delivery pipe. The extra length of the outlet pipe allows you fit the unit to barbecues or chambers with varying wall thicknesses.

The air pump hose is heat proof silicone and simply presses onto the outlet nipple on the pump.

Stay tuned for our next episode where we will be demonstrating how to mount the unit to a barbecue.

Thanks for joining us today, please subscribe to our channel, and we’ll see you again tomorrow.

Visit our website on http://Whats4Chow.com for more details.

This is episode #327 with Whats4Chow.com – please subscribe for notifications and updates.

Chinese Steamed Hoisin Pork Buns on the Barbecue. How to Make Steamed Buns on Your Barbecue.

chinese steamed bun,steamed buns,chinese steamed buns,steamed pork bun,steamed bun recipe,pork bun recipe,chinese steamed pork bun recipe,how to make steamed buns,how to make chinese steamed buns,how to make fluffy asian bread buns,chinese steamed buns recipe for dough,chinese steamed buns with pork filling,asian dim sum,chinese steamed buns white,chinese steamed buns dough recipe,how to make cha siu bao,chinese bbq pork bun,bbq pork bun,chinese steamed bbq pork bun


Chinese Steamed Hoisin Pork Buns on the Barbecue. How to Make Steamed Buns on Your Barbecue.
Author: 
Recipe type: Steamed Buns
Cuisine: Chinese
Prep time: 
Cook time: 
Total time: 
Serves: 16
 
Just 1 quick trick and you can make your Chinese steamed buns on your gas barbecue. Making the steamed buns is quick and easy, and the aromatic flavorful buns will have your guests talking for weeks!!!
Ingredients
For the Dough
  • 300g All-purpose flour
  • 15ml Baking powder
  • 110g Caster sugar
  • 125ml Milk
  • 80ml Water
  • 60ml Oil
For the Hoisin Pork Filling
  • 250g Pork loin
  • 125g Streaky bacon
  • 10ml Garlic
  • 10ml Ginger
  • 1 Small carrot
  • 30ml Hoisin sauce
  • 15ml Oyster sauce
  • 15ml Cornflour
Instructions
  1. In a large mixing bowl, combine the flour, baking powder and caster sugar.
  2. In a jug, whisk the milk, water and oil together, then pour this into the mixing bowl.
  3. Using a wooden paddle, mix this until a smooth dough comes together. The dough will be soft and very sticky.
  4. Turn this out onto a well floured work surface and sprinkle more flour over the top of the dough. Start kneading, stretching and folding the dough, sprinkling more flour on every time it becomes sticky.
  5. When the dough smooth and is no longer sticky it is ready wrap in clingwrap. Place the dough in your refrigerator for 60 minutes.
  6. While the dough rests, place the pork, bacon, garlic, ginger, carrot, hoisin sauce, oyster sauce and cornflour in your food processor and zap this until it is finely chopped.
  7. Unwrap the dough and roll it into a long sausage. Divide the sausage into 4. Roll each of these into a sausage and divide these into 4, giving a total of 16 pieces.
  8. Working with one piece, flatten this into a disc on a lightly floured work surface. Then extend and thin the edges of the disc.
  9. Spoon 2 tablespoons of the filling into the center of the disc. Pull and stretch the edges of the disc up and over the filling to meet at the top. Twist the edges at the top to seal the bun.
  10. Continue with the rest of the buns. Transfer the buns to your bamboo steamer, each one on top of a small square of baking parchment. For 16 buns you will need to use both tiers of your steamer, or steam 2 batches.
  11. Remove the grill racks from your barbecue and place a cooling rack across the flame tamers of 2 of the burners. Light the 2 burners.
  12. Place your wok on top of the rack and half fill it with boiling kettle water.
  13. Once the water comes back to a boil, place the steamer on top of the wok. Allow this to steam for 30 minutes. This timing is slightly longer than usual because the temperature is slightly lower than that of a wok burner.
  14. Remove the steamer from the wok, transfer the buns to serving platters and brush them with roasted sesame oil before serving.


How to Make KFC Coleslaw – KFC Coleslaw Recipe, The REAL DEAL!!!

kfc coleslaw recipe, kfc coleslaw salad recipe, kfc coleslaw calories, kfc coleslaw carbs, kfc coleslaw recipe without buttermilk, kfc coleslaw nutrition info, kfc coleslaw secret recipe, copycat kfc coleslaw recipe, copycat kfc coleslaw, kentucky fried chicken, kentucky fried chicken coleslaw,how to make kfc coleslaw at home,homemade kfc coleslaw,kfc coleslaw salad recipe easy,quick kfc coleslaw


How to Make KFC Coleslaw - KFC Coleslaw Recipe, The REAL DEAL!!!
Author: 
Recipe type: KFC / Fast Food / Salad
Cuisine: American
Prep time: 
Total time: 
Serves: 6-10
 
KFC coleslaw is quite unique in its flavor, with a thin, tangy sauce that barely glazes the cabbage. This is how to make it at home!!!
Ingredients
  • 600g Green cabbage, cut into blocks, thick bits removed
  • 100g Carrot, peeled and chopped
  • 30ml Yogurt or cultured buttermilk
  • 30ml Apple cider vinegar
  • 90ml Tangy mayonnaise
  • 2.5ml Salt
  • 5ml Sugar
Instructions
  1. Cut the cabbage into blocks, roughly chop the carrots, measure out the yoghurt or cultured buttermilk, the tangy mayonnaise, salt, sugar and apple cider vinegar.
  2. In a jug, combine all of the ingredients except the carrot and cabbage. Stir this until the salt and sugar have dissolved.
  3. Place the carrot in your food processor and chop this until fine. Add the cabbage to the processor and pulse this until almost fine.
  4. Pour in the sauce and continue to pulse this until it is finely chopped.
  5. The added peppery flavor comes from allowing this to age overnight covered in the refrigerator.
  6. Like any coleslaw, this is best served well chilled.


4th of July Cookout – Cheesy Potato Bombs on the Barbecue – Grilled Cheese & Bacon Potatoes

barbecue baked potatoes,baked potatoes on the barbecue,cheesy barbecue potatoes,cheese and bacon barbecue potatoes,how to bake potatoes on the barbecue,easy barbecue baked potatoes, barbeque side dish recipes, cook barbeque side dishes, barbeque side dishes, barbeque side dish grilling, barbecue baked potatoes weber, grill baked potatoes, grill baked potatoes in foil, grill baked potatoes time, baked potato (dish)


4th of July Cookout - Cheesy Potato Bombs on the Barbecue - Grilled Cheese & Bacon Potatoes
Author: 
Recipe type: Potato / Barbecue
Prep time: 
Cook time: 
Total time: 
 
Awesome Barbecue baked potatoes filled with cheese & wrapped in bacon!!! These barbecue baked potatoes are quick and easy and will grace any occasion!!!
Ingredients
  • Medium size potatoes
  • 1 Slice streaky bacon for each potato
  • A Block of mature cheddar cheese
  • Salt and pepper to season
  • Foil to wrap
Instructions
  1. Place the potatoes in a pot, cover with water, and bring these to a boil over high heat. Allow these to boil for 10 minutes.
  2. Drain the potatoes in your colander and cool them under cold running water.
  3. Cut a block of cheese to the average thickness of the potatoes, and count out as many slices of bacon as you have potatoes.
  4. Use your apple corer to make a tunnel through the potatoes. Save the potato core.
  5. Use the corer to press out a core of cheese and press this into the potato.
  6. Wrap a slice of bacon around the potato to cover both holes and contain the cheese. Continue until all of the potatoes are assembled.
  7. Wrap the potato bombs in foil and put these aside until you're ready to barbecue.
  8. Heat your barbecue to medium high heat and grill the potatoes over direct heat for 10 minutes, turning once halfway through.
  9. While these grill, heat a half filled pan of oil to 180c or 350f and deep fry the potato cores until golden.
  10. Unwrap the potatoes, transfer to serving platters and top each one with its own crispy deep fried core before serving.


4th of July Cookout – Barbecue Chicken Foldover – Whole Deboned, Stuffed BBQ Chicken

whole deboned bbq chicken,deboned chicken on the barbecue,whole deboned stuffed bbq chicken,whole barbecue chicken,how to roast chicken on the barbecue, deboned bbq chicken, boneless bbq chicken, boneless bbq chicken recipe, boneless bbq chicken on the grill,stuffed deboned barbecued chicken,how to barbecue deboned chicken,how to debone a whole chicken,how to barbecue stuffed chicken


4th of July Cookout - Barbecue Chicken Foldover - Whole Deboned, Stuffed BBQ Chicken
Author: 
Recipe type: Barbecue / Chicken
Prep time: 
Cook time: 
Total time: 
Serves: 4-6
 
This awesome barbecue chicken foldover is really worth the effort and will score some serious points with your friends and family.
Ingredients
  • 1 x 1.4kg (3lb) Chicken, deboned
  • 350g Pork sausage meat
  • 15ml Smoked hot paprika
  • 5ml Garlic powder
  • Salt and cracked black pepper
Instructions
  1. Starting with the filling, squeeze the pork sausage filling from the bangers into a mixing bowl. Add the smoked paprika and massage this into the pork thoroughly.
  2. A while back I did a video on how to debone a whole chicken, if you missed this you can see it now by clicking Here.
  3. Lay the deboned chicken out flat on a board and season the flesh liberally with salt and cracked black pepper.
  4. Fill the legs and wings with some of the pork. Flatten the remaining pork across half of the chicken and fold the chicken over to enclose the filling.
  5. Oil a ribbed skillet and transfer the chicken to the skillet. If you don't have a ribbed skillet you can use a rack in a roasting pan. Season the skin liberally with salt and cracked black pepper and you're ready to go.
  6. Heat your barbecue to 180c or 350f and roast the chicken for 2 hours. Increase the heat to 200c or 400f and roast for a further 15 to 30 minutes until the skin is golden.
  7. Remove the chicken from the barbecue and allow it to stand for 5 minutes before slicing and serving.


4th of July Cookout – Brandy & Coke T Bone Steak – Perfectly Tender Barbecue T-Bone!!!

bbq t-bone,barbecue t-bone,barbecue t-bone steak,how to barbecue t-bone steak,marinated t-bone steak,how to marinate t-bone steak,how to barbecue t-bone steak,grilled t-bone steak,how to grill t-bone steak,brandy and coke t-bone steak,how to injection marinate t-bone steak,bbq grilled t-bone,thick cut t-bone barbecue, t-bone steak (food), grilling (culinary technique), barbecue t-bone steak recipe, grilled t bone steak marinade


4th of July Cookout - Brandy & Coke T Bone Steak - Perfectly Tender Barbecue T-Bone!!!
Author: 
Recipe type: Barbecue / Steak / Beef
Prep time: 
Total time: 
Serves: 4
 
This Brandy & Coke T-Bone is awesome!!! Injection marinated thick-cut t-bone is absolutely tender and will be the talk of the town!!!
Ingredients
For the Brandy & Coke Solution
  • 250ml Coke
  • 125ml Brandy
  • 15ml Salt
For the Steak
  • 1 x T-Bone steak, cut 80mm / 3¼ inch thick
  • Salt and cracked black pepper
Instructions
  1. Get your butcher to cut the t-bone, from young beef, to a thickness of 80mm or just over 3 inches.
  2. Combine the brandy, coke and salt and stir this until all of the salt has completely dissolved.
  3. Draw 50ml or 2 ounces of the solution into you meat syringe and inject this into the t-bone at intervals of 25mm or 1 inch, first through the fatty side, then on the fillet side.
  4. Place the steak in a tray, pour any overrun solution over and allow this to stand for 20 minutes.
  5. After resting, season all the sides liberally with salt and cracked black pepper.
  6. Heat your barbecue to medium high heat. Place the steak with fat side down directly over the heat and barbecue this for 5 minutes until the fat is well browned. Baste the steak often with the brandy mixture.
  7. Turn the steak to stand on the bone and cook for a further 5 minutes, basting often as you go.
  8. Turn the steak onto one side and continue to barbecue flipping the steak every five minutes.
  9. A timing of 20 minutes (4 turns) will give you a rare steak, 30 minutes (6 turns) medium rare and 40 minutes (8 turns) will result in medium.
  10. Continue to baste all the way through.
  11. Once the steak is done to your liking, remove from the heat and allow the t-bone to rest for 5 minutes.
  12. Cut both sides of meat from the bone and slice each into 4 slices before serving.


4th of July Cookout – Slow Barbecue Brisket on Your Gas Barbecue – Super Tasty, Super Tender!!!

barbecue brisket,how to barbecue brisket, smoked meat smoking bbq brisket, smoking bbq brisket, texas style bbq, barbecue brisket recipes, barbecue brisket rub, barbecue brisket temperature, barbecue brisket recipe gas grill, barbecue brisket in oven, barbecue brisket marinade, barbecue brisket calories, curing brisket for barbecue,how to cure brisket,flavoring brisket,marinating brisket,how to tenderise brisket


4th of July Cookout - Slow Barbecue Brisket on Your Gas Barbecue - Super Tasty, Super Tender!!!
Author: 
Recipe type: Barbecue / Beef Brisket
Cuisine: american
Prep time: 
Cook time: 
Total time: 
Serves: 6-8
 
Barbecue Brisket is one the tastiest meats around, provided it is prepared and cooked correctly. It certainly is a labor of love, but well worth the effort!!!
Ingredients
  • Brisket, about 6lbs or 2.7kg
For the Curing Brine
  • 5lt Filtered water
  • 25g Saltpeter
  • 90g Sugar
  • 30g Bicarbonate of soda
  • ½ Tsp black peppercorns
  • 3 Bay leaves
  • 5 Whole allspice (pimento)
  • 3ml Ground ginger
  • 3ml Garlic powder
  • 5ml Smoked hot paprika
For the sprinkle
  • 1 Tsp Garlic powder
  • 1 Tsp Ground ginger
  • 1 Tsp Cayenne pepper
  • 2 Tsp Sugar
For Smoking
  • 1 Cup Oak barrel chips, damp
Instructions
  1. To make the curing brine, add the salt to the water and pour in the saltpeter, sugar, bicarbonate of soda, black peppercorns, bay leaves, whole allspice, ground ginger, garlic powder and smoked hot paprika.
  2. Bring this to a simmer then quick cool the brine by floating the pot in a sink of cold water.
  3. While the brine cools, trim off any excess fat from the brisket.
  4. Place the meat in a large non-reactive container and pour in the curing brine. Put the lid on the container and allow this to cure for a full 48 hours in your refrigerator.
  5. After 48 hours, remove the brisket from the brine and pat it dry with kitchen paper.
  6. Combine the garlic powder, ground ginger, cayenne pepper and sugar and sprinkle half of this over both sides of the meat.
  7. Wrap the brisket in foil and place this on a rack in a roasting pan.
  8. Light one burner in you barbecue and allow the barbecue to warm up to 98c or 210f with the lid closed.
  9. Place the roasting pan on the other side of the grill, close the lid and allow this to slow roast for 10 hours undisturbed. Keep an eye on the temperature from time to time, making sure to keep it at 98c or 210f.
  10. Remove the meat from the barbecue and remove the foil. Return the meat to the rack and season it again on both sides with remaining half of seasoning.
  11. In addition, have a cup of damp smoking wood chips prepared and placed in a disposable aluminium tray.
  12. Reheat the barbecue to 300f or 150c. You may have to light a second burner. Place the wood chips directly over the lit burners, and return the meat to the grill.
  13. Close the lid and allow this to smoke for 60 minutes. Transfer the meat from the pan to the grill over direct heat and finish the process by grilling for 15 minutes per side until the meat is well colored and has formed a good crust.
  14. Remove the meat from the grill and allow it to rest for 5 minutes before carving and serving.


Scroll to top

Kitchen Conversions

Convert:
Masses
to:
Volumes
to:
Temperatures
to:
Lengths
to: