Breakfast Hotdog Recipe! How to Make a Breakfast Hotdog – A Full Breakfast in One Neat Package!!!

hot dog,hotdog,hot dog recipe,hotdog recipe,breakfast hotdog,breakfast hot dog,how to make,how to,breakfast,recipe,food,recipes,cooking (interest),cook,how,at home,cooking,kfc chicken recipe,cooking,kfc recipe,food,homemade,kfc secret recipe,recipes,burger bun recipe,kfc hot wings,how to make kfc chicken,kentucky fried chicken,how to make apple cider vinegar at home,spring roll wrapper recipe,gourmet hot dog recipes,best hot dog recipes,homemade hotdog


Breakfast Hotdog Recipe! How to Make a Breakfast Hotdog - A Full Breakfast in One Neat Package!!!
Author: 
Recipe type: Fast Food
Serves: 2
 
In today's episode we're going to be making a hot dog that really stands out from the crowd. Frankfurter sausage with crispy fried streaky bacon, flipped egg and salad all served on a length of crusty baguette makes for a breakfast of note.... this is the breakfast dog.
Ingredients
For 2 Breakfast Hotdogs
  • 2 Frankfurter sausages
  • 4 Rashers streaky bacon
  • 2 Eggs
  • 30ml Butter for frying
  • Salad greens
  • 1 French baguette
  • Tomato sauce and mustard (or sauces of your choice)
Instructions
  1. To start, cut your baguette at an angle into lengths just a bit shorter than the frankfurters.
  2. Turn these length-ways and make 2 cuts downward, 1 third of the width of the roll in from either edge.
  3. Remove the center section of the roll.
  4. Butter the flat faces on the inside of the roll.
  5. Place a generous dose of salad leaves into the channel of each roll and put these aside.
  6. Cut angled incisions into the frankfurters with each incision going about 2 thirds of the way through the sausage.
  7. In addition, unpack 4 rashers of streaky bacon and 2 eggs.
  8. Heat a large pan over medium high heat and add 30g or 2 tablespoons of butter. Add the sausages and bacon to the pan.
  9. Fry the bacon until it is crispy and golden, and the sausages until the crisp up on the edges.
  10. When the bacon and sausages are almost ready, crack the eggs into the pan.
  11. Use your lifter to break the yolks and spread them across the whites of each egg.
  12. Also press in or fold the edges of the whites to form a long rectangular shape.
  13. By this stage the bacon can be removed from the pan and kept warm.
  14. Flip the eggs to cook the top side. The tops only need to fry for 30 seconds.
  15. Lift one of the eggs from the pan and place length-ways on one of the baguettes.
  16. Line the inside edges of the baguette with 2 slices of crispy bacon and fill the remaining space with a frankfurter. Continue with remaining dog.
  17. And there it is... a full breakfast in a crispy baguette. Simply garnish with the condiments of your choice and serve.


Classic Big Mac Burger Buns Recipe – How to Make McDonald’s Burger Buns at Home – Quick and Easy!!!

burger, cooking, big mac, recipe, big mac burger buns, big mac hamburger buns, big mac burger buns, hamburger (food), burger, buns, baking, yeasted dough, cooking (interest), big mac club bun, big mac, hamburger buns, homemade hamburger buns, classic big mac buns, club buns, sesame seed hamburger buns, homemade baking, made from scratch baking, pains à hamburger, panes de hamburguesa, hamburgerbrötchen, food, bread, homemade, kfc chicken recipe, how to, how to make, kfc recipe,


Classic Big Mac Burger Buns Recipe - How to Make McDonald's Burger Buns at Home - Quick and Easy!!!
Author: 
Recipe type: Buns
Cuisine: American
Serves: 8
 
Big Mac burger buns are quick and easy to make and that's what we're going to do today, and if you stay tuned to the end of the episode, I will show you a really simple trick to keeping your burger buns fresh for months.
Ingredients
  • 30ml Dried yeast
  • 60ml Sugar
  • 340ml Warm water
  • 20ml Oil
  • 1 Egg
  • 5ml Salt
  • 520g Strong white bread flour
  • 80g Strong white bread flour
  • 1 Egg whisked with 50ml water
  • Sesame seeds
Instructions
  1. To start, pour 60ml of sugar into your stand mixer bowl along with 30ml or 6 teaspoons of active dry yeast.
  2. Use a whisk to mix these together.
  3. Pour in 340ml of warm water and 20ml of oil.
  4. Whisk these together thoroughly, cover the bowl and allow this to stand for 10 to 15 minutes until very frothy.
  5. After this time, place the bowl on the mixer, pour in 520g of strong white bread flour, 1 egg and a teaspoon of salt.
  6. Fit the dough hook to the mixer and mix the dough on medium low speed for 7 minutes.
  7. Add a further 80g of flour and mix this for another 4 minutes.
  8. Scrape the dough hook down, remove it from the mixer, close the mixer and allow the dough to relax for 10 minutes. If your mach does not have a splash guard, cover the bowl with a damp tea towel.
  9. While the dough rests, cut 8 strips of baking parchment 40mm in width and 360mm in length. Cut them from the roll lengthways in order that they naturally curl into circles.
  10. Overlap the ends by 20mm and zap 2 staples top and bottom to secure. This is the rising collar. Continue until all of the collars are formed.
  11. Line a baking sheet with parchment and place the collars on the sheet.
  12. Turn the dough out onto a lightly floured work surface and roughly divide it into 8 pieces. Weigh the pieces and adjust each portions weight to 130g.
  13. To form the buns, smooth the tops by stretching dough from the top edge to the underneath around the edge of the bun.
  14. Place the bun on the work surface, cup your hand over the bun on roll in a circular motion to complete it.
  15. Flatten it slightly and place it into one of the collars.
  16. Continue until all 8 buns are formed.
  17. Cover the buns loosely with cling-wrap and allow them to rise for 30 minutes, or until they have almost filled the collars.
  18. Whisk 1 egg with 50ml of water and brush the tops of the buns.
  19. Sprinkle the tops with sesame seeds to garnish.
  20. Bake the buns in a preheated oven at 200c or 400f for 12 to 15 minutes and they are well risen and golden.
  21. Remove the buns from the oven and transfer them to a rack to cool, sliding the collars from the buns as you go.
  22. And there we have the tall Big Mac buns.
  23. As promised, here is how to keep them fresh for months....
  24. Slice your buns through the center. These buns will be sliced twice for classic McDonalds centerpiece.
  25. Butter all of the flat surfaces.
  26. These plastic film bread bags cost just a fraction of a cent each. For the McDonalds style bun, place the bottom of the bag on top of the base of the bun.
  27. Place the centerpiece on top of this.
  28. Fold the bag over the centerpiece.
  29. Place the lid of the bun on top of this.
  30. Open the bag and fold the remaining length of bag over the top and bottom of the bun to enclose the whole thing. Place your wrapped buns in a freezer tray and freeze indefinitely.
  31. Wrapping a single cut bun is even easier. Butter the flat surfaces and place the bottom of the bag over the base of the bun.
  32. Place the lid of the bun on top of this.
  33. Open the top of the bag and pull it over the bun to encapsulate it.... then off to the freezer.
  34. The plastic between the buttered surfaces make separating the buns instant, and you can quickly defrost the buns by toasting the flat surfaces in a pan over medium heat.
  35. That's all today folks, thanks for joining us, please subscribe to our channel, give us a thumbs up, share this with your family and friends and we'll see you again tomorrow.


Hybrid Hotdogs – Super Easy Sausage Rolls – Tasty, Crispy Hotdog in Puff Pastry!!!

hotdog, hotdog recipe, hybrid hotdog, gourmet hotdog, special hotdog recipe, hotdog in puff pastry, best hotdog recipe, how to, how to make, easy, pastry, tasty, sausage, puff, cooking, recipes, recipe, food, cook, kfc chicken recipe, food, kfc recipe, kfc secret recipe, homemade, burger bun recipe, kitchen, chef, make, video, meat, roll, baking, dinner, spring roll wrapper recipe, kfc chicken wings, chicken wings recipe, how to make burger buns, kentucky fried chicken recipe, hot wings recipe,


Hybrid Hotdogs - Super Easy Sausage Rolls - Tasty, Crispy Hotdog in Puff Pastry!!!
Author: 
Recipe type: Snacks / Fast Food
Serves: 6
 
Today we're going to make a hybrid hotdog.... or the simplest sausage roll ever. A hotdog sausage wrapped in puff pastry with tomato sauce and mustard is amazing, however there is a trick to making this work, otherwise you will end up with a gooey mess.... and here it is...
Ingredients
For 6 Hotdogs
  • 6 Vienna sausages
  • 2 x 400g Rolls puff pastry
  • Tomato sauce (ketchup)
  • Mustard
  • 1 Egg, beaten
Instructions
  1. Slice the vienna sausage at an angle all the way down the length of the sausage.
  2. Flip the sausage over and repeat this.
  3. When the sausage bakes in the pastry with the sauces, the sauce pulls in to the sausage instead of making the pastry wet and doughy.
  4. Continue with this until all of the viennas are cut.
  5. Unroll the puff pastry and place a vienna at the end of the roll.
  6. Give the vienna a dose of tomato sauce and mustard.
  7. Use the plastic separator yo roll up the puff pastry to enclose the vienna.
  8. Press down the edges of the pastry, and trim off the sausage roll.
  9. Add another sausage to the pastry and continue the process until all of the sausage rolls are formed.
  10. From a standard 400g pack of puff pastry, you should get 3 rolls. Simply multiply out the recipe to get the quantity you require.
  11. Line a baking sheet with parchment and transfer the sausage rolls to the sheet.
  12. Brush the hybrid hotdogs with beaten and bake them in a preheated oven at 200c or 400f until crispy and golden and nicely puffed up.
  13. Serve the baked hotdogs immediately with the accompaniments of you choice.


How to Make Square Burger Patties – Perfect Burger Patty Production with No Specialized Equipment!!!

burgers, patties, burger patty, burger patties, how to, how to make, burger patty recipe, burger patty mixture, burger patty recipe youtube, how to make burger patties, square burger patties, how to make square burger patties, cooking, food, barbecue, recipes, unusual burger patty, unusaul burger patties, homemade burger patties, make burger patties at home, burger, recipe, best burger patty recipe, gourmet burger patty recipe, gourmet burgers, make gourmet burgers at home,


How to Make Square Burger Patties - Perfect Burger Patty Production with No Specialized Equipment!!!
Author: 
Recipe type: Burgers
 
Making square burger patties takes a whole load of hassle out of making patties for large crowds of people. No specialized equipment is required and the whole process is foolproof.
Ingredients
  • 75ml Onion flakes
  • 15ml Salt
  • 7.5ml White pepper
  • 1.4kg Good quality ground beef
  • 10% Weight of meat in liquid - Worcestershire sauce / Light soy sauce / Beef stock / Water
Instructions
  1. Place the dried onion flakes, salt and white pepper into your spice grinder.
  2. Zap these until you have a fine powder.
  3. Place the ground beef in the bowl of your stand mixer and add the seasoning.
  4. You also need to add 10% of the weight of the meat in liquid. I am using Worcestershire sauce, however you can use light soy sauce, stock, or even plain water.
  5. Attach the dough hook, close the mixer and switch it on. Start slow and gradually increase the speed to medium. The meat must mix for 8 minutes. It will try to climb the sides of the bowl while mixing. Use something to help it back down to the bottom of the bowl.
  6. During the mixing process, the salt reacts with the protein in the meat causing it emulsify. This is what keeps the patties together when they are formed.
  7. Line a 10 inch by 14 inch baking sheet with cling-wrap.
  8. Tip the meat mixture into the pan and flatten it out.
  9. Pull another length of cling-wrap over the top of the pan.
  10. Use your rolling pin to roll and compress the ground beef into the tray until it is level with the edges. Any excess meat will simply squeeze out from the edges and can be cleared in the next step.
  11. Place the pan in your freezer for 30 minutes to firm up.
  12. Turn the slab of beef out onto a large chopping board.
  13. Trim away any excess meat.
  14. Keeping the cling-wrap in place, cut the slab into 12 equal squares for 100g patties or 6 pieces for giant 200g patties, as I am doing here.
  15. At this point, these can be wrapped and frozen, or grilled.
  16. Using a heavy pan or skillet over medium high heat, add 20g of butter.
  17. When the butter is sizzling, add the patties and grill them for 5 to 6 minutes per side until nicely charred and caramelized both sides.
  18. And there it is... the easiest way to make perfectly uniform, tasty patties with an amazing texture that will not fall apart, even on the barbecue.


Grilled Prawn & Monkfish Skewers – Succulent Prawns and Rich Monkfish, Grilled to Perfection!

grilled prawns, grilled monkfish, grilled prawns and monkfish, prawn skewers, prawn kebabs, seafood skewers, seafood kebabs, prawn and monkfish kebabs, how to grill prawns, how to grill monkfish, how to grill prawn skewers, seafood kebabs, seafood skewers, recipe, how to, homemade grilled prawns, homemade grilled monkfish, easy grilled prawns, easy grilled fish, makiing seafood skewers, how to make seafood skewers, how to make seafood kebabs, fish kebabs recipe,


Grilled Prawn & Monkfish Skewers - Succulent Prawns and Rich Monkfish, Grilled to Perfection!
Author: 
Recipe type: Seafood
Serves: 4
 
Today we're going to grill a batch of seriously tasty prawn and monkfish skewers. Monkfish is found worldwide and is revered for its remarkable similarity in texture and taste to crayfish and lobster. Combine this with the prawns and you have an amazing flavor explosion.
Ingredients
  • 32 Medium size prawns
  • 800g Monkfish tails
  • 16 x 6 inch Bamboo skewers (150mm)
  • 150g Butter
  • 30g Crushed garlic
  • 2 Small lemons
  • Salt to season
  • 4 Portions cooked rice (according to the package instructions)
Instructions
  1. Start with 32 medium size prawns. Use a sharp scissors to cut down the spine of each prawn up until and including the second last segment of the shell.
  2. Use toothpick to hook out the vein. Put this aside and continue until all of the prawns are deveined.
  3. Monkfish only has a central bone. Use a sharp knife to cut the fillets from the bone. For this quantity of prawns, you will need about 800g of monkfish fillets.
  4. Cut through the fillets at an acute angle to get strips of fish 50mm or 2 inches in length.
  5. You will need 16 x 6 inch or 150mm thin bamboo skewers.
  6. Press a skewer through the prawn just behind the head. Press another skewer through the prawn just above the second last segment. Notice that the prawn is lying sideways. The skewers enter the belly and exit the spine.
  7. Thread a strip of monkfish onto the skewers.
  8. Follow this with another prawn, and so on, until each kebab has 4 prawns and 3 strips of monkfish.
  9. Continue until all 8 skewers are complete.
  10. Heat a large pan over high heat. Add the butter.
  11. Once the butter is sizzling, add the garlic. Stir this around the pan for just a few seconds before adding the skewers.
  12. If your pan is not as large as this one, use a smaller pan, half the butter and half the garlic and fry 2 batches.
  13. Fry the skewers for 4 to 5 minutes. Squeeze the fresh lemon over the prawns.
  14. Turn the skewers, squeeze the remaining lemon over the prawns and season liberally with salt. Continue frying for 4 to 5 minutes.
  15. Wipe the skewers around in the pan then turn again. Fry for 60 seconds.
  16. Wipe the skewers around the pan and turn again. Fry the prawns for a final 60 seconds.
  17. Remove the prawns from the pan and add the prepared rice to the pan.
  18. Stirfry the rice in the prawn butter to pick up all the yummy bits from the pan.
  19. Serve a bed of rice onto each platter and top each with 2 of the seafood skewers.
  20. Serve immediately with lemon wedges and the accompaniments of your choice.


How to Make Beetroot Chutney – Sweet, Sour and Spicy Beetroot Chutney!!!

beetroot chutney, how to, how to make, beetroot chutney recipe, beetroot preserve, beetroot jam, beetroot relish, beetroot dip, preserving beetroot, chutney, sweet, beetroot, sweet chutney, recipe, homemade beetroot chutney, beetroot recipes,


How to Make Beetroot Chutney - Sweet, Sour and Spicy Beetroot Chutney!!!
Author: 
Recipe type: Vegetables
 
With the New Year right here this beetroot chutney is an amazing accompaniment to any meal, and can also be used as a unique and tasty dip.
Ingredients
  • 500ml White wine vinegar
  • 600g White sugar
  • 400g Chopped onion
  • 1kg Beetroot, boiled for 20 minutes, peeled and grated
  • 5ml Salt
  • 20g Curry powder (of your choice)
  • 7.5ml Ground cumin
  • 40ml Cornstarch (dissolved in a little water)
Instructions
  1. To start, measure out the white wine vinegar, white sugar, and chop the onion.
  2. The main ingredient is 1kg of beetroot, boiled for 20 minutes, skinned and grated.
  3. In addition, measure the curry powder, ground cumin, and salt.
  4. Towards the end of the cooking process you'll also need to dissolve the corn starch in a little water and add this.
  5. Add the sugar and vinegar to a large pan over medium high heat. Stir this until dissolved.
  6. As the mixture comes to a boil, add the onion.
  7. Bring the mixture back to a boil and allow this to cook for 5 minutes.
  8. Add the grated beetroot to the pan, mix it in, bring the pan back to a boil and continue to cook for a further 5 minutes.
  9. Add the salt, curry powder and cumin, mix this in and continue to cook for a further 5 minutes.
  10. Dissolve the cornstarch in a little water and add this to the pan, stirring continuously. Allow this to cook for 60 seconds until the chutney has thickened.
  11. Pour the hot mixture into sterilized jars, and allow the chutney to cool completely before serving.
  12. The chutney can be stored indefinitely at room temperature, however, it is advisable to refrigerate after opening the jar.


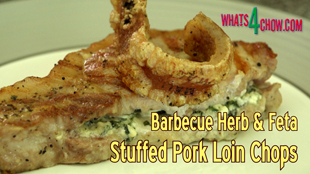
Barbecue Herb and Feta Stuffed Pork Loin Chops with Crispy Crackling

barbecue pork loin chops, how to barbecue pork loin chops, barbecue pork loin chops with crispy crackling, stuffed pork loin chops, barbecue stuffed pork loin chops, feta and herb stuffing recipe, feta and herb stuffed pork loin chops, how to stuff pork loin chops, how to butterfly pork loin chops, preparing pork loin chops, making pork loin chops on the barbecue, pork loin chops recipe, pork loin chops recipe youtube, pork loin chops recipe video, best pork loin chops recipe,


Barbecue Herb and Feta Stuffed Pork Loin Chops with Crispy Crackling
Author: 
Recipe type: Pork
Cuisine: Mediterranean
Prep time: 
Cook time: 
Total time: 
Serves: 4
 
With the festive season just round the corner, today's episode is a legendary barbecue. Thick cut pork loin chops, butterflied and stuffed with fresh herb and feta is an absolute winner.
Ingredients
For 4 Barbecue Stuffed Pork Loin Chops
  • 4 x 450g Thick cut pork loin chops
  • 100g Feta cheese
  • 10ml Chopped fresh oregano
  • 10ml Chopped fresh sage
  • 10ml Chopped fresh rosemary
  • 10ml Chopped fresh thyme
  • 25ml Chopped fresh basil
  • 10ml Chopped fresh garlic
  • 45ml Olive oil
Instructions
  1. To make the stuffing, place the fresh chopped herbs, garlic, feta and olive oil in a bowl and mash it to a paste.
  2. Have your butcher cut the pork chops 30mm thick, or 1 and a quarter inch.
  3. Use a sharp paring knife to cut the rind away from the chop.
  4. Run the knife between the rib bone and the meat and remove the bone.
  5. Stand the pork on the fatty edge and slice down the center along the length to butterfly the meat.
  6. Stop slicing when you reach the fatty strip.
  7. Flap the butterflied meat open and stuff a quarter of the filling into the chop.
  8. Continue until all of the chops are processed.
  9. Place the rinds on a platter and salt both sides of the rinds liberally with salt.
  10. Place the stuffed chops on a platter and brush both them with melted butter, followed by a liberal grinding of salt and pepper.
  11. Turn them over and repeat this process.
  12. Heat a ribbed skillet on your barbecue over high heat. In this case I have the skillet over 2 burners, running on full flame.
  13. Place the salted rinds on the skillet and close the lid.
  14. Allow these to grill for 6 minutes with the rind side facing down.
  15. Open the grill, flip the rinds over and add the pork chops to the skillet.
  16. Close the barbecue and allow these to grill for a further 5 minutes.
  17. Open the grill and turn the pork chops.
  18. Close the barbecue again and allow this to grill for a further 5 minutes.
  19. After this time, remove the chops from the grill and move the pork rind to the hottest part of the skillet skin side down.
  20. Press them down onto the skillet until they are well blistered and crisp.
  21. Serve your amazing creation immediately with the accompaniments of your choice.


How to Make Spicy, Cheesy Turkey Sausage – Full-Flavor Homemade Turkey Sausage!!!

turkey, sausage, turkey sausage, how to make turkey sausage, homemade turkey sausage, turkey sausage recipe, turkey sausage youtune, turkey sausage recipe video, make turkey sausage at home, spicy turkey sausage recipe, turkey cheese sausage recipe, best turkey sausage reciep, how to, sausage, poultry sausages recipes, hand crafted turkey sausage,


How to Make Spicy, Cheesy Turkey Sausage - Full-Flavor Homemade Turkey Sausage!!!
Author: 
Recipe type: Sausage
Cuisine: Mexican
Serves: 3kg
 
This spicy turkey cheese sausage is out of this world. Tender juicy ground turkey, spiced with Mexican spice blend and loads of mature cheese will have you guests lining up for more.
Ingredients
  • 2.6kg Turkey meat, cubed
  • 300g Well matured cheddar or Monterey Jack
  • 250ml Chilled water
  • 22mm Collagen casings
For the Spice Blend
  • 30ml Ground cumin
  • 30ml Ground coriander seed
  • 30ml Paprika
  • 30ml Oregano
  • 10ml Chilli powder
  • 10ml Garlic powder
  • 50g Salt
Instructions
  1. Starting with the spice blend, place the ground cumin, ground coriander seed, paprika, oregano, chilli powder, garlic powder and salt on a bowl and mix this until combined.
  2. Place the cubed turkey meat in a large roasting tin. You can use any part of the turkey, however the drumstick meat will yield the best result.
  3. Sprinkle the spice mixture over the meat and mix this in thoroughly.
  4. Transfer the pan to your freezer for 45 minutes to firm up. This is absolutely necessary as it aids your grinder to get a good clean grind with no fat smearing, resulting in a much better texture of sausage.
  5. Remove the meat from your freezer and and run it through the grinder with a 4mm plate fitted.
  6. Add the coarsely grated cheese to the meat and mix this in briefly.
  7. Pour in the well chilled water and mix everything together until all of water has been absorbed by the meat.
  8. Load the meat mixture into the hopper of your sausage stuffer.
  9. Fit an 18mm funnel to the stuffer and feed the 22mm collagen casing onto the funnel.
  10. Crank the stuffer until the meat reaches the end of the funnel, then twist off the casing.
  11. Apply gentle pressure to the casing at the end of the funnel and start cranking the handle.
  12. When the end of the casing is almost reached, stop cranking, remove the casing from the funnel and twist off the end.
  13. Continue with this process until all of the filling has been used.
  14. To make up individual sausages, crimp the sausage between your thumb and forefinger.
  15. Twist the sausage a few times, then snip it off in the center of the twisted section. Continue until all of the sausages are formed.
  16. Wrap the sausages and transfer them to your refrigerator overnight for the flavors to fully develop before cooking and serving.
  17. To cook the sausage, fry them gently in butter over medium heat until golden on all sides.
  18. Serve immediately with the accompaniments of your choice.


How to Make Mossbolletjies – South Africa’s Traditional Brioche – Aniseed Flavored Tear & Share Bread

mossbolletjies, how to make mossbolletjies, brioche, how to make brioche, bread, recipe, brioche, south african brioche, traditional south african bread, mossbolletjies recipe, mossbolletjies video recipe, mossbolletjies recipe youtube, aniseed brioche bread, aniseed tear and share bread, perfect tear and share bread, best mossbolletjies recipe,


How to Make Mossbolletjies - South Africa's Traditional Brioche - Aniseed Flavored Tear & Share Bread
Author: 
Recipe type: Bread
Serves: 12-18
 
Mossbolletjies are a traditional South African bread. With sweetness and feathery texture of brioche, the flavor and aroma is enhanced with aniseed, and makes for the perfect tear and share bread.
Ingredients
  • 1kg Cake flour
  • 10ml Salt
  • 100g Sugar
  • 10g Instant yeast
  • 30g Whole aniseed (or fennel seed)
  • 100g Butter
  • 250ml White grape juice
  • 125ml Warm milk
  • 250ml Warm water
  • 30ml Sugar mixed with 30ml lukewarm water to brush after baking (optional)
Instructions
  1. Pour the cake flour into your stand mixer bowl, along with the salt, sugar, instant yeast and whole aniseed. If you can't find aniseed, substitute this with whole fennel seed.
  2. Mix this together and put it aside.
  3. Pour the grape juice into a small saucepan and add the butter. Heat this gently over medium low heat just until the butter has dissolved. Remove this from the heat.
  4. Finally measure out the warm milk and warm water.
  5. Place your mixer bowl on your mixer. Pour in the butter mixture, the water, and the milk.
  6. Attach the dough hook to the mixer and knead the dough for 2 minutes on the slowest speed, followed by 6 minutes on medium slow.
  7. Remove the bowl from the machine, cover it with cling-wrap and put this in a warm place to rise for 30 minutes or doubled in size.
  8. While the dough rises, line a large baking pan with parchment.
  9. Turn the dough out onto a floured work surface. The dough will be slightly sticky so you will need to flour the top of the dough as well.
  10. Knead the dough for about 3 minutes to knock it down. Once the dough is smooth, grab handfuls of the dough and squeeze them off from the main mass and arrange these tightly in the baking pan.
  11. You can make the balls as big or small as you like. I wand to present these as tear and share dinner rolls, so I have made mine a little bigger than normal.
  12. Cover the pan with cling-wrap and allow to rise again for 40 to 45 minutes in a warm place.
  13. Bake the rolls in a preheated oven at 180c or 350f for 25 to 30 minutes until deep golden in color.
  14. Remove from the oven and turn the buns out onto a rack to cool. Allow them to cool for at least 15 minutes before serving.
  15. These little wonders are so easy to make, and I guarantee they will steal the show.


Crispy Feta and Cream Cheese Fritters – Light & Airy Cheese Fritters Deep-Fried to Golden Perfection

feta cheese fritters, cream cheese fritters, feta and cream cheese fritters, how to make feta and cream cheese fritters, how to make fritters, crispy deep fried fritters, quick fritter recipe, easy fritter recipe, cheese fritter recipe youtube, cheese fritter recipe video, homemade fritter recipe, making crispy deep-fried fritters at home, feta cheese, cream cheese, buttermilk, self-raising flour,


Crispy Feta and Cream Cheese Fritters - Light & Airy Cheese Fritters Deep-Fried to Golden Perfection
Author: 
Recipe type: Cheese / Deep-Fried
Cuisine: Mediterranean
Prep time: 
Cook time: 
Total time: 
 
These cheesy fritters are light and airy, and just full of flavor. Best of all, they are fail proof, so you could even get your children to mix the batter, however I don't suggest allowing kids to do the deep-frying.
Ingredients
  • 250ml Cultured buttermilk
  • 250g Cream cheese (plain or flavored)
  • 250g Feta cheese
  • 2 Eggs, beaten
  • 1½ Cups Self-raising flour
Instructions
  1. Measure out 250g of feta cheese, 250g of cream cheese , 250ml of cultured buttermilk, beat 2 eggs, and weigh 1½ cups of self raising flour.
  2. Place all of these in your food processor.
  3. Zap these until well blended and smooth, then allow the batter to stand for 15 minutes.
  4. Half fill your wok, or a large pan with oil and heat this to 170c or 340f.
  5. Spoon slightly heaped tablespoons of the batter into the oil.
  6. Allow these to fry for 3 minutes, turning halfway through.
  7. Use you tongs to lift the fritters from the oil and drain any excess oil on kitchen paper. Continue frying the remaining fritters.
  8. Serve these light and crispy snacks as is and enjoy.


Cheesy Parmesan & Herb Roast Baby Potatoes – The Cheese Challenge

parmesan roasted baby potatoes, cheesy roast baby potatoes, herb infused parmesan roasted baby potatoes, herb infused baby potatoes under vacuum, how to flavor baby potatoes, using vacuum to infuse baby potatoes with flavor, best baby potato recipe, italian roasted baby potatoes, how to roast baby potatoes, easy baby potatoes recipe, baby potatoes recipe youtube, baby potatoes recipe video, how to make the best baby potatoes,


Cheesy Parmesan & Herb Roast Baby Potatoes - The Cheese Challenge
Author: 
Recipe type: Potatoes / Cheese
Cuisine: Italian
Prep time: 
Cook time: 
Total time: 
Serves: 4
 
These unbelievable baby potatoes are infused with fresh Italian herbs and garlic, then roasted to cheesy perfection.
Ingredients
  • 500g Baby potatoes
  • 10ml Fresh origanum
  • 10ml Fresh rosemary
  • 10ml Fresh thyme
  • 30ml Fresh basil
  • 30ml Fresh parsely
  • 3 Cloves fresh garlic
  • 30g butter
  • 30ml Olive oil
  • 250ml Fine shredded Parmesan cheese
  • Salt and cracked black pepper to season
Instructions
  1. Roughly chop 2 teaspoons each of oreganum, thyme and rosemary and 2 tablespoons each of basil and parsley.
  2. Top and tail the garlic and smash these flat with your blade to remove the skins. Roughly chop the garlic.
  3. Slice the baby potatoes in half lengthways.
  4. Measure out 30g of butter and 30ml of olive oil.
  5. Transfer the baby potatoes to a vacuum bag.
  6. Pour in the chopped herbs and garlic.
  7. Follow this with oil and the butter.
  8. Straighten out the top of the bag and vacuum seal the bag using your vacuum packer.
  9. It is a good idea to do a double seal just for security.
  10. Place the vacuum packed potatoes in a medium size pot and pour in enough boiling kettle water to cover.
  11. Place the pot over medium high heat and bring this to a boil. Lower the heat to a simmer and allow this to simmer for and hour and 20 minutes.
  12. Remove the bag from the pot, cut it open and pour the potatoes into a medium size roasting tin.
  13. Arrange the potatoes in the tin so that all the flat sides are facing upward.
  14. Scatter a cup of shredded Parmesan cheese over the potatoes and season everything liberally with salt and cracked black pepper.
  15. Roast this in a preheated oven at 200c or 400f for 20 minutes until crisp and golden.
  16. Remove the potatoes from the oven and serve immediately as the most outstanding accompaniment to your main course.


How to Make Potato Crisps – Best Recipe Homemade Potato Crisps – Super Crispy, Super Tasty!!!

potato crisps, potato crisps recipe, how to make potato crisps, low carb potato crisps, homemade potato crisps, home made potato crisps, best potato crisps recipe, how to make potato crisps youtube, how to make potato crisps video recipe, best potato crisps recipe youtube, potato, recipe, crisps, super crispy deep-fried potato crisps recipe, healthy potato crisps recipe,


How to Make Potato Crisps - Best Recipe Homemade Potato Crisps - Super Crispy, Super Tasty!!!
Author: 
Recipe type: Potatoes
 
Potato crisps are a tote favorite across the globe. Today we're going to look at how to make low carb potato crisps that are super crispy and super tasty.
Ingredients
For the Flavor Powder
  • 30ml Dried mixed herbs (Italian or Herbs Provence)
  • 2.5ml Garlic powder
  • 2.5ml White pepper
  • 5ml Salt
For the Crisps
  • 2-4 Large potatoes
  • 3 Liters water
  • 60ml White vinegar
  • 30ml Salt
Instructions
  1. Place the mixed herbs, garlic powder, fine ground white pepper and salt in your spice grinder. The fine powders help the grinder grind the herbs to powder by adding extra resistance in the chamber.
  2. Transfer the fine blend to a sprinkle bottle.
  3. To cut the potatoes in thin slices, you can use a regular potato peeler, however these slices are too thin and will over-brown before crisping.
  4. Better than the regular is the ceramic peeler which will give you slightly thicker slices. The problem with this is that if you go even slightly skew, the wafers will be horribly uneven, resulting in burnt edges.
  5. The best way to achieve perfect slices is with a very sharp thin blade knife. Cut the slices to 1mm thickness.
  6. Transfer the sliced potato to a mixing bowl and pour in 3 liters of water.
  7. Add the salt and white vinegar and mix this around yo separate all of the potato wafers.
  8. You will immediately see the vinegar liberating the starch from the potato.
  9. Allow this to soak for 30 minutes.
  10. Drain and rinse the potatoes and lay them out flat on a clean dish towel.
  11. Place another towel over these and pat them dry.
  12. Half fill a large pan or wok with oil and heat this to 180c or 350f.
  13. Carefully drop the wafers in to the oil. As the crisps fry you will notice that the violent frying as the water content is driven from the potato becomes more and more gentle.
  14. Within a couple of minutes the crisps will be causing no frying reaction at all, and they will be crisp and golden.
  15. Remove the crisps from the oil and drain on kitchen paper.
  16. Continue with any remaining potato wafers.
  17. As the crisps cool they will crisp up even more.
  18. Transfer them to a large roasting tin. Sprinkle the flavoring powder over the crisps and toss them around gently to coat.
  19. Sprinkle again to cover any blind spots, toss again, then serve with a dipping sauce of your choice.
  20. And the we have it.... a mountain of awesomely crisp, golden, low carb potato crisps ready to be snacked.


Scroll to top

Kitchen Conversions

Convert:
Masses
to:
Volumes
to:
Temperatures
to:
Lengths
to: