Irish Guinness Bread - St Patrick's Day Special Recipe!!!
Author: Whats4Chow
Recipe type: Bread
Cuisine: Irish
Prep time:
Cook time:
Total time:
Irish Guinness bread is without a doubt one of the nicest breads I have ever tasted. In addition, it is also one of the simplest breads to make. In fact, even if you have never boiled an egg, you will be able to make Guinness bread.
Ingredients
Dry Ingredients
250ml Rolled oats
500ml Whole wheat flour
125ml Brown sugar
10ml Baking soda (bicarb)
5ml Baking powder
2.5ml Salt
Wet Ingredients
60ml Melted butter
10ml Vanilla extract
250ml Cultured butter milk
360ml Guinness Draught
Instructions
In a large mixing bowl, combine the rolled oats, whole wheat flour, brown sugar, baking soda, baking powder and salt. Stir these together until well combined.
In a second mixing bowl, combine the melted butter, vanilla extract, cultured buttermilk and Guinness draught beer.
Use a ball whisk to mix this until well combined, then add the dry ingredients. Mix this together until you have a batter that resembles porridge.
Pour the batter into an 8 inch square non-stick pan. If your pan is not non-stick, give it a good rub-down with butter.
Bake the bread in a preheated oven at 220c or 425f for 30 minutes. Reduce the heat to 200c or 400f and continue yo bake for a further 30 minutes.
Let the loaf cool in the oven for 30 minutes before turning it out onto a cooling rack.
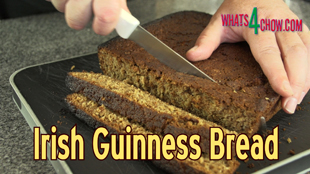
And there we have it, Irish Guinness bread... with a super-crispy and caramelized crust and a soft airy crumb.
This bread is best served warm with a generous dose of butter and honey.
How to Cure, Age and Smoke Bacon at Home - Best Homemade Bacon!!!
Author: Whats4Chow
Recipe type: Curing and Smoking / Charcuterie
Cuisine: Italian
Bacon is one of the real joys of life. Nothing beats the amazing aroma of bacon sizzling in the pan.... and home-cured bacon takes this to a whole new level. This video will show you how to cure the bacon and smoke the bacon.
Ingredients
2kg Pork loin, bone in, skin on
2lt + 2lt Water
300g Salt
140g Prague powder #2
15ml Garlic Powder
4 Bay Leaves crushed
15g Black Pepper
Instructions
Measure out the Prague powder, salt, garlic powder, black pepper corns and bay leaves.
Place the black peppercorns into your spice grinder and tear the bay leaves into this.
Process this until reasonably fine. Add this to a pot along with all of the other dry ingredients, excluding the Prague powder.
Pour in 2 liters of hot water. Bring this to a boil, reduce the heat and allow this to simmer for 10 minutes. Quick chill the brine by floating the pot in a sink of cold water, then put this aside.
To prepare the pork loin, we need to debone it and remove the skin. You can also use deboned and skinned pork belly if you prefer.
To skin the pork stand it up on its end and pull the skin back from the top. Use a sharp knife the peel the skin back from the fatty layer, leaving as much fat behind as possible. You can use the skin to make crackling.
To remove the bone, start at the top with your knife, running it down the rack of ribs, using them as a guide for the blade. These ribs still have some meat on them, so save them for the barbecue.
Place the prepared pork loin in a large non-reactive container.
Once the brine has cooled add 2 liters of cold water and the Prague powder and stir this in until completely dissolved.
Pour the curing brine into the container. The pork will float in the brine and you will need to place a bowl or plate on top of it to keep it submerged.
Place the lid on the container and allow this to cure in your refrigerator for 7 days.
After curing, remove the pork from the brine and pat it dry. Place the bacon on a rack over a roasting tin and allow this to air-dry for 5 days in your refrigerator.
After the drying time, this is what you have.... a lovely, rosy pink colored slab of green bacon. This can be consumed as you would any regular bacon, however smoking the bacon really does add the extra dimension to its taste and aroma.
Lift the rack up and balance it across the corners of the pan.
Fire up your smoker and ignite a single burner furthest from where you intend placing the pork. If you're fortunate enough to be using a Smoke Daddy smoke generator, then the smoke will be chugging out in no time, and you can place the pork in the barbecue.
Smoke the bacon for 3 and a half hours until you reach the target internal temperature of 65c or 149f. You will need a probe thermometer to monitor this.
And there we have it. A beautifully cured smoked pork loin just waiting to be sliced and fried to perfection.
How to Cure & Age Capicola - Homemade Capicola - Perfect Charcuterie
Author: Whats4Chow
Recipe type: Curing Meats / Charcuterie
Cuisine: Italian
Capicola or cured and dry-aged pork neck is absolutely amazing. The outstanding aroma and robust, rounded flavor, make this one of the most popular Italian cured meats.
Ingredients
2.5kg Pork neck
70g Salt
15g Sugar
15g Prague Powder #2
8g Cracked Black Pepper
4g Crushed Juniper Berries
2 Bay Leaves Crushed
2ml Ground Nutmeg
Paprika
Instructions
Measure out the Prague powder, salt, sugar, nutmeg, black pepper corns, bay leaves and juniper berries.
Place the juniper berries, black peppercorns and bay leaves into your spice grinder and process this until fine.
Add the ground spices to the rest of the powders and mix this together thoroughly.
Place the pork neck on your work surface and roll it tightly length-ways. Use butchers twine to tie the roll firmly. This helps the roll keep its shape.
Place the meat in a roasting tin or catch tray and sprinkle the curing mixture evenly over the meat. Pat the powder into the surface of the meat as you go until all of the meat has a coating.
Turn a vacuum packing bag half inside out. Feed the meat into the bag and unfold the bag to close it around the meat. Pop this into your vacuum packer and seal it up good and tight. It is a good idea to give the bag a double seal for security.
Place the vacuum packed meat in your refrigerator for 7 days to cure. You can also seal the meat in a ziplock bag, but then you must massage and flip the meat every day while it is curing.
After the curing time, remove the meat from the bag and rinse it thoroughly under cold running water. Use a clean dish towel to pat the meat dry.
Place the meat on a board and sprinkle liberally with paprika all over and press this into the surface of the meat. Place the meat on a rack and allow this to age for 5 to 6 weeks at a temperature of 14 to 18c, or 57f to 65f, and humidity of 60-70%.
After this time, cut the strings away from the capicola. Cutting the roll open reveals the beautifully colored cured meat with a firm texture and an absolutely amazing aroma.
Slice the meat thinly by hand or machine and you're ready to taste heaven.
Leipold's Ham - Kosher Ham from Lamb - How to make Kosher Ham at Home!!!
Author: Whats4Chow
Recipe type: Curing Meats
Cuisine: South African
Leipold's ham, named after poet Louis Leipold, is an incredibly delicious ham made by curing lamb or young mutton. This recipe would have appeared somewhere in the early nineteenth century from a little town called Worcester in the southern Cape, South Africa.
Ingredients
2kg Leg of lamb, deboned
240g Salt
95g Prague powder
3Lt Hot Water
40g Sugar
20g Cracked Black Pepper
10g Ground Coriander Seed
1 Sachet gelatin
3 Bay leaves
2 Sprigs parsley
15ml Whole black peppercorns
1 Carrot
1 Onion
2 Whole cloves
10ml Hot English mustard
25ml Brown sugar
50ml White / Red wine vinegar
Instructions
Place the hot water in a non-reactive pot and add the salt, sugar, cracked black pepper and ground coriander seed.
Bring this to a boil, reduce the heat and allow this to simmer for 10 minutes. Quick-chill the brine by floating the pot in a sink of cold water. Once it has cooled, stir in the Prague powder until dissolve, then put this aside.
Have your butcher debone the leg of lamb. He will inevitably place this in a net. Remove the leg from the netting.
There will be a tunnel through the meat where the bone was removed. Find the narrow side and slice through the meat. Open the leg and flatten it out.
Sprinkle a layer of gelatin over the meat. This will absorb liquid and expand negating any possibilities of air pockets in the rolled meat.
Starting with the wide edge of the meat, roll the leg up as tightly as possible.
Using butcher's twine tie the roll very firmly. Three rings across the roll should do the trick, then finish this off with one tie along the length to close the ends of the roll.
Place the roll in a large non-reactive container and pour in the curing brine.
Using your brining syringe, suck up brine and inject this into the meat from the ends of the roll, withdrawing the needle as you depress the plunger. Continue with this until you're convinced that all of the meat has been treated.
Place the lid on the container and let the meat cure in your refrigerator for a full 7 days, turning the meat each day.
After 7 days, remove the lamb from the brine and wash it thoroughly under cold running water. Dry the meat with a clean dish towel, place the meat on a rack over a roasting tin or catch-tray and allow this to air-dry in your refrigerator for 5 days.
After five days you'll have a magnificently colored ham with a glossy patina.
Place the ham in a large pot. Add 3 bay leaves, a couple of sprigs of parsley, the whole peppercorns, a chopped carrot and onion studded with 2 whole cloves.
Pour in enough water to cover the ham. Bring this to a simmer and allow this to continue for 60 minutes.
For the glaze, mix the brown sugar, mustard powder and white wine vinegar.
Remove the ham from the pot and pat it dry. Place it in a roasting pan and baste it all over with the glaze. Roast the ham in a preheated oven at 160c or 320f for 30 minutes.
Remove the ham from the oven every 10 minutes to brush on more glaze.
After the roasting time, remove the ham from the oven and allow it to rest for 5 minutes. Cut the string away from the meat and slice the ham into thin slices before serving.
Place the chickpeas in a large bowl and cover with twice the depth of water. You cannot use canned chickpeas, the recipe will fail. This recipe can be challenging and as a result, I have included a troubleshooting addendum below. Be sure to read this before starting.
Cover the bowl with cling-wrap and allow this to stand overnight.
The following day, drain the chickpeas and rinse them thoroughly.
Transfer the chickpeas to your food processor along with the chopped onion, parsley, garlic, flour, salt, ground cumin, ground coriander, pepper, cayenne and cardamom.
Process the mixture until it resembles couscous. Place it in a bowl, cover with cling-wrap and refrigerate for 2 hours.
To form the falafel, use a 30ml measuring scoop. Compress the mixture into the scoop and shake the molded shape out into your hand. Gently shape it into a ball and transfer this to a platter.
To make sesame coated falafel, roll the formed ball in sesame seeds scattered across a platter.
Continue until all of the balls are formed.
Half fill a large pan with oil and heat this over medium heat to 160c or 320f.
Carefully drop the falafel into the oil and fry for 2 to 3 minutes per side until crispy and golden.
Remove the falafel from the oil and drain and drain on kitchen paper.
Serve the falafel on a bed of hummus. Thin the sesame paste with extra olive oil and pour this over the falafel. Garnish the plate with fresh coriander and serve immediately.
Troubleshooting
If the balls will not hold together:
) Your chickpeas are too old
) The mixture has not been processed fine enough
To fix this
) Return the mixture to your processor and process until it resemble couscous
) If it still does not hold together, add 2-3 tablespoons of flour and 1-2 eggs and mix this into the mixture thoroughly
Thoroughly rinse the canned chickpeas and measure out the tahini paste, salt, extra virgin olive oil and lemon juice. Peal and roughly chop 1 clove of garlic.
Place all of these ingredients into a tall jug and process until smooth using your stick blender. You can also do this in your food processor. If you're using stick blender lift the head of the blender to clear the blades after each pulse to avoid damaging the unit.
Once you're happy with the texture, transfer the thick paste to a bowl. Drizzle this with a little extra olive oil and mix this in. Continue adding oil until you achieve your desired consistency.
Serve dressed with a little chopped coriander, fresh lemon zest and a drizzle of olive oil.
Stay tuned for our next episode where we're making authentic falafel, accompanied with sesame sauce and hummus.
How to Make Authentic Tahini Paste - Homemade Tahini, Quick & Easy!!!
Author: Whats4Chow
Recipe type: Sauce
Cuisine: Middle Eastern / Mediterranean
Tahini paste originates in the Middle East and has gained wide popularity in almost every country of the world. It is one of the main ingredients in hummus, and can be thinned further to make a pourable sauce.
Ingredients
125ml Hulled sesame seeds
30ml Extra virgin olive oil
Instructions
Measure the hulled sesame seeds and the extra virgin olive oil. I am going to process this with a stick blender which is ideal for small quantities, however you can do this in a small food processor, or of you have a large processor, double or triple the recipe to do this.
Place the sesame in a pan over medium heat. Stir the seeds continuously to avoid burning. The toasting process will take 5 to 6 minutes. About halfway through, you will notice the seeds starting to clump together as a result of the oil being released.
Towards the end, the seeds will be very fragrant and will have darkened to a golden color.
Place the sesame in a tall jug and pour in 2 thirds of the oil. Process this with your blender until smooth.
You will notice here that the paste is still a little thick, so Add the remaining oil. Process again to combine this.
Pour the paste into a bowl for immediate use, or store it in an air-tight container in your refrigerator for a few months.
Stay tuned for our next episode where we're using this sesame paste to make hummus.
How to Make Classic Osso Bucco - Osso Bucco using Lamb Leg Cutlets!!!
Author: Whats4Chow
Recipe type: Lamb / Veal
Cuisine: Italian
Prep time:
Cook time:
Total time:
Serves: 8
Osso Bucco is classic Italian dish of slow cooked veal cutlets with a thick glossy gravy. Although veal shank cutlets are the tradional meat used, osso bucco can be quite successfully made with lamb leg cutlets as I am about to do, or even with young goat leg cutlets.
Ingredients
2kg / 4.4lb Lamb leg cutlets
Oil for coating
120ml Oil for frying
1 Onion, chopped
250ml White wine
250g Cherry tomatoes, halved
1lt Vegetable stock
For the Seasoned Flour
500ml All-purpose flour
10ml Salt
2.5ml Fine black pepper
2.5ml Ground nutmeg
For the Gremolata, mix together
60ml Parsely, finely chopped
2 Cloves garlic, finely chopped
30ml Grated lemon rind
Instructions
Combine the flour, salt, pepper and nutmeg and place this in a large pan. Place the lamb leg cutlets in another pan, drizzle with little oil and rub this into the meat until everything is coated.
Chop the onion, half the cherry tomatoes, measure out the wine and the vegetable stock.
Heat 120ml of oil in a large pan. Dredge the lamb cutlets in the seasoned flour and fry the cutlets slowly for 5 minutes per side and they are nicely browned. Repeat this until all of the cutlets are fried. Transfer the cutlets to a large roasting tin.
Add the onion to the pan and fry for 2 to 3 minutes until tender. Pour the onions and the roux from the pan over the lamb.
Return the pan to the heat and add the wine, tomatoes and stock. Heat this until almost boiling, then pour it over the lamb.
Cover the roasting tin with foil and bake in a preheated oven at 150c or 300f for 90 minutes.
Remove the osso bucco form the oven and serve immediately topped with a generous dose of the gravy and a scattering of gremolata.
For Veal or Goat Osso Bucco, follow exactly the same procedure.
If your gravy is still a bit thin after the cooking time, transfer it to a saucepan and thicken it by adding a tablespoon or 2 of cornflour dissolved in a little water. Allow this to boil until thickened.
Smoked Garlic Powder using Smoke Daddy's Vortex Smoke Generator
Author: Whats4Chow
Recipe type: Smoking
Prep time:
Cook time:
Total time:
Okay, we've just had a look at the Smoke Daddy Vortex coming out of the box, now let's give it a test run. To do this, I am going smoke some garlic. Using a bit of heat from the barbecue, I am also going to dry the garlic out, then grind it to a powder.
Ingredients
Garlic (at least 2 full heads to make it worth your while)
Instructions
To start, separate the heads of garlic. There are easier ways to this, but you actually want to remove the skins exactly like this for this procedure.
To skin the cloves, cut the stem end off. Place the clove on the board and crush it by banging the knife blade down on the clove. Grab the pointed end of skin and the entire skin will simply slip off. Transfer the crushed clove to a mesh strainer or a splatter screen.
Place the Vortex near the center of the barbecue. The burner to the left of the Vortex will be the only burner running. Notice my probe thermometer on the right. This will help me monitor my target temperature of 67c or 168f.
Using a blow torch or heat gun ignite the one side of the circle on the Vortex. Swing the unit around 180 degrees and ignite the other side to get the double burn. Depending on your wood pellets, you may have to repeat this a couple of times.place the mesh basket of garlic near the thermometer, ignite the left-hand burner, close the lid, and you're on your way.
Set a timer for 4 hours to time the process.
After 4 hours, remove the garlic from the barbecue. It will be lovely and golden, with an aroma from heaven. Most of the garlic will be pretty dry by this stage, however, some of the thicker bit might still be a bit spongy. Pop this into your oven at 67c or 168f with the door slightly open and continue to desiccate the garlic until completely dry.
Run the dried garlic bits in your spice grinder for a few seconds to reduce it to a powder.
And here is all that is left of the pellets in the Vortex.... just a little clean ash. Simply empty this out, give the unit a rinse, and it's as good as new.
6 months ago I introduced an incredible product from Smoke Daddy, the cold smoke generator. They have now come up with a passive smoker unit called the Vortex. Mine has just arrived, so let’s have a look.
Before we continue, you can get more details on the Vortex by clicking the onscreen link.
The unit comes in a sturdy full color printed box, ensuring it will arrive undamaged. It sates clearly on the top that unit can be used for hot and cold smoking, and that it can be used with any existing closed barbecue grill. Very importantly, like all of their other equipment, it is 100% made in the USA.
Opening the box reveals the Vortex. But before we get onto that, all of the instructions are included in detail inside the lid.
The instructions explain clearly how to set the unit up to prove smoke for anything from 2 hours to 10 hours of smoke. In addition, how to ignite the unit to get it smoking.
Looking at the Vortex, it is manufactured from a really heavy gauge stainless steel mesh with a solid stainless steel surround and just from the feel of it, you know the Vortex means business.
On one side, there is a large indented circle for longer smoking times, and on the reverse side a smaller indented circle for shorter smoking times. These circles are filled with wood pellets which are then ignited. The flame-less burn proves the smoke required, while not affecting the temperature in the smoking enclosure. This makes the Vortex ideal for hot or cold smoking.
In the second part of this un-boxing video, I will be making smoked garlic powder to demonstrate the capabilities of the Vortex. I need 4 hours of smoke so I am filling the large circle with pellets. To get just 4 hours, I am going to ignite both sides of the circle and ignition points will burn towards one another. This will actually give me about 6 hours of smoke, but there is bit of breeze today, so I am playing it safe. If I only lit one side, I would get up to 10 hours of smoke. Using the smaller circle on the reverse side, I would get 2 hours from a double ignition, or 4 hours from a single ignition.
These are regular wood pellets from local supplier, however you can get wood pellets directly from Smoke Daddy as well. The original Smoke Daddy pellets contain a little charcoal as well aiding the burn, and giving a better smoke ring. I will also be testing the Vortex with fine wood chips to see if these will work.
Stay tuned for the next episode when we fire this baby up.
Gourmet Garlic Bread - Crispy, Crusty Garlic Bread with Pancetta & Blue Cheese!!!
Author: Whats4Chow
Recipe type: Bread / Baked / Barbecue
Cuisine: French
Yesterday we made amazing crusty white farm bread. Today we're going to use one of these loaves to make awesome gourmet garlic bread turbo-charged with creamy melted blue cheese and pancetta.
Measure out the softened butter and blue cheese, and finely chop the fresh garlic and pancetta.
Add the pancetta and garlic to the butter and blue cheese and mash this in thoroughly until everything is totally combined.
Slice through the loaf of bread at an angle leaving the bottom crust of the loaf intact until the entire loaf is sliced with a space of 15mm or just more than a half inch between slices.
Start filling the slices with the garlic butter mixture. This quantity of mixture is sufficient for one loaf.
Place the loaf on a rectangle of foil and roll the log edge of the foil to enclose the loaf. Twist the ends to secure the foil. Don't twist the ends too tightly as you need to unwrap the loaf while it is hot, and if it is too tightly bound this will be very difficult and possibly dangerous.
Bake the loaf in a preheated oven at 180c or 350f for 20 minutes.
Immediately after baking, unwrap the loaf and serve hot and steaming.
You can also bake the garlic bread in your closed barbecue following the same time and temperature. (indirect heat)
Crusty White Farm Bread - How to Make Rustic, Flavorful Bread at Home!!!
Author: Whats4Chow
Recipe type: Bread & Dough
This rustic farmhouse bread is amazing. It can be free-formed, rolled and baked in the shape of a baguette, or baked in a bread pan. Most amazing though, is the amazing crust.... thick and chewy, with a flavor from heaven.
Ingredients
950g Strong white bread flour
60g Butter, grated
15ml Sugar
10ml Salt
12.5ml Instant yeast
30ml Milk powder
600ml Warm Water
Instructions
Measure out the flour, grate the butter and measure the salt, sugar, milk powder, instant yeast and warm water.
Place the mixer bowl on your stand mixer and add the grated butter. Attach the beater paddle to the mixer for this stage.
Run the mixer on low speed for 60 seconds until the butter has been rubbed into the flour.
Add all of the remaining dry ingredients and mix these in until well combined.
Pour in the warm water and run the mixer on low speed to form the dough. When all of the water has been absorbed, and there is no loose flour at the bottom of the bowl, stop the mixer and exchange the beater for the dough hook.
Allow the dough hook to knead the dough on medium-low speed for 8 to 10 minutes until it is smooth and elastic.
Remove the bowl from the mixer, scrape the dough down from the sides of the bowl, cover the bowl with cling-wrap and allow the dough to rise for 45 minutes in a warm place.
After rising, the dough will be at least doubled. Punch it down and turn it out onto a floured work surface. Flour the top of the dough as well, then knead the dough briefly, adding a little extra flour every time it becomes too sticky. Using a dough scraper also helps tremendously.
Roll the dough into a large log and divide it into 4 equal pieces for baguette-style rolls, 2 pieces for 2 large 900g loaves, or leave it in one piece for extra-large loaf.
I am doing baguette-style rolls which will be featured in another recipe tomorrow when I make gourmet pancetta, blue cheese, garlic and butter rolls.
Knead the dough briefly and shape it into loaves, or in this case, roll it into lengths to fit your baguette pan or baking sheet.
Transfer the rolls to the pan and cover them lightly with cling-wrap. Allow to rise again for 30 minutes. While they rise, preheat your oven to 200c or 400f.
After 30 minutes the loaves will have doubled in size. Dust the tops of the loaves with flour then slash the loaves with a sharp blade. Spray your oven with a mist of water and bake the loaves for 30 minutes. Spray more water into the bottom of the oven halfway through.
Bake 35 minutes for a 2 large loaves and 40-45 minutes for the extra large loaf.
Test for doneness by flicking the loaves --- if it sounds hollow it is done.
Once baked and golden, remove them from the oven. If you're using a perforated baguette pan, allow them to cool on the pan, otherwise transfer the loaves to wire racks to cool.
All that remains is to savour these wonderful breads.