Snack Platter Catering – Part 10 – Super Cheesy Cocktail Sausage Rolls

Super Cheesy Cocktail Sausage Rolls,mini sausage rolls,snack food,finger food,snack platter food,cheesy sausage roll recipe,homemade sausage rolls,how to make cheesy sausage rolls,cheesy sausage rolls recipe,finger food recipes,snack platter recipes,cheese pastry,Sausage Roll (Dish),easy sausage roll recipe,easy cheese sausage roll recipe,how to make cheese sausage rolls,best sausage roll recipe,sausage roll video recipe


Snack Platter Catering - Part 10 - Super Cheesy Cocktail Sausage Rolls
Author: 
Recipe type: Finger Foods / Snack Foods / Pork
Cook time: 
Total time: 
Serves: 40
 
Super-cheesy cocktail sausage rolls are awesome!!!. Cheesy pork sausage meat mixed with mature cheddar, baked in flaky cheese pastry is legendary!!!
Ingredients
  • 350g Pork sausage meat
  • 150g Mature Cheddar cheese
  • ½ Batch of Flaky cheese pastry (Click here for recipe)
  • 1 Egg yolk mixed with 1 Tbs water
  • Cracked black pepper
Instructions
For 40 Cocktail Sausage Rolls
  1. Place the pork sausage meat and the grated mature cheddar cheese in a mixing bowl and mix this until well combined.
  2. Roll our half of the pastry and cut 4 rectangles of 6 inches by 16 inches, or 15cm by 40cm.
  3. Arrange the filling across the center of each piece of pastry in a long sausage formation.
  4. Lift the edge closest to you up and over the filling. Roll it over to totally enclose the filling. Complete the other 3 rolls and transfer them to a lightly greased baking sheet.
  5. Using a sharp knife, cut through the tops of the sausage rolls at ¾ inch intervals.
  6. Brush the sausage rolls with the egg wash consisting of an egg yolk whisked together with a tablespoon of water.
  7. Grind fresh cracked black pepper liberally over the pastries and bake the pastries in a preheated oven at 200c or 400f for 30 minutes until golden.
  8. Remove the sausage rolls from the oven, cut them apart, transfer to platters and serve immediately.


Snack Platter Catering – Part 9 – Creamy Tarragon Chicken Mini Top Hat Pies

mini tarragon chicen top hat pies,chicken pies,tarragon chicken pies,creamy chicken pies,snack chicken pies,finger snack chicken pies,cocktail chicken pies,creamy chicken pastries,fingerfood chicken pies,miniature chicken pies,tarragon chicken pastries,finger foods,snack foods recipes,cocktail party recipes,snack platter recipes,snack basket recipes


Snack Platter Catering - Part 9 - Creamy Tarragon Chicken Mini Top Hat Pies
Author: 
Recipe type: Finger foods / Snack Foods / Poultry
Cuisine: French
Serves: 40
 
Tarragon chicken mini top hat pies are really quick and easy to make, and the components can be made well ahead of time and assembled just before serving.
Ingredients
For 40 Mini Top Hat Pies
  • 500g Chicken breast
  • 7.5ml Dried tarragon
  • 2.5ml Garlic powder
  • 100ml Double cream
  • Salt and pepper to season
  • One batch of flaky pastry
  • 30g Butter
  • 1 Egg
Instructions
  1. Roll your pastry out to a thickness of 3mm. Cut the pastry into 80 squares of 40mm, or 1.5 inches.
  2. Place the squares on a lightly greased baking sheet and brush them with an egg wash consisting of an egg yolk whisked together with a tablespoon of water.
  3. Bake the pastries in a preheated oven at 200c or 400f for 12-15 minutes until golden.
  4. While the pastry bakes, cut the chicken breast into strips a quarter inch thick across the grain. Measure out the dried tarragon, garlic powder and the double cream.
  5. Heat a pan over medium high heat and add 30g of butter. Fry the chicken for 3 to 4 minutes until just cooked through.
  6. Remove the pan from the heat and allow the chicken to cool for 5 minutes. Transfer the chicken to a chopping board and cut it into small cubes.
  7. Transfer the cubed chicken to a bowl and mix in the tarragon and garlic powder.
  8. Return the chicken to the pan and fry briefly before pouring in the cream. Stir this briefly to heat the cream through and remove the pan from the heat.
  9. Spoon a teaspoon of the chicken onto 40 of the pastry squares. Top these with the remaining 40 squares and serve immediately. They also taste great served cold.


Snack Platter Catering – Part 8 – Boeff en Croute Petit – Mini Beef Wellington

boeff en croute,beef wellington,how to make boeff en croute,how to make beef wellington,boeff en croute petit,mini beef wellington,beef wellington pies, FILET DE BOEUF EN CROUTE, individual beef wellingtons, beef wellington Gordon ramsay recipe, how to cook beef wellington, easy beef wellington recipe, individual beef wellington, how to make individual beef wellington, mini beef wellington recipe


Snack Platter Catering - Part 8 - Boeff en Croute Petit - Mini Beef Wellington
Author: 
Recipe type: Beef / Finger Foods / Snacks
Cuisine: French
Serves: 20-40
 
Boeff en croute or Beef Wellington is an all time classic. Here this awesome treat of beef fillet coated with liver pate and wrapped in pastry is adapted to finger foods, using the millionaires chicken liver pate from yesterday's episode.
Ingredients
Instructions
  1. Cut the beef fillet into medallions across the grain.
  2. Heat a pan over medium high heat and add 50g of butter. Fry the medallions for 2 minutes per side until lightly browned.
  3. Remove the fillet from the pan and allow it to cool for 5 minutes. Stack the medallions and slice them into thin slices. Cut across the slices to dice the meat.
  4. Transfer the the beef to a mixing bowl and stir in the liver pate thoroughly. Set this aside to cool completely.
  5. Roll out the pastry to a thickness of 3mm and cut it into squares of 2 inches or 50mm.
  6. Working with 1 square at a time place a slightly heaped teaspoonful of the beef mixture in the center of the pastry.
  7. Fold the pastry diagonally over the filling and press the edges down lightly to seal.
  8. Pattern the edges using the tines of a fork. This also ensures a good seal on the edges. Continue until all of the pastries are formed.
  9. Transfer the pastries to a lightly greased baking sheet and brush them with an egg wash of 1 egg yolk whisked together with a tablespoon of water.
  10. Bake the pastries in a preheated at 200c or 400f for 25 to 30 minutes until golden. Remove from the oven and serve immediately.


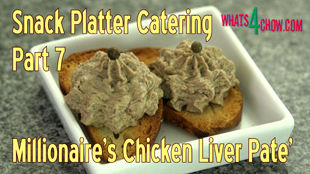
Snack Platter Catering – Part 7 – Millionaire’s Chicken Liver Pate’ – Ideal Snack Platter Food!!!

millionaires chicken liver pate',chicken liver pate',chicken liver pate' recipe,how to make chicken liver pate',homemade chicken liver pate',homemade chicken pate',chicken liver pate with brandy, chicken liver pate with cream, chicken liver pate paleo, making chicken liver pate, quick chicken liver pate', easy chicken liver pate, make chicken liver pate' at home, make creamy chicken liver pate'


Snack Platter Catering - Part 7 - Millionaire's Chicken Liver Pate' - Ideal Snack Platter Food!!!
Author: 
Recipe type: Snack Food / Finger Food / Pate'
Cuisine: French
 
Millionaire's Chicken Liver Pate' puts a new spin on a classic recipe. Once you've tasted this amazing flavor, you won't go back!!!
Ingredients
  • 500g Chicken livers
  • 50g Seedless raisins
  • 150ml Brandy
  • 1 Onion, finely chopped
  • 2 Cloves garlic, finely chopped
  • 10ml Fresh thyme, finely chopped
  • 50g Butter
  • 60ml Cream
  • Salt & cracked black pepper to taste
Instructions
  1. Cut away any sinew and discolored parts from the chicken livers. Place the livers in a large jug along with the seedless raisins and pour in the brandy. Set this aside for 1 to 2 hours.
  2. Dice the onion and finely chop the garlic and fresh thyme.
  3. Strain the livers through a colander and reserve the liquid.
  4. Heat a large pan over medium high heat, add 50g of butter and fry the onion and garlic for 5 minutes until tender and translucent.
  5. Add the liver and raisins to the pan along with the fresh chopped thyme. Fry this for 5 minutes until the livers are cooked through.
  6. Pour in the reserved liquid and continues to cook this for a further 2 to 3 minutes until the liquid has reduced by half.
  7. Remove the pan from the heat and allow it to cool for a few minutes.
  8. Transfer the mixture to a large jug and process this with your stick blender until smooth. You can also do this in a food processor or blender.
  9. Pour in the cream and mix this in thoroughly. Season to taste with salt and pepper.
  10. Cover the pate' and allow this to set in your refrigerator for at least an hour.
  11. As a serving suggestion, slice thin slices of dinner or cocktail buns and toast them under your grill for a few minutes on either side until golden.
  12. Transfer these to platters around a communal bowl of pate, or serve them in single portion bowls piped with a little pate and garnished with pickled green peppercorns.


Snack Platter Catering Part 6 – Sweet & Sour Spring Rolls. Delicious Mini Spring Rolls in Fillo.

sweet & sour spring rolls,sweet & sour mini spring rolls,sweet & sour chicken spring rolls,how to make spring rolls,how to roll spring rolls,chicken spring rolls recipe,sweet & sour chicken spring rolls recipe,homemade spring rolls recipe,how to make spring rolls at home, how to make sweet and sour sauce, homemade sweet and sour sauce, sweet and sour sauce recipe, chinese sweet and sour sauce, sauce for sweet and sour chicken


Snack Platter Catering Part 6 - Sweet & Sour Spring Rolls. Delicious Mini Spring Rolls in Fillo.
Author: 
Recipe type: Snack Food, Finger Food, Chicken, Poultry
Cuisine: Chinese
Serves: 20-40
 
Spring rolls are an all-time favorite, and these mini sweet & sour spring rolls are perfect for snack platters and baskets.
Ingredients
For 40 Mini Spring Rolls
  • 400g Cooked chicken thigh meat, finely chopped
  • 250g Onion, finely chopped
  • 40ml Tomato sauce
  • 30ml White wine vinegar
  • 30ml Sugar
  • 5ml Light soy sauce
  • 2.5ml Salt
  • 125ml Chicken stock
  • 7.5ml Cornflour dissolved in a little water
  • 50g Butter to fry
  • Melted butter for brushing
  • Fillo pastry
Instructions
  1. Place the cooked chicken thigh meat in your food processor and machine it until finely chopped. Measure out 400g of the chopped chicken and put it aside.
  2. Chop 250g of onion, then in a jug combine the tomato sauce, white wine vinegar, sugar, light soy sauce, salt, chicken stock and cornflour slurry. Mix this thoroughly until all of the solids have dissolved.
  3. Heat a pan over medium high heat and add 50g of butter. Fry the onion for 5 minutes until tender and translucent.
  4. Pour in the sweet and sour sauce, bring this to a boil and allow it to boil for 60 seconds until thickened.
  5. Remove the pan from the heat and stir in the chopped chicken. Set this aside to cool completely.
  6. Once cooled, cut 3 inch or 75mm squares of pastry. Place one of the squares diagonally in front of you and spoon a tablespoon of the chicken mixture just below the center line in a small sausage shape.
  7. Fold the corner closest to you up and over the filling. Roll the pastry up to the center line, the fold the side corners in towards the center to totally enclose the filling.
  8. Continue rolling the pastry upward, wet the top corner with a little water and seal the roll. Continue until all 40 rolls are formed.
  9. Transfer the rolls to a lightly greased baking sheet and brush them with melted butter. Bake the spring rolls at 200c until lightly golden.
  10. Remove them from the oven and serve immediately.


Snack Platter Catering Part 4 – Petit Chicken & Salami Kebabs au Gratin – Cocktail Chicken Kebabs

cocktail chicken kebabs,cocktail chicken and salami kebabs,mini chicken kebabs,mini chicken and salami kebabs,finger snack chicken kebabs,party food chicken kebabs,how to make mini chickken kebabs,homemade chicken kebabs,chicken kebabs on toothpicks,superbowl chicken kebabs,snack platter chicken kebabs, cocktail chicken kebabs recipe, cocktail chicken skewers, chicken seekh kaba, chicken tikka kabab


Snack Platter Catering Part 4 - Petit Chicken & Salami Kebabs au Gratin - Cocktail Chicken Kebabs
Author: 
Recipe type: Finger Foods, Cocktail Party Foods , Poultry
Prep time: 
Cook time: 
Total time: 
Serves: 20-40
 
These cocktail chicken kebabs are outstanding. Tender chicken thigh meat enhanced with the flavor of strong salami and melted over with strong mature cheddar is legendary!!!
Ingredients
To Make 40 Cocktail Kebabs
  • 14 Chicken thighs
  • 10 Slices strong salami, 5mm thick, cut into quarters
  • 100g Mature cheddar cheese, grated
  • Salt & Pepper to taste
  • 40 Toothpicks
Instructions
  1. To debone the thighs, locate the spine along the one side. Use a sharp paring knife to lift the skin along the spine. Pull the skin back to expose the hip joint, then cut the oyster free.
  2. Using your shears, cut through the hip joint.
  3. Flip the thigh over and cut through the connecting tissue to free the spine from the thigh.
  4. Grab one side of the thigh bone and use the edge of your blade to scrape the flesh down the bone towards the other joint. Cut around the joint to free the bone from the thigh.
  5. Continue until all of the thighs are deboned, then cut each thigh into 6 blocks.
  6. Peel away the skin of the salami and cut 10 slices from the roll, each slice about 5mm thick.
  7. Stack the slices up and cut them into quarters.
  8. To make up each kebab, thread a piece of chicken onto a toothpick. Follow this with a piece of salami, then another piece of chicken. Repeat this until all of the skewers are done.
  9. Heat your pan over medium high heat and fry the kebabs for 12 to 16 minutes until well browned, turning every few minutes.
  10. Remove the pan from the heat and transfer the kebabs to a roasting tin.
  11. Sprinkle a generous layer of grated mature cheddar over the kebabs.
  12. Grill the kebabs on the second highest rack in your oven until the cheese is completely melted and starting to take on color.
  13. Transfer the kebabs to platters and serve immediately.


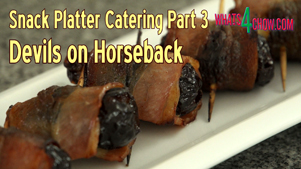
Snack Platter Catering Part 3 – Devils on Horseback – Brandy Soaked Prunes Wrapped in Bacon

Devils on Horseback, New Year's Eve, devils on horseback recipe, devils on horseback prunes,party recipes,cocktail party recipes,snack food recipes,snack platter recipes,cocktail platter recipes,brandy soaked prunes wrapped in bacon,cocktail pary recipes catering, devils on horseback recipe, prunes. wrapped in bacon, dates wrapped in bacon, easy appetizer, superbowl recipe, superbowl snack, Devils On Horseback (Food)


Snack Platter Catering Part 3 - Devils on Horseback - Brandy Soaked Prunes Wrapped in Bacon
Author: 
Recipe type: Snack Platter / Cocktail Snacks
Serves: 20-40
 
Devils on horseback are out of this world!!! Brandy soaked prunes wrapped in bacon and grilled to crispy perfection!!! Devils on horseback will get your cocktail party rocking.
Ingredients
For 40 Devils
  • 20 Rashers of streaky bacon
  • 40 Dried prunes
  • Brandy to cover
  • 40 Toothpicks
Instructions
  1. Place the pitted dried prunes in a bowl and pour in enough brandy to almost cover the prunes. Allow these to soak overnight.
  2. The following day cut the streaky bacon in half across the grain.
  3. Grab a half slice of bacon and one of the prunes and wrap the bacon around the prune. Press a toothpick through the overlap of bacon to secure it in place.
  4. Continue until all the devils are formed.
  5. Place the skewers in a roasting tin and grill the devils on the second highest shelf of your oven until the bacon is browned and crispy. Turn the devils over and repeat this with the other side.
  6. Remove the pan from the oven, transfer the devils to serving platters and serve immediately. They can also be served cold.


Snack Platter Catering Part 2 – Angels on Horseback (Bacon Wrapped Mussels / Oysters / Scallops)

angels on horseback,bacon wrapped mussels,bacon wrapped scallops,bacon wrapped oysters,snack platter recipes,cocktail party recipes,easy party recipes,quick superbowl recipes,easy superbowl recipes,recipes for the big game,quick and easy party recipes,seafood wrapped in bacon,crispy bacon wrapped mussels,crispy bacon wrapped oysters,crispy bacon wrapped scallops


Snack Platter Catering Part 2 - Angels on Horseback (Bacon Wrapped Mussels / Oysters / Scallops)
Author: 
Recipe type: Snacks / Cocktail Snacks / Finger Foods
Serves: 20-40
 
Angels on Horseback are absolutely delicious, and so easy to make that they lend themselves perfectly to catering for larger numbers of people.
Ingredients
For 40 Angels on Horseback
  • 20 Strips of streaky bacon
  • 40 Fresh mussels (or oysters / scallops)
  • 40 Toothpicks
Instructions
  1. Fry the bacon over medium heat until it is lightly browned but not crispy. Remove the bacon from the pan and allow it to coon for a few minutes, then cut it in half across the grain.
  2. Grab a half strip of bacon and one of the seafood pieces and wrap the bacon around the seafood. In this case I am using fresh mussels. Press a toothpick through the overlap of bacon to secure it in place. Continue until all of the skewers are done.
  3. Place the angels in a roasting tin and grill them on the second highest rack in you oven until well browned and crispy. Turn the skewers over and grill the other side until crispy.
  4. By grill, I mean using the top element of your oven on maximum temperature, which is normally 250c.
  5. The grilling is pretty quick, so be sure to keep a watchful eye on your creation so that it does not burn.
  6. Remove the angels from the oven, transfer to platters and serve hot or cold, although I must add that they are better on the hot side.


How to Make the Best Yorkshire Pudding!!! Simply the Best Yorkshire Pudding Recipe to go with Your Roast!!!

yorkshire pudding,yorkshire pudding recipe,how to make yorkshire pudding,yorkshire pudding batter recipe, Yorkshire Pudding (Dish), yorkshire pudding recipe easy, yorkshire pudding recipe jamie oliver, roast beef with yorkshire puddings and gravy recipe, yorkshire pudding nigel slater, yorkshire pudding james martin, yorkshire pudding delia, yorkshire pudding gordon ramsay, yorkshire pudding alton brown


How to Make the Best Yorkshire Pudding!!! Simply the Best Yorkshire Pudding Recipe to go with Your Roast!!!
Author: 
Recipe type: Accompaniments
Cuisine: English / British
Prep time: 
Cook time: 
Total time: 
Serves: 6-12
 
Yorkshire pudding is an all-time favorite accompaniment to any roast meal. In Yorkshire it is even served on its own as a starter with a thick gravy.
Ingredients
  • 200g All-purpose flour
  • 4 Eggs
  • 200ml Full cream milk
  • 2.5ml Salt
Instructions
  1. Sift the flour into a large mixing bowl. In a jug, lightly whisk 4 eggs and add this to the flour along with 200ml of milk and a pinch of salt. Whisk this thoroughly until you have a smooth, silky batter.
  2. Fill the end hollows of your muffin pan with oil and tip the pan up so that oil runs down to the lower hollows. When the bottom hollows fill at an angle, level the pan, and all of the hollows will have exactly the same amount of oil.
  3. Place the muffin pan into a roasting tin. This catch any spillage while the puddings bake. Place this in an oven at 200c or 400f for 15 to 20 minutes and the oil is really hot.
  4. Remove the pan from the oven and pour batter into each hollow. For regular sized puddings, fill them up halfway. For giant sized puddings fill them almost all the way.
  5. Return the pan to the oven for 20 to 25 minutes until the puddings are well risen and browned. Do not open the oven while the puddings are baking. This will cause them to drop back and you will have a flop.
  6. Remove the pan from the oven and marvel at the beautifully golden and crispy, puffed up and hollow Yorkshire puddings.
  7. Transfer these to platters and serve with the roast of your choice and a rich gravy.


Egg Foo Yong / Yung / Young. How to Make Classic Egg Foo Yong. Chinese Foo Yong.

egg foo yong,egg fu yong,egg foo yung,egg foo young,chinese egg foo yong,how to make egg foo young,egg foo young recipe,making egg foo yong at home,easy egg foo yong recipe,Egg Foo Young (Dish), egg foo young gravy, egg foo young sauce, shrimp egg foo young,chicken egg foo young,Vegetable Egg Foo Young,egg foo young recipes easy,egg foo young calories,egg foo young gravy recipe,egg foo young sauce


Egg Foo Yong / Yung / Young. How to Make Classic Egg Foo Yong. Chinese Foo Yong.
Author: 
Recipe type: Egg / Vegetable
Cuisine: Chinese
Prep time: 
Cook time: 
Total time: 
Serves: 4-8
 
Chinese Egg foo / fu yong / yung / young is a classic and is served both as a starter or as an accompaniment to the main course. Essentially it is a Chinese omelette, however the thickness & shape differs due to the fact that it is cooked in a wok.
Ingredients
  • 6 Eggs
  • 3 Spring onions
  • 3 Tbs Diced peppers
  • 5ml Salt
  • 5ml Finely chopped garlic
  • 5ml Finely chopped ginger
  • 15ml Light soy sauce
  • 15ml Hoisin sauce
Instructions
  1. Cut the spring onion into rounds, dice the red pepper, mince the garlic and ginger, lightly beat the egg with the salt, then mix the light soy sauce with the hoisin sauce.
  2. Heat the oil in your wok over medium high heat and add the spring onion and red pepper. Stir-fry this for 30 seconds.
  3. Add the garlic and ginger and continue to stir-fry for a further 30 seconds.
  4. Pour in the egg. The egg will force the vegetables to the edges of the pan. Use your wok shovel to redistribute the vegetables evenly across the egg.
  5. Allow the bottom of the egg to set for 60 seconds. It will start to bubble up as it starts yo set.
  6. Slide your shovel under the egg and flip it over. Allow the second side to set for another minute. Remove the foo yong from the heat.
  7. Slice it into 6 or 8 wedges and transfer to platters.
  8. Drizzle a little of the soy hoisin sauce over each wedge and serve immediately.


How to Make Lavash. Crispy Middle Eastern Flat-Bread. Homemade Lavash Recipe.

lavash,lavash recipe,how to make lavash,homemade lavash,middle eastern flat bread,flat bread recipe,spicy lavash recipe,recipe for lavash flat bread,Lavash (Dish), lavash crackers, lavash bread, lavash bread recipe, Lebanese Bread, Middle Eastern Bread, Crispbread, FlatBread Recipe, Turkish thin pastry, turkish flatbread, thin flatbread recipe, how to make flatbread, easy lavash, recipe for lavash


How to Make Lavash. Crispy Middle Eastern Flat-Bread. Homemade Lavash Recipe.
Author: 
Recipe type: Flat Bread / Crackers
Cuisine: Middle Eastern
Prep time: 
Cook time: 
Total time: 
 
Lavash is a middle eastern flat bread that has become quite popular in the west on snack platters served with a variety of dips.
Ingredients
  • 1 Tsp Dried yeast
  • 1 Tsp Honey
  • 125ml Warm water
  • 185g All-purpose flour
  • 2 Tsp Salt
  • ¼ Tsp Ground hot paprika
  • ¼ Tsp Cayenne pepper
  • 1 Egg white, lightly beaten
  • 2 Tbs seeds (poppy, sesame, caraway)
Instructions
  1. Combine the yeast, warm water and honey in a jug. Allow this to stand for 15 minutes until frothy.
  2. While the yeast matures, combine the flour, salt, ground hot paprika and cayenne pepper in a mixing bowl.
  3. Add the frothy yeast to the bowl. Using a wooden paddle stir this into the dry ingredients until a dough comes together.
  4. Turn the dough out onto a lightly floured work surface and knead it for 2 minutes until smooth. Wrap the dough in cling wrap and place it in your refrigerator for 45 minutes to firm up.
  5. Remove the dough from the refrigerator and divide it in half. Flatten one half and flour the outside if it is sticky. Pass it through your pasta roller on the widest setting. Fold it in half and pass it through again. Repeat this until the dough is silky smooth. Rub a little flour into the surface every time it becomes sticky.
  6. Reduce the thickness of the rollers by one step, pass the dough through, then another step and so on, until you reach number 5 on the machine.
  7. Dust both sides of the pastry with flour and put this aside while you roll out the second strip of pastry.
  8. Cut the pastry into triangles across the width of the pastry.
  9. Transfer the triangles to a lightly greased baking sheet and brush them with the egg white. Sprinkle the seeds of your choice onto the lavash.
  10. Using a fork prick holes into the pastry triangles. The closer you make the holes, the crispier and flatter the breads will be. If you make the holes further apart, the lavash will be lighter and airier, with bigger rising bubbles. The choice is yours.
  11. Bake the lavash in a preheated oven at 180c or 350f for 10 minutes until crisp and golden.
  12. Remove from the oven and serve hot or cold with the dipping sauces of your choice. In our serving we have uses our creamy lambs liver pate.


Lamb’s Liver Pate’ – Rich, Smooth, Creamy Lambs Liver Pate’ – Quick & Easy, the Food of Kings!

lamb's liver pate',lamb liver pate',how to make lamb liver pate',homemade lamb liver pate',creamy lamb liver pate',lamb liver pate' recipe,how to make lamb liver pate' at home, lamb liver pate recipe bbc, lambs liver pate recipe jamie oliver, lamb liver pate paleo, lamb liver pate jamie oliver, lamb liver pate thermomix, lamb liver pate bbc, lambs liver pate ingredients, lambs liver pate with brandy


Lamb's Liver Pate' - Rich, Smooth, Creamy Lambs Liver Pate' - Quick & Easy, the Food of Kings!
Author: 
Recipe type: Pate'
Cuisine: French
Prep time: 
Cook time: 
Total time: 
 
Lamb's liver pate' is quick and easy to make. It is smooth and creamy with a wonderful taste and texture - this truly is the food of kings!
Ingredients
  • 200g Streaky bacon
  • 600g Lamb's liver
  • 50g Butter
  • 2 x Medium onions, chopped finely
  • 1 Clove garlic, finely chopped
  • 1 Tbs Tomato puree
  • 60ml Brandy or Cognac
  • 200ml Sour cream (optional)
Instructions
  1. Cut the lambs liver into cubes, the streaky bacon into strips, and dice the onion and garlic.
  2. Heat a pan over medium heat, add the butter and fry the bacon for 3 minutes until barely browned.
  3. Add the onion and garlic and continue to fry gently for a further 3 minutes until the onion is tender.
  4. Add the liver to the pan and fry this for 5 minutes until it is cooked through.
  5. Pour in the brandy and the tomato puree and continue frying gently for a final 2 minutes.
  6. Remove the pan from the heat and allow it to cool for 5 minutes. Using your stick blender, puree the liver until absolutely smooth. At this stage you can add the sour cream if desired, but this entirely personal choice.
  7. Transfer the pate to serving bowls, single portion or bulk and seal the top of the pate with melted butter.
  8. The pate will last for up to 10 days in your refrigerator, or up to 3 months in your freezer wrapped airtight in cling wrap.


Scroll to top

Kitchen Conversions

Convert:
Masses
to:
Volumes
to:
Temperatures
to:
Lengths
to: