The Most Awesome Toasted Sandwich. A Gourmet Toasted Sandwich Inspired by the East.
Author: Whats4Chow
Recipe type: Toasted Sandwiches Recipes
Prep time:
Cook time:
Total time:
Serves: 2
A Gourmet Toasted Sandwich Inspired by the East. Across China, Thailand and Vietnam it is quite normal to combine seafood, smoked pork and peanuts or roasted sesame oil in a meal - with remarkable results. This toasted sandwich is inspired by this amazing combination!
Ingredients
For 2 Gourmet Sandwiches
6 Slices white farmhouse bread, 4 of them buttered on 1 side
100g Mashed sardines
100g Fried streaky bacon, chopped
2 Heaped tablespoons of crunchy peanut butter
2 Eggs, scrambled
Instructions
Turn the buttered slices upside down. Spread a generous layer of the peanut butter onto 2 of the slices.
Top each of these with the chopped bacon, and press This into the peanut butter.
Top this with the 2 un-buttered slices of bread and press it down to make sure it is well bonded.
Top the un-buttered slices with the mashed sardine, followed by the sloppy scrambled egg.
Close the sandwiches with the 2 remaining buttered slices, with butter facing outward.
Heat your pan or sandwich grill and fry the sandwiches until crispy and golden.
Quarter the sandwiches and transfer them to platters to serve.
How to Debone & Stuff a Whole Turkey. Thanksgiving Recipe Special. Turkey Galantine / Ballotine.
Author: Whats4Chow
Recipe type: Poultry / Thanksgiving / Christmas / Festive Season
Cuisine: American
Prep time:
Total time:
Serves: 6-8
How to Debone & Stuff a Whole Turkey. With Thanksgiving and the festive season just around the corner, here is a fantastic deboned stuffed turkey recipe for the occasion!!! A while back we demonstrated deboning a whole chicken in a few easy steps - deboning the turkey is just as simple, but requires a little more strength owing to the turkey having much stronger connective tissue than a chicken. The bird is stuffed with a rich filling of bacon, feta, olives and baby spinach.
Ingredients
1 x 3kg / 6.6lb Turkey (if you use a larger bird, simply scale up the filling and recalculate the cooking time using my formula below)
For the Filling / Stuffing
200g Baby spinach
200g Streaky bacon
140g Feta cheese
12 Olives
Instructions
Starting with the stuffing, cut the bacon thinly across the grain. Roughly chop the baby spinach, and pit and slice the olives into rounds. In addition take out 2 rounds or 140g of feta cheese.
Heat your wok or pan over medium high heat and fry the bacon until lightly golden.
Add the spinach and fry this until spinach is totally wilted and tender.
Turn off the gas or remove the wok from the heat, add the olives and crumble in the feta cheese. Put this aside to cool.
To debone the turkey, cut off the tail, then cut off the wings at the elbow.
Turn the bird onto its breast and pull back the skin on the shoulder. Feel for the articulation in the shoulder and slice through the joint. Repeat this with the other wing.
Slice all the way down the back of the turkey and then pull the wings and the skin away from the carcass all the way down to the oysters.
Stand the bird up on its butt, and put your fingers under the skin on either side of the sternum. Pull the skin and the breasts away from the front of the carcass.
Lie the bird on its sternum then cut the oysters free from the carcass.
To free the legs, move one of the legs sideways and upwards then pull it over and straight downwards to snap and expose the hip joint. Use your knife to cut through the connective joint tissue. Repeat this with the other leg.
Pull the carcass free from the bird. Do not dispose of this yet as any bits of meat left on the carcass will be used to fill up blank spots later.
Open the turkey up with the skin side down.
To debone the leg, cut around the hip joint then scrape the meat down the bone to the knee joint.
Cut around the knee joint then scrape the meat down the drumstick.
Press the bone back into the drumstick and break the bone just above the knuckle using the back of your cleaver. Pull the leg bone free, tuck the flesh back into the skin and continue with the other leg.
To debone the wing, cut around the wing joint. Grab the joint and scrape the flesh down the bone. Pull the bone free, tuck the flesh back into the skin, and then continue with the other wing.
The turkey is now totally deboned. Use the flesh recovered from the carcass to patch the blank spots between the legs and breasts.
Cut at an angle through the thick upper breasts and flap the flesh forward.
To stuff the bird, fill the legs and wings with the stuffing to plump them up. Spread all the remaining fill evenly across the bird.
Fold one half of the turkey across the center-line, then fold the other half over this to entirely enclose the filling.
Using butchers twine tie the legs together. Using half hitch loops close up the rest of the bird. Bring the twine back down to the legs and tie to secure.
Place the turkey on a rack in a roasting pan and rub it all over with butter. Season with salt and cracked black pepper and roast the bird for 45 minutes plus 15 minutes per pound.
At the end of the cooking time, remove the turkey from the oven and allow it to stand for 5 minutes before slicing into thick slices and serving with the accompaniments of your choice.
Baked Chilli Chicken Drumsticks. Great for the Big Game or Served Cold!
Author: Whats4Chow
Recipe type: Chicken / Poultry / Snack Food
Prep time:
Cook time:
Total time:
Serves: 4-8
These spicy hot chicken drumsticks are perfect snack-food for the big game, or simply served cold at a picnic. Simple and quick to make, these will have your fans raving for more!
Ingredients
8 Chicken drumsticks
1 Medium onion, roughly chopped
2 Cloves Garlic
1 Tbs dried chilli flakes
15ml paprika
Juice of 1 lemon
30ml White wine vinegar
15ml Worcestershire sauce
100ml Oil
Instructions
Place the onion, garlic, dried chilli flakes, paprika, lemon juice, white wine vinegar, Worcestershire sauce and olive oil in a jug. Using your stick blender zap these until smooth.
Make three deep cuts into the thickest part of the flesh of each drumstick. Place the drumsticks in a roasting pan and pour the sauce over the chicken.
Bake the chicken in a preheated oven at 180c or 350f for 75 minutes. Turn and re-coat the chicken twice during this time - after the first 30 minutes then after the second 30 minutes.
Remove the chicken from the oven, allow it to stand for 5 minutes before transferring it to baskets or platters and serving.
How to Make Sous Vide Burger Patties in Your Dishwasher! Quick and Easy Sous Vide Burger!
Author: Whats4Chow
Recipe type: Burgers / beef
Cuisine: American
Prep time:
Cook time:
Total time:
Serves: 4-6
Sous Vide Burger Patties / Sous vide burgers Sous vide involves cooking vacuum packed foods in a water bath at low temperature for an extended period of time. This normally involves buying an expensive circulating water bath, however your dishwasher will do a pretty good job of this for free! Check out the video and see how.
Ingredients
600g Beef mince
½ Tsp Salt
Instructions
Combine half a teaspoon of salt with 600g of beef mince, then press your patties, or form them by hand.
Vacuum pack your patties in single packs, making sure that the vacuum packs are properly sealed.
Pack the sealed patties flat in your dishwasher and run them for a full cycle at 65c. Almost all dishwashers have 2 temperature cycles, 65c and 75c. Consult the user manual for your machine.
Remove the patties from the washer. They are completely and thoroughly cooked. Remove them from their packets and serve immediately, or if you prefer to add a little color, flash fry them in a smoking hot pan to singe the outside of the patty. To speed things up you can also use a blowtorch.
The texture of these patties is quite pleasant, more on the side of actual steak, than that of regular patty. Considering you could probably fit at least about 60 patties in you dishwasher at a time, this is the ideal way to bulk cater for parties, providing your menu choice is burgers, or burgers, or burgers.
This simple barbecue pork ribs recipe will have your friends and loved ones raving for ages. Beautifully flavored with soy, garlic, ginger and roasted sesame oil, these ribs are a sure winner.
Ingredients
1.5kg Pork Belly, skin on, bone in
80ml Light soy sauce
3 Tsp Cornflour
1 Tsp Garlic powder
2 Tsp Ground Ginger
2 Tsp Roasted sesame oil
Instructions
You will need 1.5kg of pork belly with skin on and bone in. Have your butcher cut it into short ribs of around 75mm or 3 inches.
Place the ribs in your wok and cover them with boiling kettle water. Bring this to a boil, reduce the heat and simmer the meat for 10 minutes. Turn the belly over and continue to simmer for another 10 minutes.
Remove the belly from the wok and cut the ribs apart.
Combine the light soy sauce, cornflour, garlic powder, ground ginger and roasted sesame oil.
Place the ribs in a roasting pan and pour the marinade over the meat. Toss them until everything is well coated. Allow these to marinate for 30 minutes.
Over a medium hot barbecue, grill the ribs for 6 minutes per side.
Turn the ribs onto the skin side then barbecue for a further 3 minutes. Remove the ribs from the heat and serve immediately with the accompaniments of your choice.
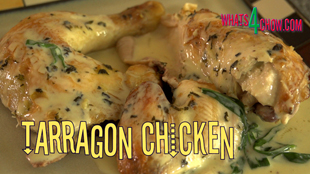
Traditional French Tarragon Chicken. How to make the best tarragon chicken EVER!!!
Author: Whats4Chow
Recipe type: Chicken / Poultry
Cuisine: French
Prep time:
Cook time:
Total time:
Serves: 4
Tarragon chicken is an absolute classic of French cuisine. Traditionally baked whole in a Dutch oven or casserole, this method results quicker and more even cooking, with flesh that is far more moist and has a better infusion of flavor.
Ingredients
1½ Tbs Fresh tarragon, finely chopped
1 Clove garlic, crushed
50g Butter, melted and portioned into 2 x 25g
1.6kg Chicken
150ml Chicken Stock
30ml Dry white wine
1 Tbs Cornflour dissolved in 3Tbs water
Small handful fresh tarragon leaves
150ml Cream
Instructions
Cut through the skin and flesh along the breast bone, then cut through the bone with your shears.
Open the chicken up, turn it over and dislocate the pelvic girdle with a firm downward thrust of your hand.
Cut off and discard the wing tips.place the bird skin side up in a roasting pan and brush it liberally with the melted butter.
Grill the chicken on the second highest rack in your oven for 10 minutes until lightly browned. To clarify the term grill, use the top element only on maximum temperature.
Once this step is complete, reset your oven to 200c or 400f.
Remove the bird from the oven. Combine the the half of the melted butter, the finely chopped fresh tarragon, the garlic, white wine and chicken stock. Spoon this over the chicken.
Cover the roasting pan with foil and bake the chicken at 200c or 400f for 80 minutes.
Remove the pan from the oven and transfer the chicken to a platter and keep it warm.
Strain the juices from the pan into a small saucepan. Add the cornflour slurry and the whole fresh tarragon leaves.
Heat the saucepan over medium high heat, bring it to a boil, reduce the heat and simmer for 2 minutes.
Remove this from the heat and stir in the cream.
Joint the chicken and transfer the pieces to serving platters. Ladle the cream sauce over the chicken and serve immediately with the accompaniments of your choice.
Trev's Gourmet Burger - All-Beef Patty with Crumbed Camembert, Bacon and Roast Red Pepper Relish!!!
Author: Whats4Chow
Recipe type: Burgers / Beef
Cuisine: American
Prep time:
Cook time:
Total time:
Serves: 2
This gourmet burger is all good - 150g all beef patty with another patty of crumbed camembert, topped with crispy bacon and roasted red pepper relish -- you should need a license to eat a burger like this!!!
Ingredients
For the Patties
150g Ground sirloin
150g Ground rump
1 Tsp Salt
For the Relish
1 Large Red Pepper
1 Medium Onion
30ml Balsamic vinegar
30g Butter
Salt to taste
For the Camembert
¼ Cup finely crushed cornfalkes mixed with ¼ cup all-purpose flour
¼ Cup cornflour
1 Eggs lightly beaten
Other
2 Large burger buns
4 Rashers streaky bacon
Lettuce
Butter
Instructions
Starting with the relish, scorch the skin of the red pepper with your blowtorch, gas hob, or under the grill. Place the pepper in a plastic packet, tie the top and allow the pepper to sweat.
While the pepper sweats, chop the onion.
Remove the pepper from the bag and scrape the skin from the pepper. Chop the whole pepper into cubes.
Heat a pan over medium high heat and add the butter. When the butter is bubbling, add the pepper and onion and fry this for 10 min until it is well browned and caramelized. Add the balsamic vinegar and stir this for 60 seconds until the vinegar has thickened to a sticky syrup and coated everything.
Remove this from the heat and transfer it to a jug. Using your stick blender, puree the relish then keep it warm on the side.
Next in line is the camembert. For the coating combine the flour with the finely crushed cornflakes and measure out the cornflour. Whisk the eggs briefly.
Hold the camembert round on its side and cut through the cheese, effectively giving you 2 rounds.
Dip one of the rounds in the egg, then dredge it in the cornflour.
Dip the cheese in the egg making sure to wet all of the cornflour.
Dredge the cheese in the cornflake mixture making to get a good solid coating.
Return the cheese to the egg making sure to wet all of the cornflake mixture, then second coating of the cornflake mixture. Make sure to get a good solid coating.
Repeat this with the second round of cheese, then transfer both rounds to a platter and allow the coating to set for 20 minutes.
My burger mix is 50% ground sirloin mixed with 50% rump, with a fat content of 20%. This is just a recommendation - you can use a good quality ready-made patties of 150g each.
Place the mince in a bowl with 1 teaspoonful of salt and mix well. The salt reacts with the protein binding the meat.... there is no need for egg. Go ahead and form your 2 patties by hand or using a press. Place the patties between 2 pieces of foil and flatten out until they are the slightly bigger than the burger buns. When flattening them out make sure to make the center thinner than the edges, this helps keep the patty flat when it cooks.
Put the patties in the freezer while you continue.
Cut and butter the buns, then toast them in a large pan until crisp and lightly browned on the inside.
Remove the buns from the pan then add the bacon the pan. Fry the bacon until well browned, then remove.
Remove the patties from the freezer and add them to the pan. Fry the patties for 3 minutes per side, then remove these from the pan.
Add 300ml of oil to the pan, allow the oil to heat for a minute, then add the camembert. Fry the camembert for 3 minutes, turning after 90 seconds. Remove the camembert from the pan.
Dress the buns with a healthy bed of lettuce and top this with a little of the relish. Top this with a patty, then the bacon.
Finish the burger off with the camembert and a bit more relish, then serve your masterpiece immediately with the accompaniments of your choice.
KFC Chicken Wings Recipe / KFC Hot Wings Recipe. This is Part 3 of the series on KFC Chicken. This Episode covers KFC Hot Wings. If you missed Episode 1 & 2, click on the onscreen link to view them in order to understand the process. Crispy deep-fried KFC chicken wings are legendary - this is how to make them at home.
Ingredients
16-24 Whole chicken wings
For the Spice Blend
3 Tsp Paprika
2 Tsp Onion salt
1 Tsp Dried sage
1 Tsp Garlic powder
1 Tsp Oregano
1 Tsp Cayenne pepper
1 Tsp Cracked black pepper
1 Tsp Dried basil
1 Tsp Dried marjoram
1 Tsp Dried coriander
For the Curing Brine
100g Dairy or Kosher salt (any non-iodated salt is fine)
1 Tsp Whole black peppercorns
1 Corn of whole allspice
12.5g Saltpetre
1 Tsp Ginger
50g Sugar
15g Bicarbonate of soda
1 Tbs Dried chilli flakes
Other
2 Cups all purpose flour
1 Tbs Cayenne pepper
4-6 eggs lightly beaten
Instructions
To start prepare the curing brine as we did in part 1 and part 2.
Remove and discard the wing tips from the wings and cut through the center joint. Place the wings in a sterilized container.
Sprinkle 1 tbs of crushed chilli flakes over the wings, then pour in the brine. Put the lid on the container and allow the chicken to cure for a full 12 hours in your refrigerator.
Combine the second half of the spices with flour and add 1 tbs of cayenne pepper, then sprinkle a layer of the seasoned flour over the surface of a large platter.
Lightly beat 4 eggs.
To coat the wings, first dredge them in the flour, then dip then in the egg.
Dredge them in the flour again to get a good solid coating. Transfer the wings to the floured platter and allow the coating to set for 20 minutes.
Fill your pan with oil to a depth of 25mm or 1 inch and heat this to 150c or 300f. Fry the wings for a full 20 minutes turning halfway through.
Remove the wings from the oil and drain on kitchen paper. Allow them to stand for 5 minutes before serving.
KFC Chicken Burger - Original Recipe - The Real Secret to KFC Fried Chicken 1st by Whats4Chow.com
Author: Whats4Chow
Recipe type: KFC Fried Chicken / Poultry
Cuisine: American
KFC Chicken Burger Video Recipe This is Part 2 of a 3 Part series on how to make KFC Fried Chicken. Part 2 is all about fried chicken breast fillets and in particular, KFC Chicken Fillet Burgers. If you missed Part 1 you will need to view this first in order to understand the process used. You can find Part 1 HERE WHATS4CHOW.COM IS THE FIRST TO PUBLISH THIS METHOD - I AM SURE THAT THIS VIDEO WILL BE COPIED BY NUMEROUS WEBSITES AND VIDEO CHANNELS WITHIN A VERY SHORT SPACE OF TIME - TO THE FREELOADERS WHO INEVITABLY WILL STEAL MY HARD WORK, PLEASE AT LEAST HAVE THE DECENCY TO GIVE OUR CHANNEL AND WEBSITE THE CREDIT IT DESERVES FOR DECODING THE MYSTERY OF KFC'S INSANELY GOOD TASTE, AROMA AND TEXTURE.
Ingredients
The Chicken
8-12 Chicken breast fillets (100g - 125g each)
For the Spice Blend
3 Tsp Paprika
2 Tsp Onion salt
1 Tsp Dried sage
1 Tsp Garlic powder
1 Tsp Oregano
1 Tsp Cayenne pepper
1 Tsp Cracked black pepper
1 Tsp Dried basil
1 Tsp Dried marjoram
1 Tsp Dried coriander
For the Curing Brine
100g Dairy or Kosher salt (any non-iodated salt is fine)
1 Tsp Whole black peppercorns
1 Corn of whole allspice
12.5g Saltpetre
1 Tsp Ginger
50g Sugar
15g Bicarbonate of soda
Other
2 Cups all purpose flour
4-6 eggs lightly beaten
Instructions
Mix the curing brine discussed in episode 1, bring it to a boil stirring frequently, lower the heat and simmer for 5 minutes.
Remove the brine from the heat and allow it to cool completely.
Take 8 to 12 chicken breasts of 100 to 125g each and place them in a large sterilized container.
Pour the curing brine over the breasts, put the lid on the container and allow the breasts to cure in your refrigerator for 12 hours. The reason for time being half that of the chicken pieces is that there is no skin, and the surface area of the breast is far bigger, and the meat is thinner.
After 12 hours, combine the second half of the spice mix with 2 cups of all purpose flour and lightly beat the eggs.
Sprinkle a solid layer of the spice mix over the surface of a large platter.
Remove the chicken from the brine and tap the breasts down to an even thickness of 10mm or just under half an inch using your meat mallet.
To coat the fillets, dredge them in the seasoned flour then dip them in the egg making sure to wet all of the flour.
Dredge them in the flour again making sure to get a good solid coating.
Transfer the coated chicken to the floured platter and allow the coating to set for 20 minutes.
Fill your pan with oil to a depth of 25mm or 1 inch and heat this to 150c or 300f.
Carefully lower a few breasts into the pan and fry them for 20 minutes, turning halfway through.
Remove the fillets from the oil and keep warm in a low oven until the remaining breasts are fried.
To serve, butter the buns, top the lower half with shredded lettuce, then top each of these with chicken.
Top the chicken with tangy mayonnaise, followed by the top of the bun then serve immediately.
KFC Fried Chicken Secret Recipe Kfc fried chicken is legendary, and there must be hundreds of websites and videos claiming to have cracked the secret recipe of 11 herbs and spices. Others get into deep discussions about how the chicken is pressure fried. Over time I have tried many of these copycat recipes and can only say that it was one disappointment after the next. None of them even came close to the real thing. Today I will reveal to you the actual secret behind the legendary taste, aroma and texture of this iconic chicken. Before I continue, I would just like make a point. Whats4Chow.com is the FIRST TO PUBLISH THIS, and I am sure that there will be a load of other channels copying my video within a very short time of this being published. Unfortunately there is nothing I can do to prevent this, but to those free loaders out there that will inevitably copy my work, please have the decency to give our channel and website the credit it deserves for finally decoding the mystery of the world's finest chicken brand. Let's get started by saying that it is not the secret blend of 11 herbs and spices, and it is not the use of pressurized deep fryers, or the type of oil or shortening used to do this. The secret to the insanely good flavor, texture and aroma is in the preparation of the chicken before it even coated. In fact, using this method the chicken tastes very close to the real thing even without the 11 herbs and spices!
Ingredients
The Chicken
8-12 Chicken thighs and drumsticks
For the Spice Blend
3 Tsp Paprika
2 Tsp Onion salt
1 Tsp Dried sage
1 Tsp Garlic powder
1 Tsp Oregano
1 Tsp Cayenne pepper
1 Tsp Cracked black pepper
1 Tsp Dried basil
1 Tsp Dried marjoram
1 Tsp Dried coriander
For the Curing Brine
70g Dairy or Kosher salt (any non-iodated salt is fine)
1 Tsp Whole black peppercorns
1 Corn of whole allspice
12.5g Saltpetre
1 Tsp Ginger
50g Sugar
15g Bicarbonate of soda
Other
2 Cups all purpose flour
4-6 eggs lightly beaten
Instructions
Combine the paprika, onion salt, sage, garlic powder, oregano, chilli powder, black pepper, basil, marjoram and coriander in a bowl and mix it together, then divide this in half.
Pour 2.5lt of filtered water into a pot and add half of the spice mix along with all of the curing brine ingredients.
Bring the pot to a boil, stirring frequently. Reduce the heat and allow the pot to simmer for 5 minutes.
Remove the pot from the heat and allow the brine to cool completely.
Using a carving fork or similar tool, poke holes through the skin of the chicken pieces, then place them in a large sterilized container.
Pour the cooled brine over the chicken pieces, put the lid on and let this cure in your refrigerator for a full 24 hours.
Before I continue, for this recipe to succeed, you cannot omit anything, especially the saltpetre and bicarb. The proper curing process is where the taste, texture and juiciness comes from.
After 24 hours, remove the chicken from the brine.
Combine 2 cups of all purpose flour with the other half of the spices, and lightly beat 4 eggs.
Dredge the chicken in the flour mixture, then dip it in the egg making sure to wet all of the flour. Dredge the chicken in the flour again making sure to get a good solid coating.
Sprinkle a layer of the flour mixture onto a platter, transfer the coated chicken pieces to the platter and allow the coating to set for 20 minutes.
Half fill your wok or pot with oil. Heat the oil to 160c or 325f. Fry the chicken pieces for 20 minutes, turning over halfway.
Remove the chicken from the oil, drain on kitchen paper and serve.
Just a few more notes before we go....
The chicken must fry for at least 20 minutes. If you fry hotter and shorter, the coating will have a chalky texture.
The chicken is cured, and as a result it can stand in a low oven for extended periods of time with no health risks, just as it does in the store. This makes it possible to make a mountain of chicken before your guests arrive.
Smaller cuts like the KFC wings and chicken burgers will be covered in the next few days. Please subscribe for notifications and updates.
Chinese Crispy Fried Pork Belly Rashers. Deep-Fried Pork Belly Rashers with Black Bean Marinade.
Author: Whats4Chow
Recipe type: Pork Belly / Deep-fried / Dim Sum
Cuisine: Chinese
Prep time:
Cook time:
Total time:
Serves: 4-8
This is Part 2 of the Chinese Pork Ribs & Belly demonstration. To see Part 1, click the on-screen link. In this Episode, we slice the pork belly into rashers, marinate it in a rich fermented black bean marinade, coat it and deep-fry it to crispy golden perfection.
Ingredients
600g Pork Belly, skin on
2Tbs Rice win or dry sherry
4 Tsp Caster sugar
2 Tsp Salt
2 Tsp Roasted sesame oil
2 Tsp Garlic powder
4 Tbs Fermented black beans, rinsed and finely chopped
1 Tsp Dried chilli flakes
4 Tsp Cornflour
Instructions
Slice the belly into ¼ inch or 6mm rashers. Place these in a large mixing bowl and add the caster sugar, salt, garlic powder, chilli flakes, cornflour, black beans, rice wine and roasted sesame oil.
Massage this all into the pork rashers, then allow to marinate for 2 hours in your refrigerator.
Fill your wok or pan with oil to depth of 50mm or 2 inches and heat this to 190c or 350f.
Working with 1 rasher at a time dip a rasher in the egg, then drench it in the cornflour. Carefully lower it into oil, then repeat until the pan or wok is full.remove the rashers from the oil using a pair of tongs as soon as they are crisp and golden.
Transfer the rashers to platters and serve with the dipping sauces of your choice.
Chinese Steamed Pork Ribs with Black Bean Sauce. How to Make Chinese Steamed Ribs - Dim Sum Pork Ribs
Author: Whats4Chow
Recipe type: Dim Sum / Cocktail Snacks / Pork Belly
Cuisine: Chinese
Prep time:
Cook time:
Total time:
Serves: 4
This Chinese Steamed Pork Ribs is Part 1 of a 2 part demonstration covering Chinese Pork Belly. Part 2 will be published tomorrow. In Part 1, we separate the ribs from the belly, cut them apart, marinate them in a rich black bean sauce, then steam them to succulent perfection. In Part 2, tomorrow, we slice the belly into rashers, marinate it, then deep-fry it to crispy golden perfection.
Ingredients
Pork Belly, bone in, cut to 75mm / 3 inches wide
1 Tbs Rice wine
2 Tsp Caster sugar
1 Tsp Salt
1 Tsp Sesame oil
1 Tsp Garlic powder
2 Tbs Fermented black beans, rinsed and finely chopped
½ Tsp Dried chilli flakes
2 Tsp Cornflour
Instructions
To start, have your butcher cut the entire belly into short ribs, about 75mm or 3 inches wide. You will use 1 of these strips for this series.
Scrape the skin with the blade of your cleaver to get rid of any stray bristles.
Cut the ribs away from the rest of the belly. Put the belly aside for tomorrow's episode.
Cut the ribs apart and place them in a large mixing bowl.
Add the caster sugar, salt, garlic powder, chilli flakes and cornflour. Add the finely chopped fermented black beans and the rice wine and roasted sesame oil.
Massage this into the ribs thoroughly, then leave this to marinate in your refrigerator for 2 hours.
Place a heat-proof plate in your steamer. Using 4 bamboo skewers form a bridge across the plate. Place the ribs on top of the skewers. Place the lid on the steamer and steam the ribs over rapidly boiling water for 25 minutes.
Remove the steamer from the wok and serve the ribs immediately with the dipping sauces of your choice.