The Amazing Gourmet Schnitzel Hot Dog. This is for HUNGRY Hot Dog Fans!!! Gourmet Hot Dog Recipe.

gourmet hotdog,gourmet schnitzel hotdog,gourmet hotdog recipe,how to make a gourmet hotdog,best hotdog recipe,gourmet hotdog delux, hot dog (food), gourmet hot dogs, gourmet hotdog cafe, gourmet hot dog toppings, gourmet hotdog opskrift, 5 dogs gourmet hot dogs, homemade, hot dog challenge, hot dog gourmet, originals hot dog,chicken hot dog,chicken schnitzel hotdog,how to make a chicken and bacon hotdog


The Amazing Gourmet Schnitzel Hot Dog. This is for HUNGRY Hot Dog Fans!!! Gourmet Hot Dog Recipe.
Author: 
Recipe type: Fast Food
Cuisine: American
Prep time: 
Cook time: 
Total time: 
Serves: 2
 
Today we're taking yesterday's schnitzel even further from the traditional version. A footlong sausage wrapped in cheese, schnitzel and bacon, pan-fried to golden crispy perfection, then served on a length of fresh French loaf. Gourmet Hotdog Deluxe!!!
Ingredients
For 2 Gourmet Hot Dogs
  • 2 x 12 inch Smoked Vienna sausages
  • 2 x Chicken breasts
  • 6 Slices streaky bacon
  • 40g Mozzarella cheese, finely shredded
  • 1 x 24 inch French loaf
  • ⅓ Small lettuce
  • Condiments of your choice to garnish
Instructions
  1. Using sharp knife, slash angled cuts into both sides of the sausages.
  2. Unpack the smoked streaky bacon.
  3. To prepare the chicken, cut away the fillets from the breasts. Fold them in cling-wrap and using your meat mallet, tap them down to a thickness of 3mm or ⅛th of an inch.
  4. Working with one schnitzel at a time, turn the schnitzel width-ways and sprinkle half of the finely shredded cheese over the chicken.
  5. Place the sausage in the center and proceed to roll the chicken around the sausage as firmly as possible.
  6. Place a strip of bacon at a slight angle above the chicken. Roll this up with the chicken so that it spirals along the chicken. Repeat this with another 2 slices of bacon until the chicken is totally wrapped in bacon.
  7. Repeat this with second dog.
  8. Before frying the dogs, finely slice a third of a small lettuce.
  9. Cut the French loaf in half. This is a store-bought loaf, and the cheese had already been added, however, you can use any loaf of your choosing, provided it is large enough to accommodate these huge dogs.
  10. Slice through the tops of the half-loafs leaving the bottoms intact.
  11. Fill each half-loaf with half of the shredded lettuce.
  12. Heat a large pan over medium high heat and add 30g of butter. Fry the dogs for 3 minutes per side, remembering that they have 4 sides, giving you a total of 12 minutes.
  13. Transfer the crispy golden dogs to the 2 half-loaves and garnish with condiments of your choice.


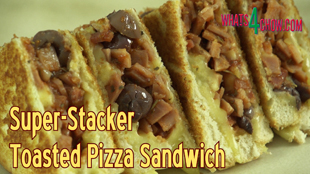
The Mega Toasted Pizza Sandwich!!! Super-Stacker Double Thick Toasted Sandwich – Pan Grilled.

grilled sandwich,toasted sandwich,grill sandwich recipe,toasted sandwich recipe,the best toasted sandwich recipe,the best way to toast a sandwich,how to toast a sandwich,how to make the best toasted sandwich,double size toasted sandwich,toasted sandwich ideas,toasted sandwich fillings,toasted sandwich in pan,ainsley harriott toasted sandwich,jamie oliver toasted sandwich,chef toasted sandwich


The Mega Toasted Pizza Sandwich!!! Super-Stacker Double Thick Toasted Sandwich - Pan Grilled.
Author: 
Recipe type: Toasted Sandwiches / Pizza
Cuisine: Italian
Prep time: 
Cook time: 
Total time: 
Serves: 2
 
Following yesterdays super stacker toasted sandwich, here's another super stacker, this time with all the flavor of real Italian pizza.
Ingredients
  • 4 Slices hickory ham
  • 8 Slices strong mini-Salami
  • 6 Calamata Olives, pitted and sliced
  • 24 x 1 inch Squares of mozzarella cut ⅛th inch thick (3mm)
  • 5ml Italian herb mix
  • 75ml Tomato sauce or tomato puree
  • 6 Slices square loaf bread
  • Butter
Instructions
  1. Chop the smoked hickory ham and strong aged salami, and pit the olives and cut them into rounds.
  2. Add the Italian herb mix and tomato sauce and mix this all together thoroughly.
  3. In addition cut 24 squares of mozzarella cheese to a thickness of around 3mm or ⅛th of an inch.
  4. Take 6 slices of square loaf bread and cut the centers from 2 of the slices.
  5. Butter the remaining 4 slices and place them in 2 pairs with the butter inwards.
  6. Working with on pair, arrange cheese around the edge of the bread. Top this with one of the hollow slices. While cooking the cheese will melt and glue the sandwich closed.
  7. Fill the hollow slice with half of the filling. Don't fill past the level of the crust.
  8. Arrange more cheese around the edges.
  9. Lift the filled half of the sandwich and place the underneath slice on top to close. Both outer surfaces will be buttered surfaces.
  10. Repeat this with the second sandwich.
  11. Heat your pan over a low flame. The pan must not be too hot as you want the cheese inside the sandwich to melt before the bread over-browns.
  12. Toast the sandwiches on the first side until you visibly see the underneath layer of cheese melting. Turn the sandwich over and repeat.
  13. To cut the sandwiches use the tip of your knife to get a clean cut, and avoid crushing the sandwich.
  14. Transfer the quarters to platters and serve immediately.


The Mega Toasted Sandwich!!! Super-Stacker Double Thick Toasted Sandwich – Grilled Chicken Mayo

grilled sandwich,toasted sandwich,grill sandwich recipe,toasted sandwich recipe,the best toasted sandwich recipe,the best way to toast a sandwich,how to toast a sandwich,how to make the best toasted sandwich,double size toasted sandwich, toasted sandwich ideas, toasted sandwich fillings, toasted sandwich in pan, ainsley harriott toasted sandwich, jamie oliver toasted sandwich, chef toasted sandwich


The Mega Toasted Sandwich!!! Super-Stacker Double Thick Toasted Sandwich - Grilled Chicken Mayo
Author: 
Recipe type: Sandwich / Gourmet Deli
Prep time: 
Cook time: 
Total time: 
Serves: 2
 
The Mega Toasted Sandwich!!! Super-Stacker Double-Thick Toasted Sandwich - Grilled Chicken Mayonnaise. Today's episode presents simply the best way to make a toasted sandwich. My recipe is using chicken mayo, but you can use tuna mayo or any saucy type filling.
Ingredients
  • 1 Chicken breast
  • ½ Onion
  • 30g Butter for frying
  • 75g Mayonnaise
  • Butter for spreading
  • 6 Slices bread from a square loaf
  • Salt and pepper
Instructions
  1. Cut away the fillet on the inside of the breast and put this aside.
  2. Fold the breast in cling-wrap and tap it down using your meat mallet to a thickness of 3mm or ⅛th of an inch.
  3. To continue, dice half of a medium size onion.
  4. Use your peeler to cut 16 very thin slices of mozzarella cheese.
  5. Unwrap the chicken and season it liberally on both sides with salt and cracked black pepper. This includes the fillet that you cut away.
  6. Heat a pan over medium high heat and add 30g of butter. Fry the onion for 5 minutes until it just starts to brown on the edges. Scoop the onion from the pan leaving as much butter behind as possible.
  7. Add the chicken to the pan and fry this for 3 minutes, turning every 30 seconds.
  8. Remove the chicken from the pan and transfer it to a chopping board. Cut the chicken into strips, then into blocks, then march chop until reasonably fine.
  9. Add the chicken to the onion along with the mayonnaise and mix this thoroughly to combine.
  10. Take 6 slices from a square loaf of bread. Cut the centers from 2 of the slices.
  11. Butter one side of the remaining 4 slices of bread and put them in pairs with the butter facing inward.
  12. Working with the first pair, position 4 strips of cheese along the edges of the bread. This will melt and glue the sandwich closed.
  13. Place one of the hollow slices on top of this. Fill the hollow with half of the chicken filling. Don't fill it past the level of the crust.
  14. Place another 4 slices of cheese around the edges. Lift the filled part of the sandwich and place the underneath slice on top of the sandwich. Both outer surfaces of the sandwich are buttered surfaces.
  15. Repeat this with the second sandwich.
  16. Heat another pan over medium heat and grill the sandwiches until crispy golden on both sides. Use your lifters to square up the edges every time you turn the sandwiches.
  17. I urge you not to try this in a sandwich toasted unless you have a toaster like a Breville 800 with self leveling and thickness settings. A regular toaster will simply crush the sandwich.
  18. To cut the sandwich, use the tip of your knife to get a clean cut, and to avoid crushing the sandwich.
  19. Serve these the amazing toasties to platters and enjoy.


Petit Breakfast Rolls (Petit Pains) – Beautiful Soft, Sweet and Flavorful Homemade Breakfast Rolls

breakfast rolls,soft breakfast rolls,how to make breakfast roll,homemade breakfast rolls,petit pains,how to make petit pains,petit pains breakfast rolls,petit pains breakfast rolls homemade,soft breakfast rolls,soft breakfast rolls homemade,soft and sweet breakfast rolls recipe,how to make soft sweet breakfast rolls at home, recette pain, recette petits pain, petit pains recipe, petit pains au lait, dinner rolls


Petit Breakfast Rolls (Petit Pains) - Beautiful Soft, Sweet and Flavorful Homemade Breakfast Rolls
Author: 
Recipe type: Bread rolls / Breakfast rolls
Cuisine: French
Prep time: 
Cook time: 
Total time: 
Serves: 12
 
These amazingly soft and slightly sweet breakfast rolls (Petit Pains) are really easy to make and despite the slightly longer than usual rising times, are well worth the effort.
Ingredients
  • 1 Tsp Dried yeast
  • 280ml Warm milk
  • 450g Strong white flour
  • 10ml Salt
  • 15ml Caster sugar
  • 50g Softened butter
Instructions
  1. Add the yeast to the warm milk and whisk this thoroughly. Put this aside for 10 minutes to mature.
  2. In a large mixing bowl, combine the flour, salt and caster sugar.
  3. Add the softened butter and rub this into the flour mixture until it resembles fine bread crumbs.
  4. Make well in the center of the flour and pour in the milky yeast.
  5. Using a wooden paddle, mix this until a dough comes together, and it comes away from the sides of the bowl.
  6. Turn the dough out onto a lightly floured work surface and knead the dough for 5 minutes until it is smooth and elastic.
  7. Dust the dough with a little flour every time it becomes too sticky.
  8. Place the dough back in the mixing bowl, cover the bowl with cling-wrap and allow the dough to rise for 60 minutes in a warm place.
  9. After 60 minutes, knock the dough back and remove it from the bowl.
  10. Using your scale, divide the dough into 12 equal portions.
  11. Working with a piece at a time, briefly knead the dough. Pull the edges of the dough up to the center of the ball.
  12. Turn the ball over. Cup your hand over the ball and rotate to make the ball perfectly round. Using one hand, roll the ball into an elongated oval shape.
  13. Transfer the roll to a lightly greased baking sheet and continue with the remaining rolls. Leave about an inch or 25mm of space between each roll.
  14. Cover the rolls with an upturned roasting tin and allow this to rise for a further 60 minutes in a warm place.
  15. After 60 minutes, the rolls will be well risen and will just be touching. As they bake they will support one another and rise upwards instead of sideways.
  16. Using a sharp knife, slash 3 cuts into the top of each roll and brush the rolls with milk.
  17. Bake the rolls in a preheated oven at 180c or 350f for 12 to 15 minutes until lightly browned.
  18. Remove the rolls from the oven, separate them and allow them to cool on a wire rack.


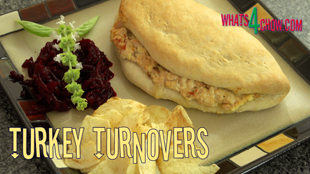
Turkey Fold-Over. How to use Turkey Left-Overs – Delicious Baked Turkey Buns.

how to use turkey left-overs,thanksgiving left-overs,christmas left-overs,turkey fold-overs,turkey turnovers,, Turkey Leftover Ideas, Turkey Leftover Recipe, Leftover Turkey, Leftover Turkey Recipe, leftover roast turkey meat, thanksgiving leftover recipes, turkey leftover recipes, thanksgiving leftovers recipes, what to do with leftovers, turkey club sandwich, thanksgiving turkey leftover idea, turkey sandwich


Turkey Fold-Over. How to use Turkey Left-Overs - Delicious Baked Turkey Buns.
Author: 
Recipe type: Left-Overs Recipe Ideas
Cuisine: American
Prep time: 
Cook time: 
Total time: 
Serves: 4
 
How to use Turkey Left-Overs. Baked turkey turn-overs are agreat way to use any left-over turkey meat. In fact you can even use any of the left-over meat in combinations, or on their own, mixed with the other ingredients.
Ingredients
For the Dough
  • 500g Strong White flour
  • 10g Instant yeast
  • 10g Salt
  • 10g Sugar
  • 300ml Lukewarm water
For the Filling
  • 250g Cooked Turkey or other left-over meat
  • 3 Tbs finely chopped pickled jalapeno
  • 200ml Sour cream
  • 80g Feta cheese
  • 6 Tbs Chopped sun-dried tomato
Instructions
  1. To make the dough, place the flour, yeast, salt and sugar in a large mixing bowl. Stir these together briefly, then pour in the warm water.
  2. Using a wooden paddle, stir this until a dough starts to come together, then using your hands in the bowl, compress the dough together to pick up and loose bits.
  3. Turn the dough out onto a lightly floured work surface and knead it for 5 minutes until it is smooth and elastic.
  4. Place the dough back in the mixing bowl, cover the bowl with cling-wrap and allow the dough to rise for 40 minutes in a warm place.
  5. While the dough rises, finely chop your cooked meat. Place this in a bowl and add the finely chopped pickled jalapeños, sour cream, feta cheese and chopped sun-dried tomato. Mix this until totally combined.
  6. Cover a wire rack with foil and give it a light coating of oil. Turn the dough out and knead it briefly.
  7. Flatten the dough into a large disc and cut it into quarters. Roll each quarter into a ball, flatten the ball, then roll into a circle of 20cm or 8 inches in diameter.
  8. Spoon a quarter of the filling across the center of the dough. Pick up the far side of the dough and pull it of the filling. Use your finger tips to tamp the edges down.
  9. This will not seal the edges, it simply thins them out, and prevents them from flying up while cooking. The edge will open during cooking, but only enough to reveal the filling.
  10. Place the completed crescents on the rack, cover the rack with and upturned roasting pan and allow this to rise for 20 minutes in a warm place.
  11. Bake the fold-overs in a preheated oven or gas barbecue at 180c or 350f for 25 minutes until lightly golden.
  12. Remove from the heat and serve immediately with the accompaniments of your choice.


Gourmet Russian Hotdogs. Footlong Russian Sausage Baked in Soft Flavored Dough.

gourmet hotdogs,gourmet russian hotdogs,hot dog recipe,how to make a russian hotdog, gourmet hot dog, gourmet hot dogs recipe, gourmet hot dogs london, gourmet hot dogs denver, gourmet hot dogs toronto, gourmet hot dogs nyc, gourmet hot dogs manly, gourmet hot dogs perth, gourmet hot dogs chicago,gourmet hotdog buns,gourmet hotdog buns recipe,soft hotdog buns,how to make the best hotdog buns,gourmet hotdog rolls


Gourmet Russian Hotdogs. Footlong Russian Sausage Baked in Soft Flavored Dough.
Author: 
Recipe type: Fast Food
Cuisine: American
Prep time: 
Cook time: 
Total time: 
Serves: 2-4
 
These gourmet hotdogs are huge! A footlong Russian sausage is wrapped in a soft bun dough flavored with sun-dried tomato and parmesan cheese, then baked to golden perfection!
Ingredients
  • 2 Footlong Russian sausages
  • 2 Cups All-purpose flour
  • 10g Instant yeast
  • 7.5ml Salt
  • 15ml Sugar
  • 250ml Warm water
  • 60ml Sun-dried tomato, finely chopped
  • 30g Parmesan cheese, shredded
  • ⅓ Cup All-purpose flour (to work the dough)
Instructions
  1. Place the flour, yeast, salt and sugar in a large mixing bowl. Mix them together briefly, then pour in the water. Mix this to a very soft and sticky dough.
  2. Add the chopped sun-dried tomato, shredded parmesan cheese and the oil.
  3. Mix this until totally combined, cover the bowl with cling-wrap and allow the dough to rise for 40 minutes in a warm place.
  4. After 40 minutes, the dough will be well risen and the gluten clearly visible. From the second batch of flour, lightly flour the work surface and turn the dough out.
  5. Sprinkle the top of the dough with flour and start to work the flour into the dough. Continue sprinkling extra flour until all of the flour has been worked into the dough. The dough will be soft, smooth, and elastic.
  6. Divide the dough in half and roll each half into a sausage of 10 inches long. Flatten the dough out until it is about 3 inches wide by 12 inches long, and oval in shape.
  7. Place a Russian sausage on the dough, lift the far edge of the dough over the sausage and stretch it down the other side.
  8. Lift the near side of the dough up and stretch over to enclose the sausage. The ends of the sausage will still protrude from the dough.
  9. Grease a piece of foil and transfer the dogs to the foil. Place the foil on top of a wire rack and using a sharp knife slash through the tops of the dogs at an angle, making sure to cut the dough and the sausage.
  10. Cover this with an upturned roasting pan and allow the dogs to rise for a further 20 minutes.
  11. Heat you gas barbecue or your oven to 180c / 350f and bake the dogs for 25 minutes and the rolls are lightly golden and sound hollow when tapped on the side.
  12. Remove from the barbecue or oven and serve immediately with the accompaniments of your choice.


Perfect Hotdog Rolls. Soft and Flavorful Hotdog Buns – Easy Recipe by Whats4Chow.com

hotdog rolls,hotdog buns,perfect hotdog rolls,how to make perfect hotdog rolls,how to make perfect hotdog buns,hotdog rolls recipe,hotdog buns recipe,soft hotdog rolls recipe,soft hotdog buns recipe,how to make soft hotdog rolls,how to make soft hotdog buns, hot dog buns, hot dog roll, Hot Dog (Dish), hot dog rolls ingredients, hot dog rolls recipe uk,hotdog rolls at home,homemade hotdog rolls,homemade hotdog buns


Perfect Hotdog Rolls. Soft and Flavorful Hotdog Buns - Easy Recipe by Whats4Chow.com
Author: 
Recipe type: Fast Food / Bread
Cuisine: American
Prep time: 
Cook time: 
Total time: 
Serves: 8
 
Perfect Hotdog rolls / buns are really easy to make, and despite the long rising times are well worth the effort.
Ingredients
  • 450g Strong white flour
  • 200ml Warm water
  • 25g Melted butter
  • 50g Sugar
  • 2 Eggs
  • 1 Tsp Salt
  • 2 Tsp Yeast
Instructions
  1. Add the sugar and yeast to the warm water and stir until the sugar has dissolved. Allow this to rest for 10 minutes.
  2. In a separate bowl, beat 1 egg and 1 additional egg yolk. Place the white of the second egg in a tumbler, add 4 tablespoons of water and whisk this together. Put this aside until later.
  3. In another bowl, melt the butter in your microwave.
  4. Place the flour in a large mixing bowl, add the egg and egg yolk, salt, melted butter and the yeast mixture.
  5. Using a wooden paddle, mix this until a dough comes together and it all comes away from the side of the bowl.
  6. Turn the dough out onto a lightly floured work surface and knead it well for 10 minutes until it is very smooth and elastic. Sprinkle lightly with a little extra flour every time the dough becomes too sticky to handle.
  7. Return the dough to the mixing bowl, cover the bowl with clingwrap and allow the dough to rise for 60 minutes in a warm place.
  8. Once risen, turn the dough out and using your scale divide the dough into 8 equal pieces.
  9. Lightly flour your work surface and press each piece out 3 inch by 5 inch rectangles.
  10. Fold the long side of the rectangle over the centerline, then the other log side over this. Turn the roll over and transfer it to a greased baking sheet. Repeat this until all of the rolls are formed.
  11. Place the rolls on the sheet with about half an inch or 12mm between them. Like this, as they rise they will support one another and rise upwards instead of sideways.
  12. Dust the tops of the rolls with flour, cover loosely with a damp tea towel and allow the rolls to rise again for 60 minutes.
  13. Heat your oven to 190c or 375f. Brush the rolls with the egg white mixture, then bake the rolls for 15 minutes until golden brown.
  14. Remove the rolls from the oven and transfer them to a wire rack to cool.


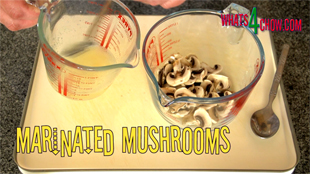
Marinated Mushrooms. The Magic Ingredient for Toasted Sandwiches, Pizzas and Salads!!!!

marinated mushrooms,how to marinate mushrooms,marinated mushrooms recipe,marinated mushrooms for toasted sandwiches,marinated mushrooms for pizzas,marintaed mushrooms for pizzas, italian marinated mushrooms, marinated mushrooms recipe, marinated mushrooms gordon ramsay, marinated mushrooms for steak, marinated mushrooms calories, marinated mushrooms grilled, marinated mushrooms raw, how to make marinated mushrooms


Marinated Mushrooms. The Magic Ingredient for Toasted Sandwiches, Pizzas and Salads!!!!
Author: 
Recipe type: Accompaniment / Vegetable
Prep time: 
Total time: 
 
How to make quick marinated mushrooms. This ingredient is absolutely magic - it makes pizzas, toasted sandwiches and salads come to life.
Ingredients
  • 6 Mushrooms, sliced
  • 1 Tbs Caster sugar
  • ¼ Tsp Salt
  • ½ Tsp Garlic powder
  • 100ml White wine vinegar
Instructions
  1. Slice the mushrooms and place them in a jug or bowl.
  2. In a separate jug, combine all of the other ingredients and stir until totally combined.
  3. Pour this over the mushrooms, stir together, and allow to marinate for at least 60 minutes before using.


The Most Awesome Toasted Sandwich. A Gourmet Toasted Sandwich Inspired by the East.

A Gourmet Toasted Sandwich Inspired by the East,gourmet toasted sandwich,gourmet grilled sandwich,the best toasted sandwich,how to make a gourmet toasted sandwich, gourmet toasted sandwiches, gourmet toasted sandwich ideas, gourmet toasted sandwiches recipes, gourmet toasted cheese sandwiches, gourmet toasted sandwiches wellington, gourmet chicken toasted sandwich,fancy toasted sandwich recipe,fancy toasted sandwich ideas


The Most Awesome Toasted Sandwich. A Gourmet Toasted Sandwich Inspired by the East.
Author: 
Recipe type: Toasted Sandwiches Recipes
Prep time: 
Cook time: 
Total time: 
Serves: 2
 
A Gourmet Toasted Sandwich Inspired by the East. Across China, Thailand and Vietnam it is quite normal to combine seafood, smoked pork and peanuts or roasted sesame oil in a meal - with remarkable results. This toasted sandwich is inspired by this amazing combination!
Ingredients
For 2 Gourmet Sandwiches
  • 6 Slices white farmhouse bread, 4 of them buttered on 1 side
  • 100g Mashed sardines
  • 100g Fried streaky bacon, chopped
  • 2 Heaped tablespoons of crunchy peanut butter
  • 2 Eggs, scrambled
Instructions
  1. Turn the buttered slices upside down. Spread a generous layer of the peanut butter onto 2 of the slices.
  2. Top each of these with the chopped bacon, and press This into the peanut butter.
  3. Top this with the 2 un-buttered slices of bread and press it down to make sure it is well bonded.
  4. Top the un-buttered slices with the mashed sardine, followed by the sloppy scrambled egg.
  5. Close the sandwiches with the 2 remaining buttered slices, with butter facing outward.
  6. Heat your pan or sandwich grill and fry the sandwiches until crispy and golden.
  7. Quarter the sandwiches and transfer them to platters to serve.


The King’s Chicken Burger

The King's Chicken Burger. Crispy deep-fried deboned chicken thigh burger recipe by Whats4Chow.com


The King's Chicken Burger
Author: 
Recipe type: Burgers / Fast Foods
Cuisine: American
Prep time: 
Cook time: 
Total time: 
Serves: 2
 
The King's Chicken Burger is a succulent feast of deep-fried deboned chicken thigh, with cheese spread, crispy lettuce, tomato and pickled gherkin. This burger is truly fit for kings.
Ingredients
  • 2 Sesame seed burger buns
  • 2 Medium size chicken thighs
  • Lettuce, cherry tomatoes, gherkins, cheese whiz / cheese spread, mayonnaise
  • ½ Cup Tapioca flour
  • 2 Eggs, lightly beaten
  • ½ Cup finely crushed corn flakes mixed with ½ cup all purpose flour
  • Oil for frying
Instructions
  1. Debone the chicken thighs (please view the video)
  2. Drench the thighs in the tapioca flour, then the egg, followed by the corn flake mixture.
  3. Transfer these to a plate and allow the coating to set for 20 minutes.
  4. While the coating sets, toast the buns. Give the bottom half of the buns a good spread of cheese whiz, then top with lettuce and tomato slices.
  5. Season to taste.
  6. Half-fill your pan with oil and heat to 180c or 350f. Carefully slide the breasts into the oil and fry for 4 minutes per side.
  7. Transfer the breasts to the buns, top with a scoop of your favorite mayonnaise and slices of pickled gherkin.
  8. Serve with accompaniments of your choice.


Philly Cheese Steak

Learn how to cook the perfect Philly Cheese Steak


Philly Cheese Steak
Author: 
Recipe type: Sandwich
Cuisine: American
Prep time: 
Cook time: 
Total time: 
Serves: 2
 
Step-by-step how to make a Philly Cheese Steak sandwich.
Ingredients
  • ¼ Green Pepper diced
  • ¼ Red Pepper diced
  • 4 White mushrooms, thinly sliced
  • 2 medium onions cut into half rounds
  • 2 Gherkins cut into spears
  • 200g Cheese Whiz or Provolone cheese, melted in your double boiler or microwave
  • 300g Rib-eye steak, slice thinly across the grain
  • 1 x 8 inch (20cm) Hoagie roll (a French roll is a suitable substitute)
Instructions
  1. Over high heat, fry the onions, green peppers and mushrooms until golden brown and caramelized (8-10 min)
  2. Remove the vegetables from the pan
  3. Add a little more oil to the pan and fry the steak until well-browned
  4. Arrange the steak in the center of the pan (roughly in the shape of the roll)
  5. Return the vegetables to the pan on top of the steak
  6. Spoon the cheese over the steak and onions and allow to settle
  7. Remove the pan from the heat and transfer the filling to the roll
  8. Slice the roll into 2 and transfer to 2 platters, garnish with the gherkin spears


Scroll to top

Kitchen Conversions

Convert:
Masses
to:
Volumes
to:
Temperatures
to:
Lengths
to: