Recipes & Videos

How to Pickle Onions – Homemade Pickled Onions Recipe – Make Pickled Onions at Home!!!

how to pickle onions,homemade pickled onions,how to make pickled onions,making pickled onions at home,pickled onions recipe,homemade pickled onions recipe,making pickled onions in spicy vinegar,best pickled onions recipe,pickled onions recipe video,how to make pickled onions video,making crispy pickled onions at home recipe, easy pickled onions, how to pickle onions and cucumbers, how to pickle onions youtube


How to Pickle Onions - Homemade Pickled Onions Recipe - Make Pickled Onions at Home!!!
Author: 
Recipe type: Pickles and Preserves
 
With the festive season just over 2 months away now is the perfect time to start making pickled onions. These make a simple and tasty accompaniment to any meal and are the perfect ingredient to liven up salads.
Ingredients
  • 750g Pickling onions
  • 3 Tbs Salt
For the Spiced Vinegar
  • 750ml White wine vinegar
  • 110g Sugar
  • ½ Tsp Coriander seeds
  • ½ Tsp Mustard seeds
  • ½ Tsp Black peppercorns
Instructions
  1. To start, top and tails the onions. Place the onions in a large heat-proof bowl and pour boiling water over them until covered. Allow these to stand for 15 to 20 minutes.
  2. After this time the skins will slip from the onions with ease.
  3. Transfer the skinned onions to a dish cloth and pat them dry.
  4. Place the onions in a clean, dry bowl and sprinkle the salt over them. Cover the bowl with cling-wrap and allow these to stand for at least 8 hours, preferably overnight.
  5. The following day, combine the sugar, coriander seed, mustard seed and black peppercorns. Place these in a pot along with the white wine vinegar. Bring this to a boil, lower the heat and allow it to simmer for 30 minutes.
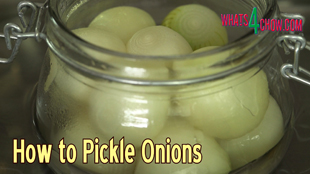
  6. In the meantime, unwrap the onions and rinse the salt off with cold water. Transfer the onions to sterilized jars.
  7. Strain the vinegar mixture through a sieve. Place the jars of onions in a pan of hot water and pour the vinegar solution into the jars until the onions are covered.
  8. Close the jars and allow them to cool in the pan. Once cooled, place the jars in a cool, dry place to age for at least 2 months before opening. After opening the jars, they should be stored in the refrigerator.


Thanksgiving Smoked Turkey – Part 6 of Smoking & Curing Foods with Smoke Daddy – How to Smoke a Turkey.

smoked thanksgiving turkey,thanksgiving turkey recipe,smoke thanksgiving turkey,how to smoke a turkey,how to smoke a whole turkey,how to cure a turkey,how to cure and smoke a turkey,smoke daddy cold smoke generator,how to smoke a turkey with the smoke daddy cold smoke generator,smoking a whole turkey for thanksgiving, ultimate smoked turkey, brine recipe, barbecue turkey recipe,whole smoked turkey


Thanksgiving Smoked Turkey - Part 6 of Smoking & Curing Foods with Smoke Daddy - How to Smoke a Turkey.
Author: 
Recipe type: Smoking / Turkey / Poultry
Cuisine: American
Prep time: 
Cook time: 
Total time: 
Serves: 6-8
 
Hi and welcome to part 6 of our series on smoking and curing foods. With Canadian Thanksgiving on Monday and in just over a month in the US, today's episode covers curing a smoking a delicious Thanksgiving turkey.
Ingredients
  • 1 x 5-6lb Turkey (2.5kg - 2.8kg)
For the Curing Brine
  • 5lt Water
  • 15g Saltpetre
  • 100g Sugar
  • 200g Salt
  • 30ml Black peppercorns
  • 30ml Whole allspice
  • 10ml Ground ginger
  • 25ml Bicarbonate of soda
For the Basting / Mop
  • 100ml Honey
  • 40ml Lemon Juice
  • Zest of 1 lemon
  • 10ml Lemon pepper
  • 15ml Garlic powder
  • 5ml Cayenne pepper
  • Smoked salt
Instructions
  1. For the curing brine combine the saltpetre, sugar, salt, black peppercorns, whole allspice, ginger and bicarbonate of soda and pour these into a pot along with 5 liters of water.
  2. Bring the pot to a boil, reduce the heat and allow this to simmer for 30 minutes. Quick chill the pot by floating it in cold water in your sink.
  3. To prepare the turkey, trim away any excess skin and fat from the neck and butt. Removing the tail is a matter of personal preference.
  4. Use a sharp knife to cut through the skin and flesh along the breast bone. Cut through the breast bone with your kitchen shears.
  5. Open up the bird, flip it over and dislocate the pelvis with a sharp downward thrust. This allows the bird to lie flat. Removing the wing tips is also a matter of personal preference, however I do recommend this.
  6. Transfer the turkey skin side up to a large food-safe non-reactive container. Pour the cooled brine into the container.
  7. Place a weight on top of the turkey to keep it fully submerged in the solution.
  8. Place the container in your refrigerator and allow it to cure for 48 hours.
  9. After curing, you will need to make the basting. Combine the lemon juice and honey. Take the lemon pepper, garlic powder, cayenne pepper and lemon zest and add these to the honey and lemon juice. Mix these until totally combined.
  10. You will also need smoked salt to grind over the turkey once it has been basted.
  11. Remove the turkey from the curing brine and pat both sides dry using kitchen paper.
  12. Brush the underside liberally with the basting, flip the bird over and repeat this with skin side, before giving the skin a generous grind of smoked salt.
  13. Place a rack at an angle across a pan and transfer the turkey to the rack.
  14. Get your smoker running and heat the barbecue to 250f or 135c. I am using the Smoke Daddy cold smoke generator which allows for perfect cold or hot smoking in any closed barbecue. If you are using another brand of smoker, follow the manufacturer's instructions.
  15. Place the turkey in the barbecue and allow this to smoke for 40 minutes per pound. For my turkey weighing in at about 5 pounds this will take 3 hours 20 minutes. Baste the bird every half hour with melted butter to prevent the skin from drying out.
  16. Towards the end point, check the internal temperature with a probe thermometer. When the internal temperature reaches 170f or 77c in the thichest part of the meat, the turkey is ready to serve.
  17. And there you have it, a beautifully fragrant, tasty and succulently tender smoked turkey flavored with garlic, lemon and a hint of chilli.


Cape Malay Lamb Curry – Spicy, Fruity Lamb Curry – How to Make Lamb Curry!!!

lamb curry,lamb curry recipe,how to make lamb curry,cape malay lamb curry,how to make cape malay lamb curry,tender lamb curry cape malay style, south, cape malay, lamb, south africa, cape malay cooking, cape malay lamb curry recipe, cape malay lamb curry potjie, cape malay lamb curry ingredients, best cape malay lamb curry, how to make cape malay lamb curry, cape malay lamb knuckle curry, cape malay lamb chop curry


Cape Malay Lamb Curry - Spicy, Fruity Lamb Curry - How to Make Lamb Curry!!!
Author: 
Recipe type: Curry / Lamb
Cuisine: South African
Prep time: 
Cook time: 
Total time: 
Serves: 4-6
 
With winter just round the corner, here is the perfect solution to fight off the chills. This Cape Malay lamb curry is spicy and fragrant with massive fruity overtones. Despite the slightly longer than usual preparation, it is really easy to make and will have your guests raving for more.
Ingredients
  • 750g Boneless lamb shoulder
  • 45ml Oil
  • 2 Onions
  • 2 Cloves garlic
  • 15ml Grated ginger
  • 15ml Curry powder
  • 2.5ml Ground coriander
  • 2.5ml Cumin seeds
  • 1.25ml Turmeric
  • Pinch of salt
  • Generous grind of black pepper
  • 1.25ml Ground cinnamon
  • 2 Whole cloves
  • 1 Bay leaf, torn into bits
  • 1 Large carrot
  • 125g Dried apricots
  • 1 Banana
  • 15ml Tomato paste
  • 25ml White wine vinegar
  • 125ml Chicken stock
  • 22.5ml Apricot jam
  • 22.5ml Plain yogurt
Instructions
  1. The ingredients are split into 3 groups. For group 1, cut the lamb into bite-sized cubes. Chop the onion and garlic and grate the ginger.
  2. In another bowl, combine the ground coriander, cumin seeds, turmeric, salt, black pepper, ground cinnamon, whole cloves, and bay leaf. In another bowl, measure out the curry spice.
  3. For group 2, peel and chop the carrots and slice the bananas. Reconstitute the dried apricots by soaking them in hot water for 30 minutes, then draining. Measure out the tomato paste, white wine vinegar and chicken stock.
  4. Group 3 is quicker.... measure out the apricot jam and plain yogurt.
  5. Heat your wok or a large pan over high heat and add 45ml of oil. Add the onion, garlic and ginger and stir-fry these for 2 minutes. Add all of the spices to the pan and fry for a further 3 minutes until everything is fragrant.
  6. Move the onion mixture to the side of the pan and add the lamb. Scoop the onion over the top of the lamb and allow this to fry for a minute undisturbed.
  7. Stir the lamb and onion mixture together and continue to stir-fry for 3 to 5 minutes until the meat is browned.
  8. Add the tomato paste, apricots, vinegar, chicken stock, carrots and bananas.
  9. Stir this all together, bring it to a boil, reduce the heat and allow this to simmer gently for 90 minutes, stirring every 15 minutes.
  10. Add a little extra chicken stock to the pan if it starts getting too dry.
  11. minutes before the end, add the apricot jam and yogurt and stir these in.
  12. Portion the curry to bowls, top with a little extra yogurt, fruit chutney and fresh coriander and serve with the accompaniments of your choice.


Home Made All Natural Cough Drops – Home Made Cold & Flu Remedy – Throat Lozenges

lemon ginger cough drops recipe,lemon ginger throat lozenges,how to make homemade cough drops,all natural cough drops,pregnancy friendly cough drops recipe,best lemon and ginger cough drops,easy cold and flu remedy, natural, remedy, how to make cough drops, sore throat (symptom), cough drops homemade, cough drops during pregnancy, cough drops while breastfeeding, cough drops sore throat, diy cold remedies


Home Made All Natural Cough Drops - Home Made Cold & Flu Remedy - Throat Lozenges
Author: 
Recipe type: Cold and Flu Remedy / Sweets
Prep time: 
Cook time: 
Total time: 
Serves: 40
 
With winter just around the corner everyone is getting the coughs and sniffles. For the first time in the history of our channel, we have guest chef, my sister-in-law, Eileen here to show us how to make the most amazing all-natural cough drops to combat these winter ailments.
Ingredients
  • 100ml Water
  • 30ml Honey
  • 1 Cup sugar (brown granulated)
  • 5ml Ground cinnamon
  • 10ml Ground ginger
  • 30ml Fresh lemon juice
  • 1.25ml Roughly crushed cloves
Instructions
  1. Measure out the water, brown sugar, ground cinnamon, ground ginger, roughly crushed cloves, honey and lemon juice.
  2. Place all of the ingredients in a medium sized pot. A small pot will not do, as the mixture bubbles up during cooking and may overflow. Not only could this be dangerous, but it definitely would be very messy.
  3. You will also need 2 x 20 hole chocolate molds. Rub these with a light coating of cooking oil.
  4. Place the pot over high heat and stir initially until everything is combined.
  5. Bring this to a rapid boil, stirring every 60 seconds, making sure to scrape down the sides of the pot. Continue to boil for 5 minutes. The mixture will darken significantly during this time.
  6. After 5 minutes, stir briefly and drop a little of the mixture into cold water. Give it 5 seconds to cool and pick it up with your fingers. If it is still gooey, then it's not ready. Give it another 30 seconds and test again. This time you will see that it sets hard as soon as I pick it up.
  7. Remove the pot from the heat and stir the mixture until the bubbling subsides.
  8. Using a pointed spoon, start filling the molds. Once all the recesses are filled, put these aside to set at room temperature. Don't be tempted to set the in your refrigerator as the drops will turn to toffee. Depending on the weather, it can take from 30 minutes to a few hours to set.
  9. Once set, sprinkle a sheet with icing sugar and pop the drops out of the mold onto the sheet. Sprinkle more icing sugar on top of this. Transfer the drops to a container and shake them up to get an even coating of sugar. The sugar prevents the drops from sticking together.
  10. These drops can be stored indefinitely until required.


The Amazing Vacuum Packer Hack – How to Use Plain Untextured Bags in Your Front-Loading Vacuum Packer!!!

use untextured bags in your vacuum packer,use smooth bags in your vacuum packer,how to use normal bags in your vacuum packer,vacuum packer hack,how to use untextured bags in your vacuum packer,saving money using vacuum packer,normal vacuum bags in front loading vacuum packer,save money using normal bags in your vacuum packer,how to use plain bags in your vacuum packer,make your vacuum packer work with regular bags


The Amazing Vacuum Packer Hack - How to Use Plain Untextured Bags in Your Front-Loading Vacuum Packer!!!
Author: 
Recipe type: Cooking Tips & Tricks
 
Almost every second household has one of these front-loading vacuum packers. These things are great, but they all have the same weak link.... the insanely expensive textured plastic bags. This hack will show you how use regular cheap vacuum packing bags, and save at least 80 percent of the costs involved.
Instructions
  1. To start cut a strip of the textured plastic from the roll. Cut the textured bits from the strip, leaving the edge intact.
  2. Fill your plain vacuum packing bag with whatever you are packing and slide the strip into the bag, sealed edge first, down the side of the contents.
  3. As long as the strip reaches the contents, this trick will work perfectly. If you are using a deep bag, cut it down to the point where the strip does reach the contents. Make sure a little of the strip protrudes from the bag.
  4. Place the bag into the vacuum packer and hit the vacuum button. Bare in mind that when it seals now, it will be trying to melt 4 layers of thick plastic.
  5. As a result, you need to follow the vacuum cycle with another sealing cycle to ensure a good seal. Some machines have an overheating protection, and you may have to wait a few seconds before it will allow the second seal to activate.
  6. Using this process you will save 80 to 90 percent in costs, and although it does not totally negate the textured bags, it will certainly save money.


Whats4Chow Launches its 4th Structured Cooking Course on Curious.com


Whats4Chow Launches its 4th Structured Cooking Course on Curious.com
Author: 
Recipe type: News Update
 
Hi and welcome again to Whats4Chow.com. Today's episode brings exciting news -- our 4th structured cooking course has just been launched on Curious.com. The course covers everything you need to know to make the most amazing pies and pastry.


Home Made Romany Creams – How to Make Romany Creams – Chocolate Cookies

homemade romany creams,how to make romany creams at home,homemade chocolate cookies,how to make romany creams,easy romany creams recipe,best chocolate cookies recipe,romany creams chocolate cookie recipe,easy romany creams recipe,milk chocolate cookies,creamy milk chocolate cookies,making romany creams,making chocolate cookies at home


Home Made Romany Creams - How to Make Romany Creams - Chocolate Cookies
Author: 
Recipe type: Cookies / Baking
Cuisine: South African
Prep time: 
Cook time: 
Total time: 
Serves: 40
 
Romany Creams are legendary cookies with creamy milk chocolate, coconut and a crisp crunchiness that cannot be described.
Ingredients
  • 375g Butter, softened
  • 325g Sugar
  • 125ml Boiling water
  • 40g Cocoa powder
  • 425g Self-raising flour
  • 160g Desecated coconut
  • 250g Cornflakes, crushed
  • 300g Milk chocolate
Instructions
  1. Place the sugar and butter in your mixer bowl. Run the mixer on medium high for about 2 minutes until these are well creamed, scraping down the side of the bowl halfway through.
  2. Dissolve the cocoa powder in the hot water and add this to the bowl and continue to mix this for a further minute until totally combined.
  3. Place the flour, crushed cornflakes and coconut in a large mixing bowl and pour in the chocolate butter mixture. Mix this by hand or machine until you have a thick chocolate batter.
  4. Line 3 to 4 baking sheets with baking parchment. Scoop heaped teaspoons of the batter up, roll them into balls, place them on the sheets and flatten them into rounds using the back of a fork. Leave a half inch of space between each cookie to allow for rising and spreading. Bake the cookies in a preheated oven at 180c for 12 minutes.
  5. Remove the cookies from the oven and allow them to cool on the baking sheets for 5 minutes before transferring to racks.
  6. While the cookies cool, melt the chocolate in your double boiler, or gently in your microwave oven.
  7. Working with one cookie at a time, spread a generous amount of the chocolate onto the smooth side of the cookie. Place another on top of this and put the completed Romany Cream aside to set. Continue until all of the cookies are complete.
  8. Once the chocolate has set, you can store these priceless items in an air-tight container indefinitely until required. This recipe will yield about 40 of these amazing treats.


How to Smoke Salt – Part 5 of Smoking and Curing Foods – Smoke Daddy Cold Smoke Generator

how to smoke salt,how to smoke your own salt,smoked salt,how to make smoked salt on the grill,cold smoked salt,hot smoked salt,smoked himalayan salt,smoking salt at home,home made smoked salt,smoking salt, smoking (cooking), how to, smoked salt, how to smoke salt in an electric smoker, how to smoke salt hickory, how to smoke salt on a traeger, how to smoke sea salt, how to recipes smoked salt


How to Smoke Salt - Part 5 of Smoking and Curing Foods - Smoke Daddy Cold Smoke Generator
Author: 
Recipe type: Smoking & Curing
Prep time: 
Cook time: 
Total time: 
 
Smoked salt is really easy to make in a hot or cold smoker. Smoked salt adds a whole new dimension to grilled foods, fried foods and even salads.
Ingredients
  • Coarse salt - either Himalayan rock salt or sea salt
  • Smoking wood chips of your choice
Instructions
  1. The important thing to remember is the differences between sea salts and rock salts. Himalayan rock salt is a compressed, dense salt, and as a result will take on the flavor the smoke, but very little of the color. Sea salt is far more porous and will take on the flavor and color of smoking.
  2. With the color not being of much importance, I still prefer using Himalayan rock salt for its amazing taste and slight acidity.
  3. To start, spread the coarse salt evenly across a baking pan.
  4. Load up your smoker with your favorite wood chips and set these smoking. I am using the Smoke Daddy Cold Smoke Generator for this demonstration and this unit together with any lidded barbecue is the perfect solution for cold and hot smoking.
  5. Place the pan of salt in the barbecue, close the lid and allow this to smoke for 90 minutes to 180 minutes, depending on your personal preference.
  6. Remove the salt from the smoker. With Himalayan rock salt you will notice only a slight darkening in color, but the smokey aroma will clearly tell you that your job is done.
  7. Transfer the salt to grinders and store these in a cool dry place.


How to Cold Smoke Cheese – Cold Smoking Cheese Using Smoke Daddy Cold Smoke Generator!!!

cheese, smoked, smoked cheese, cold smoking, how to cold smoke cheese, cold smoking cheese, cold smoker, how to cold smoke, how long to cold smoke cheese, how do you cold smoke cheese, how do i cold smoke cheese, how to smoke cheese in a smoker, smoked cheeses, how to make smoked cheese, know how on smoking cheese, smoked cheddar, smoked gouda,smoked mozzarella,smoke daddy cold smoke generator


How to Cold Smoke Cheese - Cold Smoking Cheese Using Smoke Daddy Cold Smoke Generator!!!
Author: 
Recipe type: Cold Smoking
Prep time: 
Cook time: 
Total time: 
 
How to Cold Smoke Cheese. Cold Smoked Cheese is outstanding, and adds a whole new dimension to anything it is added to, and even better just on its own.
Ingredients
  • 500g Mozzarella cheese
  • 500g Gouda cheese
  • Approx. 3 cups mild smoking wood chips - Apple, Alder, Cherry
Instructions
  1. The key to cold smoking is keeping the temperature below 100f or 37c, but preferably below 86f or 30c.
  2. I am going to smoke a block of commercial mozzarella and a block of gouda. Cut the cheese into 1 inch square lengths.
  3. Place the cheese on a rack in a roasting tin. Load your smoker up with wood chips. Any of the milder chips like apple, cherry or alder will give a very pleasing result.
  4. Set the chips alight and place the cheese in the smoker. For a mild result, smoke the cheese for 90 minutes to 2 hours. There is no rule regarding timing. Skamorze, or European smoked mozzarella is smoked for 5 to 7 hours until golden brown, however this heavily smoked cheese is an aquired taste.
  5. Once you're happy with the color, remove the cheese from the smoker and vacuum pack it or wrap tightly in cling-wrap for at least 24 hours. This gives the aromatic smokey coating time to penetrate the cheese.


Lemon Cream Crepes – Crepes Filled with Creamy Lemon Custard – Quick & Easy!!!

crepes, crêpe (dish), recipe, how to make crepes, pancake, crepe recipe, dessert crepes, breakfast crepes, crepe filling, crepes suzette recipe, crepes recette, crepes suzette, receta de los crepes, how to make a professional french crepe, crepe recipe sweet, dessert crepe, pancake crepe recipe, sweet crepes,lemon cream crepes,crepes with lemon cream custard,crepes with creamy lemon filling


Lemon Cream Crepes - Crepes Filled with Creamy Lemon Custard - Quick & Easy!!!
Author: 
Recipe type: Dessert
Cuisine: French
Prep time: 
Total time: 
Serves: 4
 
Crepes filled with the most amazing lemon cream custard are a real treat - top this off with whipped cream and you have heaven!!!
Ingredients
For the Lemon Cream Custard Filling
  • 1 Can (385ml) sweetened condensed milk
  • 125ml Lemon juice (fresh is best)
  • Zest of 1 lemon
  • 2 Egg yolks
Instructions
  1. Lemon cream crepes are insanely good, and really easy to make. You will need a batch of crepes to make the masterpieces and you can get the crepe recipe by clicking HERE.
  2. To start, pour the sweetened condensed milk into your mixer bowl, along with the lemon zest and lemon juice.
  3. Start your mixer and add the egg yolks. Allow this mix for about a minute until creamy and thoroughly combined.
  4. Transfer the mixture to your double boiler and start heating this over medium heat. If you don't have a double boiler, place a smaller pot into a larger pot. Pour enough water into the large pot to cover the base of the pot without touching the smaller pot.
  5. Stir the mixture continuously as it heats up over about 10 minutes. The creamy mixture will gradually thicken to a smooth custard. Remove this from the heat and put it aside.
  6. Using your mixer or food processor, whip the cream until it is stiff and leaves trails, or holds peaks.
  7. To assemble the crepes, place a crepe on a serving platter and spoon some of the filling onto half of the crepe. Place another crepe on top of this with a slight offset.
  8. Spoon filling over half of this crepe then fold it over.
  9. Load the whipped cream into your piping bag and pipe the crepes with a decorative swirl. Dust with icing sugar and serve immediately.


Apple Wood Smoked Chicken Thighs – Part 4 of Curing & Smoking Meats – Smoke Daddy Smoke Generator!!!

how to smoke chicken thighs,how to smoke chicken thighs in your smoker,making smoked chicken thighs,best smoked chicken thighs,making smoked chicken thighs using the smoke daddy smoke generator,recipe for smoked chicken thighs,best hot smoked chicken thighs recipe,hot smoking chicken, smoked chicken leg quarters, smoking leg quarters, competition-style barbecue chicken thighs, smoked chicken rub


Apple Wood Smoked Chicken Thighs - Part 4 of Curing & Smoking Meats - Smoke Daddy Smoke Generator!!!
Author: 
Recipe type: Chicken / Poultry / Barbecue / Smoked Meats
Prep time: 
Cook time: 
Total time: 
Serves: 6-12
 
These apple-wood smoked chicken thighs are absolutely amazing and will certainly have your guests talking for ages.
Ingredients
  • 8-12 Chicken thighs
  • 60ml Syrup (corn syrup, cane syrup or honey)
  • 30ml White wine vinegar
  • Peppadew Piquant Pepper & Cilantro Seasoning (if you can't find this look below for the homemade version which will closely approximate the taste)
For the Homemade Rub
  • 15ml Fine Himalayan Salt - or any non-iodated salt
  • 30ml Red Bell Pepper Falkes
  • 10ml Onion Powder
  • 10ml Garlic Powder
  • 30ml Powdered Dried Cilantro Leaves
  • 10ml Chilli Flakes
  • 5ml Ground Black Pepper
  • 10ml Lemon Pepper
  • 10ml Powdered Sugar
Instructions
  1. For the coating, pour the syrup and white wine vinegar into a jug and mix until totally combined. You can use cane syrup, corn syrup or even honey.
  2. Place the chicken thighs in a large mixing bowl and pour the syrup mixture over the chicken. Mix the chicken around in the bowl until everything is well coated.
  3. Cover the bowl and allow this to stand for 30 minutes.
  4. Transfer the chicken to a rack in a pan and sprinkle both sides of the thighs liberally with the seasoning. I am using my favorite Peppadew Cilantro seasoning. Peppedew products are sold in USA, UK and Australia, but if you can't find it, I have included a home made version in the printable recipe above.
  5. Lift the rack up and balance it diagonally across the corners of the pan. This will allow the smoke to reach the underside of the chicken effectively, while the pan becomes a drip-tray.
  6. Load up your smoker with apple wood chunks and bring it up to a temperature of 135c or 275f. Place the chicken in the smoker and allow this to smoke for 2 to 2.5hrs until the internal temperature reaches 76c or 170f. Use a reliable probe thermometer to measure the internal temperature, and measure from the thickest part of the largest thigh.
  7. Remove the amazingly aromatic and tasty thighs from the smoker and serve immediately with the accompaniments of your choice.


American Crispy, Light & Airy Donuts!

crispy donuts,quick donuts recipe,crispy doughnuts,quick doughnuts recipe,how to make crispy donuts,no-yeast donuts recipe,yeast free donuts recipe,american donuts recipe,how to mae american donuts, krispy kreme doughnuts, how to make a krispy kreme donut, krispy kreme donut recipe, how to make a donut, krispy kreme doughnuts recipe, creamy donuts recipe, homemade donuts, hot and fluffy


American Crispy, Light & Airy Donuts!
Author: 
Recipe type: Dessert / Cake
Cuisine: American
Prep time: 
Cook time: 
Total time: 
Serves: 20
 
These donuts are light and crispy, made from a super-quick dough using baking powder and egg as the raising agent.
Ingredients
  • 1 Cup sugar
  • 2 Eggs
  • 30g Butter, melted
  • 1 Cup milk
  • 15ml Vanilla extract
  • 600g All-purpose flour
  • 45ml Baking powder
  • 1 Tbs ground nutmeg
  • 7.5ml Salt
Instructions
  1. The ingredients are divided into 3 sets and should be measured and ready before you start. The first set is the sugar and eggs. The second set, the melted butter, vanilla extract and milk. The third set, the all-purpose flour, baking powder, nutmeg and salt.
  2. Place the eggs and sugar in the bowl of your mixer and beat them together for 2 to 3 minutes until light and creamy.
  3. Pour in the melted butter, milk and vanilla. Allow this to mix until totally combined.
  4. Replace the beaters with dough hooks and pour the flour mixture into the bowl. Mix the dough until everything is well combined. The dough will be soft and sticky.
  5. Turn the dough out onto a well floured work surface and sprinkle more flour over the top of the dough as well.
  6. Start compressing and folding the dough over and over, sprinkling with extra flour every time it becomes too sticky.
  7. Continue to knead the dough lightly for about 3 minutes until it is smooth and elastic.
  8. Roll the dough out to a thickness of 10mm or just less than a half inch. If you don't have a donut cutter use a tumbler or a food mold to cut out circles. Pull away the off-cuts, re-roll them and cut out more circles.
  9. To make the holes, poke skewer or chopstick into the center of the circle. Start swivelling the chopstick around until the hole has stretched to the desired size.
  10. Heat a half-filled pan of oil to 180c or 350f and carefully drop the donuts into the oil. Fry the donuts for 4 minutes, turning every minute to ensure even coloring.
  11. Remove the donuts from the oil, drain on kitchen paper and proceed with your preferred decorations, whether icing sugar, caster sugar or glaze.


Scroll to top

Kitchen Conversions

Convert:
Masses
to:
Volumes
to:
Temperatures
to:
Lengths
to: