Moist Chocolate Cake Recipe – How to Make the Best Chocolate Cake!

moist chocolate cake,moist chocolate cake recipe,chocolate cake,best chocolate cake,how to make chocolate cake,homemade,easy chocolate cake recipe,quick chocolate cake recipe,foolproof chocolate cake recipe,no flop chocolate cake,flop proof chocolate cake,beginners chocolate cake recipe,how to make moist chocolate cake,award winning chocolate cake recipe,how to make the best chocolate cake at home,chocolate,cake,recipe,dessert,chocolate frosting recipe


Moist Chocolate Cake Recipe - How to Make the Best Chocolate Cake!
Author: 
Recipe type: Baking, Cake
Cuisine: British
Serves: 8
 
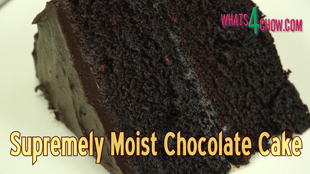
Moist Chocolate Cake! Today we're going to look at a very special chocolate cake recipe. This chocolate cake is supremely moist and full of chocolaty flavor. It is quick and easy to make, and has a shelf life of 5 to 7 days.
Ingredients
  • 225g Cake / all-purpose flour
  • 350g Caster sugar
  • 85g Cocoa powder
  • 7.5ml Baking powder
  • 7.5ml Bicarbonate of soda (baking soda)
  • 2 Large eggs
  • 250ml Full cream milk
  • 125ml Sunflower oil
  • 10ml Vanilla exctract
  • 250ml Boiling water
For the Icing
  • 200g Dark chocolate
  • 175ml Cream
Instructions
  1. To start, add 225g cake flour or all-purpose flour to your mixer bowl, along with 350g caster sugar, 85g good quality cocoa powder, 7.5ml baking powder and 7.5g bicarbonate of soda or baking soda, 2 large eggs, 250ml full cream milk, 125ml sunflower oil and 10ml vanilla extract.
  2. Place the bowl on your mixer with the beater paddle attached and mix the batter until smooth.
  3. Add 250ml boiling water a little at a time and continue mixing until well combined. The batter will be thin and glossy.
  4. Butter two 20cm or 8 inch cake tins and line the bottoms of each tin with baking parchment. The butter effectively sticks the parchment to the tin and prevents batter from flowing underneath the parchment.
  5. Pour half of the batter into each tin.
  6. Bake the cakes in a preheated oven at 180c or 350f for 25 to 35 minutes or until skewer inserted into the center of the cakes comes out clean. Once baked, remove the cakes from the oven and allow them to cool completely in their tins.
  7. While the cakes bake, measure out 200g of dark chocolate and cut it into bits.
  8. You will also need 175ml of cream.
  9. Melt the chocolate in your microwave in 20 second bursts, stirting between each cycle.
  10. Pour in the cream and stir this in until combined. Don't panic if the chocolate seams to granulate. Simply pop this back into the microwave for 20 seconds, and will be as smooth as silk.
  11. Set this aside to cool completely and set. If you are in a warm climate, you may need to refrigerate the mixture until it reaches a spreadable consistency.
  12. Turn the cakes out of the tins and spread the icing onto the cakes evenly.
  13. And there it is, an absolutely, supremely moist chocolate cake fit for Royalty.

moist chocolate cake,moist chocolate cake recipe,chocolate cake,best chocolate cake,how to make chocolate cake,homemade,easy chocolate cake recipe,quick chocolate cake recipe,foolproof chocolate cake recipe,no flop chocolate cake,flop proof chocolate cake,beginners chocolate cake recipe,how to make moist chocolate cake,award winning chocolate cake recipe,how to make the best chocolate cake at home,chocolate,cake,recipe,dessert,chocolate frosting recipe

How to Make Coffee Cookies – Easy Homemade Cookie Recipe


How to Make Coffee Cookies - Easy Homemade Cookie Recipe
Author: 
Recipe type: Cookies
Cuisine: South African
Serves: 60
 
Today we're going to make a batch of delectable coffee cookies so that you can still get your coffee fix even if you don't own a coffee machine.
Ingredients
For the Dough
  • --------------------
  • 1kg All-purpose flour / cake flour
  • 5ml Salt
  • 15ml Bicarbonate of soda / baking soda
  • 320ml Sugar
  • 400g Butter
  • 240ml Golden syrup
  • 125ml Espresso
  • 5ml Vanilla extract
For the Filling
  • -------------------
  • 45ml Strong instant coffee
  • 30ml Boiling water
  • 375ml Sugar
  • 150g Butter
  • 100ml Full cream milk
  • 7.5ml Vanilla extract
Instructions
  1. To start, sift 1kg of all-purpose or cake flour into your stand mixer bowl, along with 5ml salt and 15ml bicarbonate of soda.
  2. Place 320ml of sugar, 400g butter, 250ml golden syrup and 125ml of espresso in a pot.
  3. Place the pot over medium heat and stir the mixture until the butter has melted and all of the sugar has dissolved.
  4. Remove the pot from the heat and stir in 5ml of vanilla extract and then allow the mixture to cool to room temperature.
  5. Pour the mixture into your mixing bowl and run the machine is well combined and you have a smooth dough.
  6. Transfer the dough to a bowl, cover with clingwrap and allow this to stand overnight at room temperature.
  7. The following day, line at least 2 large baking sheets with baking parchment.
  8. Scoop out a tablespoonful of the dough. Roll it into a ball and place it on the sheet.
  9. Flatten the ball and pattern the cookie with the tines of a fork.
  10. Make sure to leav a half inch of space between each cookie as they will rise and spread quite considerably as they bake.
  11. Bake the cookies in batches in a preheated oven at 200c for 12 minutes per batch.
  12. Remove the cookies from the oven and transfer them to cooling racks.
  13. To make creamy coffee centers, dissolve 3 tablespoons of strong instant coffee in 30ml of boiling water in a pot.
  14. Add 100ml of full cream milk, followed by 375ml of sugar.
  15. And finally 150g of butter.
  16. Place the pot over medium high heat and bring it to a boil, stirring regularly.
  17. When the mixture starts to boil, allow it to boil quite vigorously for 8 minutes.
  18. Remove the pot from the heat. Stir in 5ml of vanilla extract, andallow the filling to cool to room temperature, stirring it regularly.
  19. It will thicken to paste that resembles peanut butter.
  20. To assemble the cookies, spread a teaspoonful of the filling onto a cookie.
  21. Place another cookie on top of this and squeeze the cookies together gently to spread the filling evenly.
  22. Continue until all of the cookies are complete.
  23. Store the cookies in an airtight container, if they last long enough to require storage.


Perfect Burger Buns – How to Bake the Best Burger Buns Ever – Independence Day 2018 Special


Perfect Burger Buns - How to Bake the Best Burger Buns Ever - Independence Day 2018 Special
Author: 
Recipe type: Burgers & Barbecue
Cuisine: American
Serves: 24 x 100g
 
After a short holiday following episode 600, I'm back. Tangzhou milk buns have a supremely soft, light and feathery texture all their own, however they are actually too soft to be used as burger buns. I have adjusted the original tangzhou recipe, keeping the technique, to make a firmer bun with the same light and airy texture, that makes for the perfect burger bun. In addition, these buns have a much better shelf-life, and freeze exceptionally well too.
Ingredients
  • Group 1:!
  • 1.35kg All-purpose flour
  • 15ml Salt
  • 10g Active dry yeast
  • 30ml Sugar
  • Group 2:!
  • 375ml Water
  • 75g All-purpose flour
  • Group 3:!
  • 450ml Full cream milk
  • 3 Eggs, beaten
  • 90ml Sunflower oil
Instructions
  1. To start, place 1.35kg of all-purpose flour in your stand mixer bowl along with 15ml of salt, 10g of active dry yeast and 30ml of sugar.
  2. Give these a quick stir to combine.
  3. Add 75g of all-purpose flour to a medium size pot and pour in 375ml of water.
  4. Use a whisk to mix until smooth.
  5. Measure out 450ml of full cream milk, 90ml of sunflower oil and beat 3 eggs. Put these aside for later.
  6. Place the pot over medium low heat and gently heat the flour water mixture. Whisk the mixture continuously.
  7. As the mixture heats up it will start to thicken. Continue whisking to keep the mixture smooth.
  8. The mixture will soon thicken to a porridge consistency, and will become slightly translucent.
  9. Remove the pot from the heat and whisk in the milk.
  10. Pour in the eggs and whisk these in.
  11. And finally, whisk in the oil.
  12. Pour this mixture into the mixing bowl on your stand mixer.
  13. Start the mixer kneading on medium slow speed, and allow this to continue kneading for 15 minutes until the dough is nice and smooth.
  14. Remove the bowl from the machine, cover with clingwrap and allow the dough to rise in a warm place for 90 minutes until at least doubled in size.
  15. Turn the dough out onto you work surface. Do not dust the surface or dough with flour. It will not be necessary, and will actually harm the texture of the buns.
  16. Knead the dough briefly to knock any large air bubbles out.
  17. Using your scale, divide the dough into 100g portions for regular burger buns, 120g portions for large buns, and 150g potions for giant buns. I am making regular sized buns which are perfect for 100g or quarter pound patties.
  18. To form the buns, stretch the dough from the top of the portion of dough to the bottom, working around the edge of the dough.
  19. Circle the dough in your index finger and thumb and crimp the bottom of the bun together.
  20. Place the bun on the work surface, cup your hand over the bun and finish rounding it with a circular motion.
  21. Press the bun flat and transfer it to a baking sheet lined with baking parchment.
  22. Continue with the remaining buns, leaving about a half inch of space between each one.
  23. Cover the buns loosely with clingfilm and allow the buns to rise in a warm place for 45 minutes until they are touching as they are here.
  24. minutes into this rise, start preheating your oven to 200c or 400f.
  25. Brush the buns with beaten egg and sprinkle the tops liberally with hulled sesame seeds.
  26. Bake the buns in the center of your oven for 15 to 20 minutes until golden on top.
  27. Remove the buns from the oven and transfer them to cooling racks.
  28. If we cut one of these beauties open, we see the amazing light airy, feathery texture, with excellent oven spring and an improved firmness, making these buns the perfect burger buns.
  29. Thanks for joinig us today, please like, subscribe and share, and we'll see you again soon.


Grissini Sticks – Pencil Crackers – Pretzel Sticks – Thanksgiving Special 2017

grissini,grissini sticks,pencil crackers,pretzel sticks,bar snacks,pub snacks,how to make,recipes,cooking baking,thanksgiving starters,how to make grissini sticks,how to make pretzel sticks,homemade


Grissini Sticks - Pencil Crackers - Pretzel Sticks - Thanksgiving Special 2017
Author: 
Recipe type: Bread
 
With Thanksgiving just days away, these grissini sticks make a perfect entre' to grace the start of your feast. Sometimes called pencil crackers or pretzel sticks, you can coat the snacks with salt, sesame seeds or poppy seeds, or any combination of these.
Ingredients
  • 500g All-purpose flour
  • 2 Tsp Sugar
  • 2 Tsp Salt
  • 2 Tsp Baking powder
  • 140ml Water
  • 60ml Sunflower oil
  • 2 Eggs (plus 1 for spraying)
Instructions
  1. To start, measure out 500g of all-purpose flour, 2 eggs, 2 teaspoons salt, 2 teaspoons sugar, 2 teaspoons baking powder, 140ml water and 60ml sunflower oil.
  2. Place all of these in your food processor.
  3. Pop the lid on and process on high speed for about 60 seconds.
  4. Tipping the processor from side to side helps to achieve a more even mix.
  5. You will end up with a fine crumbly dough that resembles cous cous.
  6. When pressed, the mixture will hold together very well.
  7. Tip the dough out onto your work surface and compress it into a block.
  8. Wrap the block in cling-wrap and allow this to stand for 30 minutes before continuing.
  9. After this time, unwrap the dough and cut it into 4 pieces.
  10. Working with 1 piece at a time, flatten a piece out.
  11. Run this through your pasta roller.
  12. Continue folding the dough after each pass and running it through on setting 1 until you have a tidy sheet. This will take 3 to 4 passes.
  13. Reduce the setting to 2 and run it through again.
  14. If the dough starts to feel sticky, sprinkle will flour and rub this into the surface.
  15. Reduce the setting to 3 and run the dough through twice on this setting.
  16. Square off the ends and continue with the remaining 3 pieces.
  17. The offcuts can be rerolled to make a fifth sheet.
  18. Run the sheets through the 6mm pasta cutter to cut the sheets into strips.
  19. Line 3 large baking sheets with baking parchment and arrange the strips on the trays with just a few millimetes between each strip.
  20. Whisk a large egg with 50ml of water and pour this into a misting bottle. Spray the egg wash over the pastry.
  21. Grind salt over the damp strips and you're ready to go.
  22. Here you can also use seeds as previously mentioned.
  23. Bake the strips in a preheated oven at 220c or 450f for 10 to 15 minutes until golden and crispy.
  24. Transfer the sticks to a tall pilsner glass to create a fantastic table display.
  25. Have a wonderful Thanksgiving, please like, subscribe and share and we'll see you again tomorrow.


How to Make Honey & Oat Bread – a Simple Homemade Health Bread

honey and oats bread,oats and honey bread,recipe,cooking,baking,homemade,how to make,easy recipe,easy bread recipes,health bread,healthy bread recipe,honey and oats bread recipe


How to Make Honey & Oat Bread - a Simple Homemade Health Bread
Author: 
Recipe type: Bread
 
Honey and oat bread is absolutely outstanding, with a magnificent texture, superb oven spring and a flavor from heaven. It is really simple to make as long as you stick to the steps and timings.
Ingredients
  • 520ml Warm water
  • 10g Active dry yeast
  • 80ml Honey
  • 850g All-purpose flour
  • ¾ Cup rolled oats
  • ½ Cup sunflower seeds
  • 45ml Vegetable oil
  • 2.5 Tsp Salt
  • 1 Egg beaten, for brushing
  • Extra rolled oats for topping
Instructions
  1. Honey and oat bread is absolutely outstanding, with a magnificent texture, superb oven spring and a flavor from heaven. It is really simple to make as long as you stick to the steps and timings.
  2. To start, dissolve 80ml of honey in 520ml of warm water.
  3. Add 10g of instant yeast and stir this in briefly.
  4. Cover the mixture and allow this to activate for 20 minutes.
  5. While the yeastmixture stands, measure 850g of all-purpose flour and pour this into your stand mixer bowl.
  6. Add 3 quarters of a cup of rolled oats and a half cup of sunflower seeds to the flour.
  7. In addition, you need 2 and a half teaspoons salt.
  8. Once the yeast has activated it will be very frothy. Add 45ml of cooking oil to the yeast mixture and stir to combine.
  9. Pour this into the mixer bowl.
  10. Fit the dough hook and close the mixer.
  11. Knead the dough for 12 minutes on medium slow speed.
  12. Once kneading has completed remove the bowl from mixer, cover with cling-wrap and allow the dough to rise for 60 minutes in a warm place.
  13. After rising, turn the dough out onto a lightly floured work surface and knead it briefly to knock it down.
  14. Weigh the dough and divide it into 2 equal portions.
  15. Working with one piece at a time, flatten the dough into a large oval shape.
  16. Fold the top edge down two thirds of the way. Fold the bottom edge up over this.
  17. Repeat this with the second loaf.
  18. Wipe the insides of 2 medium size loaf tins with oiled kitchen paper.
  19. Transfer the loaves to the tins and press them into the tins firmly.
  20. Cover the bread loosely with cling-wrap and allow this to rise for a further 30 minutes in a warm place.
  21. Halfway through this time, preheat your oven to 180c or 350f.
  22. Brush the loaves with beaten egg and sprinkle the loaves liberally with more rolled oats.
  23. Bake the loaves for 40 to 45 minutes until golden and they sound hollow when tapped.
  24. Remove the loaves from the oven and allow them to cool in the tins for 5 minutes before turning out onto a rack to cool completely.
  25. And there we have it... the perfect bread, with a lovely crispy crust, great texture, superb aroma and amazing taste.


Supreme Rye Bread – The Soft Rye Bread Everybody Will Love

rye bread,rye bread recipe,soft rye bread,recipes,baking cooking,how to make rye bread,homemade rye bread,best rye bread recipe,recipes,baking,cooking,how to make soft rye bread,how to make rye bread rise,using lecithin in baking,soy lecithin,baking with,dough,kneading dough


Supreme Rye Bread - The Soft Rye Bread Everybody Will Love
Author: 
Recipe type: Bread
Cuisine: German
Serves: 2
 
Today we're going to bake a unique rye bread that everyone will love. This bread has the amazing flavor of rye bread, but the light texture of a regular white farm loaf.
Ingredients
  • 625ml Warm water
  • 60g Black strap molasses
  • 30g Butter, melted
  • 30ml Brown sugar
  • 18g Soy lecithin (available at most health shops)
  • 20g Instant yeast
  • 600g Strong white bread flour
  • 300g Stoneground rye flour
  • 20ml Salt
  • 10ml Caraway or fennel seeds
Instructions
  1. To start, pour 625ml of warm water into your mixer bowl.
  2. Add 60g of black strap molasses and stir this in briefly.
  3. Pour in 2 tablespoons brown sugar, 30g of melted butter, 20g instant yeast and 18g of soy lecithin.
  4. The lecithin binds the oil in the melted butter to the water. This dramatically increases the shelf life of the bread. In addition, rye flour has a low gluten content and the lecithin replaces this shortage in order that rye loaf will rise as well as regular bread does.
  5. Use your stick blender to shear the lecithin into the liquids.
  6. Cover the bowl and give it 15 minutes for the yeast to activate.
  7. In the meantime, measure out 600g strong white bread flour, 300g stoneground rye flour, 4 teastoons salt and 2 teaspoons caraway or fennel seeds.
  8. Add these four ingredients to the yeast liquid.
  9. Place the bowl on your mixer with the dough hook attached and knead the dough on slow speed for 2 minutes. Increase the speed to medium slow for a further 8 minutes.
  10. You will have a beautifully smmoth dough that is only slightly sticky.
  11. Cover the bowl with cling-wrap and allow the dough to rise in a warm place for 60 minutes.
  12. While the dough rises, rub the insides of 2 large loaf pans with butter.
  13. Scatter flour over the inner surfaces of the pans and tip out any excess flour.
  14. As you can see this dough rises very well.
  15. Turn the dough out onto a lightly fliured work surface and knead it briefly to knock it down.
  16. Weigh the dough and divide it into 2 equal portions of around 850g.
  17. Working with one portion at a time, work the dough into a rectangle as with as the bread pan. Fold the top edge down two thirds of the way, then fold the botykm edge up over this.
  18. Place the rolled dough into the pan with seam side down. Flatten the roll to fill the bottm of the pan.
  19. Cover both pans and allow these yo rise for a further 30 minutes in a warm place.
  20. Once again, you can see clearly just how well this rises.
  21. Use a razor sharp knife to slash the tops of the loaves. Not only does this lokk cool, but it deflates the lids and prevents them from blowing while baking.
  22. Bake the loaves in a preheated oven at 220c or 430f for 25 to 30 minutes until the loaves sound hollow when tapped.
  23. Remove the loaves from the onen and turn them out onto a wire rack to cool.
  24. Allow the bread to cool for at least 30 minutes before cutting.
  25. Here we can see the beautiful light texture with incredibly good oven spring.
  26. Thats it for today folks, thanks for joining us, please like, subscribe and share, and we'll see you again tomorrow.


How to Make Coffee Burger Buns – Flavorful, Aromatic Burger Buns with a Difference!

burger buns recipe,gourmet burger buns recipe,coffee burger buns,espresso burger buns,best burger buns recipe,special burger buns recipe,how to,how to make,burgers,cooking,homemade burger buns,homemade coffee burger buns,brazilian burger buns,soft burger buns,easy burger buns recipe


How to Make Coffee Burger Buns - Flavorful, Aromatic Burger Buns with a Difference!
Author: 
Recipe type: Bread / Burgers / Burger buns
Serves: 8 - 12
 
The flavors of coffee and beef work very well together whether incorporated in dry rubs or bastings. Today we're going to take this marriage to a new level by making a batch of amazing coffee burger buns.
Ingredients
  • 950g Strong white bread flour
  • 60g Butter grated
  • 15ml Sugar
  • 10ml Salt
  • 10g Instant dry yeast
  • 30ml Full cream milk powder
  • 600ml Espresso, cooled to 35c
  • 1 Egg whisked with 25ml water
Instructions
  1. To start, measure out 10g instant yeast, 1 tablespoon sugar, grate 60g of butter and run 600ml of espresso through your coffee machine. Allow the espresso to cool to 35c before proceeding.
  2. Pour the espresson into a bowl and add the sugar and yeast. Give this a brief stir, cover the bowl and set this aside for 10 to 15 minutes to activate.
  3. Measure 950g of strong white bread flour into your mixer bowl.
  4. Add 2 tablespoons full cream milk powder and 2 teaspoons salt. Stir this to combine.
  5. Add 60g of grated butter.
  6. Place the bowl on your mixer with the beater paddle attached.
  7. Mix the flour for about 60 seconds to cut the butter into flour.
  8. Add the yeast coffee mixture to the bowl and mix this until all of the liquid has been absorbed into the flour.
  9. Open the mixer and swap out the beater paddle for a dough hook.
  10. Close the machine and allow the dough to knead for 8 to 10 minutes on medium slow speed.
  11. You will have a beautifully smooth, soft dough that is not at all sticky.
  12. Cover the bowl with cling-wrap and allow the dough to rise in a warm place for 60 minutes until doubled in bulk.
  13. Turn the dough out onto a lightly flour work surface and knead briefly to knock it down.
  14. Roll the dough into a log and divide it into 8 equal pieces for large buns, 10 for medium and 12 for regular size.
  15. Working with one piece at a time stretch the dough from the edge down to the bottom all the way around the roll.
  16. Finish it off by cupping your fingers over the roll and rounding it using a circular movement.
  17. Place the rolls on a baking sheet lined with parchment.
  18. Cover the rolls with a clean dish towel and allow these to tise again for 30 minutes.
  19. After 30 kinutes the rolls will have doubled in size.
  20. Whisk and egg with 25ml of water and brush the tops of the buns.
  21. Use a razor sharp blade to slash the tops of the buns.
  22. Bake the buns in a preheated oven at 200c or 400f for 20 minutes until golden and well risen.
  23. Remove from the oven and transfer the buns to cooling racks.
  24. Allow them to cool for at least 15 minutes before cutting.
  25. And there we have a batch of beautifully textured and aromatic coffee burger buns.
  26. Thanks for joining us today, please like, subscribe and share, and we'll see you again tomorrow.


How to Make Bolillos – Mexican Baguettes

bollilo,bolillos recipe,how to make bolillos,mexican baguettes,mexican baguettes recipe,easy bolillos recipe,maxican baking recipes,mexican breads,homemade bolillos,homemade bolillo,mexican bread recipes,how to make mexican breads,mexican bread collection,make bolillos at home,easy bolillos recipe


How to Make Bolillos - Mexican Baguettes
Author: 
Recipe type: Bread
Cuisine: Mexican
Serves: 10
 
Bolillos are Mexico's version of the French baguette. With the trademark thin and crispy crust, these little rolls are every bit as good. Despite the long rising times, the recipe is really easy, and certainly worth the effort.
Ingredients
Ingredients for the starter:
  • ¾ Cup water
  • ½ Tsp Active dry yeast
  • 1 Cup all-purpose flour
Ingredients for the Dough:
  • 3 Cups all-purpose flour
  • 1.5 Tsp Active dry yeast
  • 2 Tsp Salt
  • 60ml Melted butter
  • 240ml Warm water
Instructions
  1. This recipe does require a starter, sometimes called a preferment or poolish. To make the starter, place a cup of all-purpose flour in your mixer bowl.
  2. Add a half teaspoon of active dry yeast followed by 180ml of water.
  3. Place the bowl on your mixer with the beater paddle fitted.
  4. Mix this on medium low speed until totally combined. This will take 30 to 60 seconds.
  5. Remove the bowl from the machine, cover with cling-wrap and allow this to stand overnight.
  6. The following day the skurry will be bubbly and active.
  7. Add a further 3 cups of all-purpose flour, 2 teaspoons salt, 1 and a half teaspoons active dry yeast, 60ml of melted butter and 240ml of warm water.
  8. Place the bowl on your mixer with the dough hook attached.
  9. Start the mixer on slow for the first minute then increase the kneading speed to medium slow and allow this to knead for 7 minutes.
  10. Once kneading is complete, cover the bowl with clingwrap and allow the dough to rise in a warm place for 2 to 3 hours until doubled in size.
  11. After the first rise, you will have a lovely soft dough that is only slightly sticky.
  12. Turn the dough out onto a lightly floured work surface.
  13. Weigh the dough and divide this into 10 equal potions.
  14. Roll each portion into a round by placing it in the palm of your hand. Cup the fingers of your other hand over the portion and using a circular motion, form the roll.
  15. Cover the dough balls with cling-wrap and allow these to rest for 15 minutes. This allows the gluten to relax in preparation for the next step.
  16. Working with one ball at a time, flatten the ball into an oval shape.
  17. Fold the top third of the dough downwards and press to seal.
  18. Fold the bottom edge of the dough up and over this. Press this to seal the edge.
  19. Hold your hands at angles to the edges and roll the dough to form the bolillo.
  20. Transfer this to a lightly floured baking sheet and continue forming the remaining rolls.
  21. Cover the rolls with cling-wrap and allow them to rise for a further 60 to 90 minutes in a warm place, until doubled in size.
  22. minutes before the second rise is completed, preheat your oven to 230c or 450f. Place a small roasting pan in the bottom of your oven at this time.
  23. When the oven is up to temperature, use a razor sharp thin blade to slash the rolls along the length.
  24. Open the oven, pour a cup of cold water into the roasting tin, and place the rolls in the center of the oven.
  25. Bake the rolls for 20 to 25 minutes until golden.
  26. Remove the rolls from the oven and transfer them to a rack to cool.
  27. And there we have it.... a batch of beautifully crispy and aromatic bolillos.
  28. Thanks for joinibg us today, please subscribe, like and share, and we'll see you again tomorrow.


Rosh Hashanah Honey Cake – Happy Jewish New Year!!!

honey cake,rosh hashsanah,recipes,honey cake recipe,rosh hashanah recipes,how to make honey cake,homemade hone cake,jewish new year,jewish new year recipes,jewish cake,jewish recipes,rosh hashanah cake recipe,celebration cake recipes


Rosh Hashanah Honey Cake - Happy Jewish New Year!!!
Author: 
Recipe type: Cake
Cuisine: Jewish
 
Happy New Year to all our Jewish viewers, and to celebrate, today I am baking a traditional Rosh Hashanah honey cake. The unique texture and flavor of this delicious treat will have everyone lining up for more.
Ingredients
For the Cake
  • 2.5 Cups All-purpose flour
  • 1.25 Tsp Salt
  • 1 Tsp Baking powder
  • 0.5 Tsp Baking soda
  • 0.5 Cup Water
  • 4 Large eggs
  • 90ml Unsweetened apple sauce
  • 0.25 Cup Vegetable oil
  • 0.25 Cup Orange juice
  • 1 Tsp Vanilla extract
  • 430ml Honey
For the Icing
  • 1 Cup Icing sugar
  • 4.5 Tsp Water
  • 1 Tsp Vanilla extract
Instructions
  1. To start, measure 2 and a half cups all-purpose flour into a large mixing bowl.
  2. To this, add 1 and a quarter teaspoons salt, 1 teaspoon baking powder and a half teaspoon baking soda. Mix this until combined and put it aside.
  3. Add a half cup of water to another jug.
  4. Whisk 4 large eggs and pour these into the water.
  5. Add a heaped quarter cup measure of unsweetened apple sauce and mix this in.
  6. Pour in a quarter cup of vegetable oil and a quarter cup of fresh orange juice.
  7. Measure a teaspoon of vanilla extract and add this.
  8. Finally pour in 430ml or 1 and 3 quarter cups of honey.
  9. Mix this thoroughly until all of the honey has mixed into the other liquid.
  10. Pour the honey mixture into the flour. Use a paddle initially to cut the flour into the mixture, then move to a large whisk.
  11. Mix this until reasonably smooth.
  12. Traditionally honey cake is baked in a 12 cup Bundt pan, but today I am going to use two 8 inch cake tins.
  13. Whichever way you choose to go, the tins need to be prepared. Butter the pans liberally.
  14. Scatter flour across the buttered surfaces and tip out any excess flour.
  15. Pour equal amounts of the batter into each of the pans.
  16. Bake the honey cake in a preheated oven at 325f or 162c for 45 to 60 minutes, and a skewer comes out clean when pressed into the center of the cake.
  17. Remove the cake from the oven and place the tins on a rack. Allow the cake to cool in the tins for 30 minutes.
  18. After this time, run a thin blade around the edge of each tin and turn them out onto the rack.
  19. Allow these to continue cooling for a further 2 hours.
  20. Once totally cooled, these can be wrapped and stored at room temperature for a few days.
  21. When you're ready to finish them off, combine a cup of icing sugar with 4 and a half teaspoons of water and a teaspoon of vanilla extract.
  22. Mix this until smooth, then drizzle it over the cakes.
  23. Allow the icing to set for 30 minutes before cutting and serving.
  24. Thanks for joining us today, please subscribe, like and share, and we'll see you again tomorrow.


How to Make Pouring Cream from Milk

how to make cream,how to make pouring cream,how to make cream from milk,how to make dessert cream,how to make cream from milk and butter,how to make cream replacement,how to make fake cream,how to make non-dairy cream,recipes,how to,homemade,cream,dairy cream,pouring cream,dessert cream


How to Make Pouring Cream from Milk
Author: 
Recipe type: Dairy / Dessert
 
Today we're going to look at a very neat trick that you can use to make pouring cream from milk. In reality nothing can replace real cream, however if you're bulk catering, this recipe can be a real lifesaver. In addition, only real connoisseurs will tell the difference between this and real cream.
Ingredients
  • 75g Butter, melted
  • 175ml Full cream milk
  • ⅛ - ¼ Tsp Xanthan gum
  • Caster sugar (to taste if desired)
Instructions
  1. To start, melt 75g of butter inyour microwave. Run the microwave until it is just melted, that means barely above room temperature, or mildly warm.
  2. Heat 175ml of full cream milk to around the same temperature of the butter.
  3. In addition, you will need xanthan gum. For this combined quantity of liquid, 250ml, you will need 1 eighth of a teaspoon for thin cream, or a quarter teaspoon for a thicker pouring cream.
  4. Pour the milk into a tall jug, followed by the melted butter.
  5. Add 1 eighth of teaspoon of xanthan gum to the jug.
  6. Use your stick blender to shear the xanthan gum into the liquid. You will see the liquid noticeably thicken to the consistency of thin cream.
  7. And here it is....
  8. To demonstrate the thicker version, I have poured the thin cream back into the tall jug.
  9. Add another 1 eighth of a teaspoon of xanthan gum to the liquid.
  10. Once again, use your stick blender to shear the xanthan gum into the liquid. Now you have a thicker version of the same cream. If you need to use the cream immediately, you can purge the bubbles by pouring the cream through a fine sieve.
  11. You can go even further with the thickening process, but not past a maximum of 2% xanthan gum per volume of liquid. Beyond this level, the liquid will become slimy and will not emulate cream at all.
  12. That's it for today, thanks for watching.... please subscribe, like and share, and we'll see you again tomorrow.


Whats4Chow Launches the Amazing Pie Making System Today!!!

pie making equipment,pie machinery,pie blocking machines,pie blocking and lidding machine,pie pastry press,pie press machinery,pie making equipment south africa,commercial pie machinery,pastry blocking equipment,pastry press,pie press,whats4chow,pie equipment launch,pastry pressing equipment,dough sheeter,commercial dough sheeter,dough roller,commercial dough roller

For as long as I can remember I have had a fascination and love for foods enclosed in pastry. After months of research and development, and over a year of field-testing, today is the launch of our amazing pie making system.
The system is suitable for large households, restaurants, hotels, home industries, catering businesses, take-outs and pie shops… really any place that needs a lot of pies.
Manufacturing pies by hand has always been a laborious task, and using industrial pneumatic and hydraulic machinery is cost inhibitive. This system enables you to assemble up to 1000 pies per day and is totally scalable by adding additional units as your operation grows.
Please click www.thundafund.com/project/piemakingsystem to see the launch page and get all of the product details and pricing.

Thanks for watching, and we’ll see you on the launch page!!!

How to Make Buttermilk Rusks – Crunchy Dunking Biscuits!!!

buttermilk rusk recipe,how to make buttermilk rusks,homemade buttermilk rusks,recipe for rusks,south african rusk recipe,traditional rusk recipe,buttermilk rusks recipe,easy buttermilk rusk recipe,baking,recipes,video recipes,whats4chow,cooking,cake,make buttermilk rusks,dunking biscuits,cookies for dunking,dunking cookies


How to Make Buttermilk Rusks - Crunchy Dunking Biscuits!!!
Author: 
Recipe type: Biscuits / Cookies
Cuisine: South African
 
In yesterdays episode we made a batch of thick, creamy cultured buttermilk. Today we're going to use this to make South Africa's traditional dunking biscuit, delicious buttermilk rusks.
Ingredients
  • 500g Butter
  • 500g Sugar
  • 1Kg All-purpose flour
  • 15ml Baking powder
  • 10ml Salt
  • 500ml Cultured buttermilk
  • 2 Eggs
Instructions
  1. To start add 500g of butter and 500g of sugar to a medium size pot. Place the pot over low heat and melt the butter.
  2. This recipe is on the sweeter side. You can reduce the sugar, or even replace a portion of the sugar with seedless raisins or any dried berries.
  3. While the butter melts, sift 1kg of all purpose, 15ml of baking powder and 10ml of salt into a bowl.
  4. Measure 500ml of the cultured buttermilk into a large jug. Whisk 2 eggs and add these to the buttermilk.
  5. Make a well in the center of the flour mixture and pour the buttermilk and egg into the bowl. Mixt this briefly until all of the liquid has been absorbed by the flour.
  6. Pour in the melted butter and sugar. Use your padfle to mix this into the flour mixture until no dry flour is visible.
  7. You will have a thick, lumpy batter.
  8. Pour the batter into an 11 by 14 inch baking tin and spread it out evenly across the tin.
  9. Bake the batter in a preheated oven at 180c or 350f for 60 minutes, and a skewers comes out clean when pressed into the center of the cake.
  10. Remove the pan from the oven and allow it to stand for 15 minutes.
  11. Use a long ruler and a thin blade to cut the cake into strips of about 20mm wide.
  12. Turn the pan 90 degrees and cut the strips into fingers.
  13. Use a lifter to remove these from the pan and spread the rusks out over 4 large racks.
  14. Place the racks in your oven set at 100c or 200f with door slightly ajar. Allow the rusks to dry out like this for 2 to 3 hours.
  15. And now you have a mountain of traditional rusks just ready for eating.


Scroll to top

Kitchen Conversions

Convert:
Masses
to:
Volumes
to:
Temperatures
to:
Lengths
to: