Cape Malay Pickled Fish – Traditional Cape Town Kerrievis, a Delicious Summer Meal!!!

pickled,fish,pickled fish,pickled fish recipe,cape malay pickled fish,cape malay pickled fish recipe,pickled fich recipe south africa,how to make pickled fish,kerrievis,kerrie vis recipe,how to make kerrie vis,kerrievis recipe south africa, pickled fish ingredients, pickled fish recipes vinegar, pickled fish cape malay recipe, white vinegar pickling


Cape Malay Pickled Fish - Traditional Cape Town Kerrievis, a Delicious Summer Meal!!!
Author: 
Recipe type: Seafood / Fish / Pickling
Cuisine: South African
Prep time: 
Cook time: 
Total time: 
Serves: 4
 
Cape Malay Pickled Fish, or Kerrievis, is a traditional South African Malay dish. Served well-chilled, this pickled fish makes and amazing summer meal or starter course.
Ingredients
  • 400g Firm white fish fillet
For the seasoned flour
  • 1 Cup all-purpose flour
  • 10ml Salt
  • 10ml Ground white pepper
For the Pickling Sauce
  • 3 Bay leaves
  • 2 Onions
  • 200ml Brown vinegar
  • 125ml Water
  • 90ml Sugar
  • 7.5ml Turmeric
  • 25ml Curry powder (your personal choice - mild or spicy)
  • 2.5ml Salt
  • 4 Whole black peppercorns
  • 2 Whole allspice
To thicken
  • 20ml Cornflour dissolved in a little water
Instructions
  1. Combine the all purpose flour, salt, and ground white pepper.
  2. Cut the fish fillets into large blocks then dredge them in the seasoned flour.
  3. Heat a large pan over medium high heat and add 30g of butter. Fry the fish for 3 to 4 minutes, turning halfway. The fish should be crispy and well bronzed.
  4. To make the pickling sauce, cut your onions in half length-ways and slice them into thin half rounds.
  5. Combine the brown vinegar with the water and measure out the bay leaves, sugar, turmeric, curry powder, salt, black pepper corns and whole allspice.
  6. In addition, dissolve the cornflour in a little water to make slurry.
  7. Add the onions, all of the spices and vinegar solution to the pan over medium heat. Bring the pan to a boil, lower the heat and allow this to simmer for 10 minutes.
  8. Pour in the cornflour slurry and continue to simmer for a minute or 2 until the sauce has thickened.
  9. Place the fried fish in a non-reactive pan and pour the pickling sauce over the fish. Allow the pan to cool, cover the pan with cling-wrap and let the fish mature in the refrigerator for one to 2 days before serving.
  10. The pickled fish will last for a few weeks under refrigeration if you can resist the temptation to eat it first. This allows you to process much bigger batches without the risk of spoilage by simply multiplying this recipe out.


 

Chinese Steamed Hoisin Pork Buns on the Barbecue. How to Make Steamed Buns on Your Barbecue.

chinese steamed bun,steamed buns,chinese steamed buns,steamed pork bun,steamed bun recipe,pork bun recipe,chinese steamed pork bun recipe,how to make steamed buns,how to make chinese steamed buns,how to make fluffy asian bread buns,chinese steamed buns recipe for dough,chinese steamed buns with pork filling,asian dim sum,chinese steamed buns white,chinese steamed buns dough recipe,how to make cha siu bao,chinese bbq pork bun,bbq pork bun,chinese steamed bbq pork bun


Chinese Steamed Hoisin Pork Buns on the Barbecue. How to Make Steamed Buns on Your Barbecue.
Author: 
Recipe type: Steamed Buns
Cuisine: Chinese
Prep time: 
Cook time: 
Total time: 
Serves: 16
 
Just 1 quick trick and you can make your Chinese steamed buns on your gas barbecue. Making the steamed buns is quick and easy, and the aromatic flavorful buns will have your guests talking for weeks!!!
Ingredients
For the Dough
  • 300g All-purpose flour
  • 15ml Baking powder
  • 110g Caster sugar
  • 125ml Milk
  • 80ml Water
  • 60ml Oil
For the Hoisin Pork Filling
  • 250g Pork loin
  • 125g Streaky bacon
  • 10ml Garlic
  • 10ml Ginger
  • 1 Small carrot
  • 30ml Hoisin sauce
  • 15ml Oyster sauce
  • 15ml Cornflour
Instructions
  1. In a large mixing bowl, combine the flour, baking powder and caster sugar.
  2. In a jug, whisk the milk, water and oil together, then pour this into the mixing bowl.
  3. Using a wooden paddle, mix this until a smooth dough comes together. The dough will be soft and very sticky.
  4. Turn this out onto a well floured work surface and sprinkle more flour over the top of the dough. Start kneading, stretching and folding the dough, sprinkling more flour on every time it becomes sticky.
  5. When the dough smooth and is no longer sticky it is ready wrap in clingwrap. Place the dough in your refrigerator for 60 minutes.
  6. While the dough rests, place the pork, bacon, garlic, ginger, carrot, hoisin sauce, oyster sauce and cornflour in your food processor and zap this until it is finely chopped.
  7. Unwrap the dough and roll it into a long sausage. Divide the sausage into 4. Roll each of these into a sausage and divide these into 4, giving a total of 16 pieces.
  8. Working with one piece, flatten this into a disc on a lightly floured work surface. Then extend and thin the edges of the disc.
  9. Spoon 2 tablespoons of the filling into the center of the disc. Pull and stretch the edges of the disc up and over the filling to meet at the top. Twist the edges at the top to seal the bun.
  10. Continue with the rest of the buns. Transfer the buns to your bamboo steamer, each one on top of a small square of baking parchment. For 16 buns you will need to use both tiers of your steamer, or steam 2 batches.
  11. Remove the grill racks from your barbecue and place a cooling rack across the flame tamers of 2 of the burners. Light the 2 burners.
  12. Place your wok on top of the rack and half fill it with boiling kettle water.
  13. Once the water comes back to a boil, place the steamer on top of the wok. Allow this to steam for 30 minutes. This timing is slightly longer than usual because the temperature is slightly lower than that of a wok burner.
  14. Remove the steamer from the wok, transfer the buns to serving platters and brush them with roasted sesame oil before serving.


Snack Platter Catering – Part 21 – Deep Fried Prawn Wontons

deep-fried wontons,deep-fried prawn wontons,how to make wontons,how to fold wontons,pork and prawn wontons,best wonton recipe,seafood wontons,dim sum recipes,chinese recipes,proper wonton fold,how to deep-fry wontons,pork and prawn deep-fried wontons,finger foods,snack food recipes,super bowl recipes,snack platter recipes


Snack Platter Catering - Part 21 - Deep Fried Prawn Wontons
Author: 
Recipe type: Dim Sum / Finger Foods / Snack Foods / Super Bowl Recipes
Cuisine: Chinese
Prep time: 
Total time: 
Serves: 80
 
These amazing crispy fried pork and prawn wontons are quick and easy. One the really cool things about this is that you can make the wontons way ahead of time and deep fry them from frozen as required.
Ingredients
  • 200g Prawn meat
  • 200g Bacon
  • 15ml Ginger, grated
  • 4 Spring onions
  • 2.5ml Salt
  • 5ml Sesame oil
  • 15ml Cornflour
  • 80 Wonton skins
Instructions
  1. Cut the bacon into thin strips across the grain, chop the spring onion into rounds, measure out the grated ginger, salt, roasted sesame oil and cornflour. In addition weigh out the prawn meat and unpack 80 wonton skins and keep them under a damp cloth.
  2. Place all of the ingredients with exception of the wonton skins into your food processor.
  3. Zap this all until it is quite finely chopped.
  4. Working with one wonton skin at a time, place a skin diagonally in front of you. Using a wet finger, wet the 2 upper edges of the wrapper.
  5. Place a teaspoonful of the filling onto the center of the wrapper.
  6. Fold the corner closest to you up and over the filling to meet the top corner. Press the edges of the wrapper together to seal, making sure to press out any air from inside the parcel.
  7. This will give you a very basic gowgee fold. Wet one of the sharp corners of the parcel. Pull the 2 sharp corners towards you until they overlap, then crimp them together.
  8. Repeat this until all of the wontons are formed.
  9. Half fill a large pan with oil and heat this to 190c or 375f. Fry the wontons in batches for 2 to 3 minutes, stirring gently halfway through.
  10. Use a slotted spoon to remove the wontons from the oil and drain them on kitchen paper. Repeat this until everything is fried.
  11. Transfer the wontons to serving platters and serve immediately.


Snack Platter Catering – Part 20 – Chilli Bites, Deep Fried Chilli Puffs – Quick, Easy & Delicious!!!

chilli bites,deep-fried chilli puffs,how to make chilli bites,homemade chilli bites,chilli bites recipe,authentic indian chilli bites,real chilli bites recipe,chilli bites with chick pea flour,how to make real chilli bites,how to make deep-fried chilli puffs,authentic south african indian chilli bites,best chilli bites recipe,quick chilli bites recipe,easy chilli bites recipe,how to make chilli bites,finger foods,cocktail snack foods


Snack Platter Catering - Part 20 - Chilli Bites, Deep Fried Chilli Puffs - Quick, Easy & Delicious!!!
Author: 
Recipe type: Snack Food / Finger Food / Superbowl
Cuisine: Indian
Prep time: 
Cook time: 
Total time: 
Serves: 40-50
 
This recipe is real lifesaver when you're catering for larger numbers. Chilli bites are dead simple to make, and although they can't be prepared long before the time, they are really quick.
Ingredients
Makes 40-50 Chilli Bites
  • 3 Cups Chickpea flour
  • ½ Tsp Bicarbonate of Soda
  • 1½ Cups Water
  • ½ Cup Chopped coriander
  • 3 Chillis, chopped
  • 1 Onion, finely chopped
  • ½ Cup Spring onion, finely chopped
  • 2 Tsp Toasted cumin seeds
  • 1 Tbs Chilli powder
  • 1 Tsp Garam masala
  • 1 Tsp Salt
Instructions
  1. Combine the chickpea flower and the bicarbonate of soda in a large mixing bowl. Add chopped coriander, chopped chillis, chopped spring onion, chopped onion, toasted cumin seeds, chilli powder, salt and garam masala. Mix these into the flour.
  2. Pour in the water and stir this to a thick batter. For the best result, allow the batter to stand for 15 minutes before proceeding with frying.
  3. Half fill a large pan with oil and heat this to 170c or 340f.
  4. Carefully drop slightly heaped tablespoons of the batter into the oil. Allow the chilli bites to fry for 4 minutes until golden, turning halfway through.
  5. Remove the puffs from the oil using a slotted spoon and drain them on kitchen paper. Continue with second batch of puffs until all them are fried.
  6. Transfer the bites to platters and serve hot or cold.


Snack Platter Catering – Part 19 – Mini 5 Spice Pork Pies. Delicious Cocktail Pork Pie Finger Food!!!

pork pies,pork pies recipe,mini pork pies,cocktail pork pies recipe,finger food pork pies,party style pork pies,miniature pork pies,how to make 5-spice pork pies,5-spice pork pie recipe,spicy pork pierogi,spicy pork pierogi recipe,5-spice pork fold-overs,pork fold-overs recipe, making pork pies, how pork pies are made, pork pie hand raised home-made,homemade pork pie recipe,recipes pork pie,how to pork pies at home


Snack Platter Catering - Part 19 - Mini 5 Spice Pork Pies. Delicious Cocktail Pork Pie Finger Food!!!
Author: 
Recipe type: Finger Foods / Cocktail Snacks / Pork Pies
 
These miniature 5 spice pork pies are a perfect compliment to any cocktail party.
Ingredients
  • 2 x Pork knuckles, smoked or plain
  • 2 Whole star anise
  • 2 Tsp Whole Szechuan pepper corns
  • 2 Tsp Ground cinnamon
  • 2 Tsp Ground ginger
  • 2 Tsp Fennel seeds
  • 1 Tsp Whole cloves
  • 1 Liter chicken stock
  • 150ml Light soy sauce
  • Water to cover
For the Sauce / Gravy
  • 200ml of the cooking liquid, strained
  • 50ml Hoisin sauce
  • 15ml Tapioca flour dissolved in a little water
Instructions
  1. Slice through the skin and flesh along both thin edges of the pork knuckles. I am using smoked knuckles, but you can use plain as well if you prefer.
  2. Place the knuckles in a large pot and add the start anise, Szechuan pepper, cinnamon, ground ginger, fennel seeds and whole cloves.
  3. Pour in the stock and the light soy sauce, then top up the pot with water until pork is just covered.
  4. Bring the pot to a boil, reduce the heat and allow this to simmer for 3 and a half hours.
  5. Once the time is up, remove the knuckles from the pot. You will notice that the meat is literally falling from the bone.
  6. Peel away the skin and pull all of the flesh from the bone. Using 2 forks, shred the pork finely.
  7. To make the sauce or gravy, strain off 200ml of the liquid from the pot into a small saucepan. Add the hoisin sauce and the dissolved tapioca flour.
  8. Heat the saucepan over medium heat until it boils. Lower the heat and simmer for another minute or 2 until it has thickened to the consistency of a gravy.
  9. Transfer the shredded pork to a mixing bowl and pour in the sauce. Mix this in thoroughly, then let it cool completely.
  10. To make up the pies, roll the pastry out to a thickness of 3 mm or 1 eight of an inch.
  11. Cut circles of 10cm or 4 inches in diameter from the pastry.
  12. Dip your finger in a bowl of water and wet the edge of one of the circles. Place a heaped fork of the pork in the center of the pastry.
  13. Use the fork to lift one edge of the pastry and fold this over the filling. Use your fingers to lightly seal the edge of the pie.
  14. Repeat this until all of the pies are formed.
  15. At this stage, you can freeze the pies in an airtight container separated by sheets of baking paper.
  16. To bake the pies from fresh or frozen, preheat your oven to 200c or 400f.
  17. Transfer the pies to a lightly greased baking sheet and brush them with the egg wash.
  18. Bake the pies for 20 minutes until golden.
  19. Remove the pies from the oven, transfer them to platters and serve immediately.


Snack Platter Catering – Part 18 – Chinese Sausage Steamed Buns – Chinese Steamed Buns Finger Foods

steamed buns,chinese steamed buns,chinese sausage steamed buns,how to make steamed buns,steamed buns with chinese sausage, how to make chinese steamed buns, steamed pork bun, chinese steamed buns filling, chinese steamed buns recipe, steamed bao, chinese steamed pork bun recipe, chinese steamed buns with pork filling, chinese steamed buns without yeast, homemake chinese steamed meat buns


Snack Platter Catering - Part 18 - Chinese Sausage Steamed Buns - Chinese Steamed Buns Finger Foods
Author: 
Recipe type: Finger Foods / Snack Foods / Cocktail Snack Foods / Dimsum
Cuisine: Chinese
Serves: 16
 
These Chinese sausage steamed buns are awesome. Rich sausage wrapped in a tender soft pastry and steamed to juicy perfection are what memories are made of.
Ingredients
  • 1 Cup Self-raising flour
  • 10ml Baking powder
  • 10ml Caster sugar
  • 15g Softened butter
  • 75ml Warm milk
  • 64cm of Chinese sausage
  • Roasted sesame oil
Instructions
  1. Place the self raising flour, baking powder and caster sugar in a mixing bowl.
  2. Add the softened butter and rub this into the flour thoroughly until the flour resembles bread crumbs.
  3. Pour in the warm milk and mix this using a wooden paddle until all of the milk has been absorbed into the flour.
  4. Get in there with your hands and start compressing the dough until you have a complete ball of dough and all of the loose bits are incorporated.
  5. Turn the dough out and knead it on your work surface for 2 minutes.
  6. Wrap the dough in cling wrap and let it rest for 30 minutes.
  7. In the meantime, cut the sausage into 4cm lengths, or just less than 2 inches. If you can't find Chinese sausage, you can substitute this with a cured Italian sausage like Cabanossi.
  8. In addition cut 16 squares of baking parchment.
  9. Unwrap the dough and roll it into a sausage shape. Cut the dough into 16 equal pieces. Roll each piece into a snake of about 12 cm long, or 5 inches.
  10. Roll each snake of dough in a spiral around each piece of sausage. Place each one on a piece of parchment and transfer them to your steamer. You will need to use both tiers of your steamer, or steam 2 batches.
  11. Place the steamer over a wok of rapidly boiling water and steam the buns for 15 minutes.
  12. Remove the steamer from the heat and transfer the buns to serving platters. Brush the buns with roasted sesame oil and serve immediately.


Snack Platter Catering – Part 17 – Creamy Garlic Snails on Skewers – Garlic Snails as Finger Food!!!

garlic snails,creamy garlic snails,how to make garlic snails,homemade garlic snails,escargot in garlic sauce,escartgot garlic butter,garlic snails on skewers, snails, escargot, garlic, french snails, garlic snails french, escargot recipe,garlic snails recipe,snails in garlic butter recipe,creamy garlic snails recipe,best recipe garlic snails,making garlic snails,finger foods garlic snails,fancy finger foods,fancy snack platter foods


Snack Platter Catering - Part 17 - Creamy Garlic Snails on Skewers - Garlic Snails as Finger Food!!!
Author: 
Recipe type: Finger Foods, Cocktail Snacks, Superbowl Snacks
Cuisine: French
Serves: 12
 
In our previous episode we cooked deep fried bacon wrapped snails. Today we're going a little more traditional with creamy garlic snails, served on skewers to make them finger food friendly.
Ingredients
  • 36 Medium snails
  • 50g Butter
  • 15ml Crushed garlic
  • 60ml Cream
  • 2.5ml Cornflour dissolved in a little water
Instructions
  1. Drain the snails in a colander and rinse them thoroughly under running water.
  2. Transfer the snails to a dish towel and pat them dry.
  3. To continue, measure out the butter and chopped garlic, along with the cream. Dissolve the cornflour in a little water.
  4. Cut the bread fingers from a loaf of farm style, or light rye bread.
  5. Heat your pan over medium high heat and add the butter. When the butter is bubbling, add the snails. Fry the snails for 5 minutes.
  6. Add the garlic to the snails and continue to fry for a further 60 seconds.
  7. Pour in the cream and stir this until totally combined. Add the corn flour to the pan and stir this in.
  8. Allow the pan to simmer for 60 seconds before removing it from the heat.
  9. Using a pair of tongs, thread 2 to 3 snails onto each toothpick.
  10. Transfer the skewers to single serving bowls along with the bread fingers. Top each skewer with a little of the creamy garlic sauce and serve immediately.


Snack Platter Catering – Part 16 – Deep-Fried Snails / Deep-Fried Escargot – Heaven on Earth!!!

escargot,snails,how to cook escargot,how to cook snails,deep-fried snails,deep-fried escargot,deep-fried bacon-wrapped snails,deep-fried bacon-wrapped escargot,recipe for snails,recipes for escargot, escargot recipes, how to cook escargot, deep fried escargot, deep fried escargot recipe, escargot bourguignon, snails escargot, best escargot recipes, what does escargot taste like, how to eat escargot, escargot recipe without shells, award winning escargot recipe, award winning snail recipe


Snack Platter Catering - Part 16 - Deep-Fried Snails / Deep-Fried Escargot - Heaven on Earth!!!
Author: 
Recipe type: Finger Foods, Snack Foods, Cocktail Snacks, Entre's
Cuisine: French
Serves: 40
 
Deep-fried escargot / snails wrapped in bacon are quick and easy to make in large quantities and will lend that touch of class to your party.
Ingredients
  • 10 Rashers streaky bacon
  • 40 Snails / escargot
  • ¾ Cup cornflour
  • 1 Cup all-purpose flour
  • 2 Eggs, lightly beaten
  • 40 Toothpicks
Instructions
  1. Drain the snails in a colander and rinse them thoroughly under running water.
  2. Transfer the snails to a dish towel and pat them dry.
  3. Stack the rashers of bacon and cut them in half across the grain. Cut the 2 stacks in half along the length.
  4. To make up the skewers, wrap a single snail in a piece of bacon, then drive a toothpick through the parcel. Continue with this until all of the skewers are complete.
  5. For the coating measure out the cornflour, all-purpose flour and lightly beat the eggs in a tumbler.
  6. Dust a large platter with a little of the all-purpose flour to prevent the skewers from sticking to the plate while they set.
  7. To coat the skewers, dredge a skewer in the cornflour to get a good coating. Dip the skewer in the egg making sure to wet all of the cornflour.
  8. Dredge the skewer in the all-purpose flour to get a good solid coating, then transfer the skewer to the platter to set.
  9. Allow the coating to set for 20 minutes.
  10. To fry the skewers, half fill a large frying pan with oil and heat this to 180c or 350f. Carefully drop the skewers into the oil and fry them for 3 minutes, stirring gently halfway through.
  11. Depending on the quantity of snails you're frying and the size of your pan, you may have to fry multiple batches.
  12. Use a slotted spoon to remove the skewers from the oil and drain them on kitchen paper.
  13. Transfer the snails to communal platters or single serving plates and serve immediately.


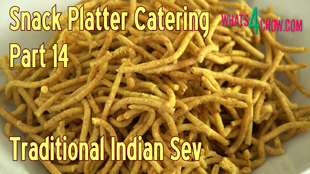
Snack Platter Catering – Part 14 – Traditional Indian Sev – Spicy Deep-Fried Chickpea Noodles

sev,traditional indian sev,sev recipe,traditional indian sev recipe,how to make sev,how to make traditional indian sev,make sev at home,how to make homemade sev,finger foods,snack foods,cocktail snack foods,cocktail party food recipes,superbowl recipes,party snack foods,spicy indian sev,how to make spicy indian sev,chickpea noodles,deep-fried chickpea noodles,how to make dough for sev,sev dough recipe


Snack Platter Catering - Part 14 - Traditional Indian Sev - Spicy Deep-Fried Chickpea Noodles
Author: 
Recipe type: Snack Food / Finger Food / Party Food / Superbowl Snacks
Cuisine: Indian
Prep time: 
Cook time: 
Total time: 
 
In the realm of snack platter catering, Sev is another lifesaver recipe that can be made way in advance in any quantity. This spicy deep-fried chickpea noodle is an all-time favorite at parties!!!
Ingredients
  • 1 Cup Chickpea flour
  • 1.25ml Tsp Fine black pepper
  • 2.5ml Salt
  • 1.25ml Turmeric
  • 1.24ml Chilli powder
  • 15ml Hot oil
  • 60ml Water
Instructions
  1. Place the chickpea flour, black pepper, salt, turmeric, and chilli powder in a mixing bowl. Stir this together until combined.
  2. Measure the oil in a small measuring glass. Place the glass in a bowl and pour boiling water into the bowl to surround the oil. Allow the oil to heat up for 3 minutes.
  3. Pour the oil into the flour mixture and stir this in until totally combined, and the flour resembles rough breadcrumbs.
  4. Pour in half of the water and stir this in until totally combined.
  5. Pour in the rest of the water and stir this in until you have a thick sticky paste, resembling peanut butter.
  6. Rub your hands with oil and compress and work the dough into a smooth ball. For the best results, let this rest for 30 minutes before continuing.
  7. In the meantime, half fill a large pan with oil and heat this to 190c or 375f and rub a coating of oil onto the inside and outside of your potato ricer.
  8. Once the oil reaches temperature, load the dough into the ricer and press this over the oil. As the dough comes to an end, you may have to cut the hanging strands off from the surface of the ricer using a knife.
  9. Allow the noodles to fry for 2 minutes, turning halfway through.
  10. Remove the noodles using a slotted spoon and drain them on kitchen paper.
  11. Allow the sev to cool for 15 minutes before separating and breaking into manageable strands. Some of strands may be stuck together, but they will come apart during this process.
  12. If you double or triple this recipe, divide the dough accordingly and process in batches.
  13. Transfer the sev to serving nowls and serve as required. To store pre-prepared sev, place it in air tight containers in a cool place.


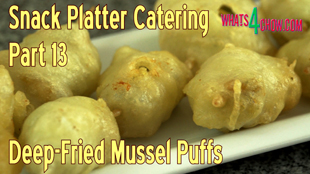
Snack Platter Catering – Part 13 – Deep Fried Mussel Puffs. Crispy Deep-Fried Mussels!!!

deep-fried mussels,crispy deep-fried mussels,finger foods,snack foods,finger food recipes,snack food recipes,cocktail party snack recipes,how to make deep-fried mussels,make deep fried mussels at home,deep-fried mussels snack food,deep-fried mussels entre',deep-fried mussels party food,superbowl snack recipe,quick deep-fried mussels recipe,easy deep fried mussels recipe,how to deep-fry mussels,deep-fried mussels superbowl


Snack Platter Catering - Part 13 - Deep Fried Mussel Puffs. Crispy Deep-Fried Mussels!!!
Author: 
Recipe type: Finger Food / Snack Food / Superbowl Food / Seafood / Entre's
Prep time: 
Cook time: 
Total time: 
Serves: 40-50
 
Deep fried mussels in a light, crispy batter will have everyone lining up for more. This recipe is quick and easy and tastes like heaven.
Ingredients
  • 90-120 Mussels, shelled and cleaned
For the Batter
  • 150g All-purpose flour
  • 75ml Tapioca flour
  • 7.5ml Baking powder
  • 2.5ml Salt
  • 235ml Water
  • 30ml Oil
Instructions
  1. Place the all purpose flour, tapioca flour, baking powder and salt in a mixing bowl. Stir these briefly to combine, then pour in the oil and water. Whisk this until it is smooth. Set this aside to rest for 30 minutes.
  2. Pour the mussel meat out onto a dish towel and gently pat it dry. Thread the mussels onto toothpicks. The number of mussels on each skewer will vary depending on the size of the mussels. You want to fill just over half of each toothpick.
  3. Whisk the batter again briefly. Half fill a large pan with oil and heat it to 190c or 375f. Dip the mussel skewers in the batter to coat the mussel meat and carefully lower them into the oil.
  4. Allow the skewers to fry for 3 to 4 minutes until crisp and lightly golden. Use a slotted spoon to remove them from the oil and drain on kitchen paper.
  5. This quantity of batter will allow you to make 40 to 50 skewers.
  6. Transfer the mussel puffs to platters and serve immediately.


Snack Platter Catering – Part 12 – Gourmet Cocktail Pizzetti – Simple, Quick Mini Pizza!!!

pizzetti,mini pizza,finger foods,snack platter foods,cocktail pizza,cocktail pizza recipe,gourmet mini pizza,quick mini pizza,quick pizzetti,easy mini pizza,easy pizzetti recipe,finger food recipes,cocktail party food recipes,snack food recipes,superbowl recipes,snack platter catering recipes,how to make pizzetti,how to make mini pizza,homemade mini pizza recipe,homemade pizzetti recipe


Snack Platter Catering - Part 12 - Gourmet Cocktail Pizzetti - Simple, Quick Mini Pizza!!!
Author: 
Recipe type: Finger Foods / Snack Foods / Pizza
Cuisine: Italian
Serves: 24
 
These rustic pizzetti will grace any snack platter occasion. Home made no knead sour dough bases topped with well aged salami, cocktail tomatoes, mozzarella and mature cheddar cheese all adds up to a supper tasty treat.
Ingredients
For the Dough
  • 500g All purpose flour
  • ¼ Tsp Dry yeast
  • 2 Tsp Salt
  • 1½ Cups Water
For the Topping
  • 120g Mozzarella, grated
  • 120g Mature cheddar, grated
  • 48 Slices of cocktail tomato
  • 150g Salami, finely cubed
  • Salt & pepper to taste
  • Dried Italian herb mix (optional)
Instructions
  1. Pour the flour into a large mixing bowl and add the yeast and salt. Pour in the water and mix this until the water is totally combined. Cover the bowl with clingwrap and allow this to stand at room temperature overnight, or 18 hours.
  2. The following day, grate your cheeses, slice the tomatoes and dice the salami.
  3. Uncover the dough. You will notice that is well risen and has developed an amazing amount of gluten.
  4. Cover a 2 baking sheets with foil and give them a light coating of oil.
  5. Drop 12 heaped tablespoons of dough onto each sheet.
  6. Rub your hands with oil and press down and shape the pizzetti bases. Don't be too concerned about the shapes that materialize, you want them to look rustic and hand made.
  7. Spread a small handful of the mixed cheese onto each base.
  8. Sprinkle the bases with dried Italian herb mix (optional)
  9. Follow this 2 slices of tomato on each pizzetti. Divide the diced salami amongst all of the bases, and follow this with another sprinkling of cheese.
  10. Finish this off with a good grinding of cracked black pepper and salt to taste.
  11. Bake this in a preheated oven at 250c or 480f until golden, and the dough is crispy on the edges.
  12. Remove the pizzetti from the oven, transfer to platters and serve immediately.


Snack Platter Catering – Part 11 – Cocktail Bacon & Cheese Burgers!!!

mini beef burgers,cocktail burger recipe,cocktail bacon and cheese burger,finger foods,cocktail snack food,Hamburger (Food),Slider (Food),Mini,Burger,party burgers,finger food burgers,snack burgers,slider burgers,bacon and cheese slider burgers,how to make cocktail burgers,cocktail burger buns,mini burger buns,cocktail party burgers,bacon and cheese cocktail party burgers


Snack Platter Catering - Part 11 - Cocktail Bacon & Cheese Burgers!!!
Author: 
Recipe type: Snack Food / Finger Food / Cocktail Party Food / Superbowl Food
Cuisine: American
Serves: 20
 
Mini beef patties studded with mature cheddar and laminated in hickory smoked bacon - all of this on a fresh cocktail burger bun!!!
Ingredients
For 20 Cocktail Burger Buns
  • 1 Batch quick burger bun dough (click here for recipe)
  • 1 Egg yolk mixed with 1 Tbs water
  • Poppy seeds and sesame seeds
For 20 Cocktail Bacon-Laminated Cheesy Beef Patties
  • 900g Ground beef in 20 x 45g portions
  • 100g Mature cheddar cheese cut into 1cm cubes
  • Salt to taste
For the garnish
  • Sliced pickled gherkin
  • Baby spinach leaves
  • Sliced tomato
To Finish
  • 20 Toothpicks
Instructions
  1. Place the yeast in a mixing bowl and pour in the warm water and the sugar. Pour the oil in and set this aside for 10 minutes.
  2. After 10 minutes the mixture will be very frothy. Add the salt and lightly beaten egg and stir this in.
  3. Place the flour in a large mixing bowl and pour in the yeast mixture. Using a wooden paddle stir this together until a dough comes together and comes away from the sides of the bowl.
  4. Turn the dough out onto s floured work surface, flour the top of the dough as well, then proceed to knead for 5 minutes sprinkling with a little more flour every time it gets too sticky.
  5. Once the dough is smooth and elastic, roll it into a sausage shape and cut it into 20 equal pieces.
  6. Roll the pieces into balls and transfer them to a lightly greased baking sheet.
  7. Brush the buns with an egg wash consisting of an egg yolk whisked together with a tablespoon of water.
  8. Sprinkle the tops of the buns with sesame seeds and poppy seeds and bake the buns in a preheated oven at 220c or 425f for 8 to 10 minutes until well risen and browned.
  9. Remove the buns from the oven and transfer them to a wire rack to cool.
  10. For the burger patties, cut the cheddar cheese into 1cm blocks or just less than half an inch, and cut the streaky bacon rashers into thirds.
  11. Portion the beef into 45g portions. Working with one portion, flatten it into a disc 1cm thick. Press a block of cheddar into the center of the meat.
  12. Lightly press a piece of bacon onto either side of the patty. The heat of the pan will laminate the bacon to the beef and contain the melted cheese.
  13. For the garnish, slice a pickled gherkin at an angle, trim the stems from a handful of baby spinach leaves, and slice 20 slices of tomato.
  14. In preparation, cut the buns and lightly butter both sides. Place a slice of tomato on each bun followed by a couple of spinach leaves.
  15. Heat your pan over medium high heat and fry the patties in batches for 3 minutes per side until well browned and the cheese is visibly melted inside the bacon and beef.
  16. Remove the patties from the pan and transfer a patty to each bun. Top each patty with a couple of slices of gherkin, put the lids on the burgers and secure them with toothpicks.
  17. Transfer the burgers to platters and serve immediately.


Scroll to top

Kitchen Conversions

Convert:
Masses
to:
Volumes
to:
Temperatures
to:
Lengths
to: