Homemade Tequila & Lime Mustard – Mexican Mustard!!!???

tequila and lime mustard,how to make mustard at home,homemade mustard,mexican mustard,how to make hot mustard,hot mustard recipe,mustard recipe,making mustard at home,gourmet mustard recipe,unusual mustard recipe,how to make mustard for pork,mexican mustard recipe,how to make mustard video recipe,homemade mustard video recipe


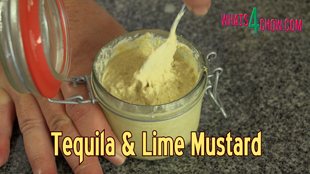
Homemade Tequila & Lime Mustard - Mexican Mustard!!!???
Author: 
Recipe type: Condiments & Sauces
Cuisine: Mexican
Prep time: 
Total time: 
 
Tequila and lime mustard gives a whole new twist to one of life's most popular condiments.
Ingredients
  • 60g Hot English mustard powder
  • 20g Whole yellow mustard seeds
  • 30ml Tequila
  • 50ml Lime Juice
  • 1.25ml Salt
  • 1.25ml Sugar
  • White wine vinegar to thin (quantity will vary from batch to batch)
Instructions
  1. Combine the yellow mustard powder and seeds, and measure out the salt, fresh lime juice and tequila.
  2. Place all of these in a tall jug and use your stick blender to grind the ingredients to a paste. As you do this the mustard will absorb more and more of the liquid.
  3. Add a little white wine vinegar every time it gets too thick. Continue blending until the paste is quite smooth.
  4. Transfer the mustard to a clean jar and refrigerate overnight.
  5. The following day the mustard will be far thicker after autolysing overnight. To thin the mustard, add more white wine vinegar bit by bit, stirring it in thoroughly as you go. When you reach your desired consistency, return the mustard to the refrigerator.
  6. The mustard will keep indefinitely in your refrigerator. For an interesting twist, try adding a little finely chopped pickled jalapeno.


Smoked Lemon & Herb Lamb Chops. Marinated Lemon & Herb Lamb Cutlets Hot-Smoked to Perfection!!!

lemon and herb lamb chops,barbecue lemon and herb lamb chops,hot-smoked lemon and herb lamb chops,smoked lamb chops,how to smoke lamb chops,how to barbecue lamb chops,lemon and herb lamb chops recipe,lemon and herb lamb cutlets on the barbecue,how to smoke lamb chops,how to hot-smoke lamb chops,best barbecue lamb chops recipe,herby lemon lamb chops


Smoked Lemon & Herb Lamb Chops. Marinated Lemon & Herb Lamb Cutlets Hot-Smoked to Perfection!!!
Author: 
Recipe type: Lamb / Smoking / Barbecue
Prep time: 
Cook time: 
Total time: 
Serves: 2-4
 
In todays episode, part 9 of the series on smoking and curing foods, I am using the Smokedaddy cold smoke generator attached to a regular closed gas barbecue to hot smoke a batch of delectable lamb loin chops.
Ingredients
  • 8 Lamb loin chops
  • 60ml Oil
  • Juice of 1 medium lemon
  • Zest of 1 medium lemon
  • 2.5ml Garlic powder
  • 1.25ml Salt
  • 1.25ml Dry basil
  • 1.25ml Dry rosemary
  • Generous grind of cracked black pepper
Instructions
  1. To start, combine the oil, lemon juice, lemon zest, garlic powder, salt, dried basil and dried rosemary in a jug.
  2. Whisk these vigorously until the mixture is totally emulsified.
  3. Grind in a generous dose of cracked black pepper and your ready to go.
  4. Arranger your lamb loin cuts in a pan and pour the marinade over the lamb. Spread it out evenly to ensure the meat is totally covered. Place the pan in your refrigerator for 4 hours.
  5. Turn the meat over half-way through this time.
  6. After marinating, remove the chops from your the refrigerator.
  7. Lift half of the chops up onto their fatty edge and drive 2 skewers through the chops just above the fatty strip. Repeat this with the remaining chops.
  8. Heat your barbecue to medium high and get the smoke generator running. Within a few minutes the smoke will be billowing out and you can place the lamb fatty side down in the barbecue.
  9. Close the lid and allow the fatty strip to cook for 6 to 8 minutes.
  10. Open the barbecue, remove the skewers from the meat, lie the the chops on their sides and continue to barbecue for 4 to 6 minutes per side (with the barbecue lid closed), depending on your preference of doneness.
  11. Transfer the lamb to platters and serve immediately with the accompaniments of your choice.


Apple Wood Smoked Chicken Thighs – Part 4 of Curing & Smoking Meats – Smoke Daddy Smoke Generator!!!

how to smoke chicken thighs,how to smoke chicken thighs in your smoker,making smoked chicken thighs,best smoked chicken thighs,making smoked chicken thighs using the smoke daddy smoke generator,recipe for smoked chicken thighs,best hot smoked chicken thighs recipe,hot smoking chicken, smoked chicken leg quarters, smoking leg quarters, competition-style barbecue chicken thighs, smoked chicken rub


Apple Wood Smoked Chicken Thighs - Part 4 of Curing & Smoking Meats - Smoke Daddy Smoke Generator!!!
Author: 
Recipe type: Chicken / Poultry / Barbecue / Smoked Meats
Prep time: 
Cook time: 
Total time: 
Serves: 6-12
 
These apple-wood smoked chicken thighs are absolutely amazing and will certainly have your guests talking for ages.
Ingredients
  • 8-12 Chicken thighs
  • 60ml Syrup (corn syrup, cane syrup or honey)
  • 30ml White wine vinegar
  • Peppadew Piquant Pepper & Cilantro Seasoning (if you can't find this look below for the homemade version which will closely approximate the taste)
For the Homemade Rub
  • 15ml Fine Himalayan Salt - or any non-iodated salt
  • 30ml Red Bell Pepper Falkes
  • 10ml Onion Powder
  • 10ml Garlic Powder
  • 30ml Powdered Dried Cilantro Leaves
  • 10ml Chilli Flakes
  • 5ml Ground Black Pepper
  • 10ml Lemon Pepper
  • 10ml Powdered Sugar
Instructions
  1. For the coating, pour the syrup and white wine vinegar into a jug and mix until totally combined. You can use cane syrup, corn syrup or even honey.
  2. Place the chicken thighs in a large mixing bowl and pour the syrup mixture over the chicken. Mix the chicken around in the bowl until everything is well coated.
  3. Cover the bowl and allow this to stand for 30 minutes.
  4. Transfer the chicken to a rack in a pan and sprinkle both sides of the thighs liberally with the seasoning. I am using my favorite Peppadew Cilantro seasoning. Peppedew products are sold in USA, UK and Australia, but if you can't find it, I have included a home made version in the printable recipe above.
  5. Lift the rack up and balance it diagonally across the corners of the pan. This will allow the smoke to reach the underside of the chicken effectively, while the pan becomes a drip-tray.
  6. Load up your smoker with apple wood chunks and bring it up to a temperature of 135c or 275f. Place the chicken in the smoker and allow this to smoke for 2 to 2.5hrs until the internal temperature reaches 76c or 170f. Use a reliable probe thermometer to measure the internal temperature, and measure from the thickest part of the largest thigh.
  7. Remove the amazingly aromatic and tasty thighs from the smoker and serve immediately with the accompaniments of your choice.


4th of July Cookout – Brandy & Coke T Bone Steak – Perfectly Tender Barbecue T-Bone!!!

bbq t-bone,barbecue t-bone,barbecue t-bone steak,how to barbecue t-bone steak,marinated t-bone steak,how to marinate t-bone steak,how to barbecue t-bone steak,grilled t-bone steak,how to grill t-bone steak,brandy and coke t-bone steak,how to injection marinate t-bone steak,bbq grilled t-bone,thick cut t-bone barbecue, t-bone steak (food), grilling (culinary technique), barbecue t-bone steak recipe, grilled t bone steak marinade


4th of July Cookout - Brandy & Coke T Bone Steak - Perfectly Tender Barbecue T-Bone!!!
Author: 
Recipe type: Barbecue / Steak / Beef
Prep time: 
Total time: 
Serves: 4
 
This Brandy & Coke T-Bone is awesome!!! Injection marinated thick-cut t-bone is absolutely tender and will be the talk of the town!!!
Ingredients
For the Brandy & Coke Solution
  • 250ml Coke
  • 125ml Brandy
  • 15ml Salt
For the Steak
  • 1 x T-Bone steak, cut 80mm / 3¼ inch thick
  • Salt and cracked black pepper
Instructions
  1. Get your butcher to cut the t-bone, from young beef, to a thickness of 80mm or just over 3 inches.
  2. Combine the brandy, coke and salt and stir this until all of the salt has completely dissolved.
  3. Draw 50ml or 2 ounces of the solution into you meat syringe and inject this into the t-bone at intervals of 25mm or 1 inch, first through the fatty side, then on the fillet side.
  4. Place the steak in a tray, pour any overrun solution over and allow this to stand for 20 minutes.
  5. After resting, season all the sides liberally with salt and cracked black pepper.
  6. Heat your barbecue to medium high heat. Place the steak with fat side down directly over the heat and barbecue this for 5 minutes until the fat is well browned. Baste the steak often with the brandy mixture.
  7. Turn the steak to stand on the bone and cook for a further 5 minutes, basting often as you go.
  8. Turn the steak onto one side and continue to barbecue flipping the steak every five minutes.
  9. A timing of 20 minutes (4 turns) will give you a rare steak, 30 minutes (6 turns) medium rare and 40 minutes (8 turns) will result in medium.
  10. Continue to baste all the way through.
  11. Once the steak is done to your liking, remove from the heat and allow the t-bone to rest for 5 minutes.
  12. Cut both sides of meat from the bone and slice each into 4 slices before serving.


4th of July Cookout – Slow Barbecue Brisket on Your Gas Barbecue – Super Tasty, Super Tender!!!

barbecue brisket,how to barbecue brisket, smoked meat smoking bbq brisket, smoking bbq brisket, texas style bbq, barbecue brisket recipes, barbecue brisket rub, barbecue brisket temperature, barbecue brisket recipe gas grill, barbecue brisket in oven, barbecue brisket marinade, barbecue brisket calories, curing brisket for barbecue,how to cure brisket,flavoring brisket,marinating brisket,how to tenderise brisket


4th of July Cookout - Slow Barbecue Brisket on Your Gas Barbecue - Super Tasty, Super Tender!!!
Author: 
Recipe type: Barbecue / Beef Brisket
Cuisine: american
Prep time: 
Cook time: 
Total time: 
Serves: 6-8
 
Barbecue Brisket is one the tastiest meats around, provided it is prepared and cooked correctly. It certainly is a labor of love, but well worth the effort!!!
Ingredients
  • Brisket, about 6lbs or 2.7kg
For the Curing Brine
  • 5lt Filtered water
  • 25g Saltpeter
  • 90g Sugar
  • 30g Bicarbonate of soda
  • ½ Tsp black peppercorns
  • 3 Bay leaves
  • 5 Whole allspice (pimento)
  • 3ml Ground ginger
  • 3ml Garlic powder
  • 5ml Smoked hot paprika
For the sprinkle
  • 1 Tsp Garlic powder
  • 1 Tsp Ground ginger
  • 1 Tsp Cayenne pepper
  • 2 Tsp Sugar
For Smoking
  • 1 Cup Oak barrel chips, damp
Instructions
  1. To make the curing brine, add the salt to the water and pour in the saltpeter, sugar, bicarbonate of soda, black peppercorns, bay leaves, whole allspice, ground ginger, garlic powder and smoked hot paprika.
  2. Bring this to a simmer then quick cool the brine by floating the pot in a sink of cold water.
  3. While the brine cools, trim off any excess fat from the brisket.
  4. Place the meat in a large non-reactive container and pour in the curing brine. Put the lid on the container and allow this to cure for a full 48 hours in your refrigerator.
  5. After 48 hours, remove the brisket from the brine and pat it dry with kitchen paper.
  6. Combine the garlic powder, ground ginger, cayenne pepper and sugar and sprinkle half of this over both sides of the meat.
  7. Wrap the brisket in foil and place this on a rack in a roasting pan.
  8. Light one burner in you barbecue and allow the barbecue to warm up to 98c or 210f with the lid closed.
  9. Place the roasting pan on the other side of the grill, close the lid and allow this to slow roast for 10 hours undisturbed. Keep an eye on the temperature from time to time, making sure to keep it at 98c or 210f.
  10. Remove the meat from the barbecue and remove the foil. Return the meat to the rack and season it again on both sides with remaining half of seasoning.
  11. In addition, have a cup of damp smoking wood chips prepared and placed in a disposable aluminium tray.
  12. Reheat the barbecue to 300f or 150c. You may have to light a second burner. Place the wood chips directly over the lit burners, and return the meat to the grill.
  13. Close the lid and allow this to smoke for 60 minutes. Transfer the meat from the pan to the grill over direct heat and finish the process by grilling for 15 minutes per side until the meat is well colored and has formed a good crust.
  14. Remove the meat from the grill and allow it to rest for 5 minutes before carving and serving.


Barbecue Mutton Ribs – Mediterranean-Style Marinated Mutton Ribs Barbecued to Perfection!

barbecue mutton ribs,mediterranean barbecue mutton ribs,marinated mutton ribs,tender marinated mutton ribs,how to barbecue mutton ribs,how to marinate mutton ribs,how to barbecue mutton ribs,barbecue lamb ribs,mediterranean barbecue lamb ribs,marinated lamb ribs,tender marinated lamb ribs, barbecue lamb ribs, barbecue lamb ribs recipe, bbq mutton ribs recipe, barbecue lamb ribs oven, mutton ribs barbecue


Barbecue Mutton Ribs - Mediterranean-Style Marinated Mutton Ribs Barbecued to Perfection!
Author: 
Recipe type: Mutton / Lamb / Barbecue
Cuisine: Mediterranean / Greek
Prep time: 
Cook time: 
Total time: 
Serves: 2-4
 
Mutton ribs are full of awesome flavor, however they do require an acidic oil marinade and an extended cooking time to tenderise. These Mediterranean-style mutton ribs will have the crowds cheering!!!
Ingredients
  • 1.5kg Mutton or Lamb ribs (skin on)
For the Marinade
  • 30ml Lemon juice
  • 60ml Oil
  • 1½ Tsp Finely chopped garlic
  • 1 Tbs Finely chopped fresh marjoram
  • 1 Tbs Salt
  • 1 Tsp Sugar
Instructions
  1. To start you will need 2 racks of mutton ribs totaling about 1.5kg. Place them on your chopping board and score the skin into blocks of 1 inch or 25mm square. The skin contracts dramatically while grilling, and this scoring stops the racks from curling up and deforming during cooking.
  2. In a jug, combine the sugar, salt, finely chopped garlic, finely chopped fresh marjoram, oil and lemon juice. Whisk this vigorously until the salt and sugar have dissolved and the mixture has totally emulsified.
  3. Place the mutton in a large pan skin side up. Pour the marinade over the racks and brush it into the meat. Place the pan in your refrigerator and allow this to marinate for at least 4 hours, preferably overnight.
  4. Heat your barbecue to medium heat and grill the mutton ribs with the lid closed for 60 minutes turning every 15 minutes. The temperature should read around 150c. Use any remaining marinade to baste the mutton during the cooking process.
  5. Be aware that the ribs have a high fat content that can lead to flare-ups. If this happens, relocate the ribs to another part of the grill surface until the flames die. Turn the heat down slightly and return them to their original position.
  6. Remove the ribs from the grill and cut them apart before serving with the accompaniments of your choice.


Authentic Tandoori Chicken. Tradition Indian Tandoori Chicken, Spiced and Grilled to Perfection.

tandoori chicken, Tandoori Chicken (Dish), how to make tandoori chicken, tandoori chicken masala, baked tandoori chicken, Indian style tandoori chicken, indian cooking, spicy chicken recipe, chicken tandoori, indian chicken recipe, Tandoori Chicken Recipe, tandoori chicken curry recipe, tandoori chicken tikka recipe, tandoori chicken indian recipe, tandoori chicken marinade, tandoori chicken recipe sanjeev kapoor


Authentic Tandoori Chicken. Tradition Indian Tandoori Chicken, Spiced and Grilled to Perfection.
Author: 
Recipe type: Indian Curry
Cuisine: Indian
Prep time: 
Cook time: 
Total time: 
Serves: 4
 
In this first episode of 2015 we make authentic Tandoori Chicken. This is the first in a 2-part series covering Tandoori Chicken and Butter Chicken.
Ingredients
  • 1.4kg Chicken
For the Paste
  • 50g Garlic paste
  • 10g Ginger paste
  • 30ml Lemon juice
  • 25g Chilli paste
  • 5ml Salt
For the Marinade
  • 5g Cumin Powder
  • 10g Garam Masala
  • 25g Ginger paste
  • 30ml Lemon Juice
  • 50ml Oil
  • 25g Chilli paste
  • A few strands of saffron
  • 20ml Yoghurt
To Serve
  • Sliced onion
  • Chaat Masala to sprinkle
  • Cream
  • Lemon wedges
Instructions
  1. Cut away any excess skin from the neck and butt of the chicken and remove the wing tips. Slice through the breast bone and open the chicken up.
  2. Turn the chicken oven, and with a downward thrust, dislocate the pelvis of the bird.
  3. Using a sharp knife, cut deep incisions into the thighs, drumsticks and breast of the chicken.
  4. In a bowl, combine the garlic paste, ginger paste, lemon juice, chilli paste and salt.
  5. Brush all of the paste onto the chicken making sure to get it into the incisions as well. Let this stand for 30 minutes.
  6. While the chicken stands, combine the cumin powder, garam masala, ginger paste, lemon juice, chilli paste, saffron, oil, salt and yoghurt. Mix this until the oil is totally combined.
  7. Spoon this mixture over the chicken, then allow this to marinate in your refrigerator for 6 hours.
  8. Remove the chicken from the refrigerator, scoop up any over-run marinade and pour it back onto the chicken.
  9. Lift the chicken up, slide a rack underneath, then bake the chicken in a pre-heated oven at 180c or 350f for 80 minutes.
  10. Remove the chicken from the oven, cut it into portions and serve garnished with fresh onion slices, chaat masala, a drizzle of cream and a few lemon wedges.


Cheese Injected Beef Rump Roast. Prime Beef Rump Injected with Cheese Wizz, Rubbed with Chilli Sugar and Roasted to Perfection.

beef rump roast,perfect beef rump roast,how to roast beef rump,how to roast beef rump in your oven,cheese injected beef rump roast,beef rump roast recipe,cheesy beef rump roast, beef rump roast recipe oven, beef rump roast marinade, beef rump roast smoker, beef rump roast pressure cooker, beef rump roast crock pot recipes, best roast beef recipe, beef rump roast slow cooker recipes, the best rump roast, tender rump roast


Cheese Injected Beef Rump Roast. Prime Beef Rump Injected with Cheese Wizz, Rubbed with Chilli Sugar and Roasted to Perfection.
Author: 
Recipe type: Beef
Prep time: 
Cook time: 
Total time: 
Serves: 4-6
 
In todays episode we're going to roast a perfect beef rump roast, injected with Cheese Wizz, rubbed with our special chilli sugar rub. You will nedd to have a meat syringe to inject the cheese. If you don't own one, never fear, they only cost about 10 dollars on eBay.
Ingredients
  • 1.4kg Beef Rump Roast
  • 100g Cheese Whizz (soft spreading processed cheese)
  • 15g Butter
  • 2 Tbs Brown sugar
  • 1 Tbs Salt
  • 1 Tbs Chilli flakes
For the Serving Suggestion
  • 6 Soft sundried tomato halves (the type in olive oil)
  • Feta cheese
Instructions
  1. To start you will need a nice 1.4kg or just over 3 pound rump roast cut. Look for a piece that has good marbling and a fair strip of fat on the edge.
  2. Place the Cheese Wizz in a bowl along with the butter and warm it up in your microwave to soften and liquify the cheese the cheese. Stir this thoroughly until the butter and the cheese are totally combined.
  3. Load half of this into your meat syringe and start injecting the meat with the cheese. Do this by pressing the needle almost all the way through the meat. Start pressing the plunger down while simultaneously withdrawing the needle from the meat. Load the other half of the cheese into the syringe and continue injecting the meat at even spaces until all of the cheese has been injected into the rump.
  4. In a bowl, combine the brown sugar, flaked salt and chilli flakes. Sprinkle these liberally all over the roast and rub them in yo the surface. Be careful not to apply to much pressure as this will force the cheese out of the meat.
  5. Place the roast on a rack in your roasting pan and bake the meat in a preheated oven at 180c or 350f for 90 minutes.
  6. Remove the roast from the oven and allow it to stand for 5 minutes.
  7. Transfer the roast to a carving board and slice the meat into thin slices at an angle across the grain.
  8. You will notice that the whole inside of the meat has been infused with the cheese, and the little cheese that has oozed out during cooking has created a beautiful cheesy crust on the top of the roast.
  9. As a serving suggestion, plate a few slices of the beef, top it with soft sundried tomato, the type preserved in olive oil, then crumble a little feta over the top before serving with the accompaniments of your choice.


Barbeue Minted Lamb Chops. Thick-cut Lamb Chops in Mint Marinade Barbecued to Perfection.

barbecue lamb chops,lamb chops on the barbecue,grilled lamb chops recipe,barbecue minted lamb chops, bbq minted lamb chops,mint marinade for lamb chops,minted lamb chops recipe,how to barbecued minted lamb chops recipe,barebue lamb recipes,lamb chops on the barbecue,how to barbecue lamb chops,barbecue mint lamb chops, Barbeque Flavoured Lamb, Barbecue Flavoured Lamb, Barbecued Marinated Lamb Leg Recipe, Butters and Marinades for the Barbecue, barbecued lamb chops marinade


Barbeue Minted Lamb Chops. Thick-cut Lamb Chops in Mint Marinade Barbecued to Perfection.
Author: 
Recipe type: Lamb / Barbecue
Prep time: 
Cook time: 
Total time: 
Serves: 2
 
How to barbecue the perfect minted lamb chops. Lamb chops need special treatment on the barbecue to be moist and tender - this will show you how to get the best results.
Ingredients
  • 4 Lamb loin chops cut 25mm / 1 inch thick
For the Marinade
  • ¼ Cup Oil
  • 30ml White wine vinegar
  • Generous handful of finely chopped mint
  • Pinch of Salt
  • ½ Tsp Ground white pepper
  • 1 Tbs Sugar
Instructions
  1. Add the finely chopped mint, oil, white vinegar, salt and ground white pepper to a jug and stir these until emulsified.
  2. Place the chops in a small roasting tin and spoon the marinade evenly over the meat. Allow this to marinate in your refrigerator for 2 to 6 hours.
  3. Remove the chops from the refrigerator and rinse most of the mint leaves off of the meat by swishing the chops in the marinade. Reserve the marinade for basting during the cooking process.
  4. Stand the chops up on their fatty side and press 3 skewers through the chops.... 2 just above the fatty strip and one towards the top of the chops.
  5. Flip the chops over and season the fat liberally with salt.
  6. Heat your barbecue to medium high heat and place the chops directly on the grid over the heat with the fatty side down.
  7. Grill the fat for 6 to 8 minutes until it charred crispy and well rendered.
  8. Remove the skewers from the chops and lay them on their sides. Baste liberally with the marinade and grill them for 4 to 6 minutes depending on your preference of doneness. 4 minutes will give you medium rare.
  9. Turn the chops over, baste liberally again and continue to grill for a further 4 to 6 minutes.
  10. Turn again, baste again and grill for 1 minute. Then 1 final turn, baste again and grill for another minute.
  11. Remove the chops from the barbecue and allow them to stand briefly before serving with the accompaniments of your choice.


KFC Chicken Tenders. KFC Chicken Strips the Real Way!!! Homemade KFC Recipes!!!

kfc chicken tenders,kfc chicken strips,deep-fried chicken strips,crispy fried chicken strips,how to make kfc at home,homemeade kfc recipes,original recipe kfc chicken,secret recipe kfc chicken,11 herbs and spices kfc secret recipe,the real kfc recipe, homemade chicken fingers, how to make chicken fingers, chicken finger recipe, chicken strips, how to make chicken strips, homemade chicken strips, kfc chicken tenders recipe


KFC Chicken Tenders. KFC Chicken Strips the Real Way!!! Homemade KFC Recipes!!!
Author: 
Recipe type: Chicken / Poultry / KFC
Cuisine: American
Prep time: 
Cook time: 
Total time: 
Serves: 8-12
 
A few weeks back we did a 3-Part series on KFC. Numerous requests have come in regarding KFC Chicken Tenders, so here it is. If you have not viewed the previous episodes in our KFC series, please click the onscreen link in the video, or the links below and view these first in order to understand the curing process.
Ingredients
  • 8 Fresh chicken breasts
For the Spice Blend
  • 3 Tsp Paprika
  • 2 Tsp Onion salt
  • 1 Tsp Dried sage
  • 1 Tsp Garlic powder
  • 1 Tsp Oregano
  • 1 Tsp Cayenne pepper
  • 1 Tsp Cracked black pepper
  • 1 Tsp Dried basil
  • 1 Tsp Dried marjoram
  • 1 Tsp Dried coriander
For the Curing Brine
  • 100g Dairy or Kosher salt (any non-iodated salt is fine)
  • 1 Tsp Whole black peppercorns
  • 1 Corn of whole allspice
  • 12.5g Saltpetre
  • 1 Tsp Ginger
  • 50g Sugar
  • 15g Bicarbonate of soda
For Coating
  • 3 Cups all-purpose flour
  • 4-6 Eggs
Instructions
  1. Combine the spices for the spice mixture, stir to combine and divide these in half.
  2. Place all of the curing ingredients in a pot along with one half of the spice mixture and pour in 2.5 lt of hot water. Stir until everything has dissolved, then bring it to a boil. Remove the pot from the heat and quick chill it by placing the pot in a sink of cold water.
  3. Place the chicken breasts in a large container and pour in the cooled curing brine. Place the lid on the container and allow this this cure for a full 24 hours in your refrigerator.
  4. After 24 hours, remove the breasts from the brine and slice it at an angle across the grain into slices of 10mm or just less than a half inch thick.
  5. To coat the chicken, combine the spice blend with the flour, and lightly whisk the eggs.
  6. Before you start coating the chicken, sprinkle a layer of the seasoned flour over a large platter. For this quantity of chicken you will need more than one platter.
  7. To continue with the coating, dredge the chicken in the flour mix, then dunk it in the egg, making sure to wet all of the flour.
  8. Dredge the chicken the flour again making sure to get a good solid coating...... then back to the egg making sure to wet all of the flour.
  9. Finally a last coating of flour finishes it off. Transfer the chicken to the platter and continue with the rest of the chicken.
  10. Allow all of the coated chicken to set for 20 minutes before frying.
  11. Fill your pan with oil to a depth of 1 inch and heat this to 160c or 310f and fry the chicken for 4 minutes per side until crispy and golden.
  12. Remove the chicken from the oil and drain any excess oil on kitchen paper. Repeat this until all of the chicken is cooked.


Carne’ Asada – Mexican Marinated Beef Grilled to Perfection by Whats4Chow

carne' asada,mexican marinated beef,how to make carne' asada,carne'asada recipe,learn to make carne' asada, mexican food, Homemade Carne Asada, Carne Asada Tacos, Authentic carne asada, grilled beef, Backyard BBQ, authentic carne asada marinade, carne asada marinade, carne asada seasoning, carne asada taco recipe, carne asada burrito, carne asada burrito recipe, BBQ carne asada, grilling carne asada


Carne' Asada - Mexican Marinated Beef Grilled to Perfection by Whats4Chow
Author: 
Recipe type: Beef / Barbecue
Cuisine: Mexican
Prep time: 
Cook time: 
Total time: 
Serves: 4-6
 
Carne'Asada is a popular Mexican marinated beef dish, thinly sliced very thinly as a filling for tortillas, or served on its own with refried beans on the side.
Ingredients
  • 1kg Skirt, flank or rump tail steak
For the Marinade
  • 4 Cloves garlic, minced
  • 1 Jalapeno chilli, seeded and minced
  • 1 Tsp ground cumin
  • 1 Generous handful fresh coriander, roughly chopped
  • Salt and pepper to taste
  • Juice of 2 limes
  • 2 Tbs White wine vinegar
  • ½ Tsp Sugar
  • ½ Cup Oil
Instructions
  1. Place the beef in a roasting pan or a large shallow tray.
  2. In a jug, combine the minced garlic, jalapeno chilli, ground cumin, fresh coriander, salt and pepper, lime juice, white wine vinegar, sugar and oil.
  3. Mix this until the oil has emulsified, then spoon the marinade evenly over the steak.
  4. Allow this to marinate in your refrigerator for 4 to 6 hours.
  5. Heat your a ribbed skillet on your barbecue or range over medium high heat.
  6. Place the meat with the fat side down and cook it for 8 minutes.
  7. Turn the steak over and cook it for a further 8 minutes. This timing will give you a medium rare result, so you can adjust the times according to your personal preference.
  8. Remove the steak from the skillet and allow it to rest for 5 minutes before slicing into very thin slices and serving.


Marinated Mushrooms. The Magic Ingredient for Toasted Sandwiches, Pizzas and Salads!!!!

marinated mushrooms,how to marinate mushrooms,marinated mushrooms recipe,marinated mushrooms for toasted sandwiches,marinated mushrooms for pizzas,marintaed mushrooms for pizzas, italian marinated mushrooms, marinated mushrooms recipe, marinated mushrooms gordon ramsay, marinated mushrooms for steak, marinated mushrooms calories, marinated mushrooms grilled, marinated mushrooms raw, how to make marinated mushrooms


Marinated Mushrooms. The Magic Ingredient for Toasted Sandwiches, Pizzas and Salads!!!!
Author: 
Recipe type: Accompaniment / Vegetable
Prep time: 
Total time: 
 
How to make quick marinated mushrooms. This ingredient is absolutely magic - it makes pizzas, toasted sandwiches and salads come to life.
Ingredients
  • 6 Mushrooms, sliced
  • 1 Tbs Caster sugar
  • ¼ Tsp Salt
  • ½ Tsp Garlic powder
  • 100ml White wine vinegar
Instructions
  1. Slice the mushrooms and place them in a jug or bowl.
  2. In a separate jug, combine all of the other ingredients and stir until totally combined.
  3. Pour this over the mushrooms, stir together, and allow to marinate for at least 60 minutes before using.


Scroll to top

Kitchen Conversions

Convert:
Masses
to:
Volumes
to:
Temperatures
to:
Lengths
to: