Kyocera Ceramic Ginger and Garlic Grater – Best Ginger and Garlic Grater Ever!


Kyocera Ginger and Garlic Grater  @Whats4Chow 

Grab your ginger and garlic grater here

Hi and welcome back to Whats4Chow.com In today’s episode we’re going to take a look at the Kyocera Advanced Ceramic Ginger and Garlic Grater. Kyocera was kind enough to send me some of their products to try out, and these are my opinions. Kyocera is not paying for this review, and they will not be vetting the video before it goes live.

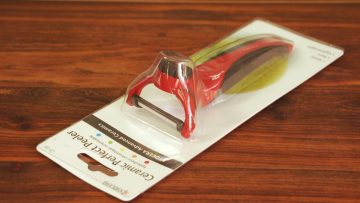
The grater comes blister packed for retail, with all the instructions clearly printed on the card. This grater is manufactured in Japan by Kyocera using Kyocera’s advanced ceramic technology. It is a single molded piece of ceramic zirconia with little sharp nibs in the center, surrounded by a catch trough.

Unlike other designs I have used in the past made from glazed pottery, I presume that these nibs will retain their sharpness for very much longer to give you decades of good service. On the underside of the grater is a circle of silicon embedded in the ceramic to prevent the grater from slipping on your work surface during use.

This grater is primarily for grating ginger and garlic. The sharp little nibs on the grating surface do a really good job of reducing the ginger to a paste while leaving any fibers behind. The same goes for garlic. A few large cloves of garlic are reduced to garlic paste in no time at all.

To clean the grater, simply hold it under running water and you’re done. This is the perfect tool to have in your kitchen for any ginger and garlic work, especially if you love Asian cuisine. Your ginger and garlic paste will be fresh every time. Click here to check out the Kyocera grater. That’s all for today folks, and we’ll see you again real soon.

Kyocera Advanced Ceramic Perfect Peeler – Product Review – Best Vegetable Peeler Ever?

Kyocera ceramic peeler


Kyocera Peeler – Best vegetable peeler ever?

Grab your peeler now

Hi and welcome back to Whats4Chow.com Today’s episode is the second in a series of product reviews covering Kyocera’s range of ceramic kitchen equipment. In the previous episode I introduced the Kyocera ceramic knives, and now we’re going to have a look at the Kyocera peeler.

Before we continue, Kyocera is not paying for this review. They were kind enough to send me a few of their products to try out, these are my opinions of the products, and they will not be viewing this video before it goes live.

I must confess that I have had this peeler unpacked for a while and re-packed it only to show everyone how it is packaged. My first impressions of this peeler are that it is absolutely beautiful, with a big soft-touch, chunky handle for good grip, even with wet hands. The molding of the handle is superb with no burrs or imperfections that could lead to discomfort. And that is only the beginning… this peeler has secret powers too…

The cutting head of the peeler swivels through 360 degrees. This allows you to use this peeler left or right-handed, or as a pull peeler or a side peeler. The blade can also be set at 45 degrees in either left or right-handed configuration.

Above all, this peeler has Kyocera’s advanced ceramic blade. This blade is incredibly sharp and breezes through the tasks of peeling potatoes, carrots, and even tough jobs like butternut. Only very light pressure is required for regular peeling, however if you want to cut vegetable ribbons, applying just a tiny bit more pressure will give you amazing cucumber and carrot ribbons.

I must say that this is the most capable peeler I have ever come across, with a blade second to none. My favourite aspect of the peeler is definitely the grip. I have big hands, and regular peelers with their tiny handles are quite difficult for me hold securely, especially if my hands are wet. The left-handed feature also comes into play in a big way, as I am left-handed.

In summary, if you’re in the market for the most amazing peeler out there, you can’t go wrong with this one. It has the best grip, the best blade and serves both left-handed and right-handed users. I have left a link below where you can check it out. That’s it for today folks, and we’ll see you again real soon.

Kyocera Knives & Diamond Sharpener – Product Review – Part 1

Kyocera ceramic Kitchen Knives and sharpener


Kyocera Knives & Diamond Sharpener Today’s episode is slightly different and takes the form of a product review. Kyocera was kind enough to send me a box of their products to try. This review is not paid for by Kyocera, and they will not be viewing it or approving it before it airs. Kyocera make a whole range of ceramic knives to suit just about any application. The knife they sent me is their kitchen utility knife.

It comes well presented in a cardboard retail package, with the blade folded in another protective layer of board. Unlike many other brands that a mass-produced and brand engineered by third party producers, the Kyocera knives are actually manufactured by Kyocera themselves in Japan. To clarify, the ceramic blades are manufactured by Kyocera in Japan, after which they are shipped to China to have the handles manufactured and then retail packed. This is obviously done to uphold the premium quality of the blades, while containing the end price of the products.

Unlike other brands of ceramic knives, the Kyocera knives do have a bit of flex in the blade, however they have rounded of the tip of the blade, as this is always the first part to break or chip on any ceramic knife. Interestingly, they have sharpened the rounded end of the blade to compensate for the blade not having a pointed tip.

As you can see, this blade is insanely sharp. I would say it is probably scalpel sharp, maybe even too sharp. This is not a negative point as you can allow it to dull slightly, and then maintain the level of sharpness you are comfortable with, using the Kyocera diamond sharpener.

This brings us to the next point. Sharpening ceramic knives has always been a problem. Regular knife steels don’t work at all as the zirconia ceramic is harder than steel. Kyocera have come up with the solution. They also manufacture a pull-through roller sharpener. The roller is made from #1000 grit, or 18 micron diamond dust, with a pre-set sharpening angle making it a breeze to sharpen your knives. Kyocera don’t recommend that the charpener be used to sharpen regular knives. I am not going to try to blunt the knife by cutting mountains of cardboard, as you would not do this to your kitchen knives unless you’re mentally disturbed. Instead, I am going to put this knife through it paces for a week or two, and then I will do a follow-up episode giving you the real-life use results and my impressions on this product, and the Kyocera diamond sharpener.

I have included links to both the knives and sharpener below in the description. That’s it for today folks, and we’ll see you again real soon. Check out Kyocera’s range of knives here

The Amazingly Simple Milk Hack – No More Glug!

Simple Milk Carton Hack


The Amazingly Simple Milk Hack!

Just about everyone in the universe has experienced the displeasure of pouring milk from a carton. The first bit starts out great, then the glug monster strikes, causing a mess of milk all over the place.

This is caused by the vacuum that builds up in the carton as the milk exits the spout. Eventually the carton will not compress any further and the flow of milk stops momentarily, and air gets sucked into the carton, followed by a massive flow of milk, referred to as the glug.

By simply inverting the carton and pouring the milk with the spout in the highest position, the problem is almost negated. The amount of milk that needs to be displaced is only a fraction of the normal pouring method, and the resulting glugging is also only a fraction of what it was. Even when pouring at full tilt, it is manageable without any mess.

Let’s look at the two together in slow motion…. It is quite obvious that this simple hack will make your pouring experience much more pleasurable. Thanks for watching, please like, subscribe and share, and we’ll see you again real soon.


Prawn Rissoles – Rissóis de camarão – Authentic Portuguese Prawn Rissoles

Prawn rissoles


Prawn Rissoles - Rissóis de camarão - Authentic Portuguese Prawn Rissoles
Author: 
Recipe type: Seafood
Cuisine: Portuguese
Prep time: 
Cook time: 
Total time: 
Serves: 60
 
Step-by-step authentic Portuguese prawn rissoles.
Ingredients
For the filling:
  • 700g Medium prawns / shrimp
  • 480ml Hot chicken stock
  • 30g Butter
  • 15ml oil
  • 1 Tomato
  • 1 Onion
  • 4 Cloves garlic
  • 2 Tbs Flat leaf parsley
  • Zest and juic of one lemon
  • 1 Tsp chilli flakes
For the filling sauce:
  • 30g Butter
  • 2 Tbs All-purpose flour
  • 250ml Full cream milk
  • 125ml Reserved prawn liquid
  • 2 Egg yolks
For the Pastry dough:
  • 250ml Reserved prawn liquid
  • 250ml Full cream milk
  • 45g Butter
  • 4 Cups All-purpose flour
  • Extra flour for dusting if needed
Instructions
Prepare the prawn filling:
  1. Place 700g medium size prawns in deep pan or a pot. The prawns must be in the shell with head on as this contributes to the flavor of the prawn meat, the sauce and the pastry. Pour in 480ml hot chicken stock.
  2. Place the pan over high heat and bring it to a boil. Allow this to boil for 2 minutes, then remove from the heat. Be sure to turn the uppermost prawns, to ensure that everything cooks evenly.
  3. Remove the prawns from the liquid and set these aside to cool. Strain the liquid through a sieve and set this aside.
  4. Measure out 30g butter, 15ml oil, chop one tomato, one onion, 4 cloves garlic, 2 tablespoons flat leaf parsley. In addition, you need the zest and juice of one lemon, and a teaspoon of chilli flakes.
  5. By this stage the prawns would have cooled enough to peal and chop. Chop them relatively finely, but not to a paste.
  6. Saute’ the onion in the butter until just starting to brown. Add all of the remaining ingredients from this section. Fry these from 3-4 minutes until everything is soft, then add the chopped prawns. Remove the pan from the heat.
  7. Measure out a quarter cup prawn liquid that was reserved after cooking the prawns. In addition, a half cup of full cream milk, whisk 2 egg yolks, weigh 30g butter and measure 2 tablespoons all-purpose flour.
  8. Melt the butter in a pan and add the flour. Stir the flour in until you have a smooth paste, or roux. This should cook for 1-2 minutes. Remove from the heat.
  9. Whisk the milk and prawn liquid into the roux thoroughly until smooth.
  10. Return the pan to the heat and bring it to a boil, reduce the heat and simmer for 5-6 minutes until thickened.
  11. Whisk in the egg yolks and cook for a further minute.
  12. Remove the pan from the heat and pour the sauce into the prawn mixture. Mix thoroughly and set this aside.
Prepare the dough:
  1. To make the dough, measure out 45g butter, mix together 1 cup prawn cooking liquid with 1 cup milk, measure 4 cups all-purpose flour, and a little extra on the side just in case you need it for kneading and rolling.
  2. Add the prawn liquid milk mixture and the butter to a pan. Place the pan over high heat and bring to a boil. Remove the pan from the heat.
  3. Add the flour to the liquid a little at a time and mix this in, first using a whisk, then as the liquid becomes stiff, a wooden spoon, then finally by hand. Once most of the flour is incorporated, turn the dough out onto the counter and start to knead it until all of the flour is incorporated. If the dough is still sticky, add a little extra flour from the side reserve.
  4. When the dough is smooth, wrap it in cling warp and allow this to rest for 15 minutes.
Assembly and cooking:
  1. To make the rissoles, start with a quarter of the dough, keeping the remaining dough wrapped. Using a scale, portion the dough into 20g portions and roll these into balls.
  2. Fold a single portion of the dough in a plastic bread bag and use a flat bottom dinner plate to press it flat. Use your roller to continue rolling this out to a diameter of around 80mm. Put this aside and continue until all the discs are rolled. If you can’t find bread bags, any plastic should work fine.
  3. Place a slightly heaped teaspoon measure of the filling in the centre of a pastry disc. Use the plastic to fold the pastry over the filling. Crimp the pastry lightly in the front and work around to the edges, removing as much air as possible in the process. Use the tines of a fork to seal and pattern the edges. Keep the rissoles in their plastic to prevent them from drying out. Continue until all the rissoles are completed.
  4. To coat the rissoles, beat 4 eggs and half-fill a bowl with bread crumbs. Dunk one of the rissoles in the egg to wet all over, then transfer it to the bread crumbs to coat. Transfer this to a platter to wait while you continue with the remaining rissoles.
  5. Heat your oil to 180c or 350f and fry the rissoles for 2-3 minutes until golden and slightly puffed up. Don’t be tempted to fry for any longer as steam will build up in the rissoles and they will rupture.
  6. Once complete, remove from the oil and serve immediately. In a 5 litre fryer, you can comfortably fry 10-12 rissoles at a time. Adjust your frying load accordingly if your fryer or pan is smaller or larger. This recipe will make approximately 60 rissoles.


Pizza Crackers! Yes, make amazing pizza flavored crackers at home!

Pizza flavored crackers


Pizza Crackers! Yes, make amazing pizza flavored crackers at home!
Author: 
Recipe type: Snacks
Cuisine: America, Italian
Prep time: 
Cook time: 
Total time: 
Serves: 60
 
Pizza crackers really do taste just like traditional pizza. Give it a try, you will not be disappointed!
Ingredients
  • 1.5 Cups All purpose flour
  • ¼ tsp Bicarbonate of soda
  • ¼ tsp Salt
  • ¼ tsp Cream of tartar
  • 10ml Yeast
  • 5ml Sugar
  • ½ Cup Finely shredded parmesan cheese
  • 35g Butter
  • 90ml Water
  • 30ml Olive oil
  • 1 Egg whisked with 30ml water
  • Italian herb mix (see below)
  • Himalayan rock salt
For the herb mix:
  • ▢2 tablespoons dried basil
  • ▢2 tablespoons dried oregano
  • ▢1 tablespoons dried rosemary
  • ▢2 tablespoons dried parsley
  • ▢1 tablespoon dried thyme
  • ▢1 teaspoon garlic powder
Instructions
  1. Sift 1 and a half cups of all purpose flour into a large mixing bowl. Add a quarter teaspoon salt, baking soda and cream of tartar.
  2. Follow this with 2 teaspoons of active dry yeast and a teaspoon of sugar. And last, but not least, a half cup of finely shredded Parmigiano Reggiano. Use a whisk to mix this all together thoroughly, then put this to one side.
  3. In a small saucepan, combine 35g of butter, 90ml water and 30ml olive oil. Heat the pan over medium heat only until the butter has melted. As soon as the butter has melted, remove from the heat.
  4. Pour the flour mixture into your food processor and start the machine on medium speed. Drizzle the melted butter mixture in through the tube. Mix until the dough comes together and there are no visible dry spots in the dough.
  5. Turn the dough out and compress it into a ball. Place the ball in a bowl and cover with clingwrap. Place the dough in your refrigerator to autolyse for at least 6 hours, preferably over night.
  6. The following day, remove the dough from your refrigerator and allow it to warm up for 15 minutes. Divide the dough in half and knead each half briefly until the dough is smooth. Roll to dough out to a thickness of 2mm.
  7. Use a roller cutter to cut the dough into small bite-size squares of around 30mm in size. Transfer the pastry squares to a large sheet pan lined with baking parchment.
  8. Whisk one egg with 30ml water and brush this onto the crackers liberally. Do this in batches to guarantee that the wash will still be wet when applying the herbs.
  9. Sprinkle the herbs liberally over the wet crackers and add a generous grind of Himalayan rock salt. Continue until all the crackers are flavored.
  10. Bake the crackers in a preheated oven at 210c or 410f for 12-14 minutes until golden. Remove from the oven and allow the crackers to cool completely in the pan before storing them in an airtight container.
  11. This recipe will make approximately 60 amazing pizza flavored crackers for you to enjoy.


Scroll to top

Kitchen Conversions

Convert:
Masses
to:
Volumes
to:
Temperatures
to:
Lengths
to: