Biker Bar Pancakes - Diner Style Pancakes - Awesome Beer Flapjacks for Hungry People!!!
Author: Whats4Chow
Recipe type: Dessert
Cuisine: American
Prep time:
Total time:
Serves: 8
Today's episode is and easy, fun and delicious treat that will result in the best flapjacks you have ever tasted. These things are huge... they are light and fluffy.... and they have an amazing flavor that is second to none.
Ingredients
365g All-purpose flour
45ml Sugar
6.25ml Baking powder
6.25ml Bicarbonate of soda
6.25ml Salt
2 Eggs
430ml Cultured buttermilk
125ml Beer or stout
5ml Vanilla extract
45ml Butter melted
Extra melted butter for frying and serving
Maple syrup
Instructions
Combine the vanilla extract, melted butter, beaten eggs, cultured buttermilk and beer in a jug. Stir this well until completely combined.
In a mixing bowl, combine the all purpose flour, baking powder, bicarbonate of soda, salt and sugar. Stir this together until well combined.
Pour the wet ingredients into the bowl. Use a ball whisk to mix this all together until you have a lumpy batter.
Heat a frying pan over medium heat. Brush the pan with melted butter and drop a half cup of the batter into the pan.
Allow this to fry for 2.5 to 3 minutes until bubbles open on the top of the pancake.
Use a spatula to lift the edge of the pancake. These are bigger normal, so you really have to get the spatula well underneath the pancake before attempting to flip it.
Flip it over and continue to fry for a further 2.5 minutes.
Remove the pancake from the pan and continue with the remaining pancakes. Keep the cooked pancakes warm in a low oven.
Serve the pancakes brushed with melted butter and drizzled with maple syrup.
In our previous 2 episodes covering distilling we looked at freeze distillation which relied on the massive disparity between the freezing point of water and the freezing point of alcohol. Today’s episode takes us to the next step in the evolution of distillation…. the pot still.
This relies on the disparity in boiling temperatures between water and alcohol. Water boils at around 100c depending on barometric pressure, whereas alcohol boils at 78.3c.
This means that if a fermented wash is heated to around 78c, the alcohol will vaporize while the water remains in liquid state. This alcohol vapor is cooled and collected.
I must stress that this video is not a recipe. It is merely a demonstration of how the process works. Fermentation recipes and actual distillations will start in the next few episodes of this course. Also, I must remind you that distilling is illegal in some countries, so please check with your local authorities before getting involved.
Back to pot stilling. Today we’re looking at the simplest form of pot still… the stock pot still.
To understand this, let’s first look at a real pot still. You have large pot. To cover the pot is an air-tight dome lid. From the center of the lid a large gauge pipe rises up, then turns downward.
This pipe joins with another pipe in the form of a spiral.
This cooling coil is encased in a circulating water cooler.
The fermented liquid or wash is placed in the pot. Heat is applied to the pot. When the temperature reaches 78.3c the alcohol starts vaporizing, and escapes through the tube.
On running through the coil it is cooled and it condenses to liquid alcohol which drips into a catchment.
The stock pot still does not require any fancy cooling coils, and can be achieved with simplest of kitchen basics.
You need a large stock pot. You will need a dome lid…. I use my wok lid, and some sort of stand inside the pot. For this I use an inverted colander. You cannot use a solid up-tuned bowl as gasses will be trapped inside the bowl.
Then you need something non-reactive to catch the distillate, either stainless steel or food grade plastic.
The fermented liquid is placed in the stock pot.
Heat is applied.
The inverted wok lid is filled with ice.
As the alcohol vaporizes at 78.3c it rises and immediately condenses on the chilled lid, runs down the curved surface of the lid and drips into the collection bowl.
Let’s have a look at this in real life. I am using a big digital pot, but you can use a regular stock pot over any heat source. It is however, preferable to have control over the heat, so I would suggest using an induction range.
Here is the wok lid, from which I have unscrewed the handle and left the bolt in place to close the hole.
For this demo, I am using el-cheapo rose wine. Commercial wines are fermented using yeasts that result in very low levels of methanol and volatiles. In our next episode on distilling we will make a high alcohol sugar wash which is ideal for this process.
Empty the wine into the pot. Place the inverted colander into the pot. On top of this is where you will catch the alcohol in another bowl.
Place the inverted lid on the pot and set your heat to around 80c.
Pour ice into the inverted lid.
Owing to heat below the ice you will need to drain the melt from the lid and top up the ice a few times during this process.
I started with 5 liters of wine with an ABV of 13%. This means that there is a total of 650ml of ethanol in the wine. If I collect 1300ml of distillate, I will have a subtly flavored distillation with an ABV of 50%.
Stay tuned for our next episode on distilling next week where we will make a fermented sugar wash from scratch and distill the wash to make Vodka.
How to Make Fake Horseradish - Fake Prepared Horseradish Recipe
Author: Whats4Chow
Recipe type: Sauce
Prep time:
Total time:
Prepared horseradish is pretty hard to find in some countries, and when you can find it, it's ridiculously expensive. This is largely due to the labor that goes into the cleaning and preparation before pickling. Today we're looking at a way to make fake horseradish that tastes just like the real thing, and apart from the difference in color, nobody will be able to tell the difference.
Ingredients
500g Garden radish (regular radishes)
200ml White wine vinegar
2.5ml Salt
1.25ml Citric acid
45ml Wasabi powder
50ml Sherry
Instructions
Top and tail the radishes and cut them into quarters.
Measure out the citric acid, salt, white wine vinegar, sherry and wasabi powder.
Place all of the ingredients in your food processor and process until fine.
Package the horseradish in suitable sterilized bottles and place in your refrigerator to mature for at least a week before consuming.
How to Make Mushroom Jerky - How to Make Mushroom Biltong - Vegan and Vegetarian Mushroom Jerky
Author: Whats4Chow
Recipe type: Mushroom / Jerky / Biltong
Mushroom jerky makes a great tasty snack, and works brilliantly chopped and sprinkled over salads and soups. With the exception of the drying time, mushroom jerky is quick and really simple to make.
Ingredients
4 Large brown mushrooms (or Porcini)
45ml Worcestershire sauce
45ml Light soy sauce
60ml Maple syrup (can substitute regular golden syrup)
60ml Cider vinegar
10ml Chilli powder
2.5ml Smoked paprika
Instructions
Combine the Worcestershire sauce, light soy sauce, maple syrup, cider vinegar, chilli powder and smoked paprika in a jug and stir this until well combined.
You will need large brown mushrooms, or porcini mushrooms as the have a well defined, robust flavor.
Cut the mushrooms into slices 12mm or a half inch thick.
Place the mushroom slices in a large non-reactive pan and pour the marinade mixture over the mushrooms.
Use a basting brush to pick up marinade from the pan and brush this over any spots you may have missed.
Cover the pan with cling-wrap and place this in your refrigerator overnight.
The following day, transfer the mushroom slices to a rack in another pan.
Set the temperature of your oven to 50c or 122f and place the tray in the oven.
Leave the oven door slightly open.
It will take around 10 hours for the mushrooms to dry. You want to be pliable and chewy, not bone dry.
And there we have it, a tasty, chewy wonderful batch of mushroom jerky.
To start, combine the all-purpose flour, salt and cayenne pepper. Place this in a container with a lid.
Trim away the wing tips from the chicken wings and slice through the center joint of each wing, giving you a dozen winglets.
Drop the winglets into the flour, put the lid on and shake them around to coat. Allow the winglets to stand in the flour for 10 minutes.
For the panko coating, place the panko crumbs in a bowl, and whisk 2 eggs in another bowl.
Before starting, spread a layer of panko crumbs over a large platter. This is where the coated wings will set and the layer of crumbs prevents the coating from sticking to the platter and getting damaged.
Dip the winglets in the egg to wet all of the flour coating.
Transfer the winglet to the panko crumbs to get a good solid coating all over.
Transfer the winglet to the platter to set. Continue with the remaining winglets.
Allow the panko coating to set for 10 minutes.
Half fill a large pan with oil and heat this to 180c or 350f. Carefully drop the wings into the oil and fry them for 5 to 6 minutes, turning halfway through.
Remove the wings from the oil using a slotted spoon and drain any excess oil on kitchen paper.
And there we have it, a batch of amazingly crisp panko chicken wings.
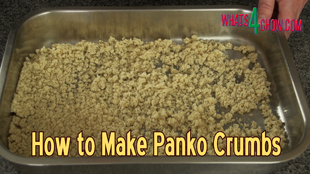
How to Make Panko Bread Crumbs at Home - Quick & Easy Panko Bread Crumbs
Author: Whats4Chow
Recipe type: Bread
Prep time:
Cook time:
Total time:
Panko crumbs are a whole different experience in coated deep-fried foods. Today we're publishing 2 episodes, this episode where we're making our own panko crumbs, followed by another episode where we crumb chicken wings and deep-fry them to super-crispy golden perfection.
Ingredients
12 Slices white bread
Instructions
Take a dozen slices of fresh white bread and trim away the crusts.
You can save the crusts to make regular bread crumbs or croutons.
Cut the trimmed slices into cubes.
Place the cubes of bread into your food processor and zap them until quite fine.
Transfer the crumbs to a large baking tray and bake the in a preheated oven at 100c or 212f for 60 minutes until dry and crispy.
Allow the crumbs to cool and store them in an airtight container until required.
Stay tuned for our next episode to see them in action.
TNK Stingray Barracuda Kitchen Multitool Review - Used Making a Quick Creamy Chicken Curry
Author: Whats4Chow
Recipe type: Curry
Cuisine: Indian
Prep time:
Cook time:
Total time:
Serves: 4
A couple of episodes back I featured 2 amazing kitchen multitools from the TNK Stingray range. In today's episode we're looking at the third kitchen multi tool in their range, the Barracuda. The unit is basically a scoop shaped nylon stirrer, making it great for stirfrying in non-stick pans and woks. The handle is good quality, well finished stainless steel with silicon grips. Pulling a loop at the end of the handle allows the handle to open revealing the Barracudas teeth. These allow you to pick food up and strain food in the pan, an absolute stroke of genius. To demonstrate the tool, I am going to make a super-quick creamy chicken curry.
Ingredients
4 x Chicken breasts (deboned, skin off)
30ml Curry powder (your favorite)
250ml Cultured sour cream
12 x Cherry tomatoes
Handful of fresh coriander
50ml + 50ml Oil
Instructions
To start, cut the chicken breasts across the grain into strips about 8mm or a third of an inch thick.
Transfer the chicken to a mixing bowl and add the curry powder.
Mix the curry in until well combined, then pour in the oil.
Mix in the oil and put this aside while you cut the cherry tomatoes in half lengthways, and roughly chop the fresh coriander.
Heat your wok until smoking hot then add the oil.
Swirl the oil around the wok and add the chicken.
Here you can see just how well the Barracuda works stir-frying and turning the chicken while in the closed position.
Continue frying for 3 to 4 minutes until the chicken is cooked through.
Here we see the Barracuda in a semi-open position being used as a strainer. I am lifting the chicken from the wok while the oil simply drains through the teeth of the Barracuda.
Turn the heat down to medium low and add the cultured sour cream, tomatoes and coriander.
Mix this all up until warmed through.
Return the chicken to the wok and shovel this around until well combined with the sauce.
Serve immediately with the accompaniments of your choice.
How to Make Edible Candy Wrappers - Edible Cellophane - Making Edible Bioplastic
Author: Whats4Chow
Recipe type: Confectionry
Prep time:
Cook time:
Total time:
Serves: 25
Imagine making your own cellophane sweet wrappers that are edible, and if you don't eat them will dissolve within days in the trash can. This is a foolproof way to make your own perfect edible candy wrappers.
Ingredients
400ml Cold water
10g Gelatin (powdered)
2.5ml Glycerin
25 x 10cm / 4 inch flat lids
Instructions
To start, pour the water into a small saucepan. Sprinkle the gelatin over the surface of the water.
Add the glycerin, in some countries called glycerol... make sure it's medical or food grade.
The glycerin acts as a plasticizer and makes the gelatin flexible when it dries.
Place the pot oven low heat and stir until the gelatin is totally dissolved. You can tell this when the liquid is absolutely clear and you can see the bottom of the pot clearly.
Whatever you do, don't allow the mixture to boil.
Remove the pot from the heat.
Arrange your molds on the work surface. I am using 10cm takeaway lids, but you can use anything circular and flat with a slight ridge around the edge.
Spoon 15mm of the gelatin mixture into each mold.
Tilt the molds around to spread the gelatin mixture.
This is where the patience comes in. The molds need to stand and dry until the edges of the film start to lift.
This can take anything from 10 hours to 2 days depending on your weather, heat and humidity.
Once you see the edges starting to lift, it's ready for the next step.
Insert a toothpick or thin skewer under the edge of the thin film and run around the edge to lift it from the mold.
And there it is, a perfect edible candy wrapper.
Place the candy, in this case a block of nougat, a third into the wrapper, and wrap it up.
Twist and crimp the ends using your fingernails to compress the twisted part closet to the candy.
And there it is... perfect edible candy wrappers... and if not eaten 100% bio-degradable.
Jamaican jerk chicken can be as mild or as hot as you like. You can adjust the heat by simply adding more or less cayenne and chilli flakes. The measurements in this recipe will give you a result on the milder side, but with tons of flavor. I am going to make jerk chicken kebabs and a couple of jerk chicken burgers using the TNK Stingray multitools feature in the previous episode.
Ingredients
9-12 Chicken thighs, deboned
For the Jerk Spice
15ml Onion flakes
10ml Dried Thyme
5ml Dried parsley
7.5ml Whole allspice
2.5ml Ground cinnamon
5ml Whole black peppercorns
2.5ml Cayenne pepper
5ml Paprika
2.5ml Chilli flakes
1.25ml Ground cumin
5ml Dried garlic granules
10ml Salt
1.25ml Ground nutmeg
10ml Sugar
10ml Dried chives
Instructions
To make the spice blend, combine the onion flakes, thyme, parsley, allspice, cinnamon, black peppercorns, cayenne pepper, paprika, chilli flakes, ground cumin, garlic granules, salt, nutmeg, sugar and dried chives.
Put this all into your spice grinder and zap it until fine. Transfer the jerk spice to a sprinkle bottle.
Place your deboned chicken thighs in a large non-reactive pan, skin side down.
Sprinkle a generous dose of the spice over the chicken. Generous can not be overstated... you want to use a third of the spice on this side.
Turn the chicken thighs over and dose the skin side with another third of the spice.
Cover the pan with cling wrap and place this in your refrigerator overnight.
The following day, cut the chicken into cubes. I have held 2 thighs back to cook as jerk chicken burger patties.
Thread the chicken cubes onto skewers and you're ready to rock.
To demonstrate the larger of the 2 Stingray multitools, I am going to barbecue most of the chicken, saving some for the pan to demonstrate the smaller model.
Heat a barbecue skillet over medium high heat and brush this with oil and add the kebabs and jerk chicken burger.
Turn the kebabs every 3 minutes, remembering that they have 4 sides, giving you a total time of 12 minutes.
Watch how well the multitools toothed edge lifts end turns the kebabs with absolutely no problem.
Grill the jerk burger for 4 minutes per side. Here's a shot of the lifter mechanism at work turning the burger.
Using the prong to lift the burger from the skillet is effortless, and you can see the true genius behind the launch mechanism that gently squeezes the chicken of of the prongs onto the plate.
Remove the kebabs from the barbecue and serve immediately.
Now across to the non stick pan. Heat the pan over medium high heat and add a little butter.
Add the kebabs and jerk burger to the pan. Grill them for 12 minutes, or 3 minutes per side. Grill the jerk burger for 8 minutes, turning halfway through.
Here we can see just how simply the multitool turns the kebabs. The toothed edge really does make a difference.
And again, here is the lifter turning the burger.
Remove the chicken from the pan and serve with the accompaniments of your choice.
And there we have it.... beautifully spiced and flavor Jamaican jerk chicken kebabs and burger patties.
Today we’re looking at some remarkable cooking multitools from TNK. This is not a paid revue. I found the TNK website and contacted them. They were kind enough to send me a whole bunch of products, and we cover these over the next few days. You can buy these directly from TNK, and you can visit their website here – http://www.tnkbrand.com/?lang=en.
The first 2 products on test are these 2 very interesting looking multi tools. The larger of the 2 is for use on your barbecue and with the exception of the silicon grips the entire unit is good quality, well finished stainless steel.
On the left hand side of the lifter assembly you will find a set of teeth which are ideal for picking up and turning sausages and kebabs.
At the end of the upper lifter assembly is a set of prongs. These allow you to skewer and lift foods that may be awkward to to lift or turn with the lifter assembly.
The next step is pure genius. When the lifter assembly is closed the food on the prongs is gently squeezed of of the prongs.
A very nice afterthought is the built in bottle opener in the handle of the unit. What is barbecue without a good cold one.
The unit stores in the closed position which is locked by pulling the loop at end of the handle.
The second in this range is made specifically for use with nonstick pans. The design is identical, however the unit is slightly smaller and has a durable nylon lifter assembly.
All of the other features are the same as its big brother, however it does not feature the bottle opener.
Stay tuned for our next episode where we’re going to put both of these to test making an amazing meal of Jamaican jerk chicken kebabs, and burgers.
How to Make Apple Jack - Ice Distilling Apple Cider at Home!!!
Author: Whats4Chow
Recipe type: Distilling
Cuisine: American
Apple Jack has been around since the beginning of America. Ice distilled from apple cider there was no need for infrastructure or elaborate equipment, which made it the perfect solution for those times. The term jacked up comes directly from apple jack where the ice distilling process jacks up the alcohol content resulting in an apple brandy with an alcohol content anywhere between 20% and 50% ABV. Today, with the exception of a handful of craft distillers, apple jack is made with a blend of apple cider and commercial alcohol.
Ingredients
Apple cider
Instructions
To start, pour your cider into suitable food grade bottles. This cider is presently about 7% ABV. Place the bottles in your freezer overnight. Remember not to tighten the bottle cap as the bottle may burst in the freezer.
Once frozen, you will have a bottle of golden ice.
Remove the bottle cap and invert the bottle in a measuring jug. You will notice almost immediately some liquid will drain from the bottle. This is the alcohol and a the syrupy flavor component of the apple cider that does not freeze along with the water content.
I am going to jack my alcohol content up to around 21%, and to achieve this I will collect 1 third of the original volume of liquid. In other words, this 1 liter bottle will yield 330ml of jack at around 21% ABV.
As the runoff passes the neck of the bottle it will cause an air block, so you need to lift the bottle every few minutes to allow the runoff to escape into the jug.
If you missed the introduction video about ice distilling you can click the onscreen link. This will give you a full explanation of the alcohol calculations and process.
Now I've collect 330ml of runoff. This runoff is the apple jack.
You will notice the ice in the bottle is now very pale as almost all of the alcohol, flavor component and color component have drained.
Notice how beautifully clear the result is, with concentrated color and flavor. A taste test will reveal the quite obviously stronger alcohol content.
How to Make Fake Roast Potatoes - The Quickest Roast Potatoes Ever!
Author: Whats4Chow
Recipe type: Potatoes
Prep time:
Cook time:
Total time:
Serves: 4-8
A few episodes back when we quick roasted a sugar chilli pork neck, I mentioned that I'd share the secret to quick roast, or fake roast potatoes. The question is why would you do this? Firtsly, when your main roast is big, you may not have space in the roasting pan for roast potatoes. Secondly, if your roasting time is shorter than normal, it is not practical to roast potatoes.... this solves the problem. Thirdly, some potatoes are just not meant for roasting, whether it be that they are glassy, or too wet. And finally, these potatoes are just simply awesome.
Ingredients
8 x Medium potatoes (any variety)
15ml Kosher or Himalayan rock salt
15ml Dried garlic granules
15ml Dried chilli flakes
Oil for frying
Instructions
To start, peel and cut your potatoes into chunks. I've used medium size potatoes and cut them into quarters.
Place the potatoes in a pot and add 15ml of kosher salt, 15ml of dried garlic granules, and 15ml of dried chilli flakes.
Pour in enough boiling kettle water to cover the potatoes.
Place the pot over high heat and boil the potatoes until very tender. This can take anything from 15 to 25 minutes.
Test the tenderness with a toothpick. When the toothpick slides easily through past the center of a potato chunk you're ready.
Place the lid on the pot slightly offset and pour off the liquid.
Place the lid back on the pot and shake the potatoes back and forth in the pot to rough them up.
From this point you can finish your potatoes off in 2 ways. If your doing a short roast, place the potatoes in your roasting tin with your main ingredient and roast in a preheated oven at 250c or 480f for 60 minutes until crisp and golden. You can see an example of this in our salt and vinegar roast potatoes video.
For true fake roast potatoes, heat a half filled wok of oil to 180c or 350f.
Carefully scoop the potatoes into the oil and allow them to fry for 15 to 20 minutes until super-crispy and golden. Give the potatoes a gentle stir just after adding them to the oil, to separate the pieces, then simply let them fry away, stirring gently every 5 minutes.
And there it is... the most amazing fake roast potatoes with a super crispy outside and a beautifully smooth, soft and silky inside.