Making Quality Pie Shells Fast Using a Tortilla Press - Increasing Pie Production with a Few Simple Tricks!!!
Author: Whats4Chow
Recipe type: Pastry
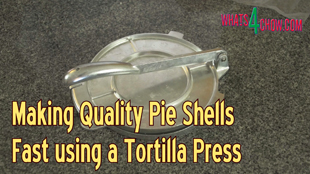
The humble tortilla press is far more useful than it appears. When you're making pies or tarts this brilliant tool can cut the time it takes to make the pastry shells dramatically. Use this alongside the shell forming technique I first demonstrated in our course on pie making, and you'll cut the pastry forming time by 80%.
Ingredients
Using 5 Inch #680 Pie Foils
- 130g of pastry for each pie base
- 100g of pastry for each pie lid
Instructions
- Starting with pot pies, line the entire press with cling-wrap or plastic film. These inexpensive bread bags work very well.
- Roll the bottom pastry portion into a ball and place in the center of the bottom plate of the press. Flatten it out slightly and fold the plastic over this. Close the press and use the lever to press the lid flat. Repeat this with all of the pie bottoms.
- Use your rolling pin to roll these out further to a diameter of 7 inches.
- Invert a 5 inch #680 pie foil on your work surface. Open one side of the plastic on one of the pastries. Drop the pastry over the pie foil. Even the pastry around the edges and drop another foil over this. Press this down firmly around the edges.
- Pick the whole lot up and flip it over. Press the inner foil down firmly around the edges of the base, then the remove the foil and plastic. And there it is.... a perfectly formed, perfectly even pie base. Repeat this with the remaining bases.
- Use the same pressing procedure to press out the lids. For this demonstration I am not filling the pie. Drop the lid onto the pie and press the edges down gently to seal. Use a fork to crimp the edges, then trim away the excess pastry with a sharp blade. Punch 2 vents in the lid and you're ready to go.
- To make tart shells is just as simple. Drop the pressed and rolled tart pastry over an inverted pie foil. Drop another shell over this and press this down firmly around the edges.
- Lift the whole lot up and flip it over. Press the inside edges of the inner foil down firmly, then remove the inner foil and plastic. Trim away the excess pastry with a sharp blade.
- Use a fork to dock the pastry. This prevents the pastry from bubbling away from the foil in the next step.
- Press a square of foil into each pastry. Fill the pastries with rice, beans or baking beads and bake the tart shells in a preheated oven at 200c or 400f for 10 minutes. Remove the shells from the oven, carefully remove the rice and foil squares, then return these to the oven for a further 5 minutes.
- Your tart shells are now ready for filling and processing.
- Not only does this process save you tons of time, but also keeps the pastry much cooler, and inhibits shrinkage, resulting in a much better quality pie or tart.