4th of July Cookout – Slow Barbecue Brisket on Your Gas Barbecue – Super Tasty, Super Tender!!!

barbecue brisket,how to barbecue brisket, smoked meat smoking bbq brisket, smoking bbq brisket, texas style bbq, barbecue brisket recipes, barbecue brisket rub, barbecue brisket temperature, barbecue brisket recipe gas grill, barbecue brisket in oven, barbecue brisket marinade, barbecue brisket calories, curing brisket for barbecue,how to cure brisket,flavoring brisket,marinating brisket,how to tenderise brisket


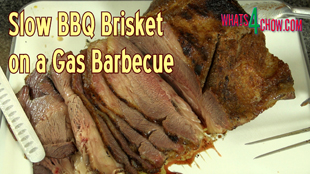
4th of July Cookout - Slow Barbecue Brisket on Your Gas Barbecue - Super Tasty, Super Tender!!!
Author: 
Recipe type: Barbecue / Beef Brisket
Cuisine: american
Prep time: 
Cook time: 
Total time: 
Serves: 6-8
 
Barbecue Brisket is one the tastiest meats around, provided it is prepared and cooked correctly. It certainly is a labor of love, but well worth the effort!!!
Ingredients
  • Brisket, about 6lbs or 2.7kg
For the Curing Brine
  • 5lt Filtered water
  • 25g Saltpeter
  • 90g Sugar
  • 30g Bicarbonate of soda
  • ½ Tsp black peppercorns
  • 3 Bay leaves
  • 5 Whole allspice (pimento)
  • 3ml Ground ginger
  • 3ml Garlic powder
  • 5ml Smoked hot paprika
For the sprinkle
  • 1 Tsp Garlic powder
  • 1 Tsp Ground ginger
  • 1 Tsp Cayenne pepper
  • 2 Tsp Sugar
For Smoking
  • 1 Cup Oak barrel chips, damp
Instructions
  1. To make the curing brine, add the salt to the water and pour in the saltpeter, sugar, bicarbonate of soda, black peppercorns, bay leaves, whole allspice, ground ginger, garlic powder and smoked hot paprika.
  2. Bring this to a simmer then quick cool the brine by floating the pot in a sink of cold water.
  3. While the brine cools, trim off any excess fat from the brisket.
  4. Place the meat in a large non-reactive container and pour in the curing brine. Put the lid on the container and allow this to cure for a full 48 hours in your refrigerator.
  5. After 48 hours, remove the brisket from the brine and pat it dry with kitchen paper.
  6. Combine the garlic powder, ground ginger, cayenne pepper and sugar and sprinkle half of this over both sides of the meat.
  7. Wrap the brisket in foil and place this on a rack in a roasting pan.
  8. Light one burner in you barbecue and allow the barbecue to warm up to 98c or 210f with the lid closed.
  9. Place the roasting pan on the other side of the grill, close the lid and allow this to slow roast for 10 hours undisturbed. Keep an eye on the temperature from time to time, making sure to keep it at 98c or 210f.
  10. Remove the meat from the barbecue and remove the foil. Return the meat to the rack and season it again on both sides with remaining half of seasoning.
  11. In addition, have a cup of damp smoking wood chips prepared and placed in a disposable aluminium tray.
  12. Reheat the barbecue to 300f or 150c. You may have to light a second burner. Place the wood chips directly over the lit burners, and return the meat to the grill.
  13. Close the lid and allow this to smoke for 60 minutes. Transfer the meat from the pan to the grill over direct heat and finish the process by grilling for 15 minutes per side until the meat is well colored and has formed a good crust.
  14. Remove the meat from the grill and allow it to rest for 5 minutes before carving and serving.


How to Make Bechamel Sauce. Perfect Smooth, Silky Bechamel Every Time!!!

bechamel, bechamel sauce, bechamel sauce recipe, béchamel sauce (dish), bechamel recipe, easy bechamel sauce, white sauce recipe, bechamel sauce pasta, bechamel sauce for lasagne, bechamel sauce recipe south africa, bechamel sauce for macaroni, bechamel sauce lasagna, bechamel sauce pasta, making bechamel, perfect bechamel sauce, mother sauce recipe, bechamel sauce jamie oliver, bechamel sauce food wishes


How to Make Bechamel Sauce. Perfect Smooth, Silky Bechamel Every Time!!!
Author: 
Recipe type: Sauce
Cuisine: Italian / French
Prep time: 
Cook time: 
Total time: 
 
Bechamel sauce is they key ingredient in dishes like lasagna and cannelloni. It also serves as the master sauce or base for cheese sauce, mushroom sauce, garlic sauce and many others.
Ingredients
  • 65g Butter
  • 40g All-purpose flour
  • Pinch of nutmeg (1/4 Tsp)
  • 600ml Full cream milk, very cold
  • 1 Bay leaf
  • 125ml Cream
Instructions
  1. Heat the butter over medium low heat and pour in the flour
  2. and nutmeg.
  3. Stir this until creamy and allow it to cook for 60 seconds.
  4. Remove the pan from the heat and stir in the milk. Add a bay leaf to the mixture and return to the heat.
  5. Bring this simmer over a few minutes, stirring constantly. Simmer until the sauce
  6. thickens and leaves a trail when you stir.
  7. Remove the pan from the heat and discard the bay leaf.
  8. Stir in the cream.


Brandy Cake!!! Soft Sponge Filled with Nuts & Dates, Soaked with Brandy Syrup.

brandy cake,brandy sponge cake,sponge cake with brandy,brandy cake with nuts and dates, brandy cake glaze, brandy cake syrup, brandy cakes recipes, brandy fruit cake, brandy cake recipe from scratch, make brandy cake recipe, apricot brandy pound cake, cake mix with brandy, chocolate brandy cake recipe, apple brandy cake recipes, brandy fruit cake recipes,brandy malva pudding


Brandy Cake!!! Soft Sponge Filled with Nuts & Dates, Soaked with Brandy Syrup.
Author: 
Recipe type: Dessert
Prep time: 
Cook time: 
Total time: 
Serves: 9
 
This brandy cake is legendary, but certainly not to be served at children's parties.
Ingredients
For the Cake
  • 2 Eggs
  • 1 Cup sugar
  • 125g Butter, at room temperature
  • 1½ Cups all-purpose flour
  • 5ml Baking soda
  • 2.5ml Baking powder
  • 1.25ml Salt
  • 1 Cup chopped, pitted dated
  • ½ Cup chopped assorted nuts
For the Brandy Syrup
  • 60ml Brandy
  • 125ml Water
  • 250ml Sugar
  • 15ml Butter
  • 2.5ml Vanilla extract
Instructions
  1. Measure out the flour, sugar, butter at room temperature, baking powder, baking soda, salt, chopped pitted dates and chopped assorted nuts.
  2. In addition you will need 2 large eggs a cup of boiling water.
  3. Place the butter and sugar in you mixer bowl and allow the machine to run until this is soft and fluffy. Add the eggs and beat these in well.
  4. In another mixing bowl, combine the flour, baking powder and salt. Add the egg mixture and stir this until well combined.
  5. Pour in the chopped nuts and mix these in thoroughly.
  6. In a small bowl, pour the boiling water over the dates. Add the baking soda and let this bubble. Pour the date mixture into the batter and mix this all together well.
  7. Pour the batter into a lightly greased baking pan, a pan of about 8 inch or 200mm square will work fine.
  8. Bake the cake in a preheated oven at 180c or 350f for 30 to 40 minutes until a skewer pressed into the center of the cake comes out clean.
  9. While the cake bakes, let's make the brandy syrup. Combine the sugar, water and butter in a saucepan. Bring this to a boil and let it simmer for 5 minutes.
  10. Remove the pan from the heat and pour in the vanilla and brandy.
  11. Pour this over the cake as soon as it comes from the oven.
  12. Allow this cool in the pan before serving with whipped cream.


The Famous Bicken Churger – Laminated Chicken, Beef & Bacon Burger Patty

how to laminate meat,chicken beef bacon patty,best chicken burger patty,best burger patty recipe,best beef burger patty recipe,best bacon burger recipe,bicken churger,laminated burger patty recipe,how to make gourmet burger patties,homemade laminated burger patties,the famous bicken churger burger patty,best burger ever,chicken and bacon burger,burger patty recipes,beef burger patty recipes,bacon burger patty recipes


The Famous Bicken Churger - Laminated Chicken, Beef & Bacon Burger Patty
Author: 
Recipe type: Burgers and Burger Patties
Prep time: 
Cook time: 
Total time: 
Serves: 4
 
The Burger Patty EVER!!! This demonstration shows you how to laminate chicken fillet, tenderloin steak and bacon into a single layered patty that tastes like heaven!!!!
Ingredients
  • 2 Chicken breast fillets
  • 2 Sirloin steaks, cut 6mm thick
  • 4 Slices oak or hickory smoked bacon, lean
  • Kosher salt
  • Flour to dust
Instructions
  1. Fold the chicken breasts in cling wrap and tap them down with your meat mallet to a thickness of 3mm or 1 eight of an inch.
  2. Have your butcher cut the tenderloin into thin steaks of 6mm in thickness. Trim away the fat along the edges, fold the in cling wrap and tap them down to a thickness of 3mm using you meat mallet.
  3. So far so good. 2 Chicken breasts flattened along with 2 steaks and 4 large slices of good quality oak or hickory smoked bacon will make 4 large bicken churger patties.
  4. To assemble, salt the chicken and press a steak into the surface. Place 2 strips of bacon on top of the steak snd press these down. You don't need salt between the steak and bacon as the bacon has a high enough salt content.
  5. Repeat this with the second set of ingredients.
  6. Lightly flour 2 large platters and place one of the bicken churger sets on each. Lighly flour the tops of the bicken churgers and place them in your refrigerator for 30 minutes.
  7. Within 30 minutes, most of the magic has happened. Remove the platters from the refrigerator and cut each set in half down the center. This gives you 4 bicken churgers.
  8. Heat a large pan over high heat and add about 30g of butter. Carefully drop the bicken churgers into the pan with the bacon side down. Allow these to fry for 3 minutes.
  9. Turn the patties over and continue to fry for a further 2 minutes.
  10. Remove the bicken churgers from the pan, construct your burgers and serve immediately.


Snack Platter Catering – Part 21 – Deep Fried Prawn Wontons

deep-fried wontons,deep-fried prawn wontons,how to make wontons,how to fold wontons,pork and prawn wontons,best wonton recipe,seafood wontons,dim sum recipes,chinese recipes,proper wonton fold,how to deep-fry wontons,pork and prawn deep-fried wontons,finger foods,snack food recipes,super bowl recipes,snack platter recipes


Snack Platter Catering - Part 21 - Deep Fried Prawn Wontons
Author: 
Recipe type: Dim Sum / Finger Foods / Snack Foods / Super Bowl Recipes
Cuisine: Chinese
Prep time: 
Total time: 
Serves: 80
 
These amazing crispy fried pork and prawn wontons are quick and easy. One the really cool things about this is that you can make the wontons way ahead of time and deep fry them from frozen as required.
Ingredients
  • 200g Prawn meat
  • 200g Bacon
  • 15ml Ginger, grated
  • 4 Spring onions
  • 2.5ml Salt
  • 5ml Sesame oil
  • 15ml Cornflour
  • 80 Wonton skins
Instructions
  1. Cut the bacon into thin strips across the grain, chop the spring onion into rounds, measure out the grated ginger, salt, roasted sesame oil and cornflour. In addition weigh out the prawn meat and unpack 80 wonton skins and keep them under a damp cloth.
  2. Place all of the ingredients with exception of the wonton skins into your food processor.
  3. Zap this all until it is quite finely chopped.
  4. Working with one wonton skin at a time, place a skin diagonally in front of you. Using a wet finger, wet the 2 upper edges of the wrapper.
  5. Place a teaspoonful of the filling onto the center of the wrapper.
  6. Fold the corner closest to you up and over the filling to meet the top corner. Press the edges of the wrapper together to seal, making sure to press out any air from inside the parcel.
  7. This will give you a very basic gowgee fold. Wet one of the sharp corners of the parcel. Pull the 2 sharp corners towards you until they overlap, then crimp them together.
  8. Repeat this until all of the wontons are formed.
  9. Half fill a large pan with oil and heat this to 190c or 375f. Fry the wontons in batches for 2 to 3 minutes, stirring gently halfway through.
  10. Use a slotted spoon to remove the wontons from the oil and drain them on kitchen paper. Repeat this until everything is fried.
  11. Transfer the wontons to serving platters and serve immediately.


Snack Platter Catering – Part 20 – Chilli Bites, Deep Fried Chilli Puffs – Quick, Easy & Delicious!!!

chilli bites,deep-fried chilli puffs,how to make chilli bites,homemade chilli bites,chilli bites recipe,authentic indian chilli bites,real chilli bites recipe,chilli bites with chick pea flour,how to make real chilli bites,how to make deep-fried chilli puffs,authentic south african indian chilli bites,best chilli bites recipe,quick chilli bites recipe,easy chilli bites recipe,how to make chilli bites,finger foods,cocktail snack foods


Snack Platter Catering - Part 20 - Chilli Bites, Deep Fried Chilli Puffs - Quick, Easy & Delicious!!!
Author: 
Recipe type: Snack Food / Finger Food / Superbowl
Cuisine: Indian
Prep time: 
Cook time: 
Total time: 
Serves: 40-50
 
This recipe is real lifesaver when you're catering for larger numbers. Chilli bites are dead simple to make, and although they can't be prepared long before the time, they are really quick.
Ingredients
Makes 40-50 Chilli Bites
  • 3 Cups Chickpea flour
  • ½ Tsp Bicarbonate of Soda
  • 1½ Cups Water
  • ½ Cup Chopped coriander
  • 3 Chillis, chopped
  • 1 Onion, finely chopped
  • ½ Cup Spring onion, finely chopped
  • 2 Tsp Toasted cumin seeds
  • 1 Tbs Chilli powder
  • 1 Tsp Garam masala
  • 1 Tsp Salt
Instructions
  1. Combine the chickpea flower and the bicarbonate of soda in a large mixing bowl. Add chopped coriander, chopped chillis, chopped spring onion, chopped onion, toasted cumin seeds, chilli powder, salt and garam masala. Mix these into the flour.
  2. Pour in the water and stir this to a thick batter. For the best result, allow the batter to stand for 15 minutes before proceeding with frying.
  3. Half fill a large pan with oil and heat this to 170c or 340f.
  4. Carefully drop slightly heaped tablespoons of the batter into the oil. Allow the chilli bites to fry for 4 minutes until golden, turning halfway through.
  5. Remove the puffs from the oil using a slotted spoon and drain them on kitchen paper. Continue with second batch of puffs until all them are fried.
  6. Transfer the bites to platters and serve hot or cold.


Snack Platter Catering – Part 19 – Mini 5 Spice Pork Pies. Delicious Cocktail Pork Pie Finger Food!!!

pork pies,pork pies recipe,mini pork pies,cocktail pork pies recipe,finger food pork pies,party style pork pies,miniature pork pies,how to make 5-spice pork pies,5-spice pork pie recipe,spicy pork pierogi,spicy pork pierogi recipe,5-spice pork fold-overs,pork fold-overs recipe, making pork pies, how pork pies are made, pork pie hand raised home-made,homemade pork pie recipe,recipes pork pie,how to pork pies at home


Snack Platter Catering - Part 19 - Mini 5 Spice Pork Pies. Delicious Cocktail Pork Pie Finger Food!!!
Author: 
Recipe type: Finger Foods / Cocktail Snacks / Pork Pies
 
These miniature 5 spice pork pies are a perfect compliment to any cocktail party.
Ingredients
  • 2 x Pork knuckles, smoked or plain
  • 2 Whole star anise
  • 2 Tsp Whole Szechuan pepper corns
  • 2 Tsp Ground cinnamon
  • 2 Tsp Ground ginger
  • 2 Tsp Fennel seeds
  • 1 Tsp Whole cloves
  • 1 Liter chicken stock
  • 150ml Light soy sauce
  • Water to cover
For the Sauce / Gravy
  • 200ml of the cooking liquid, strained
  • 50ml Hoisin sauce
  • 15ml Tapioca flour dissolved in a little water
Instructions
  1. Slice through the skin and flesh along both thin edges of the pork knuckles. I am using smoked knuckles, but you can use plain as well if you prefer.
  2. Place the knuckles in a large pot and add the start anise, Szechuan pepper, cinnamon, ground ginger, fennel seeds and whole cloves.
  3. Pour in the stock and the light soy sauce, then top up the pot with water until pork is just covered.
  4. Bring the pot to a boil, reduce the heat and allow this to simmer for 3 and a half hours.
  5. Once the time is up, remove the knuckles from the pot. You will notice that the meat is literally falling from the bone.
  6. Peel away the skin and pull all of the flesh from the bone. Using 2 forks, shred the pork finely.
  7. To make the sauce or gravy, strain off 200ml of the liquid from the pot into a small saucepan. Add the hoisin sauce and the dissolved tapioca flour.
  8. Heat the saucepan over medium heat until it boils. Lower the heat and simmer for another minute or 2 until it has thickened to the consistency of a gravy.
  9. Transfer the shredded pork to a mixing bowl and pour in the sauce. Mix this in thoroughly, then let it cool completely.
  10. To make up the pies, roll the pastry out to a thickness of 3 mm or 1 eight of an inch.
  11. Cut circles of 10cm or 4 inches in diameter from the pastry.
  12. Dip your finger in a bowl of water and wet the edge of one of the circles. Place a heaped fork of the pork in the center of the pastry.
  13. Use the fork to lift one edge of the pastry and fold this over the filling. Use your fingers to lightly seal the edge of the pie.
  14. Repeat this until all of the pies are formed.
  15. At this stage, you can freeze the pies in an airtight container separated by sheets of baking paper.
  16. To bake the pies from fresh or frozen, preheat your oven to 200c or 400f.
  17. Transfer the pies to a lightly greased baking sheet and brush them with the egg wash.
  18. Bake the pies for 20 minutes until golden.
  19. Remove the pies from the oven, transfer them to platters and serve immediately.


Scroll to top

Kitchen Conversions

Convert:
Masses
to:
Volumes
to:
Temperatures
to:
Lengths
to: