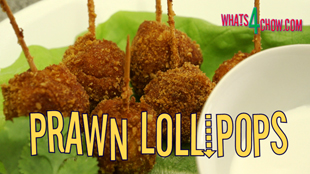
Cocktail Prawn Lollipops. How to make crispy deep-fried prawn lollipops at home.
Author: Whats4Chow
Recipe type: Seafood / Finger Food / Cocktail Snacks
Cuisine: Thai
Prep time:
Cook time:
Total time:
Serves: 2
These delicious prawn lollipops make a fantastic starter / entre' and also serve well as cocktail party finger snacks. The process is very quick and easy, and the recipe can be scaled up to suit any quantity required.
Ingredients
- 150g Prawn meat (uncooked)
- 15ml Thai green curry paste
- 15ml Tapioca or corn flour
- 1 Egg lightly beaten
- ½ Cup finely crushed cornfalkes
Instructions
- Pat the prawn meat dry, then roughly chop it into bits.
- Place the meat in a jug along with the Thai green curry paste and a tablespoon of tapioca or cornflour. Mix this together until combined.
- Using your stick blender process this until fine. If you are making larger quantities, you can us a food processor.
- Wet your hands, pick up a slightly heaped teaspoon of the mixture and shape it into a ball. Press a toothpick through the ball.
- Dunk the ball in the egg, then dredge it in the finely crushed cornflakes.
- Repeat this until all of the lollipops are formed. Transfer the lollipops to a platter and allow the coating to set for 20 minutes.
- Fill your pan or wok with oil to a depth of 25mm or an inch and heat this to 190c or 375f.
- Carefully lower half of the lollipops into the oil and fry them for 90 seconds, turning halfway through. Remove these, drain on kitchen paper, then repeat this with second half of the lollipops.
- Transfer the lollipops to platters and serve with coconut cream for dipping.